Table of Contents
Advertisement
Available languages
Available languages
Sistema SoundBar de sonido envolvente de alta definición
Enceinte acoustique ambiophonique à haute definition
Read the User Manual carefully before using the SoundBar and keep it for further
En
reference.
Lea cuidadosamente el Manual del Usuario antes de utilizar el "SoundBar" y
Es
consérvelo para referencia posterior.
Veuillez lire attentivement le Manuel de l'utilisateur avant d'utiliser le système
Fr
SoundBar, puis gardez-le soigneusement pour des références futures.
SEIKI_Soundbar UG-English Original_v2.indd 1
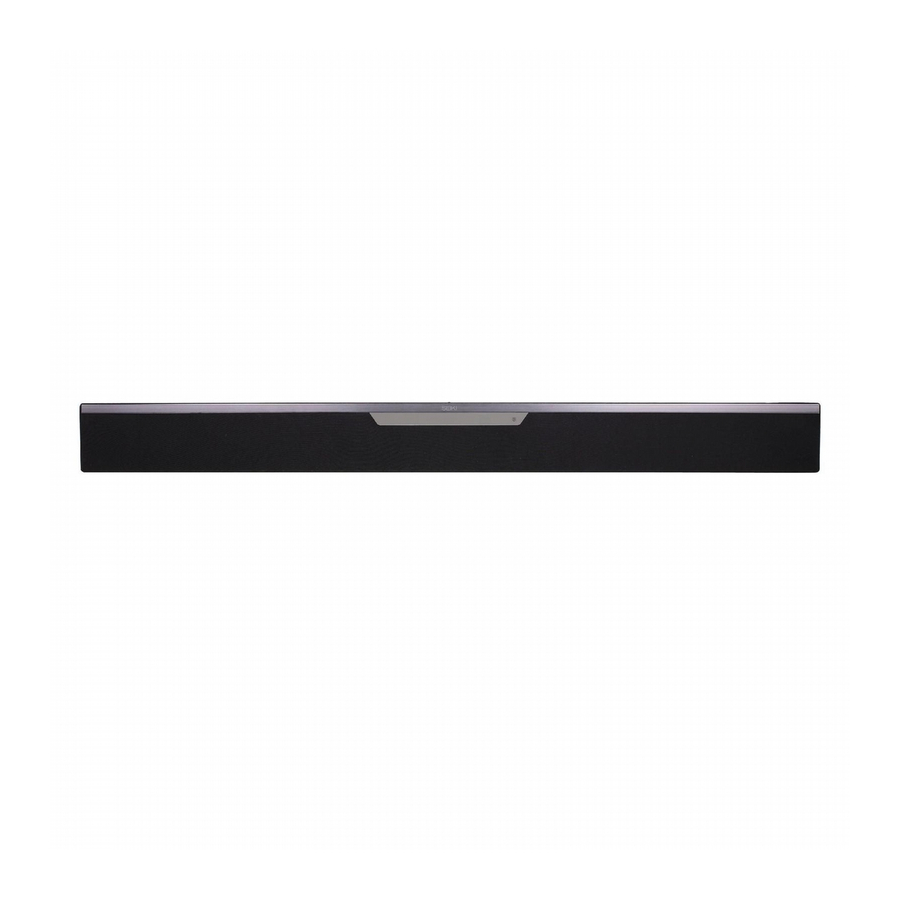
SB201C
USER MANUAL
MANUAL DEL USUARIO
MANUEL DE L'UTILISATEUR
2012/8/3 18:58:25
Advertisement
Table of Contents

Subscribe to Our Youtube Channel
Related Manuals for Seiki SB201C

Summary of Contents for Seiki SB201C
-
Page 1: User Manual
Sistema SoundBar de sonido envolvente de alta definición Enceinte acoustique ambiophonique à haute definition USER MANUAL SB201C MANUAL DEL USUARIO MANUEL DE L’UTILISATEUR Read the User Manual carefully before using the SoundBar and keep it for further reference. Lea cuidadosamente el Manual del Usuario antes de utilizar el “SoundBar” y consérvelo para referencia posterior. - Page 2 SEIKI_Soundbar UG-English Original_v2.indd 2 2012/8/3 18:58:25...
- Page 3 CONTENTS CONTENTS Important Safety Instructions Precautions Preparations Unpacking the SoundBar Front View / Controls / Rear View Wall Mounting Remote Control Connecting the SoundBar Operating the SoundBar Troubleshooting Specifications Warranty SEIKI_Soundbar UG-English Original_v2.indd 1 2012/8/3 18:58:25...
-
Page 4: Important Safety Instructions
IMPORTANT SAFETY INSTRUCTIONS IMPORTANT SAFETY INSTRUCTIONS This symbol indicates that there are important operating and maintenance instructions in the literature accompanying this unit. This symbol indicates that dangerous voltage constituting a risk of electric shock is present within this unit. • All the safety and operating instructions should be read before operating this product and retained for further reference. - Page 5 PRECAUTIONS PRECAUTIONS Security • Before operation, check if the voltage of this product is in line with the local voltage. • Hold the plug to disconnect it from the mains outlet. Do not pull the power cord. • Disconnect the plug as soon as liquid or objects enter this product. Discontinue use of this product until it has been tested and verified by a qualified service technician.
- Page 6 • We suggest you retain the packaging. If you dispose of it, do so having regard to any recycling regulations in your area. The carton should contain: SB201C SoundBar Wall Mount Bracket & Screws User Manual Remote Control with Battery...
- Page 7 PREPARATIONS Front View / Controls Volume Indicator Switch the SoundBar on or to standby. Displays the current volume. SOURCE Power Indicator Select the audio source between LINE / Illuminates Green when the SoundBar is COAXIAL. on. Illuminates Red when the SoundBar MODE is in standby mode.
-
Page 8: Wall Mounting
PREPARATIONS Rear View Model: SB201C Input Power: 15V 2.4A 36W This device complies with part 15 of the FCC rules. Operation is subject to t he f ollowing t wo c onditions: (1) t his device may not cause harmful interference, and (2) this device must accept any interference received i ncluding i nterference that m ay c ause undesired operation. -
Page 9: Remote Control
PREPARATIONS Remote Control The first time you operate the remote control, please pull out the safety strip to activate the battery. 1. Open the battery compartment. 2. Insert one CR2025 battery, with the polarity (+/-) as indicated. Switch the SoundBar on or to standby. Mute and restore the volume. 3. - Page 10 CONNECTING THE SOUNDBAR CONNECTING THE SOUNDBAR The SoundBar is supplied with a three-way audio cable. It is adapted to connect both digital and stereo analog input sources. Gently split the cable with the black plugs from the cables with red/white plugs. The black cable can be used for digital source, the red/white cables for analog source.
- Page 11 CONNECTING THE SOUNDBAR Connect audio through analog audio cables Basic Quality Audio Connect the LINE socket on the SoundBar to the Audio socket on the device using analog cables. Red plug White plug Connect to the Analog Audio out Note: Photos shown Red & White Analog Cables connection only.
-
Page 12: Adjusting The Volume
OPERATING THE SOUNDBAR OPERATING THE SOUNDBAR Before using the SoundBar to play audio from connected devices, please make the necessary connections described in this user manual and switch the SoundBar to the correct source for other devices. Switching the SoundBar On or to Standby Press the button on the SoundBar or the button on the remote control to switch... -
Page 13: Troubleshooting
TROUBLESHOOTING TROUBLESHOOTING PROBLEM REMEDY • Make sure AC power cord is securely connected to an AC socket. No power • Press the Power button on the remote control or on the SoundBar. • Connect the correct audio cable from the SoundBar to the TV or other devices. - Page 14 SPECIFICATIONS SPECIFICATIONS 2 x 2.5” full range Speakers 2 x 2.5” Woofer Full Range: 200 Hz – 20 kHz (+/- 3dB) Frequency Response Woofer: 60 Hz – 10 kHz (+/- 3dB) Integrated Class-D @ 20 watts x 2 CH, 4Ω THD Audio Amplifier = 1%, 1kHz Sound Pressure Level 87 dB (1W@0.5M) Supported Sampling Frequencies 32Khz, 44.1KHz, 48KHz, 96KHz Supported Linear PCM Bit Depths...
- Page 15 THE FCC WANTS YOU TO KNOW THE FCC WANTS YOU TO KNOW This equipment has been tested and found to comply with the limits for a Class B digital device, pursuant to Part 15 of the FCC Rules. These limits are designed to provide reasonable protection against harmful interference in a residential installation.
- Page 16 After the ninety (90) days Warranty period, you must pay for all labor charges. PARTS : For a period of ninety (90) days from the date of original consumer purchase, SEIKI will supply, at no charge to the original consumer, rebuilt or refurbished replacement parts in exchange for defective parts, or will replace the Product with refurbished product of similar or better quality, at SEIKI’s option, at no charge to the original consumer.
- Page 17 CONTENTIDOS CONTENIDOS Información Importante de Seguriddad Precauciones Preparaciones Desempacando el SoundBar Vista Frontal/ Controles/Vista Posterior Montaje en Pared Control Remoto Conectando el SoundBar Operando el SoundBar Solución de Problemas Especificaciones Garantía SEIKI_Soundbar UG-English Original_v2.indd 15 2012/8/3 18:58:27...
- Page 18 INFORMACIÓN IMPORTANTE DE SEGURIDAD INFORMACIÓN IMPORTANTE DE SEGURIDAD Este símbolo indica que hay instrucciones importantes de operación y mantenimiento en la literatura que acompaña esta unidad. Este símbolo indica que la presencia alto voltaje constituye un riesgo de choque eléctrico dentro de la unidad.
- Page 19 PRECAUCIONES PRECAUCIONES Seguridad • Antes de la operación, verificar si el voltaje de este producto está en línea con el voltaje local. • Sostener el enchufe para desconectarlo de los tomacorrientes. No halar el cable de energía. • Desconectar el enchufe tan pronto como un líquido o un objeto ingrese a este producto. Descontinuar el uso de este producto hasta que haya sido probado y verificado por un técnico calificado. Ubicación • Colocar este producto en una superficie seca y estable lejos del calor y la humedad y donde no sea probable que caiga o que sea tirado.
- Page 20 • Le sugerimos que guarde el empaque. Si usted lo desecha, hágalo teniendo en cuenta las regulaciones de reciclaje en su área. El cartón debe contener: SB201C SoundBar Soporte de Montaje en Pared y Tornillos User Manual Manual del Usuario Control Remoto con Batería...
- Page 21 PREPARACIONES Vista Frontal / Controles Indicador de Volumen Coloca el SoundBar en encendido o Muestra el volumen actual. reposo. Indicador de Energía SOURCE Se ilumina en Verde cuando el Selecciona la fuente de audio entre SoundBar está encendido. Se ilumina LINE /COAXIAL.
-
Page 22: Vista Posterior
PREPARACIONES Vista Posterior Model: SB201C Input Power: 15V 2.4A 36W This device complies with part 15 of the FCC rules. Operation is subject to t he f ollowing t wo c onditions: (1) t his device may not cause harmful interference, and (2) this device must accept any interference received i ncluding i nterference that m ay c ause undesired operation. -
Page 23: Control Remoto
PREPARACIONES Control Remoto La primera vez que usted opere el control remoto, por favor hale la tira de seguridad para activar la batería. 1. Abrir el compartimento de la batería. 2. Insertar una batería CR2025, con la polaridad (+/-) como se indica. Enciende o pone en reposo al SoundBar. - Page 24 CONECTANDO EL SOUNDBAR CONECTANDO EL SOUNDBAR El SoundBar se suministra con un cable de audio de tres vías. Se adapta para conectarlo tanto a fuentes de entrada digitales y estéreo analógicas. Separe con cuidado el cable con las clavijas negras de los cables con las clavijas rojo/blanco.
- Page 25 CONECTANDO EL SOUNDBAR Conectar el Audio a través Cables Análogos de Audio Calidad de Audio Básica Conectar el enchufe LINE en el SoundBar al enchufe de Audio en el dispositivo que usa el cable análogo. Clavija Roja Clavija Blanca Conecte a la salida de Audio Analógica Nota: Las fotos mostradas presentan únicamente la conexión de los Cables...
- Page 26 OPERANDO EL SOUNDBAR OPERANDO EL SOUNDBAR Antes de usar el SoundBar para tocar audio desde los dispositivos conectados, por favor hacer las conexiones necesarias descritas en este manual del usuario y colocar el SoundBar a las fuentes correctas para los otros dispositivos. Encendiendo el SoundBar o Dejándolo en Reposo Presionar el botón en el SoundBar o el botón...
- Page 27 SOLUCIÓN DE PROBLEMAS SOLUCIÓN DE PROBLEMAS PROBLEMA REMEDIO • Asegurarse que el cable de energía AC está conectado a un enchufe AC. No hay energía • Presionar el Botón de Energía en el control remoto o en el SoundBar. • Conectar correctamente el cable de audio del SoundBar al Tv u otros dispositivos.
- Page 28 ESPECIFICACIONES ESPECIFICACIONES 2 x 2.5” rango máximo Parlantes 2 x 2.5” Bafle Rango completo: 200 Hz – 20 kHz (+/- 3dB) Frecuencia de Respuesta Bafle: 60 Hz – 10 kHz (+/- 3dB) Clase Integrada-D @ 20 varios x 2 CH, 4Ω THD Amplificador de Audio = 1%, 1kHz Nivel de Presión de Sonido 87 dB (1W@0.5M) Frecuencias de Muestreo Soportadas 32Khz, 44.1KHz, 48KHz, 96KHz Profundidades de Bit PCM Linear 16-bit, 24-bit Soportadas...
- Page 29 NOTAS DEL FCC NOTAS DEL FCC Se ha probado este equipo y se encontró que cumple con los límites para la Clase B de dispositivos digitales, conforme a la Parte 15 de la Normas FCC. Dichos límites están diseñados para proporcionar la protección razonable contra la interferencia dañina en una instalación residencial.
- Page 30 SEIKI se compromete a reparar o sustituir el producto por otro reparado de igual o mejor calidad, a decisión de SEIKI, sin costo alguno para el consumidor original, o sin pagar los gastos de mano de obra a cualquier proveedor de servicio autorizado de SEIKI.
- Page 31 TABLE DE MATIÈRES TABLE DE MATIÈRES Consigne de Sécurité Importante Précautions Preparatifs Désemballage du Soundbar Vue Avant/ Commandes/Vue Arrière Montage Mural Télécommande Connexion du Soundbar Utilisation du Soundbar Diagnostic Des Anomalies Spécifications Garantie SEIKI_Soundbar UG-English Original_v2.indd 29 2012/8/3 18:58:29...
- Page 32 CONSIGNES DE SÉCURITÉ IMPORTANTES CONSIGNES DE SÉCURITÉ IMPORTANTES Ce symbole indique qu’il existe d’importantes instructions de fonctionnement et d’entretien dans la documentation accompagnant le présent dispositif. Ce symbole indique qu’il existe une tension électrique inappropriée exposant l’utilisateur à un risque d’électrocution dans le présent dispositif.
- Page 33 PRÉCAUTIONS PRÉCAUTIONS Sécurité • Avant l’utilisation, s’assurer que la tension de l’appareil correspond à la tension de la zone. • Tenir la fiche pour la débrancher de la sortie du secteur. Ne pas tirer le cordon d’alimentation. • Débrancher la fiche dès qu’un liquide ou des objets pénètrent dans l’appareil. Arrêter d’utiliser l’appareil jusqu’à ce qu'il soit testé et vérifié par un technicien d’entretien qualifié. Emplacement • Placer le dispositif sur une surface sèche et plane, à l'abri de la chaleur et de l’humidité, où il ne peut tomber ou basculer.
- Page 34 • Nous vous conseillons de conserver l’emballage. Si vous désirez le jeter, faites-le en tenant compte de la règlementation relative au recyclage en vigueur dans votre localité. Le carton doit contenir: SoundBar SB201C Support Mural et Vis User Manual Télécommande Accompagnée de la Pile Manuel de L’utilisateur...
- Page 35 PRÉPARATIFS Vue Avant/Commandes Indicateur de volume Mettez le SoundBar en mode Activé ou Afficher le volume actuel. En Attente. Indicateur de puissance SOURCE Le bouton est VERT lorsque le Sélectionner comme source audio le SoundBar est en marche. Le bouton mode LINE ou COAXIAL. est ROUGE lorsque le SoundBar est en MODE mode d'attente.
-
Page 36: Montage Mural
PRÉPARATIFS Vue Arrière Model: SB201C Input Power: 15V 2.4A 36W This device complies with part 15 of the FCC rules. Operation is subject to t he f ollowing t wo c onditions: (1) t his device may not cause harmful interference, and (2) this device must accept any interference received i ncluding i nterference that m ay c ause undesired operation. - Page 37 PRÉPARATIFS Télécommande Veuillez tirer la bande de sécurité pour activer la pile lors de la première utilisation de la télécommande. 1. Ouvrir le compartiment de la pile. 2. Introduire une pile de CC 2025 avec la polarité (+/-) comme indiqué. Mettez le SoundBar en mode Activé...
- Page 38 CONNEXION DU SOUNDBAR CONNEXION DU SOUNDBAR Le système SoundBar est livré avec un câble audio/vidéo et est adapté à la connexion des sources numériques et analogiques. Séparez lentement le câble avec des fiches noires des câbles aux fiches rouges/ blanches. Le câble noir peut être utilisé pour la source numérique, et les câbles rouge et blanc pour la source analogique.
- Page 39 CONNEXION DU SOUNDBAR Connecter l’audio à travers les câbles audio analogues Son audio de qualité fondamentale Connecter la prise LINE du SoundBar à la prise Audio de l’appareil à l’aide d’un câble analogue. Fiche rouge Fiche blanche Connecter à la sortie audio analogique Remarque: Illustrations représentant la connexion des câbles coaxiaux rouge et...
- Page 40 UTILISATION DU SOUNDBAR UTILISATION DU SOUNDBAR Avant d’utiliser le SoundBar pour jouer des sons audio à partir des dispositifs connectés, veuillez effectuer les branchements nécessaires décrits dans le présent manuel et branchez le SoundBar à la source appropriée sur les autres appareils. Mise du SoundBar en mode Activé...
- Page 41 DIAGNOSTIC DES ANOMALIES DIAGNOSTIC DES ANOMALIES PROBLEME RESOLUTION • S’assurer que le cordon d’alimentation CA est correctement connecté à une prise CA. Pas d’énergie • Appuyer sur le bouton Power à partir de la télécommande ou sur le SoundBar. • Connecter le câble audio approprié entre le SoundBar et la télévision (ou autres appareils).
- Page 42 SPÉCIFICATIONS SPÉCIFICATIONS 2 x 2,5” plage complète Haut-parleurs 2 x 2,5” Woofer Plage complète : 200 Hz – 20 kHz (+/- 3dB) Réponse de fréquence Woofer : 60 Hz – 10 kHz (+/- 3dB) Integrated Class-D @ 20 watts x 2 CH, 4Ω THD Amplificateur audio = 1%, 1kHz Niveau de pression acoustique 87 dB (1W@0.5M) Fréquences d’échantillonnage 32Khz, 44.1KHz, 48KHz, 96KHz...
- Page 43 DÉCLARATION FCC DÉCLARATION FCC Le présent équipement a été soumis à des essais, de manière à établir sa conformité avec les limites afférentes à un appareil numérique de classe B, en vertu de la section 15 des règlements du FCC. Ces limites sont prévues afin de fournir une protection raisonnable contre les interférences dangereuses dans une installation résidentielle. Le présent équipement génère, utilise et peut irradier l’énergie de fréquence radio et s’il n’est pas installé...
- Page 44 à neuf en échange des parties défectueuses, ou remplacera le Produit par un produit remis à neuf de qualité semblable ou meilleure, selon le choix du SEIKI. Après la période de Garantie de quatre-vingt-dix (90) jours, vous devez payer pour les coûts de toutes les parties.
- Page 45 SEIKI_Soundbar UG-English Original_v2.indd 43 2012/8/3 18:58:31...
- Page 46 SEIKI_Soundbar UG-English Original_v2.indd 44 2012/8/3 18:58:31...
- Page 47 SEIKI_Soundbar UG-English Original_v2.indd 45 2012/8/3 18:58:31...
- Page 48 Service Hotline / Servicio de Línea Telefónica / Service d’assistance téléphonique: 1-855-MY-SEIKI (1-855-697-3454) www.SEIKIDIGITAL.com © 2012 Seiki Digital Inc. All rights reserved. Printed in China SEIKI_Soundbar UG-English Original_v2.indd 46 2012/8/3 18:58:31...
Need help?
Do you have a question about the SB201C and is the answer not in the manual?
Questions and answers