Advertisement
Table of Contents
Advertisement
Table of Contents

Related Manuals for Maycom MH-430

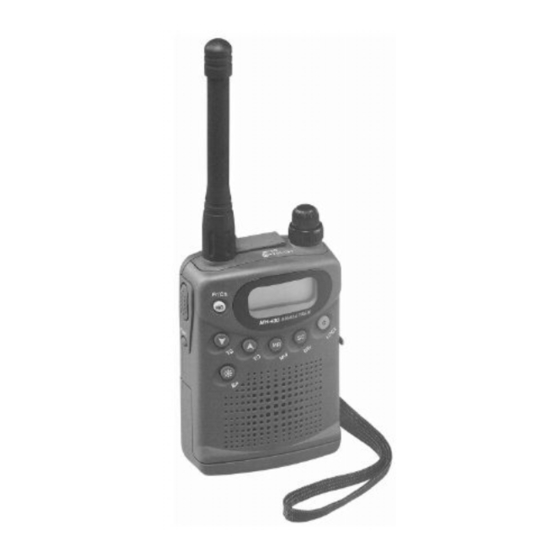
Summary of Contents for Maycom MH-430
- Page 1 MINI HAND HELD TYPE UHF TRANSCEIVER USER'S OPERATION MANUAL MODEL : MH-430...
-
Page 2: Table Of Contents
CONTENTS PAGE OPTION SETTING MODE..............DESCRIPTION OF FEATURES............-TOP PANEL FEATURES..............-SIDE AND BACK PANEL FEATURES..........-FRONT PANEL FEATURES............... -DISPLAY PANEL FEATURES............BATTERY PACK INSTRUCTION............TO RECEIVE.................... TO TRANSMIT..................SPECIFICATION..................CTCSS TONE TABLE................ -
Page 3: Option Setting Mode
OPTION SETTING MODE Press and hold "FUNC" button under the condition of Power off, and then turn on the radio. To enter each option setting mode, press "FUNC + or " button. 1. Setting of Time-Out-Timer If transmitting is continued over than fixed time, this feature is used to cut off the transmitting compulsorily. - Page 4 NOTE : If you press "PTT" button on operating of Busy Channel Lock Out, error message will appear on the LCD and your radio will stay in the receiving mode. 3. Setting of TX Delay Option In the CTCSS Tone Squelch option mode, this feature allows to keep transmitting mode in order to prevent Squelch tail when the "PTT"...
-
Page 5: Description Of Features
Display of Operating Power save On/Off setting Mode. If you press the " or " button in this setting mode, power save On/Off will toggle on the LCD. NOTE : In the option setting mode, A. If you hold "FUNC" button and then press " or " button, the next(previous) setting mode will appear on the LCD. -
Page 6: Side And Back Panel Features
2. Squelch This control is to cut off or eliminate receiver background noise in the absence of an incoming signals. For maximum receiver sensitivity, it is desired that the control be adjusted only to the point where the receiver background on ambient background noise is eliminated. -
Page 7: Front Panel Features
1. Push-To-Talk(PTT) Button Press the "PTT" button and the transmitter is activated : you can now send a message. To receive, release the "PTT" button. 2. Function(FUNC) button This button, when used in conjunction with the buttons in the front panel, allows for access of each function. - Page 8 Display of RX Tone. Display of TX Tone. Display of SCAN Skip Condition. 2) Fr/Ch(Selection of Frequency or Channel) If you press the "FUNC + MO(Fr/Ch)" button when Frequency is displayed on the LCD, Channel No. will appear on the LCD. Press the "FUNC + MO(Fr/Ch)"...
- Page 9 Display of Channel(RX/TX Channel) The last 2 small segments will show memoried channel number and balance 7 big segments will also show RX/TX channel number. 2. Channel Down()/TS Button 1) Channel Down() button Press the "" button to arrow to move to a lower Channel than is currently shown on the LCD.
- Page 10 In the above condition, press the " or " button to increase (decrease) Tone Frequency(Tone Channel No.). If you press and the hold the " or " button over than one second, Tone Frequency(Tone Channel No.) will increase(decrease) rapidly. If you press the PTT button, all changed contents will be stored and the radio will turn to normal operation.
- Page 11 3) BP(Beep) Button This feature gives the user an audible confirmation through a short beep tone that the radio has been turned on. The MH-430 comes with this feature already turned on. If you would like to deactivate this feature, press "FUNC + LAMP(BP)" button. To reactivate the "Beep"...
- Page 12 5. MR, MW Button 1) MR(Memory Channel) Button A. TX/RX in the memory channel To access the stored channel No. in the memory, press the "MR" button, and then select the channel No. you want to access by using " or " button. The stored channel No.
- Page 13 Display of Memory channel Scan On/Off condition re-setting - Press the " or button, the memory channel scan skip On/Off will toggle. - Press the "PTT or MR" button to store the changed contents. NB : - If you press the "FUNC+ or " button, the radio will return to stored TX/RX channel number re-setting mode.
- Page 14 - During the Down(Up) scanning process, press the "()" button, then scanning direction will be changed to Down(Up) scanning process. - If a signal is receiving at a certain channel in the CTCSS option mode, the scanning process will not stop if the TONE does not match with the receiving signal.
- Page 15 Display of Delete message NOTE : The deleted channel will be recovered when the radio will be On/Off. If only one channel will remain because of the deletion of channel in the scanning process, the scanning process will stop and "EMPTY"...
- Page 16 To turn off the "Dual Watch" Channel, simply press the 'FUNC + SC/DW" button or press the "PTT" button. Note that the radio will return to the "A" channel for normal operation. If you press the "FUNC + SC/DW" button or press the "PTT" button when a signal is receiving on the channel "A"...
- Page 17 NOTE : - If you press "C" button in the Setting mode, current data will be stored and change to Call Mode. - If you press "C" button in Scan/Dual Watch mode Scanning/Dual Watch process will stop and change to Call mode.
-
Page 18: Display Panel Features
2) LOCK To Activate : Press the "FUNC + C(LOCK)" button. The " " will appear on the LCD to indicate that this feature is currently activated. To De-Activate : Repeat process described in "To Activate". The " " will disappear from the LCD. 8. - Page 19 1. TX Indicates that radio is in the "transmit" mode. 2. Function Mode Indicates the "FUNC" button has been selected. 3. DW Indicates that the "Dual Watch" feature has been activated. 4. TSQ Indicates that Tone Squelch" feature has been activated. 5.
- Page 20 6. Lock Indicates the "Key Lock" feature has been activated. 7. Beep Indicates that "Beep" tone confirmation is on. 8. Bell Indicates that "Bell" feature has been activated. 9. Memory channel Indicator Display the memorized channel number. 10. d2 (Dot No. 2) This dot is used to display the "CTCSS"...
- Page 21 16. CALL Indicates the CTCSS correct call. 17. BUSY Indicates that RF signal received.
-
Page 22: Battery Pack Instruction
BATTERY PACK INSTRUCTION 1. Press down the battery lock button on the bottom side of the radio.( ) 2. Open the battery cover on the back side of the radio.( ) 3. Install the battery as like . 4. Put on the battery cover.( ) 5. -
Page 23: To Transmit
TO TRANSMIT Press and Hold the "PTT" button to transmit the signal. A. If Busy Channel Lock Out Option is on in the receiving mode, Busy Lock Error Message will appear on the LCD and the radio will stay in receiving mode even though you try to transmit the signal. - Page 24 (at 4.5V) 3. TRANSMITTER SECTION POWER OUTPUT -------------------- 10mW OR 200mW DISTORTION------------------------- 5% DEVIATION--------------------------- +/- 5KHz S/N RATIO--------------------------- 40dB CURRENT DRAIN--------------------- 300mA...
-
Page 26: Ctcss Tone Table
CTCSS TONE TABLE... - Page 27 Co., Ltd Suite 463, APT Factory 201, Haan-dong, Kwangmyong-City, Kyong Ki-Do, Korea Kwangmyong P.O Box 77 OFFICE TEL : (02) 895-8091/3 FAX : (02) 895-8094 FACTORY TEL : (02) 891-8352/3 FAX : (02) 891-8354 Printed in Korea...
Need help?
Do you have a question about the MH-430 and is the answer not in the manual?
Questions and answers