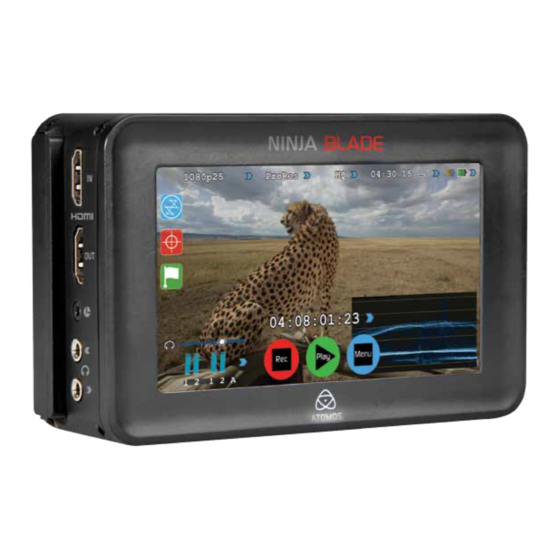
Atomos Ninja Blade User Manual
10-bit hdmi recorder/monitor/player
Hide thumbs
Also See for Ninja Blade:
- Quick start manual (4 pages) ,
- User manual (38 pages) ,
- Quick start manual (3 pages)

Related Manuals for Atomos Ninja Blade


Summary of Contents for Atomos Ninja Blade
-
Page 1: User Manual
Discover Smart Production Atomos Ninja Blade User Manual EDITION 1: FEB 2014 Have you registered your Ninja Blade yet? Upgrade to 3 year warranty now. Website: www.atomos.com | Sales: sales@atomos.com | Support: support@atomos.com... -
Page 2: Table Of Contents
Waveform Monitoring • Do not dispose of the Ninja Blade or its batteries in municipal waste and do not ............... -
Page 3: Warranty & Conditions
Software, you agree to be bound to the terms of this ATOMOS warrants that: EULA. If you do not agree to the terms of this EULA, ATOMOS is unwilling to license the Software to you. • the main product, not including TFT/LCD, or any external accessories, will be free from defects in materials and workmanship for a period of 1. -
Page 4: Introduction
Blade Unit alone (excluding IPS screen) by registering your Ninja Blade the Ninja Blade are very cheap; the cost of storage is no longer an issue. Buying a disk for the Ninja Blade is just like buying a tape – except that online at www.atomos.com/registration with a disk you will have instant “non-linear”... -
Page 5: What's Included
1. What’s included Atomos does not sell storage and your package will not contain any We try to provide you with as complete a package as possible: you don’t spinning disks or SSDs. You can buy these locally to keep running have to add anything except 2.5”... -
Page 6: What You Also Need
“spinning” disks, or the new solid state ones. Choose 2 ½” Here are some things that you should bear in mind when using spinning drives if your Ninja Blade is going to be attached to a tripod or if spinning disks: it is not going to be subject to excessive vibration. -
Page 7: Hdmi Cables
To remove touch Skippy and he will disappear ready for his next notification. Refer to page 25: Atomos Anti-skip Technology for more information about “Skippy”. Atomos Ninja Blade – User Manual Edition 1: Feb 2014... -
Page 8: Mounting Disks In The Master Caddy
The Master Caddy can’t be inserted the wrong way round. Always make sure that the disk connector faces the slot in the Ninja Blade. You have to be quite firm to push the Master Caddy into place, but don’t push too hard, just in case something isn’t set up or aligned properly. -
Page 9: Connecting And Powering Up
No. 1 and to the left of battery No. 2 as you look at the back of the Ninja Blade. Pull the latches towards the batteries to release them. -
Page 10: Power On/Power Off
Momentarily press the circular button on the right side Flashes red when recording. of the Ninja Blade as you look at the screen to power up the unit. After Battery Latch a couple of seconds you will see the Atomos logo, and then the Ninja Blade Home Screen. -
Page 11: Master Caddy And Screw Mounts
The Master Caddy is hot-swappable, so you can do this at any time – for Ninja Blade Master Disk Caddies. To insert a caddy, gently push until it even while the unit is turned on. But don’t do it while recording or you will clicks into position. -
Page 12: Using The Ninja Blade
7. Using the Ninja Blade Using the Ninja Blade The Ninja Blade is controlled via an intuitive touchscreen interface. Icons and buttons have been designed and laid out in a specific way to ensure operation is simple and fast. The HOME SCREEN displays all necessary technical and functional information. Everything important for operation and adjustment is no more than one touch away. -
Page 13: Home Screen / Menu Functions
NO INPUT Play Touch this icon to play previously recorded clips. When you press the Play green button you will be taken to the navigation screen. STANDBY NAVIGATION Atomos Ninja Blade – User Manual Edition 1: Feb 2014... -
Page 14: File Naming / Date & Time / Display Options / Screen Lock
At the top left of the screen is not actually a control but will change to Allows you to modify the brightness of the screen. You are display information about the signal being input to the Ninja Blade at the presented with a horizontal slider. Touch it anywhere on it’s time. -
Page 15: Batteries Screen / Auto Switching / Manual Switching
Warning: If both of the batteries are fully depleted, the unit will BLADE NINJABLD turn itself off. The Ninja Blade will switch to the battery screen for the last 5 seconds of available power before shutting down, alerting you that shutdown is about to occur. -
Page 16: Audio In / Audio During Playback
Audio In AUDIO DURING PLAYBACK MODE When you enter into Playback mode on the Ninja Blade it will only output channels 1/2 on the headphones, please bear this in mind when you select the audio channels for recording. Located in the bottom left corner of the main screen you can see the... -
Page 17: Monitoring And Recording
Before recording • Check there is a valid signal by looking at the main screen, ensuring it As soon as you connect a supported input to the Ninja Blade’s HDMI input looks like the ‘ready-to-record’ screen and have inserted a formatted drive: •... -
Page 18: Smartcontrol / 6 Ways To Start Recording
There is a flag within the SDI signal that lets the Ninja Blade know the start/stop record has been pressed on the camera; in turn this will trigger the Ninja Blade to start/stop Atomos Ninja Blade – User Manual Edition 1: Feb 2014... -
Page 19: Waveform Monitoring
8. Monitoring and Recording cont. Waveform Monitoring New to AtomOS5 and the Ninja Blade is Waveform Monitoring which can be enabled with only a few button presses. Waveform Monitoring Overview Waveform Monitoring Waveform Size (1/4, 1/3 and Full Screen view) -
Page 20: Luma Overlay / Rgb Parade / Vectorscope
Dynamic Transparency The Dynamic Range slider directly controls the intensity of the waveform while the Transparency slider adjusts the transparency values of the waveform display on screen. Atomos Ninja Blade – User Manual Edition 1: Feb 2014... -
Page 21: Monitor Assist
Blue Only Exposure Safe Area/Grid Lines How to use Using the Ninja Blade as a field monitor and viewfinder To enable the Monitor Assist functions, press the Monitor Assist icon on With its 5” high-resolution color 1280x720pixel screen, the Ninja the home screen. -
Page 22: Focus Assist / Zebra / False Colour
To help you determine the exposure range with more accuracy, please use the scale below: FOCUS ASSIST MONO FOCUS ASSIST MONO You can change the focus peaking colors and modes in the settings. Atomos Ninja Blade – User Manual Edition 1: Feb 2014... -
Page 23: Blue Only / Grid Lines / Focus Assist Settings
SAFE AREA/GRID LINES SHOWN WITH MENU OVERLAYS SAFE AREA/GRID LINES SHOWN WITHOUT MENU OVERLAYS The Safe Area/Grid Lines will still be visible when tapping the centre of the screen to hide the overlays. Atomos Ninja Blade – User Manual Edition 1: Feb 2014... -
Page 24: Smartlog
MONITORING MODE: CLIP MARKED AS A GOOD TAKE Removing tagged clips To clear all marking point clips, press on the Clear Tagging icon below the Home screen icon. Clear Tagging icon Atomos Ninja Blade – User Manual Edition 1: Feb 2014... -
Page 25: Exporting .Xml
• Then it will return you to the previous screen You can carry on recording but please remember before you eject the drive to export your XML files. Atomos Ninja Blade – User Manual Edition 1: Feb 2014... -
Page 26: Organising Material On Disk
If you do not set this up Ninja Blade will start recording from menu screen. Scene 1 and Shot 1 automatically. The Ninja Blade uses the exFAT file system. This is recognised natively by both PCs and Macs, without any need to install driver software. -
Page 27: Anti-Shock Technology
File Recovery Spinning disks are very reliable in a controlled environment where The Ninja Blade saves the file every 8 seconds while in recording mode, movement and vibration are minimal and within the capabilities of the so if the recording is stopped suddenly, without closing the file properly, devices. -
Page 28: Timecode
Menu also accessible by touching Menu and then Timecode) on the internal Ninja Blade Time of Day clock. This can be set in > Date & Time 04:08:01:23 Occupying the lower-centre part of the screen is the timecode display with controls to set the start-time of the timecode. -
Page 29: Pulldown
You will, of course, want the Ninja Blade to record eg 1080p24, not 3:2 pulldown detection is difficult, if not impossible to detect on 1080i60 to the disk. In many cases, it is not easy for the Ninja Blade to completely still video. This is why you should wave your hand in detect the pulldown operation in the video, so you will have to set the front of the lens. -
Page 30: Playback & Playout
You will then be taken to the Play Navigation screen. exFAT Disks If the disk has been formatted on Ninja Blade it will use the ExFat file system. The Play navigation screen will display a list of files that have been recorded. -
Page 31: Playback Controls
Move between the previous and next clips for playback. Fast Reverse/Fast Forward Plays the clip at 8x normal speed Fast Fast Reverse/Fast Fast Forward Plays the clip at 64x normal speed Atomos Ninja Blade – User Manual Edition 1: Feb 2014... -
Page 32: Loop Mode
Loop Mode At any time, you can hide all the visible controls by simply The Ninja Blade has the ability to play back a single clip in loop mode touching the screen (away from any controls) once. Touch it again via the HDMI output. -
Page 33: Connecting And Editing
• Adobe CS5 (with 5.51 update) • EDIUS 6 Mac OS Your Ninja Blade disk will show in Finder. Select the files you wish to • Sony Vegas 10 transfer, drag the files to your desired location or use the copy and paste •... -
Page 34: Importing / Import Into Final Cut Pro
Ninja Blade disk. Importing Ninja Blade footage into Final Cut Pro You can import Ninja Blade footage into Final Cut Pro (FCP) in just a few simple steps. First, connect the Ninja Blade Docking Station to your Apple Mac using the USB 2.0 or USB 3.0 port. -
Page 35: Smartlog With Fcpx
• Select the drive (in this example it is EXCVIDEO) • Double-click the unitname.FCPXML file • This will open FCP X and import the .xml file • Select the Ninja Blade drive under Devices (in this example it is called EXCVIDEO) • Choose the unitname.FCPXML, select Import FCP X will make a event of the disk name and reference all the footage in that event. -
Page 36: External Power Supply
13. Using Ninja Blade with external power supplies AC Adaptor (included) This connects on the battery slot on the back of the Ninja Blade. Please ensure it is connected to slot 1. The end of the adaptor will connect to a mains plug. -
Page 37: Software Upgrades
When it is Blade), there is a simple procedure you have to follow. finished, the Ninja Blade will restart and you will be able to use the device as normal. -
Page 38: Technical Specifications
• Connect H2S converter • Connect S2H converter Website: www.atomos.com | Sales: sales@atomos.com | Support: support@atomos.com Atomos Ninja Blade – User Manual Edition 1: Feb 2014 © ATOMOS Global Pty. Ltd. trading as ATOMOS under license. All trademarks are the property of their respective owners.
Need help?
Do you have a question about the Ninja Blade and is the answer not in the manual?
Questions and answers