
Related Manuals for JVC HD-Z70RX5


Summary of Contents for JVC HD-Z70RX5
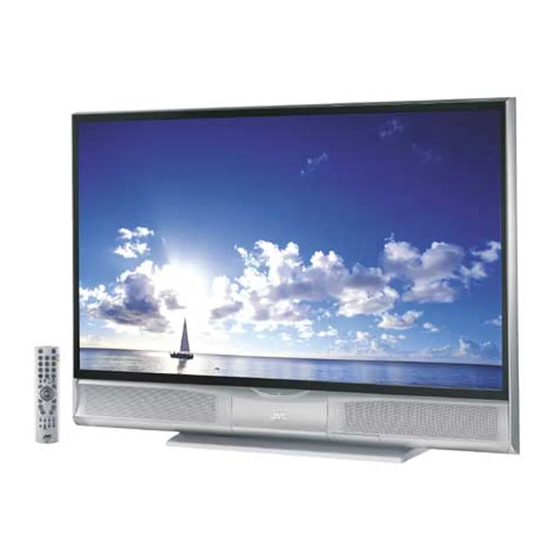
- Page 1 ENGLISH HD-Z70RX5 HD-Z56RX5 Rear Projection TV INSTRUCTIONS LAMP POWER LCT1911-001C...
-
Page 3: Introduction
- Replaceable lamp At JVC, we believe that convenience factors make all the difference in the world. This TV is equipped with a long life user replaceable lamp. The old lamp can be pulled straight out and the new lamp pushed straight back into place. -
Page 4: Warnings
Warnings Please follow all the guidelines below. Never insert objects into the cabinet openings! It may cause a fatal electric shock. Take care when children are near. Never dismantle the rear panel! Never place anything It may cause an electric shock. on the TV! Never obstruct the ventilation holes! Placing liquids, naked flames, cloths,... - Page 5 Warnings Installation requirements To avoid overheating, ensure the unit has ample room. 200 mm 200 mm 150 mm 150 mm 50 mm LAMP/PROGRAM POWER In order to use the television for a long time This television uses a lamp to project the picture onto the screen. Before using this television, please read the safety cautions and information about this television which are summarized below (1 to 10).
-
Page 6: Table Of Contents
RETURN PLUS function and Return function ......11 Additional preparation ..........24 Favourite channel function............12 Connecting external equipment ..........24 Operating a JVC brand DVD player........12 Operating a JVC brand VCR ..........12 Troubleshooting ............26 Teletext function............13 Severe noise or snow............. 26 Patterns, stripes or noise ............ -
Page 7: Setting Up Your Tv
Setting up your TV Installation Connecting the power cord to the AC outlet Cautions for installation • Install the TV in a corner, against a wall or on the floor so as to Insert the AC plug on the power cord from the TV into AC outlet. keep cords out of the way. -
Page 8: Initial Settings (Setup Tour)
EDIT/MANUAL function. For details, see “EDIT/ MANUAL” on page 21. • If the JVC logo does not appear this is because your TV has • If a TV channel you want to view is not stored in the already been turned on for the first time: programme numbers (PR) list, you can register it using the use the “LANGUAGE”, “TELETEXT LANGUAGE”... -
Page 9: Tv Buttons And Functions
TV buttons and functions LAMP/PROGRAM POWER LAMP TV/VIDEO POWER IN (VIDEO-4) MENU/OK S-VIDEO Refer to the pages in parentheses for details. 1 Lamp cover (page 31) 2 POWER button (page 5) OVER 3 POWER LED (page 5) 4 LAMP LED (page 5) CHANNEL 5 TV/VIDEO button VIDEO... -
Page 10: Remote Control Buttons And Functions
Remote control buttons and functions Turning the TV on or off from standby mode Press the # (standby/on) button to turn the TV on or off When the TV is turned on, the power lamp lights up blue. • The power can be turned on by pressing the 4 button, 6 p buttons or Number buttons. -
Page 11: Adjusting The Volume
Remote control buttons and functions To return to a TV channel: ZOOM function Press the 4 button, the 6 p buttons or the number buttons. You can change the screen size according to the picture aspect ratio. To use the programme number PR 0 (AV): Choose the optimum one from the following ZOOM modes. -
Page 12: Cinema Surround Function
Remote control buttons and functions Choose the ZOOM mode CINEMA SURROUND function 1 Press the c button to display the ZOOM menu You can enjoy sounds with a wider ambience. ZOOM • This function does not work for the sound from headphones. AUTO REGULAR PANORAMIC... -
Page 13: Using The "Multi-Picture" Function
Remote control buttons and functions • When set to 2-pictures multi, picture from HDMI can not be Using the “Multi-picture” function displayed on the Sub-picture. • The pictures from VIDEO-1 (or VIDEO-2) cannot be displayed in the sub-picture when the VIDEO-1 SETTING (or VIDEO-2 1 Set the VCR/TV/DVD switch to the TV position SETTING) is set to COMPONENT (see page 23). -
Page 14: Favourite Channel Function
2 Press the DVD control button to control your DVD player 3 Press one of the number buttons 1 to 4 • If your DVD player is not made by JVC, these buttons will not The current channel is registered in the pressed number button. -
Page 15: Teletext Function
Teletext function Hold You can hold a teletext page on the screen for as long as you want, even while several other teletext pages are being received. Press the C (Hold) button Hold indication VCR/TV/ To cancel the Hold function: Press C (Hold) button again. -
Page 16: Using The Tv's Menu
Using the TV’s menu This TV has a number of functions you can operate using menus. To Basic operation use all your TV’s functions, you need to understand the basic menu operating techniques fully. 1 Press the H button to display the menu bar PICTURE 2 Press the 5 buttons to choose the menu you want to use and then press the a button... -
Page 17: Picture Menu
PICTURE menu COLOUR PICTURE STANDARD PICTURE MODE You can adjust the picture colour. CONTRAST 2 : lighter BRIGHT SHARP 3 : deeper COLOUR TINT WHITE BALANCE COOL FEATURES TINT RESET You can adjust the picture tint. 2 : reddish 3 : greenish •... -
Page 18: Features
PICTURE menu Picture motion compensation function: FEATURES This function displays fast-moving pictures (for example, the players or ball in a football game) more smoothly and naturally on the screen. • The effect level of the picture motion compensation function Choose FEATURES and press the a or 3 button to display the sub- cannot be changed. -
Page 19: Colour System
PICTURE menu COLOUR SYSTEM 4:3 AUTO ASPECT The colour system is chosen automatically. However, if the picture is You can choose one of three ZOOM modes, REGULAR, not clear or no colour appears, choose the colour system manually. PANORAMIC or 14:9 ZOOM, as the ZOOM mode for the normal picture (4:3 aspect ratio). -
Page 20: Sound Menu
SOUND menu CINEMA SURROUND SOUND STEREO/ You can enjoy Surround sound with a “live” effect by using the BASS CINEMA SURROUND function. TREBLE BALANCE • You can choose a CINEMA SURROUND mode from HIGH, CINEMA SURROUND LOW, MONO and OFF modes. For details, see “CINEMA SURROUND function”... -
Page 21: Features Menu
FEATURES menu 3 Press the a button FEATURES The Sub-menu of CHANNEL GUARD appears. SLEEP TIMER > CHANNEL GUARD CHANNEL GUARD APPEARANCE TYPE A CH/CC BLUE BACK CHILD LOCK AUTO SHUTOFF FAVOURITE SETTING ILLUMINATION SOFT GUARD 4 Press the 6 buttons to choose a TV channel SLEEP TIMER Every time you press the 6 buttons, the Programme number (PR) changes, and the picture of the TV channel registered in the... -
Page 22: Appearance
FEATURES menu APPEARANCE FAVOURITE SETTING Press the 5 button and choose the format in which the channel Choose when deleting the favourite channels registered in the buttons number is displayed from the four types: TYPE A, TYPE B, TYPE C, 1 to 4. -
Page 23: Set Up Menu
SET UP menu EDIT/MANUAL SET UP AUTO PROGRAM The EDIT/MANUAL functions are divided into two types: EDIT/MANUAL LANGUAGE • editing the current programme numbers (PR) (EDIT functions); VIDEO-1 SETTING VIDEO VIDEO-3 SETTING VIDEO AI VOLUME • manually storing a TV channel you want to view on a particular TELETEXT LANGUAGE HDMI SETTING programme number (PR) (MANUAL function). - Page 24 SET UP menu MOVE 3 Press the 6 buttons to choose “CC” or “CH” according to the CH/CC number of the TV channel 1 Press the 6 buttons to choose a TV channel To cancel the INSERT function: 2 Press the 3 button to start the MOVE function Press the b button.
-
Page 25: Language
SET UP menu LANGUAGE TELETEXT LANGUAGE The LANGUAGE setting which was performed in the “Initial settings There are four types of teletext language groups. Set the teletext (Setup tour)” (page 6) can be changed. language group that corresponds to the language of the teletext programme that you want to watch. -
Page 26: Additional Preparation
IN (VIDEO-3) : Signal direction SERVICE ONLY CENTER CHANNEL INPUT VIDEO IN(VIDEO-3) ATSC DIGITAL IN /DIGITAL CABLE IN JVC’s VCR / DVD player AUDIO AUDIO (AV COMPULINK compatible) AV COMPULINK AV COMPULINK S-VIDEO S-VIDEO DVD player / DVD recorder IN(VIDEO-1) - Page 27 DVD player sends a signal to the television telling it to turn on and switch to the proper video input. • If your JVC brand VCR has “A code/B code remote control switching” (see your VCR’s instruction book), using VCR A code will switch the TV to input 1.
-
Page 28: Troubleshooting
Troubleshooting Severe noise or snow • Is the TV connected correctly to the aerial ? • Change the direction of the aerial. • Is the aerial or its cable damaged ? Consult your retailer. LAMP/PROGRAM POWER Patterns, stripes or noise I can't turn it on! •... - Page 29 Troubleshooting Problem Actions Page Remote control stops • Unplug TV, several minutes later plug it in again. — working. • Although the HD-ILA element is manufactured with high- Black or white dots precision technology, please understand that some pixels may be —...
-
Page 30: The Followings Are Not Malfunctions
Technical Information Problem Actions Page • It is not a malfunction. Some functions (dark background) in the — Some functions do not menu do not work depending on the situation. work Some inputs cannot be • VIDEO-4, VIDEO-5 and PC mode cannot be selected in the sub- selected in the sub- —... -
Page 31: Ch/Cc Numbers
CH/CC numbers When you want to use the INSERT function on page 22, find the CH/CC number corresponding to the Channel number of the TV channel from this table. The US channel numbers are the channel numbers used in the United States, Philippines, etc. CCIR: The CCIR channel numbers are the channel numbers used in the Middle East, Southeast Asia, etc. -
Page 32: Appendix
Appendix Changing the Lamp WARNING! It is very important that you NEVER TOUCH THE GLASS SURFACE OF THE NEW LAMP. Touching the glass surface will deposit oils from your hand onto the lamp surface. When the lamp heats up to its operating temperature, the oil will cause a difference in temperature on the lamp surface that will likely cause the lamp to break. -
Page 33: How To Replace The Lamp
Appendix 4 Remove the lamp unit. How to Replace the Lamp Using a Philips head type screwdriver (cross-head type), loosen the two screws fastening the lamp unit. When the screws have Please read these instructions fully before attempting to replace the been loosened, remove the lamp by raising the handle and gently lamp. -
Page 34: Specifications
Specifications Model HD-Z70RX5 HD-Z56RX5 Type HD-ILA Device Projection Broadcasting systems B, G, I, D, K, K1, M Colour systems PAL, SECAM, NTSC 3.58/4.43 MHz Channels and frequencies VHF low channel (VL) = 46.25 to 168.25 MHz VHF high channel (VH) = 175.25 to 463.25 MHz UHF channel (U) = 471.25 to 863.25 MHz... - Page 36 1005TKH-MW-VP...
Need help?
Do you have a question about the HD-Z70RX5 and is the answer not in the manual?
Questions and answers