Table of Contents
Advertisement
Advertisement
Table of Contents

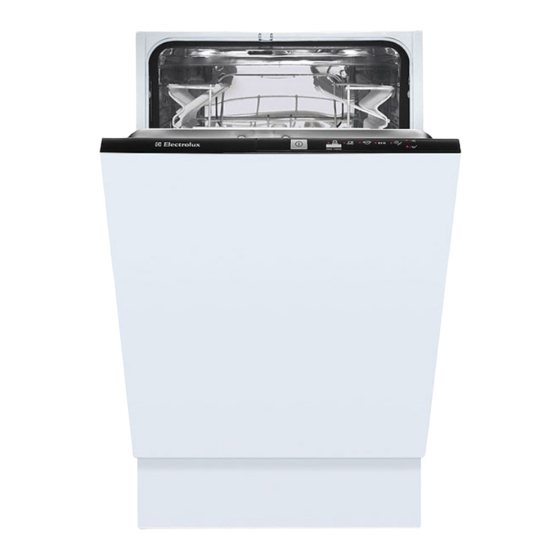
Summary of Contents for Electrolux ESL 43010
- Page 1 Dishwasher ESL 43010...
-
Page 2: Table Of Contents
2 electrolux Electrolux. Thinking of you. Share more of our thinking at www.electrolux.com Contents Safety information Washing programmes Product description Care and cleaning Control panel What to do if… Use of the appliance Technical data Setting the water softener Installation... -
Page 3: Product Description
3 • Keep all detergents in a safe area. Do not • Do not use the appliance: let children touch the detergents. – if the mains cable or water hoses are • Keep children away from the appliance damaged, when the door is open. -
Page 4: Control Panel
4 electrolux Control panel On/off button Programme selection/cancel button (PROG. / CANCEL) Indicator lights Programme indicator lights Indicator lights End-of-programme Comes on when the washing programme is completed. Auxiliary functions: • Level of the water softener. • Activation/deactivation of the audible signals. -
Page 5: Use Of The Appliance
5 Audible signals 5. Wait until programme indicator light A goes off. You can hear an audible signal: – Programme indicator light B continues • At the end of the washing programme. to flash. • When the appliance has a malfunction. -
Page 6: Use Of Dishwasher Salt
6 electrolux Water hardness Water hardness setting °dH °TH mmol/l Clarke manually electronically 15 - 18 26 - 32 2,6 - 3,2 18 - 22 11 - 14 19 - 25 1,9 - 2,5 13 - 17 4 - 10... -
Page 7: Use Of Rinse Aid
7 4. Remove the salt around the opening of the salt container. 5. Turn the cap clockwise to close the salt container. It is normal that water overflows from the salt container when you fill it with salt. When you set electronically the water soft- ener to level 1, the salt indicator light does not stay on. -
Page 8: Loading Cutlery And Dishes
8 electrolux 1. Turn the rinse aid dial to increase or de- Adjusting the rinse aid dosage crease the dosage. The rinse aid is set at the factory at position – Increase the dosage if there are water droplets or limescale on the dishes. - Page 9 9 Mix spoons with other cutlery to prevent them to bond together. Use the cutlery grid. If the dimensions of the cutlery prevent use of the cutlery grid, you can easily remove it. Upper basket The upper basket is for plates (maximum 24 cm in diameter), saucers, salad bowls, cups, glasses, pots and lids.
-
Page 10: Use Of Detergent
10 electrolux 3. Put the basket in the upper position. Maximum height of the dishes 4. Put back the front runner stops (A) in their upper bas- lower initial position. basket Caution! If the basket is in the upper Upper position... -
Page 11: Setting And Starting A Washing Programme
11 When you use tablets, that contain special salt and rinse aid, it is not necessary to fill the salt and rinse aid containers. In this condition the rinse aid indicator light stays on when the appliance is switched on. -
Page 12: Washing Programmes
12 electrolux – The end-of-programme indicator light 1. Open the door. starts to flash. – The end-of-programme indicator light 2. Release the programme selection/cancel comes on. button to cancel the washing pro- – The programme indicator light stays gramme. At this time you can do these steps: 2. -
Page 13: Care And Cleaning
13 Consumption values Programme Duration (in minutes) Energy (in kWh) Water (in litres) Intensive 110 - 120 1,5 - 1,7 18 - 20 Normal 100 - 110 1,4 - 1,5 18 - 20 Quick 120 - 130 0,8 - 0,9... -
Page 14: What To Do If
14 electrolux Do not remove the spray arms. If the holes in the spray arms become clog- ged, remove remaining parts of soil with a cocktail stick. External cleaning Clean the external surfaces of the appliance and control panel with a damp soft cloth. -
Page 15: Technical Data
15 After the check, switch on the appliance. The • Model (Mod.) programme continues from the point of in- • Product number (PNC) terruption. If the malfunction shows again, • Serial number (S.N.) contact your Service Force Centre. For these data, refer to the rating plate. -
Page 16: Water Connection
16 electrolux The dishwasher has adjustable feet to allow Adjusting the level of the appliance the adjustment of the height. Make sure that the appliance is level to close Make sure that the water inlet hose, the drain and seal the door correctly. If the level of the... -
Page 17: Electrical Connection
17 Caution! Make sure that the water couplings are tight to prevent water leakage. Electrical connection Warning! The manufacturer is not Do not replace the mains cable yourself. responsible if you do not follow these Contact the Service Force Centre. - Page 18 18 electrolux...
- Page 19 19...
- Page 20 To buy accessories, consumables and spare parts at our online shop please visit: www.electrolux.co.uk www.electrolux.ie 117989531-01-062009...


Need help?
Do you have a question about the ESL 43010 and is the answer not in the manual?
Questions and answers