
Summary of Contents for ClearOne NS-MNE
- Page 1 Musica™ - NS-MNE Musica Network Interface NS-MNE aNd i uSica NStallatioN aNd pEratioN aNual...
-
Page 2: Table Of Contents
Configuring with MNE_Finder .............................5 Other Finder Controls ..............................6 standalone metHod Information Required ..............................7 Configuration Process ..............................7 Chapter 3: Using the Browser NS-MNE Musica Interface ....................12 musica Browser control screens Startup Screen ................................13 Room Selection ...............................13 Standby Screen...............................14 Control Screen ................................14 Player Controls ................................15... - Page 3 Standby Screen and Source Selection Screen.......................21 Player Control Screens ............................21 Amp Settings Screen ..............................22 Room Settings Screen ............................22 Tuner Screens .................................23 Chapter 5: Using iTunes with iMusica ..........................24 Pairing witH a different itunes liBrary NS-MNE Technical Specifications ............................28 nstallatIon and peratIon anual...
-
Page 4: Chapter 1: Introduction
® The NS-MNE is compact in size and the software is built in so it requires no programming. Simple configuration is all that is required to take IP-control of the Musica system. In addition, up to 3 MU5066ADC units can be connected using 3 NS-MNEs to make an 18-zone system. -
Page 5: Hardware Requirements
The software required to install and configure the NS-MNE includes: • Computer running Windows XP , SP2 or higher (for configuring the IP Address of the NS-MNE) for PC’s, tablets and smartphones • Adobe Flash running on the web browser •... -
Page 6: Chapter 2: Installing And Configuring The Ns-Mne
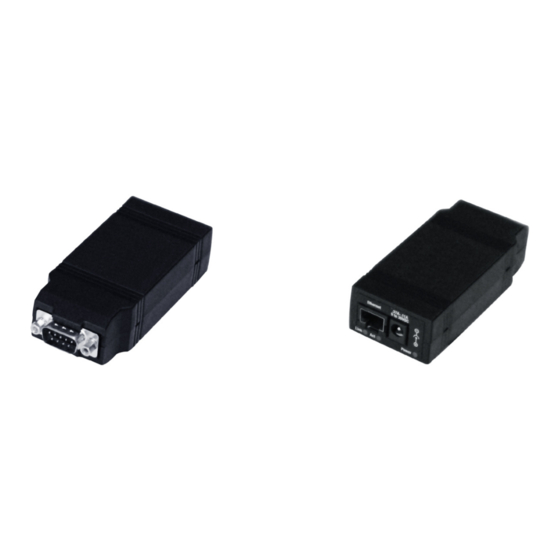
To configure the NS-MNE devices in-network, complete the following steps by referring to the diagrams below: Verify the DIP switches on the bottom of the NS-MNE unit are in the proper positions as shown: dIP switch Positions Connect each NS-MNE to the Musica MU5066ADC it will control using its null modem cable. -
Page 7: Information Required
Static IP Address » Note: In systems where more than one NS-MNE is configured, the IP addresses that are assigned must be sequential. For example, the first NS-MNE could be 10.15.100.150, then the second would be 10.15.100.151, and the third 10.15.100.152. -
Page 8: Discovering And Configuring The Ns-Mne Units
You will also need the MAC Address of each NS-MNE device (printed on bottom of the unit) ns-Mne u IscoverIng and onfIgurIng the nIts The MNE_Finder application running on a PC connected to the network discovers any NS-MNE units that are connected via the local Ethernet even if their current IP address settings are incompatible with those of the PC running the program. -
Page 9: Other Finder Controls
MNE_Finder main screen will be displayed (about 30 sec- onds). Reboot the NS-MNE by either unplugging and restoring the power to the device, or by select- ing the device and clicking on the reboot device button on the side panel of the MNE_Finder program. -
Page 10: Standalone Method Information Required
To configure the NS-MNE, connect the hardware, then use the Windows HyperTerminal or similar application to perform the configuration. (HyperTerminal can be downloaded for Windows 7.) Verify the DIP switches on the bottom of the NS-MNE unit are in the proper positions as shown: dIP switch Positions Connect the NS-MNE to the computer serial port using the null modem cable provided. - Page 11 In the Connection Description dialog box, enter NS-MNE in the Name field. Select The Connect To dialog box appears In the Connect Using field, select the COM port you want to use (this will normally be COM1). Select The COM Properties window displays...
- Page 12 Connect the power using the Power Cable to the NS-MNE Wait 30-60 seconds while HyperTerminal connects to the NS-MNE. Shortly, the screen displays information for the NS-MNE and informs that you can make changes if you press any key within five seconds of the information displaying.
- Page 13 Enter the Static IP Address and press enter. » Note: If you have more than one NS-MNE to configure the IP addresses must be sequential. For instance, the first NS-MNE might be 10.15.100.150, and the next two would be 10.15.100.151 and 10.15.100.152.
- Page 14 This procedure must be repeated for each NS-MNE unit to be placed in the customer network. The following diagram shows how the NS-MNE units must be installed at the customer network. Since they have already been configured, they can then be controlled by either a connected Flash- enabled browser or configured Apple iPhone, iPad, or iPod touch device.
-
Page 15: Chapter 3: Using The Browser Ns-Mne Musica Interface
NS-MNE with the lowest IP address automatically establishes control over all of them. Up to 18 zones will be controlled through the browser. For example, if the first NS-MNE configured is 10.15.100.150, the second (10.15.100.151) and the third (10.15.100.152) would also be controlled through the browser. -
Page 16: Startup Screen
tartup creen This screen is first displayed after launching the browser. No controls are functional at this point. electIon After startup, clicking on the room list button displays a list of rooms within the system. In the case of systems with up to 3 sequentially addressed NM-MNE’s, all the rooms served by all the ADC’s will be listed. -
Page 17: Standby Screen
tandBy creen This screen shows the room has been selected, but that an audio source has not been selected. The audio sources available for a room using the Musica system are listed on the right hand of the screen. Select a source by clicking on its button. ontrol creen The audio player controls for the room and source selected appear. -
Page 18: Player Controls
Player ConTrols The player has controls as show below: next Previous volume uP Play Mute Beginning Pause stop shuffle Continuous go to volume down graphic equalizer ettIngs creen The Settings screen is selected by clicking on the settings button on any screen. loudness Control on/off 3d audio Mode on/off sleep - set sleep Timer... -
Page 19: Transfer
ransfer The Transfer audio button is used to send the same source selection and volume settings to another room or to multiple rooms. When clicked, a confirmation screen appears. nstallatIon and peratIon anual... -
Page 20: Chapter 4: Downloading, Configuring, And Using The Imusica Software
ConfIgurIng iMusICa The iMusica software application is designed to allow an Apple iPhone, iPad, or iPod touch device to control the Musica devices connected to the home network using an NS-MNE interface. Download the iMusica application from the Apple iTunes Store. - Page 21 Source you plan to have your PC/Mac with iTunes connected to. library Id should be left blank. version number updates after you first run iMusica . Verify the NS-MNE’s are connected to a Wireless Router or Access Point which you will need to nstallatIon and peratIon...
- Page 22 If you plan to use the iTunes feature, then the computer which will have the iTunes Library will also need to be physically or wirelessly connected to the same Ethernet device the NS-MNE’s are plugged in to. (See the operating iMusica with iTunes section of this manual for more instruction on configuring for iTunes.) : 800.283.5936...
-
Page 23: Operating The Musica Adc With Imusica
oPeraTIng THe MusICa adC wITH iMusICa The following screens are used to access the various Musica ADC functions through the iMusica interface. The iMusica interface contains the same controls as the Flash-enabled browser interface. The interface is designed to be intuitive so not all controls are described. tartup creen This screen is first displayed after launching. -
Page 24: Standby Screen And Source Selection Screen
tandBy creen and ource electIon creen The first screen below identifies the room that has been selected, but that an audio source has not been selected. Access the audio sources available for a room using the source button. The second screen shows a list of sources. Select a source and use the done button to exit the Source selection screen. -
Page 25: Amp Settings Screen
ettIngs creen The Amp Settings screens provides additional audio control of the Musica ADC including 5-Band Graphic Equalizer, Loudness, Balance, and 3D Audio Mode control. Use the done button to exit the Amp Settings screen. loudness Control on/off Balance left/right 3d audio Mode on/off 5-Band graphic equalizer... -
Page 26: Tuner Screens
uner creens There are two tuner screens, one that accesses preset stations on the tuner, and a manual-mode keypad screen that allows entry of the station frequency. » Note: A Musica FM Tuner card must be installed into the room Keypad for any room requiring an FM Tuner. -
Page 27: Chapter 5: Using Itunes With Imusica
Chapter 5: using iTunes with iMusica With the iMusica interface controlling the Musica ADC through the NS-MNE, iTunes can become an audio source for your Musica system. To do this, iMusica will need to pair with iTunes on the computer you are planning to use as the Source. - Page 28 Click on the device name and iTunes will display the following Pairing Screen: Enter the passcode (0000, four zeroes). This will complete the Pairing process and iTunes will display a confirmation. : 800.283.5936 echnIcal upport...
- Page 29 Click ok. The iMusica application will index the computer’s iTunes Library and display a screen similar to the following: iMusica goes to the Player Screen once a song begins: The Transport Control will now control iTunes on the Paired Computer. nstallatIon and peratIon anual...
-
Page 30: Pairing With A Different Itunes Library
PaIrIng wITH a dIfferenT iTunes lIBrary If you later want to Pair to a different iTunes Library on another Computer, you need to go back into the Settings Tool as when iMusica was first configured. You will see a screen similar to this: Touch the Library ID field and erase its contents to delete the Pairing. -
Page 31: Ns-Mne Technical Specifications
Tel: 800.283.5936 toll free: 800-945-7730 e-mail: fax: 801-977-0087 sales@clearone.com tech.support@clearone.com © 2011 ClearOne. All rights reserved. Apple iPhone , iPad , iPod touch , Adobe , Flash , the Flash logo, and other products are trademarks of their respective owners.
Need help?
Do you have a question about the NS-MNE and is the answer not in the manual?
Questions and answers