Dell S199WFP User Manual
Flat panel monitor
Hide thumbs
Also See for S199WFP:
- Setup manual (2 pages) ,
- Setting up (2 pages) ,
- Environmental data sheet (5 pages)
Table of Contents
Advertisement
Dell™ S199WFP Flat Panel Monitor User's Guide
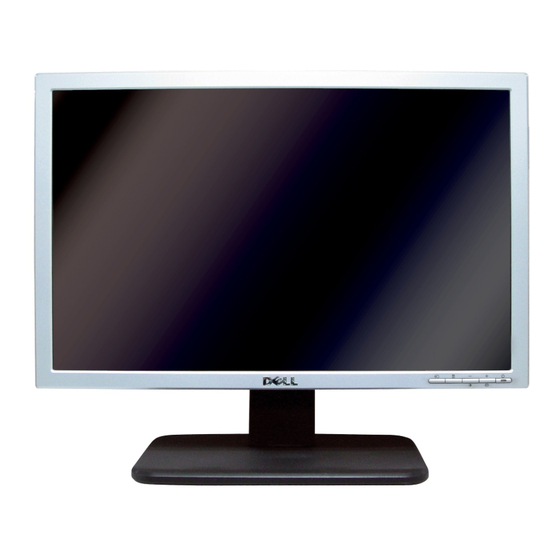
About Your Monitor
Front View
Back View
Side View
Bottom View
Monitor Specifications
Caring for your Monitor
Using Your Monitor Stand
Attaching the Stand
Organizing Your Cables
Using the Tilt
Removing the Stand
Setting Up Your Monitor
Connecting Your Monitor
Using the Front Panel
Using the OSD
Setting the Optimal Resolution
Using the Dell Soundbar (Optional)
Notes, Notices, and Cautions
NOTE:
A NOTE indicates important information that helps you make better use of your computer.
NOTICE:
A NOTICE indicates either potential damage to hardware or loss of data and tells you how to avoid the problem.
CAUTION:
A CAUTION indicates a potential for property damage, personal injury, or death.
Information in this document is subject to change without notice.
©2007 Dell Inc. All rights reserved.
Reproduction in any manner whatsoever without the written permission of Dell Inc. is strictly forbidden.
Trademarks used in this text: Dell, the DELL logo, Inspiron, Dell Precision, Dimension, OptiPlex, Latitude, PowerEdge, PowerVault, PowerApp, and Dell OpenManage are trademarks of Dell
Inc; Microsoft, Windows, and Windows NT are either trademarks or registered trademarks of Microsoft Corporation in the United States and/or other countries. which may be
registered in certain jurisdictions. ENERGY STAR is a registered trademark of the U.S. Environmental Protection Agency. As an ENERGY STAR partner, Dell Inc. has determined that
this product meets the ENERGY STAR guidelines for energy efficiency.
Other trademarks and trade names may be used in this document to refer to either the entities claiming the marks and names or their products. Dell Inc. disclaims any
proprietary interest in trademarks and trade names other than its own.
Model S199WFP
August 2007 Rev. A00
Solving Problems
Troubleshooting Your Monitor
General Problems
Product Specific Problems
Troubleshooting Your Soundbar
Appendix
FCC Identification Information
Safety Information
Contacting Dell
Your Monitor Setup Guide
Advertisement
Table of Contents

Related Manuals for Dell S199WFP


Summary of Contents for Dell S199WFP
- Page 1 ENERGY STAR guidelines for energy efficiency. Other trademarks and trade names may be used in this document to refer to either the entities claiming the marks and names or their products. Dell Inc. disclaims any proprietary interest in trademarks and trade names other than its own.
-
Page 2: About Your Monitor
Power On / Off button (with LED indicator) Back View 1 VESA mounting holes (100mm) (Behind Use to mount the monitor. attached base plate) 2 Barcode serial number label Refer to this label if you need to contact Dell for technical support. -
Page 3: Bottom View
4 Stand removal button Press to release the stand. 5 Regulatory rating label List the regulatory approvals. 6 Dell Soundbar mounting brackets Attach the optional Dell Soundbar. 7 Cable holder Help organize cables by placing them through the holder. Bottom View 1 Power connector Insert the power cable. -
Page 4: Power Management Modes
Power Save Mode. The monitor automatically resumes functioning when the system detects input from the keyboard, mouse or other input devices.The following table shows the power consumption and signaling of this automatic power saving feature: VESA Modes Horizontal Sync Vertical Sync Video Power Indicator Power Consumption Normal operation (with Dell Soundbar active) Active Active Active Blue 75 W (maximum) -
Page 5: Plug And Play Capability
Display Data Channel (DDC) protocols so that the system can configure itself and optimize the monitor settings. Most monitor installations are automatic. You can select different settings if required. General Model number S199WFP Flat Panel Screen type Active matrix - TFT LCD... -
Page 6: Preset Display Modes
1440 x 900 at 75 Hz Video Display Capabilities (DVI HD Playback) 480i/576i/1080i/480p/576p/720p/1080p(Supports HDCP) Preset Display Modes The following table lists the preset modes for which Dell guarantees image size and centering: Display Mode Horizontal Frequency (kHz) Vertical Frequency (Hz) -
Page 7: Caring For Your Monitor
Stand dimensions: Height 11.04 inches (280.31 mm) Width 10.43 inches (264.84 mm) Depth 5.81 inches (147.65 mm) Weight with packaging 15.66lbs (7.1 kg) Weight with stand assembly and 12.79 lbs (5.8 kg) cables Weight without stand assembly (For wall mount or VESA mount 8.16 lbs (3.7 kg) considerations - no cables) Weight of stand assembly... -
Page 8: Fcc Notice (U.s. Only)
For information on safety instructions, see the Product Information Guide. Contacting Dell For Customers in the United States, call 800-WWW-DELL (800-999-3355) NOTE: If you do not have an active Internet connection, you can find contact information on your purchase invoice, packing slip, bill, or Dell product catalog. ... - Page 9 Dell provides several online and telephone-based support and service options. Availability varies by country and product, and more services may not be available in your area. To contact Dell for sales, technical support, or customer service issues: 1. Visit support.dell.com 2.
-
Page 10: Setting Up Your Monitor
Dell™ S199WFP Flat Panel Monitor User's Guide Connecting Your Monitor Using the Front Panel Using the OSD Menu Setting the Optimal Resolution Using the Dell Soundbar (Optional) Connecting Your Monitor CAUTION: Before you begin any of the procedures in this section, follow the safety instructions. 1. Turn off your computer and disconnect the power cable. -
Page 11: Using The Osd Menu
Use the Input Select button to choose between two different video signals that may be connected to your monitor. NOTE: The floating 'Dell Self-test Feature Check' dialog appears on a black background if the monitor cannot sense a video signal. Depending upon the selected input, one of the dialogs shown below will scroll continually. - Page 12 NOTE: Positioning and Image Settings are only available when you are using the analog (VGA) connector. 2. Press the - and + buttons to move between the setting options. As you move from one icon to another, the option name is highlighted. See the table below for a complete list of all the options available for the monitor.
- Page 13 Exit Select to exit the Main menu. Brightness/ Brightness adjusts the luminance of the backlight. Contrast Adjust Brightness first, then adjust Contrast only if further adjustment is necessary. Push the + button to increase luminance and push the - button to decrease luminance (min 0 ~ max 100). Contrast adjusts the degree of difference between darkness and lightness on the monitor screen.
- Page 14 NOTE: When using DVI source, the Image Settings option is not available. Color Settings Color Settings adjusts the color temperature. Under the model,you can choose Graphics or Video according to what signal input.If PC connect to your monitor,please choose Graphics;if DVD or STB or VCR connected to your monitor,Video is recommended.To disable Color Management, ...
- Page 15 Blue Preset is selected to obtain a bluish tint. This color setting is used for text based applications (spreadsheets, programming, text editors, etc.). Red Preset is selected to obtain a reddish tint. This color setting is used for color-intensive applications (photograph image editing, multimedia, movies, etc.).
- Page 16 No — disables audio (default) NOTE: When the Dell Soundbar is not properly connected to the monitor, the audio menu is not available. Factory Reset Resets the OSD menu options to the factory preset values. Exit — Select to exit out of Reset to Factory Settings menu without resetting any OSD options.
-
Page 17: Osd Warning Messages
This means that the monitor cannot synchronize with the signal that it is receiving from the computer. Either the signal is too high or too low for the monitor to use. See Specifications for the Horizontal and Vertical frequency ranges addressable by this monitor. Recommended mode is 1440 X 900 @ 60Hz. NOTE: The floating Dell Self-test Feature Check dialog appears on-screen if the monitor cannot sense a video signal. or or ... - Page 18 Attaching the Dell Soundbar (Optional) The Dell Soundbar is a stereo two channel system adaptable to mount on Dell Flat Panel Displays. The Soundbar has a rotary volume and on/off control to adjust the overall system level, a blue LED for power indication, and two audio headset jacks.
-
Page 19: Solving Problems
3. Turn on the monitor. The floating 'Dell Self-test Feature Check' dialog box should appear on-screen on a black background if the monitor cannot sense a video signal and is working correctly. While in self-test mode, the power LED remains green. Also, depending upon the selected input, one of the dialogs shown below will continuously scroll through the screen. ... -
Page 20: General Problems
This means that the monitor cannot synchronize with the signal that it is receiving from the computer. Either the signal is too high or too low for the monitor to use. See Monitor Specifications for the Horizontal and Vertical frequency ranges addressable by this monitor. Recommended mode is 1440 X 900 @ 60Hz. Occasionally, no warning message appears, but the screen is blank. This could also indicate that the monitor is not synchronizing with the computer or that the monitor is in power save mode. -
Page 21: Product Specific Problems
Product Specific Problems SPECIFIC SYMPTOMS WHAT YOU EXPERIENCE POSSIBLE SOLUTIONS Screen image is too small Image is centered on screen, but does not fill Perform monitor reset on "All Settings." entire viewing area. Cannot adjust the monitor with the OSD does not appear on the screen. Turn off the monitor, unplug the power cord and then buttons on the front panel plug back and turn on the monitor. -
Page 22: Attaching The Stand
Back to Contents Page Using Your Monitor Stand Dell™ S199WFP Flat Panel Monitor User's Guide Attaching the Stand Organizing Your Cables Using the Tilt Removing the Stand Attaching the Stand NOTE: The stand is detached when the monitor is shipped from the factory. To attach the stand: 1. -
Page 23: Removing The Stand
Removing the Stand After placing the monitor panel on soft cloth or cushion, complete the following steps to remove the stand. 1.Place the monitor on a stable flat table. 2. Lift the stand away from the monitor while pressing the stand release button. Back to Contents Page ...
Need help?
Do you have a question about the S199WFP and is the answer not in the manual?
Questions and answers