Table of Contents
Advertisement
Advertisement
Table of Contents

Subscribe to Our Youtube Channel
Related Manuals for Blue Bird TC/2000

Summary of Contents for Blue Bird TC/2000
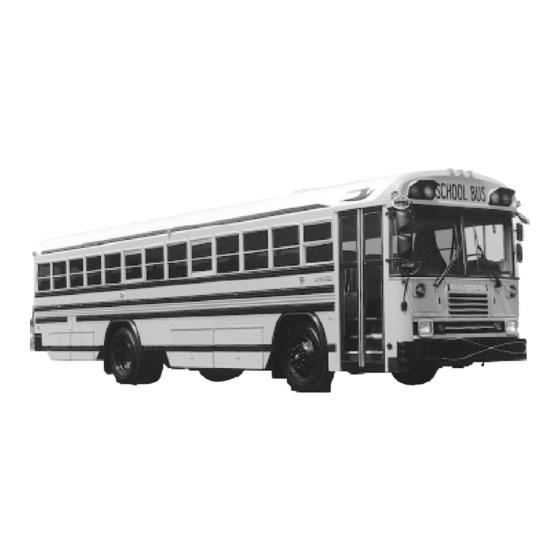
- Page 1 TC/2000 Owner's Manual...
-
Page 2: Table Of Contents
Cooling System ............79 Mirrors & Mirror Adjustment ......... 19 Corsair EM-300 Fan Clutch ........79 Emergency Equipment ..........21 TC/2000 Pitman Arm ..........80 Emergency Exit ............23 Front Axle Stop & Steering Gear Wheelchair Lifts ............24 Automatic Poppet Adjustments ......81 Transpec Safety Vent .......... -
Page 4: Introduction
It explains the various features and controls which should be familiar to the operator before he/she attempts to drive the unit and will help keep your Blue Bird TC/2000 in top operating condition and help extend its service life. -
Page 5: Forward
This Operator’s Manual provides some general, as well as specific, information regarding safe operation and maintenance of your Blue Bird bus. It does not address all items or situations that may arise and is not a substitute for proper driver and mechanic training. The exercise of care, common sense and good driving and working practices are required for safe operation. -
Page 6: Inspection
The Body Serial and Service Number Plate is located on BLUE BIRD the front upper inner panel above the windshield. Refer to the data on this plate for registration purposes or for replace- BODY CO. ment part information. FORT VALLEY, GEORGIA BODY NO. -
Page 7: Weekly Inspection
Look inside the bus: • Seat, floor - housekeeping. Steps and aisle clear? • Emergency exits open & close, rear door, windows. • Emergency equipment. • Fire extinguisher pressure. • First aid kit. • Driver’s area - windshield, windows clean? •... -
Page 8: Operator's Compartment
OPERATOR’S COMPARTMENT 1. Driver’s seat. 2. Switch panel. 3. Horn button - sounds electric horn. 4. Instrument panel. 5. Turn signal lever - operates turn signals. 6. Automatic transmission shift control (range selec- tor) location. 7. Heater and defroster controls. 8. -
Page 9: Instrument Panel & Controls
INSTRUMENT PANEL & CONTROLS INSTRUMENT PANEL WITH DUAL SCALE GAUGES The speed indicator is measured in miles per hour and kilometers per hour. All temperature gauges are measured in degrees Fahrenheit and degrees Celsius. All pressure gauges are measured in pounds per square inch and kilopascals (kilo newtons per square meter). -
Page 10: Switch Panel
4. Manuals BLANK BLANK BLANK BLANK DOME CL LAMPS BLANK WL PILOT WL PILOT WL MANUAL BLANK WL MASTER 5. Master BLUE BIRD BODY COMPANY 6. Fan BLANK BLANK BLANK BLANK BLANK BLANK WIPER WIPER WASHER WASHER 7. Wipers/Washers BLANK... -
Page 11: Forward
Driver’s seat belt should be worn at all times when the vehicle is being driven. Blue Bird driver’s seat belts have automatic locking retractors and are self-adjusting. They also have an anti-cinch device which prevents the belt from uncomfortable tightening as you drive. To use, withdraw ample length of belt from retractor or retractors to allow engagement of buckle halves. -
Page 12: Seat Belt Inspection & Maintenance
SEAT INSPECTION & MAINTENANCE Blue Bird seats are built to meet Federal Motor Vehicle Safety Standards. In order to provide even safer passenger transportation, the following guidelines should be met. 1. Inspect and retighten seat leg and wall side mounting bolts every 90 days. - Page 13 All passenger seats must have a seat or barrier in front of it to provide compartmentalization required by Federal Motor Vehicle Safety Standards. As you reconfigure your bus, you may need additional barriers. Barriers are available from Blue Bird Body Company Part Sales. FEDERAL STANDARD REQUIREMENTS FOR SEAT PLACEMENT...
-
Page 14: Flat Floor Units
Contact Blue Bird Engineering for appropriate seat and barrier location. • Seats and restraining barriers must be located such that they do not obstruct or interfere with any emergency exit label, instruction, actuation device or zone of access. -
Page 15: Electrical Systems
ELECTRICAL SYSTEMS The following guidelines must be followed when doing any work on vehicle electrical components or wiring. 1. Before beginning any electrical work, disconnect all batteries. Always remove all battery ground straps first and replace last to prevent accidental arcing. 2. -
Page 16: Light Bulb Data
LIGHT BULB DATA Lamp Description Trade Name Trade No. Color Bulb No. INTERIOR LIGHTS Dome Weldon 8005 (Standard) Weldon 8010 (Deluxe) Stepwell Arrow Emerg. Door Light Weldon 8025 Switch Panel Pilots Cole Hersee PL19 Dial 41204-1211 Switch Panel Illum. 1314962 EXTERIOR LIGHTS Directional 772-9105... -
Page 17: Repair Procedure
REPAIR PROCEDURE NOTE: Field repair is not intended for monitors covered by Blue Bird Body Company warranty. Inoperative monitors under warranty should be returned to Blue Bird Body Company for repair or replacement under the terms and conditions of warranty for electrical parts. - Page 18 The cause of an inoperative LED will generally be found in monitor and bus circuits other than at the LED; however, if an LED itself is known to be inoperative, contact your usual Blue Bird service parts source for special handling of replacement LED’s.
- Page 19 Monitor Connection Lamp Function Model: A B C D E RED WARNING LAMP RIGHT INPUT X X X X RED WARNING LAMP RIGHT FRONT OUTPUT X X X X BATTERY RED WARNING LAMP RIGHT REAR OUTPUT X X X X AMBER WARNING LAMP RIGHT INPUT AMBER WARNING LAMP RIGHT FRONT OUTPUT AMBER WARNING LAMP RIGHT REAR OUTPUT...
-
Page 20: Circuit Breakers
Failure to follow these procedures could cause serious injury or death. Right front convex crossview and right and left front convex rearview mirrors are required equipment on all TC/2000, Type (D), buses. Left front convex crossview mirrors are also available. INTERIOR MIRRORS Inside rearview mirrors are adjustable by loosening the bolts and nuts in slotted holes. - Page 21 8" DIA. SUPPLEMENTAL EXTERIOR REARVIEW MIRROR Some units may be equipped with two (2) 8" elliptical mirrors, one on the LH side and one on the RH side, which are designed to supplement the view provided by the outside rearview driving mirrors. The RH 8" elliptical mirror is attached to the RH outside rearview mirror mounting bracket as illustrated, and is viewed through the RH windshield.
-
Page 22: Emergency Equipment
FIRST AID contents comply with state specifications. BLUE BIRD BODY CO. FIRE EXTINGUISHER The fire extinguisher is normally located on the right-hand sidewall between the grabrail and barrier. -
Page 23: Flare Kit
FIRE AXE/CROWBAR The fire axe and crowbar are located on the electrical panel access cover to the left of the driver’s seat as close to the front as possible every 30 days, inspect installation mounting fasteners to insure that they are tight. -
Page 24: Emergency Exit
EMERGENCY EXITS Emergency exits are clearly identified by the words “Emer- gency Exit.” Operating instructions are written close to each exit. Some EMERGENCY DOOR SEE INSTRUCTIONS BELOW units are equipped with an audible alarm device signifying an emer- EMERGENCY EXIT INSTRUCTIONS BELOW gency exit is unlatched or open. -
Page 25: Wheelchair Lifts
WHEELCHAIR LIFTS For the TC/2000, Blue Bird supplies lifts from Braun FROM and Collins. Each vendor provides its own publication RED / BLACK SWITCH PANEL for information on maintenance, lubrication, troubleshoot- WHITE DOME ing and other important items that are imperative to the... -
Page 26: Stop Arms
STOP ARMS Stop arms are required on Blue Bird TC/2000 school buses per FMVSS 131. Stop arm assemblies are purchased as a kit; many different kits are available with blades to meet all state requirements. The stop arm is located on the left-hand side of the body under the driver’s window. Stop arms are most commonly oper- ated by a manual switch located in the switch panel. - Page 27 4. System leak - check to make sure that the air pressure supplied to the solenoid valve or the diaphragm is equal to 10 to 12 lbs. Again - CAUTION - not to exceed 12 lbs. of pressure is very important. Excessive pressure will cause damage to the diaphragm and the solenoid valve.
-
Page 28: Winterfront Cover
STOP SIGN BLADE FAILURE Problem: Lights do not function. Areas to Check: 1. Check to insure that the light bulb is working. 2. Check to insure that the ground strap is secure. 3. Check to see if 12V is being supplied to the light bulb. It is important to note that there have been improvements made to the socket and pigtail. -
Page 29: Front Access
FRONT ACCESS PANELS TCFE To service components behind or underneath the dash area on the Forward Engine models, access can be gained through the front access panels by the following procedure. Release press button latches on center panel and allow panel to open downward. This allows access to heater bleeding valve, radiator fill cap and view to radiator sight glass. -
Page 30: Body Tie Down
Tow hooks are designed to tow or pull with both hooks simultaneously. Do not pull or tow with an individual hook. Bumpers provided on Blue Bird buses are designed to protect the vehicle and occupants from front and rear collisions. TC/2000 bumpers are de- signed for use with bumper jacks. -
Page 31: Doors
A four inch wide pad is mounted to the header cover over the opening. The manual control is the Blue Bird cover over center locking type with built-in saf-latch. The door ease-of-operation facilitates use of a short handle arm, so the handle is six inches closer to the driver in the open position than with the jack-knife door. -
Page 32: Power Jackknife Door
5. Assure that the door control rod end bracket is mounted squarely on door. If bracket is not square to the door, the yoke end pivot pin will bind. Adjust by loosening screws and tighten after bracket has been squared up. 6. -
Page 33: Electric Outward Opening Door
3. Adjust switch striker plate on cylinder rod so that is does not bind against the switch and switch bracket in the closed position. 4. Insure that the roller bracket is installed square on the rear door panel. 5. Insure that the center hinge barrel is not binding against the outer skin of the rear door panel. 6. -
Page 34: Vandal Locks
VANDAL LOCKS ENTRANCE DOOR To activate the optional electric entrance door vandal lock, pull the door to a full closed position from the outside of the vehicle. When this is done, the vandal lock is activated. To deactivate the lock insert key in lock located at right of the door (forward of door) and turn. -
Page 35: Engine Access
FOREIGN MATERIAL DEPOSITS Calcium chloride and other salts, ice-melting agents, road oil and tar, tree sap, bird droppings, chemicals from industrial chimneys and other foreign matter may damage vehicle finishes if allowed to remain on painted surfaces. Prompt washing may not completely remove all of these deposits. Additional cleaners may be needed. -
Page 36: Heaters
HEATERS GENERAL INFORMATION Blue Bird heaters are hot water type which depend on heat generated by the engine for their function. Heat from the engine is picked up by the engine coolant which is pumped through the heaters inside the body and back into the engine. -
Page 37: Heater Access
body rises, engine temperature also rises. More heat will also be generated by the engine when it is caused to work in moving the vehicle. This is especially noticeable with diesels which do not warm up at idle as readily as gasoline engines. - Page 38 DEFROSTING Windshield fogging and frosting is caused by warm, humid air coming in contact with a DASH COVER cold windshield, which causes the moisture in the air to condense and possibly freeze if the windshield is cold enough. The warmer the windshield, the less moisture will con- dense on it.
-
Page 39: Heater Defroster Location
Many other factors affect performance, but the three mentioned are most basic. DEFROSTER FAN LOCATIONS Opt. 0525 - On the TC/2000 with deluxe door control and standard manual control, the fan is mounted on the door control bracket. With power door controls, the fan is mounted on the dash cover. - Page 40 TCFE PROCEDURE: INITIAL FILL WITH GRAVITY HOSE WITH ENGINE OFF AND COOL 1. Open heater supply valve at rear of engine block and close heater return valve at the transmission oil cooler. 2. Open 1/4 inch vent line valve located above radiator and direct vent line flow back into the radiator fill neck.
- Page 41 WARNING: Never idle engine in closed areas. Never sit in a parked or stopped vehicle for any extended amount of time with the engine running; exhaust gases, particularly carbon monoxide, may build up. These gases are harmful and potentially lethal. Carbon monoxide is colorless and odorless, but can be present with all other exhaust fumes.
- Page 42 STANDARD HEATER CUT OFF VALVE LOCATION Valves No. 1 & 2 are used to isolate the heater system from the engine in case a leak occurs within the system while bus operation must be continued, or for repair to a system. ENGINE: Cummins 5.9TA PRESSURE LINES...
-
Page 43: Hose Repair
Hoses are installed with as few joints as possible so as to prevent the possibility of leaking joints. If a portion of hose becomes damaged, a new piece of hose can be spliced in by use of 4 inch brass tube (Blue Bird part #1701903), and hose clamps. -
Page 44: Heater Hose Clamp Service
HEATER HOSE CLAMP SERVICE Tighten heater hose clamps after first 1,000 miles and annually thereafter. Heater hose clamps are located at the underseat heater coil, behind the access door in the heater hose covering immediately forward of the left front wheelhousing, and under the floor near the right front and driver's heater. The part number for this clamp is 1056050. -
Page 45: Engine Block Heaters
HEATER & HEATER CONNECTIONS WATER CAPACITY CHART Note: Water capacity of heaters includes tubing within heater enclosure. Option No. Description Capacity (Quarts) 90TC Front Heater 3.19 12 Driver’s Heater 1325 50 Front Underseat Heater 1.56 1330 50 Rear Underseat Heater 1.56 1332 50 Rear RH Underseat Heater... -
Page 46: Windows & Windshields
WINDOWS AND WINDSHIELDS WINDSHIELD GLASS REPLACEMENT The windshield is four-piece flat. 1. Remove vertical filler strip in glazing rubber on each side of bro- ken glass; remove horizontal filler strip in glazing rubber on top and bottom of broken glass. It will be necessary to cut the hori- zontal filler strip after it is pulled past the glass. - Page 47 Step 5 Step 4 4. On bottom glass, simply pull aluminum channel off top and bottom of glass. 5. To remove glass from top part of window, remove 6 screws holding frame around glass. 6. Reassemble window by reversing above procedure. 7.
-
Page 48: Entrance Door Glass Replacement
ENTRANCE DOOR GLASS REPLACEMENT 1. Apply pressure against glass from the outside of the bus, starting at a corner and push glass and glazing rubber off of metal flange. 2. Remove glazing rubber from around glass. 3. Put glazing rubber on new glass. 4. -
Page 49: Windshield Wipers
Remove the cap nuts, which secure the wiper arm and idler arm to the wiper and idler shaft, respectively. Remove the wiper arm and place new arm (Blue Bird No. 0348177) over wiper shaft and make sure the new arm is replaced in the same position as the old arm was removed. -
Page 50: Lower Side Panel Repair Procedure
1/2 inch of the replacement panel is under the rub rail. Install Cherry SSPV 86 blind rivets, Blue Bird P/N 0888222 on 3 1/2 inch centers through the rub rail lower flange and the new and old side panel. -
Page 51: Tires, Wheels & Rims
Both the tubeless type and tube type tires are used on the TC/2000. The tubeless tires are mounted on 15 degree drop-center rims and wheels. The tube type tires are mounted on two-piece flat base rims or wheels or three-piece flat base rims or wheels. - Page 52 • When putting air in a tire on the vehicle, stand to the side and use a clip-on chuck and hose extension. Never add to your tires unless an accurate pressure gauge is also used. In choosing the right tire pressure, be careful not to go past the maximum pressure capacity shown on the tire.
-
Page 53: Jacking Instructions
SPOKE WHEELS Place rims and spacer band on wheel. Secure clamps evenly in position by tightening the nuts by hand. Tighten the nuts to 50 ft. lbs. using the alternate sequence as shown. Check the wheel wobble, then rotate the wheel so that the furthest position out is at the top. Tighten the nuts to 100-150 ft. - Page 54 Buses meeting Federal Emissions Regulations have an exhaust system made of special materials to with- stand higher exhaust system temperatures. CAUTION: To help avoid fire, use only Blue Bird or equivalent heat shields and exhaust system parts. Do not operate engine without heat shields installed. These vehicles must not be parked over combustible materials, such as grass or leaves, as contact with a hot exhaust system may cause such materials to ignite under certain conditions.
-
Page 55: Engine Exhaust Gas Caution
To help prevent damage: 1. Keep your engine properly maintained. Engine malfunctions involving the electrical, electronic fuel injection or ignition systems may result in unusually high catalytic converter and exhaust system temperatures which, under extreme malfunctioning conditions, may ignite interior floorcovering materials above the exhaust system. -
Page 56: Diesel Engine Starting Procedure
DIESEL ENGINE STARTING PROCEDURE 1. Apply parking brake. 2. Place transmission shift lever in neutral position . 3. See appropriate engine manufacturers operating manual for proper starting procedures. Starting pro- cedures vary from different engine manufacturers and also varies with temperature. 4. -
Page 57: Gasoline Engine Maintenance Instructions
WARNING: Do not take transmission out of gear when going down a steep or long grade. You may not be able to get the transmission back in gear, and the drastic slowing of engine speed could reduce air pres- sure supply to the air brake system, and result in a reduction of brake capacity. ENGINE HIGH IDLE SWITCH The high idle control on the TCRE positions the throttle lever at high idle when air supply pressure is insufficient for normal operation of the throttle system. -
Page 58: Itemized Service Instructions
ITEMIZED SERVICE INSTRUCTIONS A. ENGINE OIL CHANGE - Always use SG quality oil of 10W-30 viscosity. The drain interval may be altered depending upon severity of service and experience with specific oil or based on the recommenda- tions and used oil analysis provided by oil suppliers. See your Owner’s Manual for additional details on engine oil. - Page 59 P. COOLING SYSTEM SERVICE - Wash radiator or surge tank cap and filler neck with clean water, pres- sure test system and cap for proper pressure holding capacity, tighten hose clamps and inspect condition of all cooling and heater hoses. Replace hoses if cracked, swollen or otherwise deteriorated. Clean exte- rior of radiator core.
-
Page 60: 1997 Emission Control Systems Warranty For Gasoline Engines
WARRANTY FOR GASOLINE ENGINES 5-YEAR/50,000-MILE EMISSION DEFECT WARRANTY Blue Bird Body Company warrants to owners of 1997 TC/2000 school busses that the gasoline engine and evaporative emission control system (1) were designed, built and equipped so as to conform at the time of... -
Page 61: What Is Not Covered
These receipts should be transferred to each subsequent owner of this vehicle. Blue Bird Body Company reserves the right to deny warranty coverage if the required maintenance has not been performed. However, Blue Bird will not deny warranty coverage... -
Page 62: Noise Emissions Warranty
Blue Bird. Defects in design, assembly or in any part, component or system of the vehicle as manufactured by Blue Bird, which at the time it left Blue Bird control, caused noise emissions to exceed Federal standards, are covered by this warranty for the life of the vehicle. -
Page 63: Compressed Natural Gas
Many gasolines are now blended with materials called oxygenates. Blue Bird recommends that you use gasolines with these blending materials, such as MTBE and ethanol. By doing so, you can help clean the air, especially in those parts of the country that have high carbon monoxide levels. -
Page 64: Fuel System Description
(Compressed Natural Gas) must be inspected every three (3) years in accordance with NGV-2 specifications. The owner/operator should be aware that cylinder expiration date is fifteen (15) years after date of cylinder manufacture and that cylinders must be replaced. This testing and certification is not covered by Blue Bird warranty. -
Page 65: Safety Cautions & Warnings
From the valve fuel flows into a common fuel line through high pressure stainless steel compression fittings. The tanks are joined to the common line through high pressure stainless steel tee's and crosses. Any open tank thus communicates to any other open tank. So for fueling, the fuel is backfed through the common line to all tanks (with open valves) simultaneously. -
Page 66: Compressed Natural Gas Fuel
COMPRESSED NATURAL GAS FILTERS Particulate and coalescer type filters are installed in Blue Bird CNG fuel systems. The primary filter is of stainless steel construction and is located at the fill point. This filter can be checked for contamination by closing main shutoff valve on frame and then relieving pressure which is trapped between the check valve in the fill nozzle and the main system check valve. -
Page 67: Fuel Composition
The owner/operator should insist that fuel from a compressor station should be clean and dry. Replacement filter elements are available through the Blue Bird Service Department. FUEL COMPOSITION Natural gas composition varies throughout the country, depending on original gas composition and pro- cessing. -
Page 68: Specific Gravity
Fahrenheit. (NOTE: Most fill stations have a dome valve to automatically make the temperature correction.) When fueling is complete, open the fill connector purge valve. Use only fuel filling couplings designed for use with the CNG. Do not force damaged couplings together. CAUTION: A check valve is included in the system behind the fill connector to prevent backflow of fuel when purging and disconnecting the fuel nozzle NOTE: The tanks are full at 3000 psi or 3600 psi and 70 degrees Fahrenheit. -
Page 69: Antiknock Properties
ignition within the cylinder or tank is not possible. In the event of fuel leak, there will be a small area in which the air to fuel ratio is within the flammability limits. In a closed garage, or within the passenger compart- ment, ignition conditions are more likely to be met. -
Page 70: Manual Five Speed Transmission
gas may be installed. LNG vehicles require insulated, pressurized (10 to 35 psi) fuel tanks. LNG is vaporized in the fuel line and warmed in the heat exchanger generally located under the hood. Pressure is reduced by the pressure regulator before the vapors are transported to the mixer/carburetor. MAINTENANCE Service manuals supplied by converters and installers should be consulted for maintenance of NGV-specific parts. -
Page 71: Allison Transmission Cable Adjustments
selector to the normal driving position. These positions also provide progressively greater engine braking power (the lower the gear range, the greater the braking ef- fect). Use (1) when pulling through mud and snow or driving up steep grades. This position provides maximum engine braking power. -
Page 72: Do Not Shift Light
With an Allison MD-equipped vehicle, it is not necessary to select the right moment to upshift or down- shift during the changing road and traffic conditions. The Allison MD does it for you. However, knowledge of the gear ranges and when to select them will make vehicle control and your job even easier. MD 3060 GEAR SELECTION WARNING: In the event the operator leaves the vehicle, even momentarily, while the engine is running, be sure that the transmission is in Neutral, parking brake and/or emergency brakes are set and properly... - Page 73 Illumination of this light, accompanied by 8 seconds of short beeps from the shift selector, indicates that shifts are being restricted. The SELECT digit on the display will be blank. Operation may continue in order to reach service assistance. The ECU may not respond to shift selector requests since operating limitations are being placed on the transmission;...
-
Page 74: Transmission Oil Temperature
inhibitors within the valve body prevent those harmful shifts when the vehicle is going too fast for the next lower gear. If the downshifts are attempted at excessive speeds, the inhibitors prevent the selected downshift until the vehicle reaches an acceptable speed. DOWNSHIFT OR REVERSE INHIBITOR FEATURE With/MD3060 Although there is no limitation on upshifting, there is on downshifting and shifts from Neutral into Drive or Reverse. -
Page 75: Hydraulic Brakes
erate the engine to 1200-1500 RPM. This should reduce the sump temperature to operating level within two or three minutes. If high temperature persists, stop the engine and have the overheating condition investi- gated by service personnel. If excessive temperature is indicated by the transmission oil temperature gauge, check the oil level in transmission. -
Page 76: Dual Brake System
DUAL BRAKE SYSTEM The dual brake system allows the driver reasonable brake capacity in case either the front or the rear brake circuit fails. CAUTION: When one circuit of the dual system fails, the following conditions will exist. 1. Bus stopping distance will increase. Drive the bus only with extreme caution. Service immediately! 2. -
Page 77: Air Brakes
CAUTION: The parking brake is designed to hold on the above mentioned grade on a clean, dry and smooth road surface. Parking on wet, ice or snow covered grades is not recommended. Chocking of wheel(s) is recommended when parking on any grade. WARNING: Extreme caution should be exercised when the drive shaft is removed on a unit equipped with hydraulic brakes. -
Page 78: Draining Air Tanks
PARKING Use the dash mounted valve to apply the rear spring brake when parking the coach. When the parking brake is applied, and the ignition switch is ON, a dash-mounted yel- PARKING BRAKE low light labelled PARK will warn the driver that the brake is applied. CAUTION: Do not attempt to move bus before spring brakes are released. -
Page 79: Hydraulic System Troubleshooting
HYDRAULIC SYSTEM - TROUBLESHOOTING 1. Hydraulic fan will not run. A. Check hydraulic oil level in reservoir. (Sight glass) B. Check fan motor for free rotation, fan motor should rotate freely. If not rebuild or replace fan motor. CAUTION: Engine should be shut off when checking fan motor for free rotation. C. -
Page 80: Shutters
SHUTTERS The optional radiator shutters on the TC/2000 RE assist in maintaining a constant engine temperature by limiting the air flow through the radiator. The shutter blades are powered by air pressure from the brake system on the vehicle. The shutters are controlled automatically by a 185 F Alarmstat which is located in the upper radiator hose and an electric solenoid in the air line controlling the shutters. -
Page 81: Tc/2000 Pitman Arm
Install a new temperature sensing device as soon as possible. TC/2000 PITMAN ARM If it becomes necessary to remove the pitman arm from the steering gear, it is possible with the gear still on the vehicle. -
Page 82: Front Axle Stop & Steering Gear Automatic Poppet Adjustments
FRONT AXLE STOP AND STEERING GEAR AUTOMATIC POPPET ADJUSTMENTS To adjust the automatic poppets and axle stops, do the following. 1. Adjustment of axle stops and steering gear pressure relief valves (poppet valves) should be made after toe-in has been set on the front axle. 2. -
Page 83: Wheelbearing Adjustments
CAUTION: Do not exceed the 20 in. lbs. torque in procedure #9. If torque is exceeded the complete procedure must be repeated. CAUTION: Relief valve pressure must not be maintained more than (5) seconds during operation in step #9 or pump damage could occur. 10. -
Page 84: Suspension Clearance
SUSPENSION CLEARANCE The allowable side-to-side movement between spring leaf and shackle or between shackle and spring hanger is 1/4". The allowable movement between spring torque leaf bushing tube and the spring hanger is 1/ 4". Total movement may be determined by inserting a 12" to 16" bar through the spring hanger bracket and the torque leaf at the spring eye, shifting the torque leaf side to side and up and down. - Page 85 3 MONTHS OR 5,000 MILES • Inspect fire extinguisher to see if fully charged. • Check first aid kits to see if fully equipped. • Oil all hinges and window latches for ease of operation. • Lubricate all window channels with silicone or graphite. •...
- Page 86 • Check single and double check valves. • Lubricate spring pin. • Inspect alternator. • Clean battery posts. • Disassemble and clean the air compressor governor and repair, as required. • Lubricate entrance door vandal lock. • Check/adjust emergency door vandal lock. •...
-
Page 87: Maintenance Service Keys
24 MONTHS OR 24,000 MILES • Clean radiator and shutters. • Change thermostat. • Clean relay valves, spring brake valves, parking brake valves, and quick release valves. • Clean pressure protection valves. • Inspect and clean Cyclo-Gard air dryer. • Change coolant. These check lists are suggested. -
Page 88: Quick Reference Maintenance Charts
QUICK REFERENCE MAINTENANCE CHARTS CUMMINS ENGINE MAINTENANCE CHART Service Intervals * Months / Miles Whichever Occurs First *Service Intervals to be performed on a continuing basis. Example: 1 / 3,000 means every month or every 3,000 miles. Operation General Instructions Check Engine Oil Level Daily See Cummins Book. -
Page 89: John Deere 8.1 Cng Engine Maint. Chart
JOHN DEERE 8.1 CNG ENGINE MAINTENANCE CHART Service Intervals * Months / Miles Whichever Occurs First *Service Intervals to be performed on a continuing basis. Example: 1 / 3,000 means every month or every 3,000 miles. Operation General Instructions Check Engine Oil Level Daily See PowerTech 6081 CNG Engine Book. -
Page 90: Suspension Maintenance Chart
SUSPENSION MAINTENANCE CHART Service Intervals * Months / Miles Whichever Occurs First *Service Intervals to be performed on a continuing basis. Example: 1 / 3,000 means every month or every 3,000 miles. Operation General Instructions SPRING SUSPENSION Check Front U-bolt Torque Torque to 325 ft. -
Page 91: Axle Maintenance Chart
AXLE MAINTENANCE CHART Service Intervals * Months / Miles Whichever Occurs First *Service Intervals to be performed on a continuing basis. Example: 1 / 3,000 means every month or every 3,000 miles. Operation General Instructions REAR AXLE Check Lubricant See Spicer Maintenance Manuals on F170S, J190S, J210S, & J230SB Axles. Keep oil to level of filler plug. -
Page 92: Brake Maintenance Chart
BRAKE MAINTENANCE CHART Service Intervals * Months / Miles Whichever Occurs First *Service Intervals to be performed on a continuing basis. Example: 1 / 3,000 means every month or every 3,000 miles. Operation General Instructions AIR BRAKE SYSTEM Air Brake Operation See page 76. -
Page 93: Chassis Component Maintenance Chart
CHASSIS COMPONENT MAINTENANCE CHART Service Intervals * Months / Miles Whichever Occurs First *Service Intervals to be performed on a continuing basis. Example: 1 / 3,000 means every month or every 3,000 miles. Operation General Instructions ACCELERATOR SYSTEM Inspect Cable Check cable for proper connection, cracking, abrasion or deterioration. -
Page 94: Body Component Maintenance Chart
BODY COMPONENT MAINTENANCE CHART Service Intervals * Months / Miles Whichever Occurs First *Service Intervals to be performed on a continuing basis. Example: 1 / 3,000 means every month or every 3,000 miles. Operation General Instructions OUTWARD OPENING DOOR Adjust door linkage rod for proper open/closed position. Adjust Door Linkage Rod As Required JACKKNIFE DOOR... -
Page 95: Wheelchair Lift Maintenance Chart
BODY COMPONENT MAINTENANCE CHART Service Intervals * Months / Miles Whichever Occurs First *Service Intervals to be performed on a continuing basis. Example: 1 / 3,000 means every month or every 3,000 miles. Operation General Instructions HEATERS Check Heater Hoses Check hoses for kinks, cracks or other visible signs of damage. -
Page 96: General Data
GENERAL DATA DIMENSIONS: Headroom - 74" to 77" Exterior height - approximately 118" to 121" Exterior height w/AC - add 16" Exterior width - 96" Interior width - 90 3/4" FLUID CAPACITIES Engine Engine Transmission Crankcase Oil Coolant Fluid ENGINE w/Filter w/o Filter Manual... -
Page 97: Electric Vehicle Information
Blue Bird Corporation and Northrop Grumman Electronic Systems have developed the first purpose built all-electric school bus. This is a full size 72 passenger vehicle based on the popular TC/2000 chassis design. This portion of this manual is designed to assist the operator and maintenance personnel with their familiarization and operation of the valve regulated lead acid powered electric vehicle. -
Page 98: Battery Power
determines a Pulse Width Modulation (PWM) profile for the high power transistors. The PWM profile facili- tates the microsecond switching capability that allows a smooth current flow from the Battery Pack through the Power Distribution Unit, to the Motor Controller which produces variable frequency 3-phase alternating current which drives the AC induction Motor. -
Page 99: Motor Controller
2389 turbine oil, the motor weighs approximately 225 pounds. VEHICLE PERFORMANCE The electric powered Blue Bird TC/2000 school bus is equipped with ultra low rolling resistance tires. With the traction battery pack fully charged, it is capable of approximately an 70 mile range at a constant 45 mile per hour velocity. -
Page 100: Vehicle Operation
VEHICLE OPERATION Efficiency of Energy To maintain smooth operation of the vehicle and efficiency of energy, the bus should be operated with a constant easy pressure on the accelerator. The battery energy per mile required to move the bus increases with speed. -
Page 101: Pre-Driving Requirements
2. Oil Pressure Gauge - Shows the pressure of oil in the electric motor cooling system. The vehicle is cooled by oil rather than water. The oil pressure range for this vehicle is 50 - 90 psi. Oil Temperature Gauge - Shows the temperature of the oil in the motor cooling system. The maxi- mum operating range is a temperature of approximately 185 degrees. -
Page 102: Starting The Electric Vehicle
STARTING THE ELECTRIC VEHICLE The following steps must be followed to start the vehicle. For safety and performance considerations, follow these steps in their listed order. 1. Ensure the charge cable is not connected to the vehicle and all access panels are closed and locked. 2. - Page 103 Changes in Voltage and Current Readings The following status of voltage and ampere readings on the digital gauges should be checked. The gauges are located to the left of the operating modes selector panel. Voltage As the vehicle accelerates or is otherwise driven by the motor, the average voltage will decrease indi- cating that current is coming out of the Traction Battery Packs.
-
Page 104: Shutting Down The Vehicle
In the Event of Accident If you are involved in an accident follow normal established procedures. Remain with the vehicle as timely notification of the authorities is essential. DO NOT, under any circumstances, move the vehicle before instructed to by the authorities. Activate the emergency flashers. Remain with the vehicle and be prepared to inform the arriving authorities that the vehicle is equipped with 112 spill proof vale regulated lead acid batteries configured with high enough voltage to be lethal. -
Page 105: Charging The Vehicle
CHARGING THE VEHICLE Following are the steps for charging the lead acid battery-powered vehicle. 1. Pull the vehicle near the charging station. Position the vehicle so that the right rear side panel is near the charging station. 2. Shut down the vehicle in accordance with the procedures listed above but do not lock the vehicle yet. 3. - Page 106 NOTES...
-
Page 107: Index
INDEX Access Doors ............. 28 Brake Maintenance Chart ........91 Air Brake System ............ 91 Hydraulic Brakes (Disc) ........91 Air Brakes ..............76 Shoe-Type Brakes (Air) .......... 91 Air Brake Adjustment ..........76 Draining Air Tanks ..........77 Chassis Component Maintenance Chart ..... 92 Fuel Stop Solenoid .......... - Page 108 Doors ................30 Engine Operating Instructions ......52 Electric Outward Opening Door ......32 Antifreeze ..............56 Jackknife Door ............30 Catalytic Converter ..........53 Power Jackknife Door ..........31 Cold Start Aid ............55 Outward Opening Door ........30 Computer Command Control System ....
- Page 109 Heaters ............... 35 Keeping Your Vehicle Looking New ....33 Care & Cleaning of Defroster Fans ...... 37 Finish Damage ............34 Control Panel ............36 Floors & Floorcovering .......... 34 Defroster Fan Locations ......... 38 Foreign Material Deposits ........34 Defrosting ..............
- Page 110 Switch Panel ............... 9 Windshield Wipers ..........48 Washer Solution Reservoir ........48 Wiper Arm Removal & Installation ..... 48 TC/2000 Pitman Arm ..........80 Wiper Assembly Replacement ......48 Wiper Refill Replacement ........48 Tilt & Telescoping Steering ........7 Winterfront Cover ............
- Page 111 Part Number: 1919331 Blue Bird Corporation • P.O. Box 937 • Fort Valley, GA 31030...
Need help?
Do you have a question about the TC/2000 and is the answer not in the manual?
Questions and answers