Advertisement
Table of Contents
Advertisement
Table of Contents

Related Manuals for Pyle PWPBT60


Summary of Contents for Pyle PWPBT60
- Page 1 PWPBT60 Bluetooth Portable speakers User Manual www.pyleaudio.com ...
- Page 2 TABLE OF CONTENTS IMPORTANT SAFETY INSTRUCTIONS ................ 2 BEFORE USE ........................ 4 COPYRIGHT ........................ 4 BLUETOOTH CONNECTIVITY .................. 4 TURN ON THE APPARATUS .................... 4 TURN OFFTHE APPARATUS .................... 4 GETTING CONNECTED ..................... 4 ENJOY MUSIC FROM AN EXTERNAL DEVICE .............. 5 USB CHARGING ........................ 5 SPECIFICATIONS ...................... 6 IMPORTANT SAFETY INSTRUCTIONS ...
- Page 3 9. Install the apparatus in accordance with the manufacturer’s instructions. 10. Clean the cabinet with a soft cloth slightly moistened with a mild detergent solution. Do not use strong solvents which may cause unpredictable damage to the apparatus. 11. Do not use attachments/accessories not recommended by the product manufacturer as they may be hazardous. 12. Power‐supply cords should be routed so that they are not likely to be trapped in any way. Also protect the power cord from being walked on or pinched, particularly at plugs, convenience receptacles and the pointers where they exist from the apparatus. 13. This product should be operated only from the type of power source indicated on the marking label. If you are not sure of the type of power supply to your home, consult your product dealer or local power company. For products intended to operate from battery power, or other sources, refer to the operation instructions. 14. The mains plug is used as disconnect device. The mains plug of apparatus should not be obstructed OR should be easily accessed during intended use. To be completely disconnect the power input, the mains plug of apparatus should be disconnected from the mains. 15. An outside antenna system should not be located in the vicinity of overhead power lines or other electric light or power circuits, or where it can fall into such power lines or circuits. When installing an outside antenna system, extreme care should be taken to keep from touching such power lines or circuits as contact with them might be fatal. 16. If the apparatus is not used for a period of time, unplug the power cord. 17. If the remote control unit is not used for a period of time, remove batteries from the remote control unit and store them in a cool dry area. 18. If it is lightening, unplug the power cord to prevent the unit from unnecessary damages. 19. This product should be moved with care to avoid damage or injury. ...
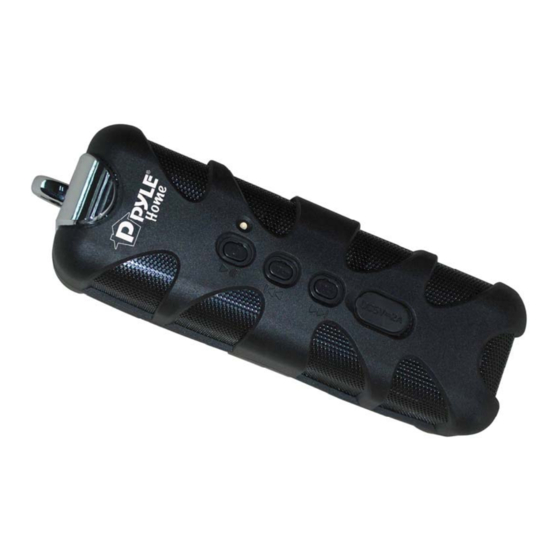
- Page 4 product in defective states. BEFORE USE 1. Choose unit installation location carefully. Avoid placing it in direct sunlight or close to a source of heat. Also avoid locations subject to vibrations and excessive dust, cold or moisture. Keep away from sources that hum, such as transformers or motors. 2. Do not open the cabinet as this might result in damage to the circuitry or electrical shock. If a foreign object should get into the set, contact your dealer. 3. When removing the power plug from the wall outlet, always pull directly on the plug, never pull the cord. 4. Do not attempt to clean the unit with chemical solvents as this might damage the finish. Use a clean, dry cloth. 5. In order to shut off the power to this product completely, unplug the power cord from the wall outlet. Be sure to unplug the unit if you do not intend to use it for an extended period of time, such as while on vacation. 6. Keep this manual in a safe place for future reference. COPYRIGHT * All trademarks and trade names are those of their respective owners. BLUETOOTH CONNECTIVITY External devices which have a built‐in Bluetooth feature can be connected to this apparatus and play through the speakers. TURN ON THE APPARATUS ‐ Press and hold the button to turn on the apparatus. The indicator besides the button will light up and flash when the apparatus is on TO TURN OFF THE APPARATUS Press and hold the button again until you hear a long voice of “du” and the indicator won’t light. ...
- Page 5 meters. 3. Wait for a while then find the “E‐9150” on the paired devices list on your external device and press “E‐9150”. If sometimes A window will ask you a password. Fill in “0000” then press “OK” on your external device. 6. A few seconds later your Bluetooth connection is success. And you can hear “dodo”. ENJOY MUSIC FROM AN EXTERNAL DEVICE 1. It will play automatically and the light will stop flashing if you get your external device paired. (See “Getting connected”); 2. Press and hold the VOL‐ button to reduce the volume; 3. Press and hold the VOL+ button to increase the volume; 4. Just press the VOL‐ button to skip the start of the current song and press the VOL‐ button again to skip the start of the previous song; 5. Just press the VOL+ button to skip the start of the current song and press the VOL+ button again to skip the next song; 6. Press the button to pause 7. Press the button again to restart to play. USB CHARGING The apparatus can be charged by some devices that have USB slot. 1. Plug the USB cable into the USB slot of the apparatus and Plug the other end of USB cable into the USB slot of the computer or other devices that have the USB slot; 2. Commonly, it will take 3 hours to charge the apparatus. USB Charge voltage is 5V. 5 ...
- Page 6 Warning Changes or modifications to this unit not expressly approved by the party responsible for compliance could void the user’s authority to operate the equipment. NOTE: This equipment has been tested and found to comply with the limits for a Class B digital device, pursuant to Part 15 of the FCC Rules. These limits are designed to provide reasonable protection against harmful interference in a residential installation. This equipment generates uses and can radiate radio frequency energy and, if not installed and used in accordance with the instructions, may cause harmful interference to radio communications. However, there is no guarantee that interference will not occur in a particular installation. If this equipment does cause harmful interference to radio or television reception, which can be determined by turning the equipment off and on, the user is encouraged to try to correct the interference by one or more of the following measures: Reorient or relocate the receiving antenna. Increase the separation between the equipment and receiver. Connect the equipment into an outlet on a circuit different from that to which the receiver is connected. Consult the dealer or an experienced radio/TV technician for help. This device complies with Industry Canada license‐exempt RSS standard(s). Operation is subject to the following two conditions: (1) this device may not cause interference, and (2) this device must accept any interference, including interference that may cause undesired operation of the device. Under Industry Canada regulations, this radio transmitter may only operate using an antenna of a type and maximum (or lesser) gain approved for the transmitter by ...
- Page 7 SPECIFICATIONS AMPLIFIER Frequency Response …………. 60 to 20,000 Hz SPEAKER SYSTEM Type …………. 1‐way Impedance …………. 4 Ohm GENERAL Power Requirements …………. The built‐in lithium battery voltage 3.7V Lithium battery capacity:1400mA Dimensions (W x H x D) …………. 65 x 70x 201 mm(approx.) Without hand buckle 65x70x216 mm(approx.) With hand buckle USB Charge …………. USB charge voltage 5V Standard Accessories …………. USB Cable 7 ...
Need help?
Do you have a question about the PWPBT60 and is the answer not in the manual?
Questions and answers