
Related Manuals for Toshiba SD4015KE


Summary of Contents for Toshiba SD4015KE
-
Page 1: Dvd Player
Introduction DIGITAL VIDEO Connections DVD PLAYER Basic playback SD4015KE Function setup OWNER’S MANUAL Others © 2010 Toshiba Corporation... -
Page 2: Introduction
“This product is marked with “CE” and complies therefore with the applicable harmonized European standards listed under the Low Voltage Directive 2006/95/EC and the EMC Directive 2004/108/EC.” Responsible for CE-marking is TOSHIBA INFORMATION SYSTEMS (U.K.) LTD, Toshiba Court, Weybridge Business Park, Addlestone Road, Weybridge,... -
Page 3: Important Safety Instructions
IMPORTANT SAFETY INSTRUCTIONS Read these instructions. Keep these instructions. Read all warnings. Follow all instructions. Do not use this appliance near water. Clean only with a dry cloth. Do not block any of the ventilation openings. Install in accordance with the manufacturer’s instructions. Do not install near any heat sources such as radiators, heat registers, stoves, or other apparatus (including amplifi... -
Page 4: Notes On Handling
Introduction IMPORTANT SAFETY INSTRUCTIONS DON’T remove any fi xed cover as this may expose dangerous voltages. DON’T obstruct the ventilation openings of the equipment with items such as newspapers, tablecloths, curtains, etc. Overheating will cause damage and shorten the life of the equipment. DON’T allow electrical equipment to be exposed to dripping or splashing, or objects fi... -
Page 5: Precautions
PRECAUTIONS NOTES ON DISCS Notes on moisture condensation On handling discs Moisture condensation damages the DVD player. Do not touch the playback side of the disc. Please read the following carefully. Moisture condensation occurs, for example, when you pour a cold drink into a glass on a warm day. Drops of water form on the outside of the glass. -
Page 6: Notes On Region Numbers
Because of problems and errors that can occur during the creation of DVD and CD software and/or the manufacture of DVD and CD discs, Toshiba cannot assure that this DVD player will successfully play every disc bearing the DVD and CD logos. -
Page 7: Table Of Contents
Table of Contents Introduction Function setup SAFETY PRECAUTIONS ......2 Customizing the Function Settings ..23 Using the Language setup menu ......23 IMPORTANT SAFETY INSTRUCTIONS ..3 Using the Video setup menu .......23 PRECAUTIONS .......... 5 Using the Audio setup menu .......24 NOTES ON DISCS ........ -
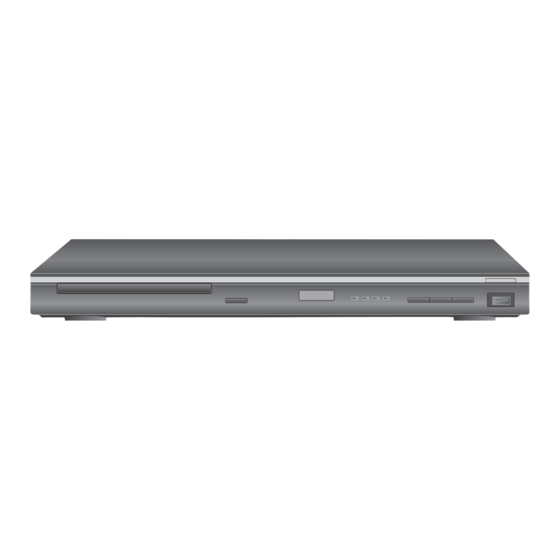
Page 8: Identifi Cation Of Controls
Introduction Identifi cation of Controls See the page in for details. Front panel HDMI indicator HDMI SELECT USB jack Rear panel Power Cord HDMI OUT jack VIDEO COAXIAL DIGITAL ANALOG HDMI OUT AV (SCART) socket DVD display The indicators vary depending on the kinds of discs you play. Power off No disc Bad disc... -
Page 9: Using The Remote Control
Using the Remote control Loading batteries Operating with the remote control Open the cover. Point the remote control at the remote sensor and press the buttons. Insert batteries (R03/AAA size). Distance: About 7 m (23 feet) from the front of the remote sensor Angle: About 30°... -
Page 10: Remote Control
Introduction Using the Remote control (continued) Remote control The instructions in this manual describe the functions on the remote control. See the page in for details. ON/STANDBY button SEARCH (T) button MUTE button MUTE SUBTITLE/MP3 CONV. button SUBTITLE/MP3 CONV. VIDEO OUT VIDEO OUT button 12 HDMI button USB button 13... -
Page 11: Names And Functions
Names and functions 1. OPEN/CLOSE button 8. SKIP buttons • Press the button to open/close the disc tray. To locate succeeding chapters or tracks. • The function is the same as the OPEN/CLOSE button on the front panel. 2. ON/STANDBY button To locate preceding chapters or tracks. - Page 12 Introduction Names and functions (continued) To change the programmed selections, use 19.MUTE button to move the highlighted bar to the item Press to mute and restore the sound. you want to change and press CLEAR, then input 20.SLOW button the new number. Forward slow playback.
- Page 13 26.DISPLAY button CD Information display Press to view the operational status. e.g. DVD Information display Elapsed time of the Repeat Off Track e.g. current track 1) Press DISPLAY while a disc is playing, the fi rst banner shows the title, chapter information and the elapsed CDDA TR K time display of the current chapter.
-
Page 14: Connections
Connections Connecting to a TV Connect the DVD player to your TV. Connecting to a TV (Using the SCART socket) VIDEO Normal TV COAXIAL DIGITAL ANALOG HDMI OUT To AV • Make the following setting. On-screen display Page Select: SCART cable “Video”... -
Page 15: Connecting To A Display
About HDMI HDMI has the capability to support standard, enhanced, or HDMI (High Defi nition Multimedia Interface) supports both high-defi nition video plus standard to multi-channel surround- video and audio on a single digital connection for use with sound audio. HDMI features included uncompressed digital DVD players, DTV, set-top boxes, and other AV devices. -
Page 16: Connecting To Optional Equipment
Connections Content of the output for each output jack is shown in the following table and differ depending on the On-Screen Display Setting: On-Screen Display Setting Content of output for each output jack “Video” HDMI Output HDMI Video Setting Setting Output Output Output... -
Page 17: Connecting To An Amplifi Er Equipped With A Dolby
Connecting to Optional Equipment (continued) ® Connecting to an amplifi er equipped with a Dolby Digital decoder Dolby Digital Dolby Digital is the surround sound technology used in theaters showing the latest Manufactured under license from movies, and is now available to reproduce this realistic effect in the home. You can Dolby Laboratories. -
Page 18: Dts Decoder
Connections Connecting to Optional Equipment (continued) ® Connecting to an amplifi er equipped with a DTS decoder ® Manufactured under license under U.S. DTS is a high quality surround technology used in theaters and now available for Patent #: 5,451,942 & other U.S. and home use, on DVDs or audio CDs. -
Page 19: Playing A Disc
Playing a Disc CAUTION Keep your fi ngers well clear of the disc tray as it is closing. This section shows you the basics on how to play a disc. Neglecting to do so may cause serious personal injury. Basic playback Preparations •... -
Page 20: Playing Mp3/Divx /Jpeg Files
766KB C0006 content, including music fi les, in any format, including the 2009/12/01 C0007 MP3 formats, prior to the downloading thereof. Toshiba RETURN ENTER MENU PGUP/DN has no right to grant and does not grant permission to download any copyrighted content. - Page 21 ABOUT DIVX VIDEO : DivX ® is a digital video format Zooming in an image created by DivX, Inc. This is an offi cial DivX Certifi ed Press ZOOM repeatedly to toggle through Q1, Q2 and device that plays DivX video. Visit www.divx.com for more information and software tools to convert your fi...
-
Page 22: Using Usb Device
Basic playback Playing USB Device You can connect the USB fl ash drives (not included) to the USB jack on the front of DVD player. DivX ® You can play the fi les in MP3, or JPEG format stored on a USB fl ash drive by connecting it to this player. Connecting to USB fl... -
Page 23: Customizing The Function Settings
Customizing the Function Settings You can change the default settings to customize performance to your preference. ® DivX Subtitle Using the Language setup menu If your DivX ® fi les include a subtitle fi le, then you may select a supported DivX ®... -
Page 24: Function Setup
Function setup Customizing the Function Settings (continued) Notes Using the Audio setup menu • The displayable picture size is preset on the DVD. Therefore, the playback picture of some DVDs may not 1. Press SETUP during stop. conform to the picture size you select. 2. -
Page 25: Using The Parental Lock Setup Menu
If you forget your password at this moment, you cannot Using the Parental Lock setup menu use the super password (8888). You need to go to the Parental Lock setup menu to reset and input a new 1. Press SETUP during stop. password. -
Page 26: Hdmi Cec
Function setup Customizing the Function Settings (continued) View DivX(R) VOD HDMI CEC You can control this DVD unit from TV’s remote which is DivX ® Deregistration connected via HDMI cable. ® DivX deregistration code allows you to deregister your Functions available for the HDMI-CEC DVD player using the DivX ®... -
Page 27: Others
Others Before Calling Service Personnel Check the following guide for the possible cause of a problem before contacting service. Symptoms and correction Symptom Cause Correction Page No power. • The power plug is disconnected. • Connect the power plug securely into the wall outlet. 14-15 The DVD player turned off •... -
Page 28: Specifi Cations
Others Specifi cations DVD player / outputs / supplied accessories DVD Player Power supply 100V - 240V AC, 50/60 Hz Power consumption 9 W (standby: less than 1.0W) Mass 1.28 kg External dimensions 430 x 42 x 209 mm (W/H/D) Signal system PAL/3.58 NTSC Laser...
Need help?
Do you have a question about the SD4015KE and is the answer not in the manual?
Questions and answers