Table of Contents

Subscribe to Our Youtube Channel
Related Manuals for Rival 11560


Summary of Contents for Rival 11560
- Page 1 840193801 ENv05.qxd:840135000 Ev00.qxd 11/19/10 9:26 AM Page 1 compact fabric steamer plancha de vapor compacta para ropa Customer Atención al Assistance: Cliente: 11560 1.866.321.9509 1.866.321.9509...
-
Page 2: Important Safeguards
840193801 ENv05.qxd:840135000 Ev00.qxd 11/19/10 9:26 AM Page 2 IMPORTANT SAFEGUARDS When using your appliance, basic precautions should always be followed, including the following: 1. Read all instructions. 10. Burns could occur from touching hot 2. Close supervision is necessary for any metal parts, hot water, or steam. -
Page 3: Parts And Features
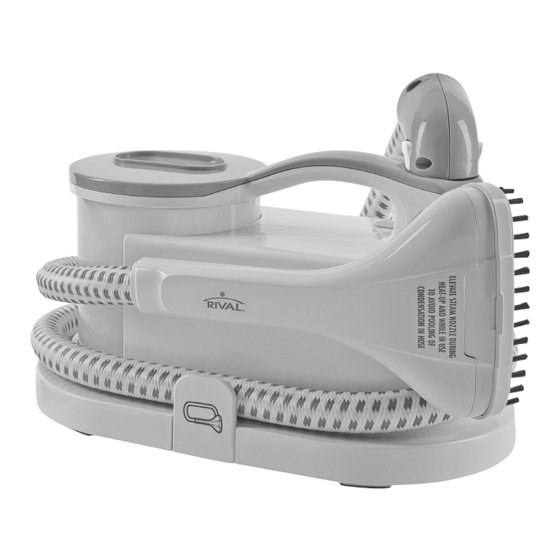
840193801 ENv05.qxd:840135000 Ev00.qxd 11/19/10 9:26 AM Page 3 PARTS AND FEATURES BEFORE FIRST USE: REMOVE ALL PACKING MATERIALS FROM GARMENT STEAMER. BRUSH ATTACHMENT Snap onto steam nozzle. CREASING ATTACHMENT Slide onto steam nozzle until it locks into place. 1. Flexible Steam Hose 8. - Page 4 840193801 ENv05.qxd:840135000 Ev00.qxd 11/19/10 9:26 AM Page 4 ASSEMBLY AND STORAGE INSTRUCTIONS BEFORE FIRST USE: REMOVE ALL PACKING MATERIALS FROM GARMENT STEAMER. INSERTING HOSE INTO BASE: Firmly grasp base of flexible steam hose. Insert into opening on steamer until it snaps into place. To remove hose, push in tabs on both sides and pull hose out.
-
Page 5: How To Steam
840193801 ENv05.qxd:840135000 Ev00.qxd 11/19/10 9:26 AM Page 5 HOW TO STEAM BURN HAZARD. w WARNING Steam is hot. Always make sure unit is OFF when assembling attachments. The float ball will rise to the top of Fill with cool water UP TO MAX FILL LINE ONLY using the fill/drain hole. - Page 6 840193801 ENv05.qxd:840135000 Ev00.qxd 11/19/10 9:26 AM Page 6 HOW TO STEAM (CONT.) Remove spray nozzle from door hook Push ON/OFF switch to the ON (I) and replace with garment on a position. Wait at least 2 minutes for steam to start flowing from the steam hanger.
- Page 7 840193801 ENv05.qxd:840135000 Ev00.qxd 11/19/10 9:26 AM Page 7 COMPACT GARMENT STEAMER TIPS NOTICE: To avoid garment damage, check garment label for fabric composition and any steaming instructions such as this symbol: Do not use steam • Do not operate without water in the water tank. To add water during operation, first switch steamer OFF (O) and then use a pitcher to refill.
-
Page 8: Care And Cleaning
840193801 ENv05.qxd:840135000 Ev00.qxd 11/19/10 9:26 AM Page 8 CARE AND CLEANING Follow this procedure monthly to avoid mineral deposits and buildup, which can affect the steaming performance of the unit. Empty remaining water from tank Make sure unit is unplugged and has over sink using the fill/drain hole. -
Page 9: Troubleshooting
840193801 ENv05.qxd:840135000 Ev00.qxd 11/19/10 9:26 AM Page 9 CARE AND CLEANING (CONT.) Wrap cord around the cord wrap on Wrap flexible steam hose around top of steamer base and slide nozzle bottom of steamer. down onto storage hook. TROUBLESHOOTING PROBLEM PROBABLE CAUSE Unit won’t steam. -
Page 10: One-Year Limited Warranty
SAVE THIS FOR YOUR RECORDS RIVAL™ logo is a registered trademark of Sunbeam Products, Inc. used under license by Wal-Mart Stores, Inc., Bentonville, AR 72716. Made in China... -
Page 11: Instrucciones De Seguridad Importantes
840193801 SPv05.qxd:840135000 Ev00.qxd 11/19/10 9:29 AM Page 11 INSTRUCCIONES DE SEGURIDAD IMPORTANTES Cuando use su plancha plana de vapor para ropa, se debe seguir siempre las precauciones básicas de seguridad, incluyendo las siguientes: 1. Lea todas las instrucciones. 10. No haga funcionar una plancha con 2. -
Page 12: Partes Y Características
840193801 SPv05.qxd:840135000 Ev00.qxd 11/19/10 9:29 AM Page 12 PARTES Y CARACTERÍSTICAS ANTES DE USAR POR PRIMERA VEZ: REMUEVA TODO EL MATERIAL DE EMPAQUE DE LA PLANCHA DE VAPOR PARA ROPA. ADITAMENTO DE BROCHA Se fija en la boquilla de vapor. ADITAMENTO DE ARRUGAS Se desliza sobre la... -
Page 13: Instrucciones De Ensamblaje
840193801 SPv05.qxd:840135000 Ev00.qxd 11/19/10 9:29 AM Page 13 INSTRUCCIONES DE ENSAMBLAJE ANTES DE USAR POR PRIMERA VEZ: REMUEVA TODO EL MATERIAL DE EMPAQUE DE LA PLANCHA DE VAPOR PARA ROPA. CÓMO INTRODUCIR LA MANGUERA EN LA BASE: Tome con firmeza la base de la manguera de vapor flexible. -
Page 14: Peligro De Quemaduras
840193801 SPv05.qxd:840135000 Ev00.qxd 11/19/10 9:29 AM Page 14 CÓMO PLANCHAR CON VAPOR w ADVERTENCIA PELIGRO DE QUEMADURAS. El vapor está muy caliente. Siempre asegúrese de que la unidad esté APAGADA cuando coloque los accesorios. El flotador se elevará hasta la parte Llene con agua fría SÓLO HASTA LA LÍNEA MÁXIMA DE LLENADO utilizando superior del tanque cuando llegue a... - Page 15 840193801 SPv05.qxd:840135000 Ev00.qxd 11/19/10 9:29 AM Page 15 CÓMO PLANCHAR CON VAPOR (CONT.) Presione el interruptor ENCENDIDO/ Quite la boquilla de pulverización del gancho de la puerta y vuelva a colocar APAGADO en la posición ENCENDIDO (I). con la prenda en el soporte. Espere al menos 2 minutos para que el vapor comience a fluir de la boquilla de vapor.
- Page 16 840193801 SPv05.qxd:840135000 Ev00.qxd 11/19/10 9:29 AM Page 16 CONSEJOS PARA LA PLANCHA DE VAPOR PARA ROPA AVISO: Para evitar dañar la ropa, revise la etiqueta de la ropa para la composición de la tela y cualquier instrucción para planchar con vapor tal como este símbolo: No use vapor •...
-
Page 17: Cuidado Y Limpieza
840193801 SPv05.qxd:840135000 Ev00.qxd 11/19/10 9:29 AM Page 17 CUIDADO Y LIMPIEZA Siga este procedimiento mensual para evitar depósitos de mineral y acumulaciones, lo cual puede afectar el desempeño para emitir vapor de la unidad. Vacíe el agua restante del tanque Asegúrese que la unidad esté... - Page 18 840193801 SPv05.qxd:840135000 Ev00.qxd 11/19/10 9:29 AM Page 18 CUIDADO Y LIMPIEZA (CONT.) Coloque el cable eléctrico alrededor Enrolle la manguera flexible de vapor del enrollado del cable ubicado en la alrededor de la parte superior de la base de la plancha de vapor. base de la plancha y deslice la boquilla hacia abajo en el gancho de almacenamiento.
-
Page 19: Detección De Problemas
840193801 SPv05.qxd:840135000 Ev00.qxd 11/19/10 9:29 AM Page 19 DETECCIÓN DE PROBLEMAS PROBLEMA CAUSE PROBABLE La unidad no emite • Asegúrese que haya agua en el tanque de agua vapor. No hay y que la unidad esté conectada y que esté suficiente vapor. -
Page 20: Garantía Limitada De Un Año
CONSERVE LA PRESENTE PARA SUS REGISTROS El logo RIVAL™ es una marca registrada de Sunbeam Products, Inc. utilizado bajo licencia por Wal-Mart Stores, Inc., Bentonville, AR 72716. Hecho en China...
Need help?
Do you have a question about the 11560 and is the answer not in the manual?
Questions and answers