Advertisement
Your miter saw stand has been engineered and manufactured to Ryobi's high standard for dependability, ease of operation,
and operator safety. When properly cared for, it will give you years of rugged, trouble-free performance.
WARNING:
To reduce the risk of injury, the user must read and understand the operator's manual before using
this product.
Thank you for your purchase.
SAVE THIS MANUAL FOR FUTURE REFERENCE
OPERATOR'S MANUAL
MITER SAW STAND
RMS10
Advertisement
Table of Contents

Related Manuals for Ryobi RMS10


Summary of Contents for Ryobi RMS10
- Page 1 OPERATOR’S MANUAL MITER SAW STAND RMS10 Your miter saw stand has been engineered and manufactured to Ryobi’s high standard for dependability, ease of operation, and operator safety. When properly cared for, it will give you years of rugged, trouble-free performance. WARNING: To reduce the risk of injury, the user must read and understand the operator’s manual before using...
-
Page 2: Table Of Contents
TABLE OF CONTENTS Rules for Safe Operation ..............................2 Symbols ................................... 3 Features ................................... 4 Assembly ..................................4-6 Operation ..................................7 Maintenance ..................................8 RULES FOR SAFE OPERATION Safe operation of this accessory requires that you read and Do not modify or use this stand for any purpose for understand this operator’s manual, the operator’s manual for which it is not intended. -
Page 3: Symbols
SYMBOLS The following signal words and meanings are intended to explain the levels of risk associated with this product. SYMBOL SIGNAL MEANING Indicates an imminently hazardous situation, which, if not avoided, will result DANGER: in death or serious injury. Indicates a potentially hazardous situation, which, if not avoided, could result WARNING: in death or serious injury. -
Page 4: Features
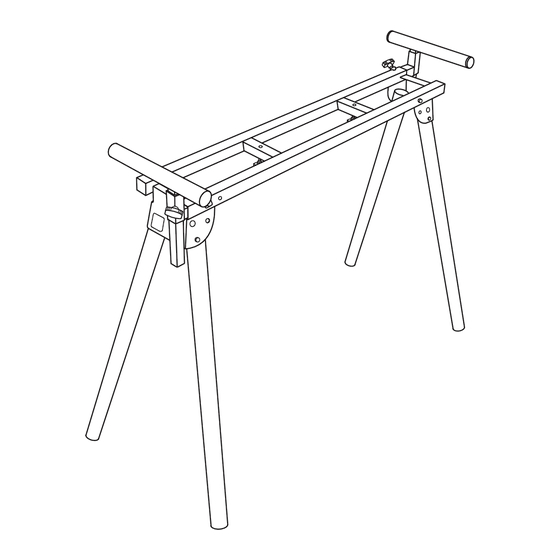
FEATURES work support extension work rail support extension rail Fig. 1 ASSEMBLY UNPACKING Inspect the tool carefully to make sure no breakage or damage occurred during shipping. This product requires some assembly. Do not discard the packing material until you have care- ... -
Page 5: Packing List
ASSEMBLY PREPARING THE STAND WARNING: See Figure 2. Lay the stand’s top surface down on the floor with the Do not attempt to modify this tool or create accesso- folded legs on top. ries not recommended for use with this tool. Any such alteration or modification is misuse and could result in a Push in a leg locking pin and rotate that leg up until the hazardous condition leading to possible serious personal... -
Page 6: Assembly
ASSEMBLY INSTALLING EXTENSION RAILS See Figures 3 - 4. stand Depress the locking pin and slide the extension rail into the opening on the end of the stand. loCkinG Repeat with the other extension rail on the opposite side of the stand. -
Page 7: Operation
OPERATION WARNING: loCkinG pin Do not allow familiarity with tools to make you care- less. Remember that a careless fraction of a second is sufficient to inflict serious injury. WARNING: Always wear eye protection with side shields marked to comply with ANSI Z87.1. Failure to do so could result in objects being thrown into your eyes, resulting in possible extension serious injury. -
Page 8: Maintenance
MAINTENANCE GENERAL MAINTENANCE WARNING: Avoid using solvents when cleaning plastic parts. Most plastics are susceptible to damage from various types of When servicing, use only identical replacement parts. commercial solvents and may be damaged by their use. Use Use of any other parts may create a hazard or cause clean cloths to remove dirt, dust, oil, grease, etc.
Need help?
Do you have a question about the RMS10 and is the answer not in the manual?
Questions and answers