Table of Contents
Advertisement
Table of Contents
1
HITACHI
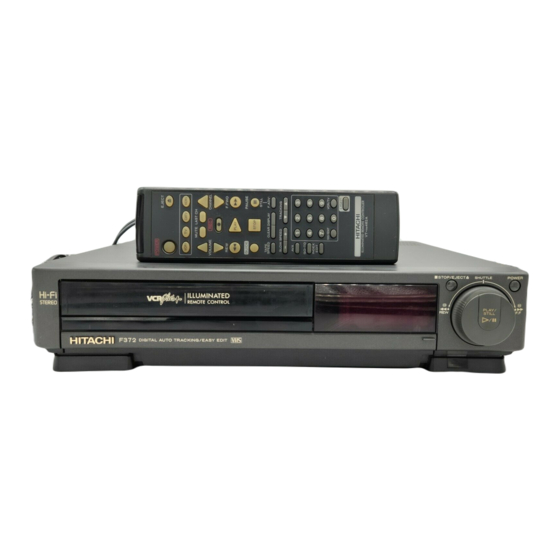
Video Deck
VT-F372A
Owner's Manual
Your Complete Guide
to Videocassette Viewing
and Recording
Using these quality features:
VHS hi-fidelity sound in playback
Automatic tape head cleaning
Up to 8 delayed recording programs
Auto tracking for improved picture in playback
Cable-compatible frequency synthesizer quartz tuner
Illuminated remote control for use with your VCR, TV and cable converter
All basic playback functions on convenient shuttle control
On-screen programming guide
Multi-channel TV sound (MTS)
VCR Plus+* for easy timed recording
* VCR Plus+ and PlusCode are trademarks of Gemstar Development Corporation.
HITACHI HOME
ELECTRONICS
(AMERICA), INC.
3890 Steve Reynolds Blvd.,
Quebec
Norcross, GA 30093
Tel. 404-279-5600
P4707955 © Hitachi, Ltd. 1993
1
HITACHI SALES
CORPORATION
OF HAWAII, INC.
3219 Koapaka Street
Honolulu, HI 96819
Tel. 808-836-3621
HITACHI (HSC)
CANADA INC.
3300 Trans Canada Hwy.
Pointe Claire,
H9R1B1, CANADA
Tel. 514-697-9150
Printed in Japan KM-S(N)
Advertisement
Table of Contents

Related Manuals for Hitachi VT-F372A


Summary of Contents for Hitachi VT-F372A
- Page 1 * VCR Plus+ and PlusCode are trademarks of Gemstar Development Corporation. HITACHI HOME ELECTRONICS (AMERICA), INC. 3890 Steve Reynolds Blvd., Quebec Norcross, GA 30093 Tel. 404-279-5600 P4707955 © Hitachi, Ltd. 1993 HITACHI SALES HITACHI (HSC) CORPORATION CANADA INC. OF HAWAII, INC. 3300 Trans Canada Hwy. 3219 Koapaka Street Honolulu, HI 96819 Tel.
-
Page 2: Table Of Contents
Table of Contents Table of Contents FOR YOUR SAFETY ... 5 Read This First... 6 IMPORTANT SAFEGUARDS... 9 Getting Started... 14 Simple Hookups... 14 1 Decide Where to Put Your VCR ... 14 2 Decide Which Hookup Method to Use... 14 3 Hook up the Audio/Video Signal ... - Page 3 Table of Contents Special Playback Effects ... 34 To Find Specific Sections on a Tape... 36 Basic Operations (Recording) ... 39 Recording a Program... 39 Before you Record ... 39 Basic Recording Steps ... 39 Recording Tips... 40 Using the Instant Recording Timer (IRT)... 41 Setting the VCR to Record Later ...
- Page 4 Table of Contents Don't Attempt Repairs Yourself ... 68 Care and Servicing (Problems) ... 69 Hitachi Service Hotline... 70 SPECIFICATIONS ... 71 Technical Specifications... 71...
-
Page 5: For Your Safety
FOR YOUR SAFETY FOR YOUR SAFETY POWER SUPPLY: AC 120V, 60 Hz ONLY. The POWER switch turns the VCR on and off, leaving the clock/timer unaffected. If the unit is to be left unattended for a long period, it is recommended that the unit be completely switched off and unplugged. -
Page 6: Read This First
Read This First Thank you for buying a Hitachi product. You've chosen the best VCR for you, and we want to help you make the most of your purchase. Please take time to become familiar with this manual and how it is set up. - Page 7 Read This First Instructions in French and Spanish...19 Problem chart...65 Recording a Program, 33 Before You Record, 33 Basic Recording Steps, 33 Recording Tips, 34 Using the Instant Recording Timer (IRT), 35 Setting the VCR to Record Later, 36 Reviewing What You Have Programmed, 38 Programming Priorities, 39 Easy Delayed Recording with VCR Plus+, 40 About VCR Plus+, 40...
- Page 8 Read This First...
-
Page 9: Important Safeguards
IMPORTANT SAFEGUARDS IMPORTANT SAFEGUARDS In addition to the careful attention devoted to quality standards in the manufacture of your video product, safety is a major factor in the design of every instrument. But, safety is your responsibility too. This page lists important information that will help to assure your enjoyment and proper use of a Video Cassette Recorder and accessory equipment. - Page 10 IMPORTANT SAFEGUARDS a risk of fire or electric shock. Overloaded AC outlets and extension cords are dangerous, and so are frayed power cords, damaged or cracked wire insulation and broken plugs. They may result in shock or fire hazard. Periodically examine the cord and have it replaced by your service technician if appearance indicates damage or deteriorated insulation.
-
Page 11: Example Of Antenna Grounding
IMPORTANT SAFEGUARDS near a bath tub, wash bowl, kitchen sink, or laundry tub, in a wet basement, or near a swimming pool, and the like. 11 Accessories -- Do not place this video product on an unstable card, stand, tripod, bracket or table. - Page 12 IMPORTANT SAFEGUARDS 16 Lightning -- For added protection for this video product during a lightning storm, or when it its left unattended and unused for long periods of time, unplug it from the wall outlet and disconnect the antenna or cable-system. This will prevent damage to the video product due to lightning and power-line surges.
- Page 13 IMPORTANT SAFEGUARDS 17 Servicing -- Do not attempt to service this video product yourself as opening or removing covers may expose you to dangerous voltage or other hazards. Refer all servicing to qualified service personnel. 18 Conditions Requiring Service -- Unplug this video product from the wall outlet and refer servicing to qualified service personnel under the following conditions.
-
Page 14: Getting Started
This sections explains how to hookup the VCR, quick tour of the controls, set up for first-time operation using on-screen menus, and videocassette tapes. Enjoy getting to know all about your Hitachi VCR. Let's get started. Simple Hookups 1 Decide Where to Put Your VCR Be sure your chosen location allows for proper ventilation, stability, and protection from heat and moisture (see Important Safeguards). -
Page 15: Hook Up The Audio/Video Signal
Getting Started Any other devices you want to include in the system (stereo, second VCR, etc.) We will guide you through the process. But first, turn the TV and the VCR around so you are looking at their backs. Note the various input and output receptacles, their shapes, and how they are labeled. -
Page 16: Hook Up The Rf Signal
Getting Started electronic signal won't have to go through a conversion process. Plus your VCR has a stereo decoder, which your TV might not. For big speaker sound, you can also use these jacks to connect the VCR to your stereo system (page 54). Capabilities: The audio and video signal connections are all you need to play back a prerecorded tape. - Page 17 Getting Started TV jack on the back of the VCR. 4. Connect the other end of the same cable onto the 75 ohm antenna input on your TV (where you first disconnected the TV in step 1.) Capabilities: With this hookup, you should now be able to perform all the basic functions provided by this equipment.
- Page 18 Getting Started Single 300 ohm flat wire Separate UHF and VHF antenna wires, both 300 ohm flat wire 300 ohm flat UHF and 75 ohm round VHF If you have "rabbit ears" (an antenna on top of your TV), you will need an additional adapter and 75 ohm extension to make your leads reach from the antenna to the VCR.
-
Page 19: Attach The Tv And Vcr To The Power Supply
Getting Started 1. Using whichever adapter you have fit your antenna with, attach that connector to the IN FROM ANT jack on the back of the VCR. 2. Using the 75 ohm cable supplied with your VCR, connect either end to the OUT TO TV jack on the back of the VCR. - Page 20 Getting Started When the VCR is on, its video signal can come into your TV on either channel 3 or channel 4. You need to select the appropriate channel. Turn the power on to both the TV and the VCR, and look for a switch on the back of the VCR.
-
Page 21: Getting Started (Controls)
Getting Started (Controls) Getting Started (Controls) Quick Tour of the Controls Study these pictures carefully to learn about the buttons and controls that you'll need for everyday operation. Various controls are explained throughout this manual as they are needed, but now is a good time to get familiar with their locations. Most of the time, you'll be directing the VCR from the remote control, but there are some controls on the VCR that will come in handy too. -
Page 22: Remote Control Buttons
Getting Started (Controls) device you are controlling at the moment. Remote Control Illustration Remote Control Buttons POWER Turns the VCR on and off. VCR1, TV CATV, VCR2 Device buttons let you set the remote to control one of four devices. MUTE Turns off the audio until you press MUTE again. -
Page 23: When The Remote Doesn't Work Right
Getting Started (Controls) TRACKING Lets you fine tune the picture. 0 to 9 Number buttons used in on-screen programming. Can also be used to change channels. (Simply press 2 or 3 digits for the channel you want - such as 0 and 6 for channel 6, or 100/ENT and 2 and 4 for channel 124.) VCR/TV Switches between viewing through the VCR and not viewing through the VCR. -
Page 24: Vcr Controls
Getting Started (Controls) VCR Controls POWER Turns VCR power on and off. STOP/EJECT Cancels any videotape action, and when pressed a second time, ejects tape. PLAY Play the loaded videotape. SHUTTLE Controls the videocassette's forward and reverse motion with one convenient dial. - Page 25 Getting Started (Controls) Your Hitachi VCR has as a special feature called the Easy Guide System. This feature guides you through simple setup and programming tasks right on the TV screen. With the TV and VCR turned on, press GUIDE on the remote control. You will see this screen: You may view all the on-screen instructions in English, French or Spanish.
-
Page 26: Getting Started (Initial Setup)
Getting Started (Initial Setup) Getting Started (Initial Setup) Setup for First-Time Operation Before you use your VCR to watch or record from your TV, you need to "tell" the VCR whether your TV uses cable or antenna input and let it program itself to receive your TV's channels. -
Page 27: Setting The Clock
Getting Started (Initial Setup) Here is what the options mean: 1 ANTENNA/CABLE Press 1 to select the type of receiving setup you have: <ANT.> Internal or external antenna <CATV1> Ordinary cable <CATV2> Alternate cable (if CATV1 doesn't give you the channels you expect) 2 AUTO CHANNEL SETTING Press 2 to automatically program the VCR to receive all the channels that come in on your antenna or cable. -
Page 28: More About Channel Selections
Getting Started (Initial Setup) To set the clock, press GUIDE, then press 6 to bring up the Clock Set screen: Press the number buttons on the remote control to set the current time - two digits for the hour and two for the minutes. Then press 1 or 2 for AM or PM, respectively. For example, if it is now 2:15 PM, press 0, 2, 1, and 5 for hours and minutes, and press 2 for PM. -
Page 29: Choosing A Mode For Audio Playback
Getting Started (Initial Setup) For convenience, the TV channel numbers should match those programmed into the VCR. If your TV has automatic channel programming, set it on the same mode - ANT, CATV1 or CATV2 - and let it reprogram to match the VCR. Once channels are preset, you can use the up and down CHANNEL buttons to move through the active channels. -
Page 30: Hi-Fi Sound
Getting Started (Initial Setup) STEREO is the normal factory setting because it works for both stereo and mono broadcasts. It is also necessary for recording a second audio program (SAP). When you select MONO, sound is recorded as mono even when a channel broadcasts in stereo. -
Page 31: Getting Started (Videotapes)
T-160 160 min. You may have noticed that there is also an LP speed. You Hitachi VCR does not record at this speed, but it can play cassettes that were recorded in LP mode. No special setting is required for playback. -
Page 32: Loading And Ejecting
Getting Started (Videotapes) Loading and Ejecting When you load a videocassette into the VCR, there is only one right way! Most tapes show you the way with a little arrow on the top side which should go in first. Push the videocassette gently into the slot on the front of the VCR. You will feel the VCR take it in. -
Page 33: Basic Operations
Basic Operations Basic Operations Practice starting and stopping a video you've rented - play it through, see how it automatically rewinds. Get a blank tape and try recording a TV show. Then you'll know how to use the VCR when you need to - or where in the manual to find the instructions you forgot. -
Page 34: Rewinding The Tape
Basic Operations Manual Tracking Scratched tapes or poorly recorded tapes may require additional picture adjustment. You can do this with the remote control. Press either of the TRACKING buttons (down or up arrows) until picture clears up. After operating the tracking manually, eject the tape and reinsert it to reactivate auto tracking. - Page 35 Basic Operations While in PAUSE mode during playback, press F.ADV to view the video one frame at a time. Press PAUSE to resume play. Skip Playback While playing back your tape you can skip forward by pressing the FRAME ADVANCE button.
-
Page 36: To Find Specific Sections On A Tape
Basic Operations If noise bars appear on the TV screen during SLOW/STILL mode, first set the VCR to SLOW mode and then press the TRACKING control buttons ( control to minimize the noise bars. The noise bars are then eliminated automatically in the STILL mode. - Page 37 Basic Operations If there is one part of the video that you know you are going to want to return to, you can set the time counter to memorize that spot. Begin in either STOP or PLAY mode. Press DISPLAY twice to show the counter on the TV screen. (If you want the counter to appear on the VCR's display too, press DISPLAY three times.) Begin recording or playing back a tape.
- Page 38 Basic Operations A quick way to access specific program segments is with the index search feature. This lets you move through a tape that has several recordings on it by searching for the INDEX "mark." This function only works with recordings that have been set up with indexing.
-
Page 39: Basic Operations (Recording)
Basic Operations (Recording) Basic Operations (Recording) Recording a Program Before you Record The VCR must be hooked up properly for recording. See the Simple Hookups at the beginning of this manual. Make sure you are familiar with the Easy Guide System for on-screen programming (page 19) and the basics about videocassettes and VCR safety. -
Page 40: Recording Tips
Basic Operations (Recording) Recording will start unless the cassette is protected with the safety tab. If this tab has been removed, the VCR will eject the tape to prevent recording over what is there. (See About Videocassettes for more about preventing tape erasure.) Recording Tips To Watch the Same Program While Recording To view what you are recording, press VCR/TV so that the VCR is selected - the VCR... -
Page 41: Using The Instant Recording Timer (Irt)
Basic Operations (Recording) To Leave Index Marks on the Tape This feature is useful when you are recording several programs on the same tape. It helps you quickly find the beginnings of the shows during playback (page 32). You create the index "mark" every time you begin recording by pressing REC. To leave an index mark between shows, simply press STOP at the end of each show, then press REC to record the next show. -
Page 42: Setting The Vcr To Record Later
Basic Operations (Recording) Setting the VCR to Record Later With the delayed recording feature, you can set this VCR so that it automatically comes on and records programs whenever you like - without your being around! You can record a program one time only, or you can automatically record a show every weekday or every week at the same time. - Page 43 Let's say you were interviewed today by a local TV reporter. You're eager to see yourself on the evening news tonight. The news comes on channel 8 at 6 0'clock - but you've got a meeting scheduled during that time. Luckily you just purchased this Hitachi VCR.
-
Page 44: Reviewing What You Have Programmed
Basic Operations (Recording) Press TAPE SPEED to switch to SP because you want the best quality picture for this recording. Everything is as you want it, so press GUIDE to set the program in memory. Insert a videocassette, and power off the VCR. Check for the delayed recording indicator on the VCR's display. - Page 45 Basic Operations (Recording) starting time. To avoid recording only bits and pieces of different overlapping shows, review your programming and delete those shows that are not essential.
-
Page 46: Basic Operations (Vcr Plus + Recording)
Basic Operations (VCR Plus + Recording) Basic Operations (VCR Plus + Recording) Easy Delayed Recording with VCR Plus + About VCR Plus+ This handy feature makes timed recordings a snap. You don't need to enter the specific channel, date, time, or duration of a program. All you enter is its PlusCode - a number of up to eight digits. - Page 47 Basic Operations (VCR Plus + Recording) 3. If you don't get cable TV, make a list of all the broadcast channel numbers you receive on your TV - for example, channel 4 WTTV (Ind.), channel 20 WFYI (PBS). 4. If you subscribe to cable TV, have your cable company's channel directory handy. This should list all the channels as you receive them in your home, for example: Channel 34 Arts and Entertainment Network Channel 35 Turner Network Television...
- Page 48 Basic Operations (VCR Plus + Recording) program guide to your list of channels that you receive at home. If any channel numbers don't match, follow the steps (page 43) to assign your local channel numbers to VCR Plus+ numbers. Cable (No Cable Box) This is the channel setup to use if your VCR is hooked up directly to cable without a cable box.
- Page 49 Basic Operations (VCR Plus + Recording) arrow. 3. If your broadcast channel number is not the same as the VCR Plus+ channel in your TV listing, use the number buttons to assign the broadcast channel to the corresponding VCR Plus+ channel. If you enter a wrong digit, press CLEAR and enter the correct one.
-
Page 50: Using Vcr Plus+ To Record A Program
Basic Operations (VCR Plus + Recording) Some of your cable channels through a cable box (scrambled premium channels), Some of your channels (unscrambled) directly through the cable Before you begin, you need to know which cable channels you receive through your cable box. - Page 51 Basic Operations (VCR Plus + Recording) 2. Use the number buttons to enter the PlusCode of the program you want to record. This code can be up to eight digits. If you enter a wrong digit, press CLEAR and enter the correct one.
-
Page 52: Advanced Operations
Advanced Operations 7. Review the screen to be sure everything is set as you want, then press GUIDE to complete your programming or continue with additional programs. When you have set up all the timed recordings you want: Don't forget to load a videocassette (with the safety tab still attached) to record on. If you have a cable box hookup with an A-or-B switchbox, set the switchbox to the proper connection for the programs you are recording (through a cable box for scrambled premium channels, direct cable for all other channels). -
Page 53: Programming The Remote Control
Once you have programmed the remote, you won't have to do it again until you change the batteries. This Hitachi remote control can be used with your TV as well as the VCR, as long as your TV comes with a remote control. This feature comes in handy - you don't have to juggle two remotes. -
Page 54: Controlling The Tv
Advanced Operations Gold Star 1 Toshiba Gold Star 2 Panasonic CHANNEL (up arrow) Mitsubishi CHANNEL (down arrow) Sharp 1 Sharp 2 Controlling the TV Once programmed, the VCR's remote control is ready to control the TV. First press TV to change to the TV function mode, then press the button of the TV function that you want. -
Page 55: Advanced Operations (Cable Box Hookups)
Advanced Operations (Cable Box Hookups) Advanced Operations (Cable Box Hookups) Hooking Up to a Cable Box The cable box brings all the advantages of pay cable, but finding a satisfactory hookup can be challenging. To sort out what to do, we suggest a step-by-step approach to installation. - Page 56 Advanced Operations (Cable Box Hookups) Option 1 - All Channels Scrambled 1. Remove the cable company's cable line from the back of your TV. Connect it to the IN FROM ANT lower jack on the back of the VCR. 2. Using the 75 ohm coaxial cable supplied with your VCR, connect either end to the VCR's OUT TO TV upper jack.
-
Page 57: Remote Control Of The Cable Converter
Advanced Operations (Cable Box Hookups) Option 3--Some Channels Scrambled This hookup requires three coaxial jumpers with connectors, a 1-into-2 splitter, and an A-or-B switch box. 1. Disconnect the cable from the cable box and attach it to the input line of the 1-into-2 splitter. - Page 58 Advanced Operations (Cable Box Hookups) Hamlin Zenith Scientific Atlanta Pioneer Philips To operate the cable box once the remote is programmed for it: Press CATV and then the button of the function you want. Press VCR1 to operate your VCR with the remote again.
-
Page 59: Advanced Operations (Stereo System)
Advanced Operations (Stereo System) Advanced Operations (Stereo System) Integrating Your Stereo System There are several reasons to consider hooking up your stereo system with your TV and VCR. If your TV does not have stereo, you can get stereo quality from your VCR by hooking it to your stereo receiver. - Page 60 Advanced Operations (Stereo System) cassette into the VCR. Be sure that HIFI is selected in the Initial Setup screen of the Easy Guide System. Press DISPLAY, then press 5 on the remote control to select SP or EP. The EP setting gives you reasonable quality and a longer tape program.
-
Page 61: Advanced Operations (Second Vcr)
Second VCR Hookup To Control Both VCRs with the Remote Control If the second VCR that you've hooked up is also a Hitachi, you can set your remote to operate both VCRs. Press GUIDE, then press 5 to bring up the Initial Setup screen. - Page 62 Advanced Operations (Second VCR) Insert the videotape you wish to record in VCR2. Insert a blank or erasable tape (with the safety tab intact) into VCR1. Press AVX on VCR1 - the LINE indicator will display. Press REC on VCR1, and press PLAY on VCR2. To monitor the picture as you record, VCR1 must be connected to your TV (follow instructions in the other VCR's manual).
-
Page 63: Advanced Operations (Synchro Editing)
This lets you use a single set of controls to govern both VCRs. We assume that VCR2 is your model VT-F372A. This is the playback VCR. The other VCR must be a Hitachi and must have a jack labeled EDIT. This is the recording VCR. -
Page 64: Programmable Easy Edit
Advanced Operations (Synchro Editing) Insert the cassette you want to copy into VCR2. On VCR2, press PLAY. Locate the place on the tape where you want to begin copying, then press PAUSE. Insert a cassette (with its safety tab intact) into VCR1. Put this VCR in RECORD- PAUSE mode, and press AVX to put it in LINE mode. - Page 65 Advanced Operations (Synchro Editing) Select the start point of the section of the program that you want to copy. You can locate the beginning of the program by using the shuttle dial or the PLAY, REWIND, or FAST FORWARD controls. When you have located the start point of your edit press the EDIT button on the remote.
-
Page 66: Advanced Operations (Camcorder)
Advanced Operations (Camcorder) Advanced Operations (Camcorder) Copying Tapes From a Camcorder If you would like to copy a video tape shot in your camcorder onto your VCR here's how to do it. Connect the camcorder's AV output cable to your VCR. (see diagram below) Camcorder Hookup Illustration Press the AVX button on the VCRs remote control so that the L2 (Line) indicator appears in the VCR display. -
Page 67: Vcr Care And Servicing
This dust interferes with the signal being picked up. Your Hitachi VCR automatically cleans the video heads whenever a cassette is loaded or ejected and when a cassette is already inside the VCR when you turn the power off. -
Page 68: If The Vcr Doesn't Work Right
VCR Care and Servicing If the VCR Doesn't Work Right Many operational problems are easily remedied by reviewing the instructions in this manual and trying out some different controls and settings. The chart on the facing page covers the more common problems that new VCR owners encounter. Don't Attempt Repairs Yourself Do not remove the cover or the back of the VCR - this will void the warranty and endanger your safety. -
Page 69: Care And Servicing (Problems)
Care and Servicing (Problems) Care and Servicing (Problems) OFTEN ENCOUNTERED PROBLEMS PROBLEM No Power Delayed recording does not work. Does not record when you press REC and PLAY at the same time/ TV program cannot be viewed or recorded. Poor picture quality (“noise”) during playback. -
Page 70: Hitachi Service Hotline
Mechanical sounds during the STOP Hitachi Service Hotline Authorized Hitachi service facilities are available throughout the US and Canada. For the location nearest you, call the Hitachi Service Hotline at one of these numbers: In the continental U.S.A. In Canada QUEBEC... -
Page 71: Specifications
SPECIFICATIONS SPECIFICATIONS Technical Specifications Recording: Video: Cassette: Heads: Tape Speed: Tape Width: RF Output: RF Input: Tuning Range: Video Input: Video Output: Audio Input Audio Output Video Recording S/N: Horizontal Resolution: lines (EP) Audio Response: Audio S/N: Hi-Fi Audio: Power Input: Power Consumption: Cabinet Size: Rotary two-head helical scan azimuth recording... - Page 72 Accessories: For information about how to obtain these accessories, please call TOLL FREE 1-800- 448-2244 for your nearest Hitachi Authorized Parts Distributor in the continental United States. For ALASKA and HAWAII, please contact the nearest Hitachi Regional office. 38.0cm (W) x 8.2cm (H) x 33.4cm (D) 11.7 lbs.
Need help?
Do you have a question about the VT-F372A and is the answer not in the manual?
Questions and answers