
Related Manuals for Hisense TC14FS68


Summary of Contents for Hisense TC14FS68
- Page 1 COLOR TELEVISION OWNER'S MANUAL TC14FS68 Part No: IES031110 2003. Hisense Electric Corp. All rights reserved...
-
Page 2: Table Of Contents
WELCOME TO THE BRIGHT AND VIVID WORLD OF HISENSE COLOR TV Dear customer, Thank you for your purchasing Hisense color TV. We wish you many years of viewing pleasure. The goal of this manual is to guide you through setting up and operating your Hisense TV as quickly as possible. Please read all the safety and operating instructions carefully before you begin. -
Page 3: Important Safety Instructions
CAUTION CAUTION: TO REDUCE THE RISK OF ELEC- TRIC SHOCK, DO NOT REMOVE COVER(OR BACK).NO USER- SERVICEABLE PARTS INSIDE. REFER SERVICING TO QUALIFIED SERVICE PERSONNEL. CAUTION: CHANGES OR MODIFICATIONS NOT EXPRESSLY APPROVED BY THE PARTY RESPONSIBLE FOR COMPLIANCE WITH THE FCC RULES COULD VOID THE USERS AUTHORITY TO OPERATE THIS EQUIPMENT. - Page 4 Important safety instructions 12. USE ONLY WITH CART, STAND, TRIPOD, BRACKET, OR TABLE SPECIFIED BY THE MANUFACTURER, OR SOLD WITH THE APPARATUS. WHEN A CART IS USED, USE CAUTION WHEN MOVING THE CART/APPARATUS COMBINATION TO AVOID INJURY FROM TIP-OVER. Do not place this TV on an unstable cart, stand, tripod, bracket ,or table. The TV may fall, causing serious injury to someone, and serious damage to the appliance.
-
Page 5: Brief Operating Instructions
Brief Operating Instructions 1. Connection Connect the antenna lead or CATV cable or external equipments ( such as Antenna, Cable TV ,VCD,DVD, VTR,Set top box,etc .) to the corresponding terminals or interface on the TV rear ( please refer to the owner s manual of the equipment to be connected as well ) and confirm that the signal source is avaliable and works normally. -
Page 6: Picture Adjustment
3.Switching on/off 1) Connect the TV to power outlet. The power indicator will glow in red color. Press the power switch or the POWER button on the remote control to turn on the TV. 2) Press the power switch or the POWER button on the remote control to turn off the TV. 4.Signal source selection Press the TV/AV button to select TV or AV mode. -
Page 7: Learning About Your New Tv
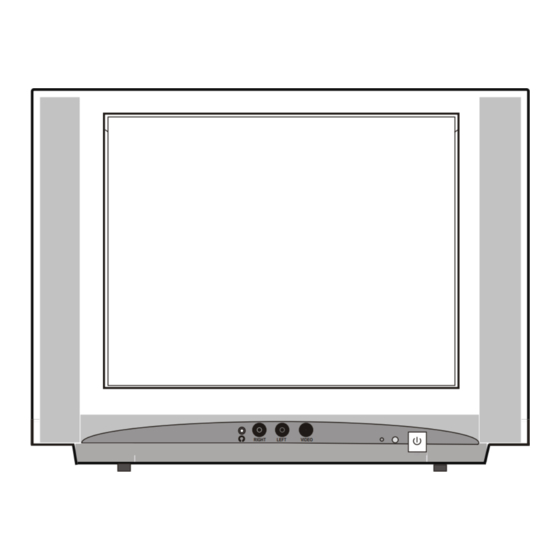
Learning about your new TV You can operate your TV by using the buttons on the front panel or the remote control. All the terminals on the front and the back panel provide the connections you will need to connect other equipment to your TV. Front Controls Front panel VOLUME DOWN... -
Page 8: Connecting The Audiovisual Equipments
Connecting your TV Connecting the audiovisual equipments To enjoy the programs coming from your audiovisual equipments such as VCR, DVD, Satellite receiver, Camcorder, Audio amplifier and etc, the signal must be received by the set via the AV input terminals at rear. You can also record the TV programs to a video tape by VCR. -
Page 9: Connecting A Cable Converter Box
Connecting your TV Connecting a cable converter box This television has an extended tuning range and can tune most cable channels without using a cable company supplied converter box. Some cable companies offer [premium pay channels] in which signal is scrambled. -
Page 10: Using The Remote Control
Using the remote control Preparing the remote control for use Installing the remote control batteries 1. Open the battery cover of the back of the remote control. ° ´ ¼ ý Í · · ½ Ï ò Ç á Í Æ Slide in the direction of the ¼... -
Page 11: Using The Tv Features
Using the TV features Understanding the TV features Tinted, Bright Black Matrix Picture Tube 181 Channels Selection-All VHF/UHF channels plus up to 125. PLL Frequency Synthesized Tuning-The latest PLL frequency synthesized electronic tuning system provides free and easy channel selection, and lets you tune directly to any channel using the channel number buttons on the remote control. -
Page 12: Using The Preset Menu
Using the TV features Press VOL+ or VOL- to change the on-screen display language among English, French, Spanish and Portuguese. The item is for decreasing the noise of the background. Press VOL+ or VOL- to select On or Off. You have two options with the closed caption feature: captions or text. A caption is a printed version of the dialogue, narration and/or sound effects of a TV program. -
Page 13: Changing Channels
Using the TV features Note: 1)When the search is finished, the screen will display as left shown below and the TV will automatically turn to the first channel that has a program. Otherwise the screen will display as right shown below. 2) The PRESET menu will not appear when the TV is in AV status. -
Page 14: Adjusting The Picture
Using the TV features Adjusting the picture Adjusting the picture quality 1)Press the MENU button, then the PICTURE menu appears as 2)Press the CH+ or CH- to select the item you want to adjust. 3)Press the VOL+ or VOL- to adjust the level . Note: The items in this menu are explained in details as following. -
Page 15: Muting The Sound
Using the TV features Muting the sound MUTE on the remote control Press sound is off, the screen will display as To restore the sound, press MUTE again. Selecting BTSC/SAP broadcasts You can enjoy watching TV while you listen to high-fidelity stereo sound with the BTSC feature. BTSC can also transmit a second audio program(SAP) containing a second language or other audio information. -
Page 16: Using The V-Chip Menu
Using the TV features The item is for reminding you when preset time comes. The screen will display right shown. It will disappear when you press any button. Set this item just like the Time setting. The item allows the TV automatically to turn to a channel preset in the Position when the preset time comes. Set this item just like the Time setting. - Page 17 Using the TV features 1)Press VOL+ or VOL-, the screen will display as left shown below to ask you to enter a password. Enter the right password, the Block will alternate between On and Off. If the password is wrong, the screen will display as right shown below. 1)Press VOL+ or VOL- and the TV will ask you to enter a password.
-
Page 18: Setting The Sleep Timer
Using the TV features Defined as TV-Y All children TV-Y7 Directed to older children TV-G General audience TV-PG Parental Guidance suggested Parents Strongly cautioned TV-14 Mature Audience only TV-MA About MPAA Ratings The Motion Picture Association of America(MPAA) uses a rating system to qualify motion picture content. Television broadcasters employ a rating system to qualify the content of televison programs as well. -
Page 19: Displaying The Current Channel Number On Screen
Using the TV features Note: 1) If you have set the sleep timer, the Off-time (See Using the CLOCK menu) you set will be cleared automatically. 2) If you have set the On-time (See Using the CLOCK menu), when the preset time comes to turn on the TV, the sleep timer will be set to 120 minutes automatically. -
Page 20: Troubleshooting
Appendix Troubleshooting Before calling a service technician, please check the following table for a possible cause of the problem and some solutions. Problem TV will not turn on No picture, no sound No sound, picture OK Poor sound, picture OK Poor picture, sound OK Poor reception of broadcast channels Unable to select a certain channel... -
Page 21: Specifications
AUDIO INPUT: RCA connector 4 terminals VIDEO OUTPUT: RCA connector 1 AUDIO OUTPUT: RCA connector 2 Width: 15 Height: 14-9/16inches Dimensions Depth: 16-1/2in Weight 28lbs Supplied accessories Remote control Design and specifications are subject to change without notice. TC14FS68 A-5~A-1, 4A -3/4inches ches -19-... -
Page 22: Limited Warranty
Hisense Hisense Corporation warrants this Product(including any accessories)against defects in material or workmanship, subject to any conditions set fourth below: 1. Limited Warranty This limited warranty extends to the original consumer purchaser or any person receiving this TV set as a gift from the original consumer purchaser and to no other purchaser or transferee.
Need help?
Do you have a question about the TC14FS68 and is the answer not in the manual?
Questions and answers