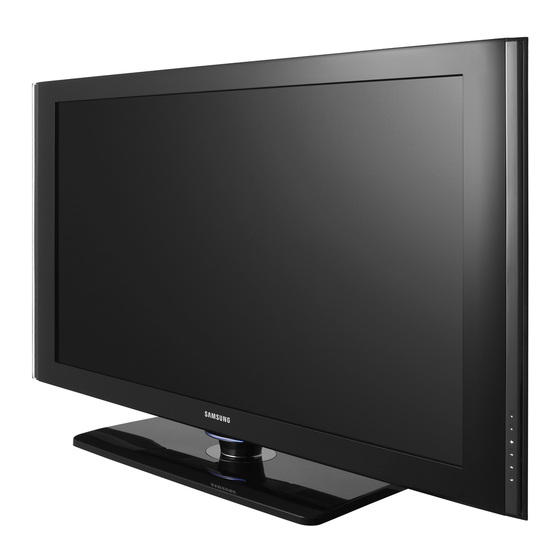
Table of Contents

Advertisement

Contact SAMSUNG WORLDWIDE
If you have any questions or comments relating to Samsung products,
please contact the SAMSUNG customer care centre.
Country
Customer Care Centre
AUSTRALIA
1300 362 603
CHINA
800-810-5858 , 010- 6475 1880
HONG KONG
3698 - 4698
INDIA
3030 8282
1800 1100 11
INDONESIA
0800-112-8888
JAPAN
0120-327-527
MALAYSIA
1800-88-9999
PHILIPPINES
1800-10-SAMSUNG (7267864)
SINGAPORE
1800-SAMSUNG (7267864)
THAILAND
1800-29-3232
02-689-3232
TAIWAN
0800-329-999
VIETNAM
1 800 588 889
SOUTH AFRICA
0860 7267864 (SAMSUNG)
U.A.E
800SAMSUNG (7267864)
8000-4726
Web Site
www.samsung.com/au
www.samsung.com.cn
www.samsung.com/hk
www.samsung.com/in
www.samsung.com/id
www.samsung.com/jp
www.samsung.com/my
www.samsung.com/ph
www.samsung.com/sg
www.samsung.com/th
www.samsung.com/tw
www.samsung.vn
www.samsung.com/za
www.samsung.com/mea
BN68-01324A-02
Owner's Instructions
Before operating the unit,
please read this manual thoroughly,
and retain it for future reference.
ON-SCREEN MENUS
PC DISPLAY
PICTURE IN PICTURE (PIP)
TELETEXT
Register your product at www.samsung.com/global/register
Record your Model and Serial number here for future reference.
▪ Model _______________ ▪ Serial No. _______________
LCD TV
LA40F81BD
LA46F81BD
LA52F81BD

Advertisement

Table of Contents
loading

Summary of Contents for Samsung LA40F81BD

  • Page 1 LCD TV LA40F81BD LA46F81BD Contact SAMSUNG WORLDWIDE LA52F81BD If you have any questions or comments relating to Samsung products, please contact the SAMSUNG customer care centre. Country Customer Care Centre Web Site AUSTRALIA 1300 362 603 www.samsung.com/au CHINA 800-810-5858 , 010- 6475 1880 www.samsung.com.cn...
  • Page 2: User Instructions

    Displaying still images from Video games and PC for longer than a certain period of time may produce partial after-images. To prevent this effect, reduce the ‘brightness’ and ‘contrast’ when displaying still images. © 2007 Samsung Electronics Co., Ltd. All rights reserved.
  • Page 3: Table Of Contents

    Contents Function Description General Information  Setting the Time ..........35  User Instructions ..........2  Menu Transparency / Energy Saving /  List of checking Parts ........4 HDMI Black Level / Film Mode /  Installing the Wall Mount Kit ......4 Light Effect / Blue Screen / ...
  • Page 4: List Of Checking Parts

    Wall Mount items. Contact a technician for assistance when installing the wall mounted bracket. Samsung Electronics is not responsible for any damage to the product or injury to yourself or others if you elect to install the TV on your own.
  • Page 5: Viewing The Control Panel

    Viewing the Control Panel Front Panel buttons Touch the each button to operate. The product colour and shape may vary depending on the model. 1 SourCe 5 Power Indicator Toggles between all the available input Blinks and turns off when the power is on and sources (TV, AV1, AV2, S-Video, Component1, AV2, S-Video, Component1, S-Video, Component1,...
  • Page 6: Viewing The Connection Panel

    Viewing the Connection Panel [Side Panel Jacks] Power Input ➢ The product colour and shape may vary depending on the model. ➢ Whenever you connect an external device to your TV, make sure that power on the unit is turned off. ➢...
  • Page 7 DVI IN (HDMI ) AUDIO L/R DVI audio outputs for external devices. The external devices that support lower version HDMI mode may not implement sound ouput for theTV with the latest HDMI version (HDMI 1.3.) In this case, connect to HDMI IN2 and DVI IN (HDMI 2) “...
  • Page 8: Viewing The Remote Control

    (depending on the model) % Remote control setup 0 Fastext topic selection ^ Selects a target device to be ! Teletext display/mix both controlled by the Samsung teletext information and the remote control (TV, DVD, normal broadcast STB, CABLE, VCR) @ Teletext size &...
  • Page 9: Installing Batteries In The Remote Control

    Installing Batteries in the Remote Control Lift the cover at the back of the remote control upward as shown in the figure. Install two AAA size batteries. ➢ Make sure to match the “+” and “–” ends of the batteries with the diagram inside the compartment.
  • Page 10: Plug & Play Feature

    Plug & Play Feature When the TV is initially powered on, basic settings Plug & Play proceed automatically: Runs the Plug & Play function when setting the TV up Press the POWER button on the remote control. for the first time or when resetting it. Sets the The message Runs the Plug &...
  • Page 11: Viewing The Display

    Setting the Clock Automatically Press the ENTER/OK button. Plug & Play Press the ▲ or ▼ button to select Off or On, then the Select the time zone in which you live. ENTER/OK button. The message Select the time zone in which you live. New South Wales/ACT is displayed.
  • Page 12: Viewing The Menus

    Viewing the Menus With the power on, press the MENU button. The main menu will appear at the bottom of the screen. There are seven menu groups: Picture, Sound, Channel, Mode : Dynamic Setup, Input, Guide, and PIP. Press the ▲ or ▼ button, then press the ENTER/OK Contrast : 100 button to select an item you want in the menu.
  • Page 13: Viewing External Signal Sources

    Viewing External Signal Sources You can switch between viewing signals from connected equipment, such as a VCR, DVD, Set-Top Box, and the TV source (broadcast or cable). Source List Press the MENU button to display the menu. Edit Name Press the ▲ or ▼ button to select Input, then press the ENTER/OK button.
  • Page 14: Editing Device Names

    Editing Device Names You can give a name to the external source. Press the MENU button to display the menu. Source List Press the ▲ or ▼ button to select Input, then press the Edit Name  ENTER/OK button. Press the ▲ or ▼ button to select Edit Name, then press the ENTER/OK button.
  • Page 15: Setting The Guide

    Setting the Guide You can set the guide as your preference. Press the MENU button to display the menu. WISELINK Press the ▲ or ▼button to select Guide. Press the ENTER/OK button. Full Guide Select your required guide (Now & Next Guide or Full Now&Next Guide Guide) by pressing the ▲...
  • Page 16: Checking The Digital-Signal Strength - Digital

    Checking the Digital-Signal Strength - Digital Unlike analog channels, which can vary in reception quality Manual Store from “snowy” to clear, digital (HDTV) channels have either Fine Tune perfect reception quality or you will not receive them at all. Signal Strength ...
  • Page 17: Storing Channels Manually

    Storing Channels Manually You can store television channels, including those Channel List received via cable networks. Auto Store When storing channels manually, you can choose: Manual Store   Whether or not to store each of the channels found.  The programme number of each stored channel which you Fine Tune wish to identify.
  • Page 18: Managing Channels

    Managing Channels Using this menu, you can Add/Delete or set Favourite channels and use the program guide for digital broadcasts. Viewing All Channels Channel List  Show all currently available channels. Auto Store To use the Channel List function, first run Auto Program. Manual Store Press the MENU button to display the menu.
  • Page 19 Adding and Erasing Channels You can add or delete a channel to display the channels you want. Press the MENU button to display the menu. Press the ▲ or ▼ button to select Channel, then press the ENTER/OK button. Channel List ...
  • Page 20 Setting Your Favourite Channels You can set channels you watch frequently as favourites. Press the MENU button to display the menu. Press the ▲ or ▼ button to select Channel, then press the ENTER/OK button. Channel List  Press the ▲ or ▼ button to select Channel List, then press the ENTER/OK button.
  • Page 21 Reserving a Program (Time Viewing) If you reserve a program you want to watch, the channel is automatically switched to the reserved channel in the Channel List even when you are watching another channel. To reserve a program set the current time first. See pages 35~36. Reserved channels can only be set if they are in the Channel List (See page 18).
  • Page 22 Confirming a Viewing Reservation You can view, modify or delete a reservation. Press the MENU button to display the menu. Press the ▲ or ▼ button to select Channel, then press the ENTER/OK button. Channel List  Press the ▲ or ▼ button to select Channel List, then press the ENTER/OK button.
  • Page 23 Labeling Channels - Analog Channels can labeled so that their call letters appear whenever the channel is selected. Press the MENU button to display the menu. Press the ▲ or ▼ button to select Channel, then press the ENTER/OK button. Channel List ...
  • Page 24: Fine Tuning Channel Reception

    Fine Tuning Channel Reception If the reception is clear, you do not have to fine tune the Auto Store channel, as this is done automatically during the search Manual Store and store operation. Fine Tune  If the signal is weak or distorted, you may have to fine tune the channel manually.
  • Page 25: Lna (Low Noise Amplifier)

    LNA (Low Noise Amplifier) This function is very useful in the situation that the TV is Fine Tune used in weak signal. Signal Strength LNA amplifies the TV signal in the weak signal area, a : On  low-noise preamplifier boosts the incoming signal. Press the MENU button to display the menu.
  • Page 26: Changing The Picture Standard

    Changing the Picture Standard You can select the type of picture which best corresponds to your viewing requirements. Press the MENU button to display the menu. Mode : Dynamic  Press the ENTER/OK button to select Picture. Contrast : 100 Press the ENTER/OK button again to select Mode.
  • Page 27: Customizing The Picture Settings

    Customizing the Picture Settings Your television has several setting options that allow you to control the picture quality. Colour : 55 To select the desired picture effect, follow the “Changing Tint (G/R) : G50/R50 the Picture Standard” instructions number 1 to 3 on page Colour Tone : Cool1 ...
  • Page 28: Configuring Detailed Settings On The Picture

    Configuring Detailed Settings on the Picture You can set detailed picture settings. Colour Tone : Cool1 Press the MENU button to display the menu. Backlight : 10 Press the ENTER/OK button to select Picture. Detailed Settings  Press the ▲ or ▼ button to select Detailed Settings, Size : 16:9 then press the ENTER/OK button.
  • Page 29: Selecting The Picture Size

    Selecting the Picture Size You can select the picture size which best corresponds to Backlight your viewing requirements. Detailed Settings Press the MENU button to display the menu. Size : 16:9  Press the ENTER/OK button to select Picture. Press the ▲ or ▼ button to select Size, then press the Digital NR : Auto ENTER/OK button.
  • Page 30: Digital Nr / Active Colour / Auto Motion Plus 100Hz / Dnie

    Digital NR / Active Colour r /Auto Motion Plus 100Hz / DNIe Press the MENU button to display the menu. Detailed Settings Press the ENTER/OK button to select Picture. Size : 16:9 Select the required option by pressing the ▲ or ▼ button, Digital NR : Auto ...
  • Page 31: Viewing Picture-In-Picture

    Viewing Picture-in-Picture This product has one built-in tuner, which does not allow PIP to function in the same mode. For example, you cannot watch one TV channel in the main screen, and a different one in the PIP screen. Please see ‘PIP Settings’ below for details. You can use the PIP feature to simultaneously watch two video sources.
  • Page 32 Changing the Position of the PIP Window Press the ▲ or ▼ button to select Position, then press : On the ENTER/OK button. Size Press the ▲ or ▼ button to select the desired PIP window Position  position, then press the ENTER/OK button. ➢...
  • Page 33: Sound Features

    Sound Features Press the MENU button to display the menu. Press the ▲ or ▼ button to select Sound, then press the ENTER/OK button. Mode : Custom  Select the required option by pressing the ▲ or ▼ button, Equalizer then press the ENTER/OK button.
  • Page 34: Selecting The Sound Mode (Depending On The Model)

    Selecting the Sound Mode (depending on the model) The DUAL I-II button displays/controls the processing and output of the audio signal. When power is switched on, the mode is automatically preset to either “DUAL-I” or “Stereo”, depending on the current transmission. Type of broadcast On-screen indication Regular broadcast...
  • Page 35: Setting The Time

    Setting the Time Setting the clock is necessary in order to use the various timer features of the TV. Plug & Play Also, you can check the time while watching the TV. (Just Clock : -- : -- --  press the INFO button.) Sleep Timer : Off...
  • Page 36 Setting the On/Off Timer Use this feature to set the TV to turn on or off at a desired time. Press the MENU button to display the menu. Clock : 12 : 00 am Press the ▲ or ▼ button to select Setup, then press the Sleep Timer : Off ENTER/OK button.
  • Page 37: Menu Transparency / Energy Saving / Hdmi Black Level / Film Mode / Light Effect / Blue Screen / Melody / Function Help

    Menu Transparency / Energy Saving / HDMI Black Level / Film Mode / Light Effect / Blue Screen / Melody / Function Help Press the MENU button to display the menu. Game Mode : Off Press the ▲ or ▼ button to select Setup, then press the Parental Lock ENTER/OK button.
  • Page 38: Activating The Child Lock

    Activating the Child Lock This feature allows you to prevent unauthorized users, Timer 2 : Inactivated such as children, from watching unsuitable programmes Timer 3 : Inactivated by muting out video and audio. Child Lock cannot be Child Lock  released using the buttons on the side.Only the remote control can release the Child Lock setting, so keep the Subtitle...
  • Page 39: Setting The Subtitle

    Setting the Subtitle Press the MENU button to display the menu. Timer 3 : Inactivated Press the ▲ or ▼ button to select Setup, then press the Child Lock ENTER/OK button. Subtitle  Press the ▲ or ▼ button to select Subtitle, then press the ENTER/OK button.
  • Page 40: Using The Game Mode

    Using the Game Mode When connecting to a game console such as Child Lock PlayStation or Xbox , you can enjoy a more realistic Subtitle gaming experience by selecting game menu. Game Mode : Off  Press the MENU button to display the menu. Press the ▲...
  • Page 41: Setting Up The Parental Lock

    Setting up the Parental Lock This feature allows you to prevent unauthorized users, Subtitle such as children, from watching unsuitable programmes Game Mode : Off by a 4-digit PIN (Personal Identification Number) code that Parental Lock  is defined by the user. The on-screen menu will instruct you to assign a PIN code (you can change it later, if Menu Transparency : Medium...
  • Page 42: Press The ▲ Or ▼ Button To Select Setup, Then Press The Enter/Ok Button

    How to Set up Restrictions Using “Parental Rating” First, set up a personal identification number (PIN), and enable the V-Chip. (See previous section.) Press the MENU button to display the menu. Subtitle Press the ▲ or ▼ button to select Setup, then press the Game Mode : Off ENTER/OK button.
  • Page 43: Wall- Mount Adjustment (Sold Separately)

    Wall- mount adjustment (Sold separately) Once the wall mount is installed, the position of your TV can be easily adjustable. Auto Wall-Mount Rear Panel Serial Cable(P to P)(Not supplied) Entering the menu Press the MENU button to display the menu. HDMI Black Level : Normal Press the ▲...
  • Page 44: Upgrading The Software

    Upgrading the Software Samsung may offer upgrades for your TV’s firmware in the future. There are two methods to upgrade the software. Please contact the Samsung call center at 1-800-SAMSUNG to receive information about downloading upgrades and using the USB device and Over the Air Download.
  • Page 45: Over The Air Download

    Over the Air Download Press the MENU button to display the menu. Melody :Medium Press the ▲ or ▼ button to select Setup, then press the Anynet+ (HDMI-CEC) Setup ENTER/OK button. SW Upgrade  Over the Air Download Press the ▲ or ▼ button to select SW Upgrade, then USB Download Function Help : On...
  • Page 46: Setting Up Your Pc Software (Based On Windows Xp)

    Windows and your particular video card. even if your actual screens look different, the same, basic set-up information will apply in almost all cases. (If not, contact your computer manufacturer or Samsung Dealer.) 1. First, click on "Control Panel" on the Windows start menu.
  • Page 47: Display Modes

    Display Modes Both screen position and size will vary depending on the type of PC monitor and its resolution. The resolutions in the table are recommended. (All resolutions between the supported limits are supported) D-Sub Input Horizontal Vertical Pixel Clock Sync Polarity Mode Resolution...
  • Page 48: Setting The Pc

    Setting the PC ➢ Preset to the PC mode by pressing the SOURCE button. Menu Transparency : Medium Press the MENU button to display the menu. Energy Saving : Off Press the ▲ or ▼ button to select Setup, then press the ...
  • Page 49: Changing The Picture Size (Pc Mode)

    Changing the Picture Size (PC Mode) You can select the picture size which best corresponds to Backlight : 10 your viewing requirements. Detailed Settings Press the MENU button to display the menu. Size : 16:9  Press the ENTER/OK button to select Picture. Digital NR : Off Press the ▲...
  • Page 50: Wiselink

     Before connecting your device to the TV, please back up your files to prevent them from damage or loss of data. SAMSUNG is not responsible for any data file damage or data loss.  The USB hub is not supported and you cannot use a digital camera (PTP: Picture Transfer Protocol) and USB storage device at the same time.
  • Page 51: Using The Wiselink Mode

    Using the Remote Control Button in WISELINK Menu Button Operations Move the cursor and select an item. Select the currently selected item. Play or pause the Slide Show or MP3 file. Return to the previous menu. Run various functions from the Photo and Music menus. Stop the current slide show or MP3 file.
  • Page 52: Using The Photo (Jpeg) List

    Using the Photo (JPEG) List You can play back the JPEG files saved on a memory device in various ways. After switching the mode to WISELINK, select a memory device that you have installed. (Refer to page 50~51) Press the ENTER/OK button to select Photo. WISELINK JPEG files and existing folders are displayed.
  • Page 53: Background Music

    Zoom: You can zoom into images in full screen mode. Images are zoomed in, in the order of x1 (original size), x2 and x4. (Refer to “Zooming-In” on page 55) Zoom Out Zoom In Rotate: You can rotate images in full screen mode. Images are rotated in the order of 0°...
  • Page 54: Picture Setting

    Picture Setting: TOOLS You can set the Picture mode. Stop Slide Show Slide Show Speed (Refer to on page 27) Zoom Rotate Background Music : Background Music Setting Delete Picture Mode  Dynamic  Sound Mode Custom Move Adjust Enter Sound Setting: You can set the Sound mode.
  • Page 55 Press the TOOLS button during slide show to set the TOOLS option. Start Slide Show To exit WISELINK mode, press the EXIT button on the Zoom Rotate remote control. Background Music : Background Music Setting Delete Picture Mode Dynamic Sound Mode Standard Information Move...
  • Page 56 To move the enlarged photo image up/down/left/right, press the ENTER/OK button, then press the ▲/▼/◄/► buttons. ➢ Note that when the enlarged picture is smaller than the original screen size, the location change function doesn’t work. To exit WISELINK mode, press the EXIT button on the remote control.
  • Page 57 Rotating After switching the mode to WISELINK, select a memory device that you have installed. (Refer to page 50~51) Press the ENTER/OK button to select Photo. Folder 1 2007/1/2 JPEG files and existing folders are displayed. File 1.jpg 2007/1/2 File 2.jpg 2007/1/2 Press the ▲...
  • Page 58 Background Music On/Off If you set Background Music On, the background music will be played when viewing photos one by one or in a Slide Show. Folder 1 2007/1/2 After switching the mode to WISELINK, select a memory File 1.jpg 2007/1/2 device that you have installed.
  • Page 59 ➢ Press the WISELINK button on the remote control to turn on the WISELINK mode. Deleting the Photo files You can delete photo (JPEG) files saved on a USB storage device. After switching the mode to WISELINK, select a memory device that you have installed.
  • Page 60: Using The Music (Mp3) List

    Deleting Multiple Photos In the Photo list, press the ▲ or ▼ button to select a photo to be deleted and press the yellow button. Folder 1 2007/1/2 ➢ The <✔> mark appears to the left of the selected File 1.jpg 2007/1/2 Start Slide Show Delete selected File...
  • Page 61 Playing a Selected Music File In the Music list, press the ▲ or ▼ button to select a music file and then press the yellow button. Folder 1 2007/1/2 ➢ The <✔> mark appears to the left of the selected Tomas-Feel So Good.mp3 2007/1/2 music.
  • Page 62 Deleting the Music files You can delete music (MP3) files saved on the USB storage device. After switching the mode to WISELINK, select a memory device that you have installed. (Refer to page 50~51) Folder 1 2007/1/2 Press the ▲ or ▼ button to select Music, then press the Tomas-Feel So Good.mp3 2007/1/2 Play Repeat mode...
  • Page 63: What Is Anynet

    The Anynet+ system can be used only with Samsung AV devices that have the Anynet+ feature. To be sure your Samsung AV device has this feature, check if there is an Anynet+ mark on it. To directly connect to TV...
  • Page 64: Setting Up Anynet

    Setting Up Anynet+ The following settings help set the Anynet+ functions. To use the Anynet+ Function, Anynet+ (HDMI-CEC) must be set to On Press the MENU button to display the menu. Blue Screen :Off Press the ▲ or ▼ button to select Setup, then press the Melody :Medium ENTER/OK button.
  • Page 65: Scanning And Switching Between Anynet+ Devices

    Scanning and Switching between Anynet+ Devices Press the Anynet+ button. TOOLS Press the ENTER/OK button to select Device List. View TV ➢ Anynet+ devices connected to the TV are listed. Device List ➢ If you cannot find a device you want, press the red button Recording : DVDR to scan for devices.
  • Page 66: Recording

    TV Remote Control Buttons Available in Anynet+ Mode Device Type Operating Status Available Buttons After switching to the Numeric buttons device, when the menu of ▲/▼/◄/►/ENTER buttons the corresponding device is Colour buttons displayed on the screen. EXIT button Anynet+ Device ◄◄(Backward search) After switching to the device, ►►(Forward search)
  • Page 67: Listening Through A Home Theatre

    Listening through a Home theatre You can listen to sound through a receiver (home theatre) instead of the TV’s speakers. Press the Anynet+ button. Press the ▲ or ▼ button to select Receiver, press the ◄ or ► button to select to On. Now you can listen to sound through the Home theatre receiver.
  • Page 68: Teletext Feature (Depending On The Model)

    Teletext Feature (depending on the model) Most television stations provide written information services via teletext. The index page of the teletext service gives you information on how to use the service. In addition, you can select various options to suit your requirements by using the remote control buttons.
  • Page 69 The teletext pages are organized according to six categories: Part Contents Selected page number. Broadcasting channel identity. Current page number or search indications. Date and time. Text. Status information. FASTEXT information. ➢ Teletext information is often divided between several pages displayed in sequence, which can be accessed by: ...
  • Page 70: Setting Up Your Remote Control

    Setting Up Your Remote Control After it has been set up properly, your remote control can operate in five different modes: TV, VCR, Cable, DVD, or Set-Top Box. Pressing the corresponding button on the remote control allows you to switch between these modes, and control whichever piece of equipment you choose. ➢...
  • Page 71 Setting Up the Remote to Operate Your DVD Turn off your DVD. Press the DVD button on your TV’s remote control. Press the SET button on your TV’s remote control. Using the number buttons on your remote control, enter three digits of the DVD code listed on page 74 of this manual for your brand of DVD.
  • Page 72: Remote Control Codes

    Remote Control Codes Brand Code Brand Code SAMSUNG 000 001 002 003 004 005 077 078 079 MITSUBISHI 019 034 041 046 ADMIRAL MONTGOMERY WARD AIWA 002 025 AKAI 004 027 032 MULTITECH 002 005 025 038 AUDIO DYNAMICS 007 026 007 008 018 026 037 062 064 BELL&HOWELL...
  • Page 73: Cable Box

    019 021 023 028 PIONEER 004 018 020 044 WARNER AMEX 014 022 040 ZENITH 017 029 035 037 045 REGAL SAMSUNG SET-TOP BOX Product Code Ground wave STB 000 001 002 008 013 CABLE STB 000 004 008 013 Satellite STB...
  • Page 74 SAMSUNG DVD Product Code Product Code 000 001 002 Home theater VCR COMBO 014 015 016 DVDR 003 004 HDD Record COMBO BD Record 005 006 TWIN TRAY COMBO VCR COMBO 007 008 009 010 011 STB DVD COMBO VCR Record...
  • Page 75: Using The Anti-Theft Kensington Lock (Depending On The Model)

    Using the Anti-Theft Kensington Lock (depending on the model) The Kensington lock is a device used to physically fix the system when using it in a public place. The locking device has to be purchased separately. The appearance and locking method may differ from the illustration depending on the manufacturer.
  • Page 76: Technical And Environmental Specifications

    Technical and Environmental Specifications Model Name LA0F1BD LAF1BD LAF1BD Screen Size (Diagonal) 40 inch 46 inch 52 inch PC Resolution 1920 x 1080 @ 60 Hz 1920 x 1080 @ 60 Hz 1920 x 1080 @ 60 Hz Sound 10 W X 2 10 W X 2 10 W X 2 Output...
  • Page 78 This page is intentionally left blank.

This manual is also suitable for:

La46f81bdLa52f81bd

Table of Contents