Table of Contents
Advertisement
Quick Links
Advertisement
Table of Contents

Related Manuals for Huawei Ascend II M865C


Summary of Contents for Huawei Ascend II M865C
-
Page 1: User Guide
User Guide Model: HUAWEI M865C... -
Page 2: Table Of Contents
Contents 1 Read Before Proceeding............1 1.1 Safety Precautions ................1 1.2 Personal Information and Data Security.......... 2 1.3 Legal Notice..................3 2 Getting Started ................. 6 2.1 Appearance ..................6 2.2 Setting Up Your Mobile Phone ............8 2.3 Power On or Off Your Mobile Phone ..........10 2.4 Using the Touchscreen.............. - Page 3 4.8 Backing Up and Synchronizing Contacts ........23 4.9 Managing Groups ................24 4.10 Joining and Separating Contacts..........25 4.11 Sending Contacts ................ 26 5 Using the Onscreen Keyboard ..........27 5.1 Displaying the Keyboard..............27 5.2 Customizing Keyboard Settings ............ 29 6 Messaging................
- Page 4 10 Synchronizing Information............ 50 10.1 Managing Your Accounts ............50 10.2 Customizing Your Account Synchronization........ 52 11 Using Other Applications............53 11.1 Calendar ..................53 11.2 Clock.................... 55 11.3 File Manager................56 11.4 Calculator ..................58 11.5 Richpad ..................58 12 Managing Your Mobile Phone..........
-
Page 6: Read Before Proceeding
1 Read Before Proceeding 1.1 Safety Precautions Please read the safety precautions carefully to ensure the correct use of your mobile phone. Do not crash, throw, or puncture your mobile phone. Avoid the falling, squeezing, and bending of your mobile phone. Do not use your mobile phone in a moist environment, such as the bathroom. -
Page 7: Personal Information And Data Security
Do not place your mobile phone or its accessories in containers with a strong electromagnetic field. Do not place magnetic storage media near your mobile phone. Radiation from the phone may erase the information stored on them. Do not put your mobile phone in a high-temperature place or use it in a place with flammable gas such as a gas station. -
Page 8: Legal Notice
• Be sure to obtain third-party applications from a legitimate source. Downloaded third-party applications should be scanned for viruses. • Install security software or patches released by Huawei or third-party application providers. • Some applications require and transmit location information. As a result, a third-party may be able to share your location information. - Page 9 Thus the descriptions herein may not match exactly the product or its accessories you purchase. Huawei Technologies Co., Ltd. reserves the right to change or modify any information or specifications contained in this manual without prior notice and without any liability.
- Page 10 RELIABILITY OR CONTENTS OF THIS MANUAL. LIMITATIONS OF LIABILITY TO THE MAXIMUM EXTENT PERMITTED BY APPLICABLE LAW, IN NO EVENT SHALL HUAWEI TECHNOLOGIES CO., LTD. BE LIABLE FOR ANY SPECIAL, INCIDENTAL, INDIRECT, OR CONSEQUENTIAL DAMAGES, OR LOST PROFITS, BUSINESS, REVENUE, DATA, GOODWILL OR ANTICIPATED SAVINGS.
-
Page 11: Getting Started
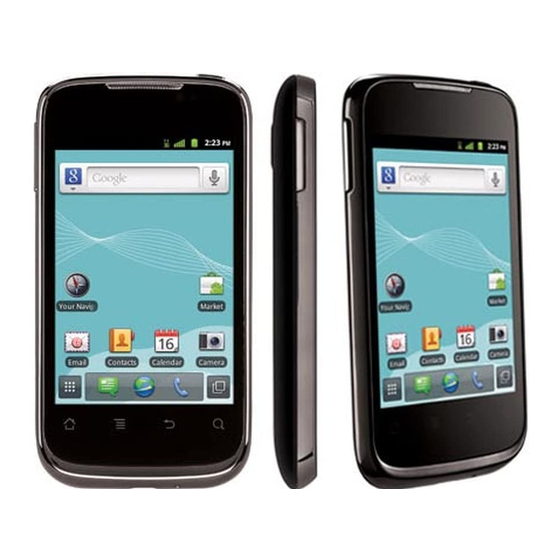
2 Getting Started 2.1 Appearance 2.1.1 Phone at a Glance All the pictures in this guide are for your reference only. Your phone’s actual display features may be different to those described here, depending on its software version. Earpiece Home Menu Back Speaker... -
Page 12: Key Functions At Your Fingertips
2.1.2 Key Functions at Your Fingertips • Press and hold to power on your mobile phone. • Press and hold to open the Phone options menu. • Press to lock the screen when your mobile phone is active. • Touch to return to the previous screen or exit the application you are running. -
Page 13: Setting Up Your Mobile Phone
2.2 Setting Up Your Mobile Phone 2.2.1 Installing the Battery and the microSD™ Card Remove the battery cover Install the battery Insert the microSD card Install the battery cover 2.2.2 Charging the Battery Before charging the battery, ensure that it has been properly installed on your phone. -
Page 14: Important Information About The Battery
If you charge your mobile phone while it is powered on, the battery icon on the notification bar indicates the charging status. When the battery icon changes , your mobile phone is fully charged. 2.2.3 Important Information About the Battery •... -
Page 15: Power On Or Off Your Mobile Phone
• Lower the volume. • Close power-draining programs, when you do not need them. • Turn off the data service. 2.3 Power On or Off Your Mobile Phone 2.3.1 Powering On Your Mobile Phone Press and hold . The first time you power on your phone, you will be asked to sign in to your account and set up your mobile phone. -
Page 16: Locking And Unlocking The Screen
• Drag: Touch and hold the desired item with your finger. To move an item, drag the item to any part of the screen. You can drag an icon to move or delete it. 2.4.2 Rotating Your Mobile Phone Screen The orientation of most screens will change to landscape or portrait view when you rotate your phone sideways. -
Page 17: Home Screen
2.6 Home Screen Notification bar: 10:23 Displays reminders and phone status icons. Flick down to open the notification panel. Display area: Main display area of the phone. Screen switching dots: Indicate the number of the screens on the left or right. Touch the left or right dots to switch between the screen. -
Page 18: Notification Panel
Battery full Battery extremely low Call in progress Missed call Call in progress with a New mail from Gmail Bluetooth headset used Problem with text or New text or multimedia multimedia message message delivery New chat message New email New voicemail Connected to a PC Open Wi-Fi network Upcoming event... -
Page 19: Viewing Other Parts Of The Home Screen
Opening the Notification Panel 1. When a new notification icon appears on the notification bar, place your finger on the notification bar and flick down to open the notification panel. 2. On the panel, you can: • Touch a notification to open the related application. •... -
Page 20: Using A Microsd™ Card
Removing a Home Screen Item 1. Touch and hold an item on the Home screen until the item expands and the mobile phone vibrates. 2. Without lifting your finger, drag the item to the trash can. When the item and the trash can turn red, the item is ready to be removed. -
Page 21: Calling
When your microSD™ card acts as a USB mass storage, your mobile phone will not use this memory space. Ensure that you follow the correct procedures to disconnect the USB mass storage device (your mobile phone) from the PC when you have finished transferring files. -
Page 22: Making A Call From Contacts
3.1.1 Making a Call with the Dialer Application 1. On the Home screen, touch > Dialer to display the dialer. If you are already working with Contacts or Call log, touch the Dialer tab. 2. Touch the appropriate number keys to enter the phone number. Your mobile phone supports the SmartDial function, that is, when you touch numbers on the dialer, the phone automatically searches among your contacts and lists the matching results ordered according to the... -
Page 23: Answering Or Rejecting A Call
3.2 Answering or Rejecting a Call 3.2.1 Answering an Incoming Call When you receive a phone call, the incoming call screen opens. If you have previously saved the caller’s number in Contacts, the caller's name and number are displayed. If the caller’s number is not saved in Contacts, the caller’s number is displayed. -
Page 24: Other Operations During A Call
3.3 Other Operations During a Call 3.3.1 Making a Conference Call If you receive a new call while you are already in a call, you can add the second call to the call you are in. This feature is known as conference calling. You can also set up a conference call with multiple callers. -
Page 25: Using Airplane Mode
3.4.1 Adding an Entry to Contacts 1. If you are already working with Dialer or Contacts, touch the Call log tab. 2. Touch and hold the entry you want to add to your Contacts. 3. Touch Add to contacts in the options menu. 4. -
Page 26: Setting Hearing Aid Compatibility
• TTY HCO: Transmit TTY characters but receive by listening to the earpiece. • TTY VCO: Receive TTY characters but transmit by speaking into the microphone. 3.7 Setting Hearing Aid Compatibility Touch > Settings > Call settings > Hearing aids to set your phone to be compatible with a hearing aid. -
Page 27: Indexing Contacts
4.2.1 Adding a Contact to Your Favorites • Touch and hold the contact you want to add to Favorites. Then touch Add to Favorites. • Touch a contact, and then touch the star to the right of the contact’s name. The star turns gold. -
Page 28: Communicating With Your Contacts
4.6 Communicating with Your Contacts From the Contacts or Favorites tab, you can quickly call or send a text (SMS) or multimedia (MMS) message to a contact’s default phone number. You can also open details to view a list of all the ways you can communicate with that contact. -
Page 29: Managing Groups
4.8.1 Using a microSD™ Card to Back Up Contacts Backing Up Contacts 1. In the contact list, touch > Manage contacts. 2. Touch Backup to SD card in the displayed menu. 3. Touch OK to export your phone contact's information to the installed microSD card. -
Page 30: Joining And Separating Contacts
4.9.2 Editing a Group You can always make changes to the information you have saved for a group. 1. In the groups list, touch and hold the group whose details you want to edit, and then touch Edit group in the options menu. 2. -
Page 31: Sending Contacts
4.10.2 Separating Contacts If contact information from different sources was joined together in error, you can separate the contacts. 1. On the Home screen, touch > Contacts. 2. Touch the joint contact to be separated. 3. Touch the option for separating a contact. 4. -
Page 32: Using The Onscreen Keyboard
5 Using the Onscreen Keyboard 5.1 Displaying the Keyboard To enter text, use the onscreen keyboard. Some applications open the keyboard automatically. In others, touch a text field to open the keyboard. Touch to hide the keyboard. Touch and hold a text field to open the Edit text menu. 5.1.1 Choosing an Input Method 1. -
Page 33: Using The Swype Keyboard
5.1.3 Using the Swype Keyboard q w e r t y u i o p & ” Touch to delete a character a s d f g h j k to the left of the cursor. z x c v b n m Touch and hold to delete all characters to the left ’... -
Page 34: Customizing Keyboard Settings
5.2 Customizing Keyboard Settings 1. On the Home screen, touch > Settings > Language & keyboard. 2. In Keyboard settings, select an input method to customize the keyboard settings. 6 Messaging The Messaging application allows you to exchange text messages (SMS) and multimedia messages (MMS) with anyone using an SMS-or-MMS- capable phone. -
Page 35: Creating And Sending A Multimedia Message
6.1.3 Creating and Sending a Multimedia Message You can use multimedia messages to make everyday communications very special. You can record a message and send it as an audio file, sing 'Happy Birthday' and send it to friend, or send a slideshow of photographs of a special event. -
Page 36: Email
6.1.4 Opening and Viewing a Multimedia Message 1. In the message list, touch the message thread you wish to view. 2. Touch the multimedia message to view the message. 6.1.5 Replying to a Message 1. In the message list, touch a text or multimedia message thread to open it. 2. -
Page 37: Viewing An Email Message
2. To customize your email settings, follow the onscreen instructions, and then touch Next. 3. Enter the account name and the name you want other people to see when they receive an email from you. 4. Touch Done. Adding Other Email Accounts 1. -
Page 38: Replying To An Email Message
6.2.4 Replying to an Email Message 1. On the accounts screen, touch the email account you want to use. 2. Touch the email message to which you want to reply. 3. Touch Reply or Reply all to reply to the email message. 6.2.5 Saving an Email Attachment 1. -
Page 39: Getting Connected
7 Getting Connected 7.1 Turning on the Data Service 1. Touch > Settings. 2. Touch Wireless & networks > Mobile networks. 3. Select the Data enabled check box to turn on the data connection. 7.2 Wi-Fi Wi-Fi gives you wireless access to broadband Internet. To use Wi-Fi on your mobile phone, you must have an access to wireless access points (hotspots). -
Page 40: Browser
7.3 Browser Your mobile phone comes with an Internet browser pre-installed. 7.3.1 Opening the Browser Touch > Browser to open the home page. When known or open Wi-Fi networks and mobile data networks are available at the same time, your phone will preferably select a Wi-Fi network for Internet access. -
Page 41: Bluetooth
7.3.4 Managing Bookmarks You can store as many bookmarks as you want on your mobile phone. Adding a Bookmark 1. In a browser window, go to the webpage you want to save as a bookmark. 2. Touch , and then touch Bookmarks >... -
Page 42: Turning On Bluetooth
7.4.1 Turning On Bluetooth™ 1. Touch > Settings. 2. Touch Wireless & networks, and then select the Bluetooth check box to turn on Bluetooth. When Bluetooth is turned on, the Bluetooth icon appears in the notification bar. 3. Touch Bluetooth settings, and then select the Discoverable to make your mobile phone visible to other Bluetooth devices. -
Page 43: Entertainment
7.4.4 Disconnecting from or Unpairing with a Bluetooth™ Device 1. Touch > Settings > Wireless & networks > Bluetooth settings. 2. Navigate to the Bluetooth devices section, and then touch and hold the device to which you are connected. 3. Touch Unpair to disconnect from the device. 8 Entertainment In addition to being a communication device and personal assistant, your mobile phone also provides you with a multitude of entertainment possibilities. -
Page 44: Taking A Photo
Capture Screen Thumbnail of the last photo. Touch to preview the photos or videos. Slide up to record videos; slide down to take photos. Touch to take a photo. Touch to customize the camera settings. On the capture screen, touch to show the capture panel. -
Page 45: Using The Gallery
8.1.4 Recording a Video 1. Open the camera application, and then switch it to camcorder mode. 2. If necessary, change the camcorder settings. 3. Frame the scene with which you want to start your video. 4. Touch to start recording a video. 5. -
Page 46: Enjoying Music
8.2.2 Viewing a Picture 1. In Gallery, touch the folder that contains the pictures you want to view. 2. Touch the picture to view it in full-screen mode. 3. Touch the screen. Then the zoom panel appears. You can zoom in or zoom out on the picture. -
Page 47: Opening The Media Library
3. Create a folder in the root directory of the microSD card (for example, Music). 4. Copy the music from your computer to the folder you have created. 5. After copying music, unmount or eject the drive as required by your PC’s operating system to safely remove the mobile phone. -
Page 48: Listening To The Fm Radio
8.4 Listening to the FM Radio The FM radio lets you listen to FM radio programs on your mobile phone. Since the FM radio uses the provided wired stereo headset as its antenna, before opening the application, connect the headset to your phone’s the audio jack. -
Page 49: Creating A Google™ Account
9.1 Creating a Google™ Account If you do not have a Google account, you can create one: 1. After reading the setup information, touch Next. 2. Touch Create. 3. Enter the first name, last name, and username for your Google account, and then touch Next. -
Page 50: Creating And Sending An Email
9.2.3 Creating and Sending an Email 1. In the mail list, touch , and then touch Compose. 2. Enter the message recipient’s email address in the To field. If you are sending the email to several recipients, separate the email addresses with commas. -
Page 51: Talk
9.3 Talk Talk is Google’s instant messaging service. You can use it to communicate in real time with other people using Talk on a phone or on the web. 9.3.1 Opening Talk On the Home screen, touch > Talk to open the application. Your Talk account is based on the Google™... -
Page 52: Maps
Select the check box to receive a notification on the notification bar when you receive an instant message. notifications Touch to choose the ringtone used for a new instant Select message. You will hear a short sample of the ringtone when ringtone you select it. -
Page 53: Youtube
9.4.3 Searching for Places of Interest 1. On the map, touch , and then touch Search. 2. Enter the place you want to search for in the search box, and then touch the Search icon. 3. Your search results will then be displayed. Touch a place you are interested in and the application will show where it is on the map. -
Page 54: Market
9.5.3 Sharing a Video From the video list on the YouTube™ screen, select a video clip and touch More > Share. 9.6 Market Android Market provides direct access to applications and games which you can download and install on your phone. 9.6.1 Opening Market 1. -
Page 55: Synchronizing Information
3. To check the progress of a download, open the notification panel. Most applications are installed within seconds. To stop an application from downloading, touch the cross (×). After the application has been downloaded and installed on your mobile phone, the content download icon appears in the notification bar. If you want to install a non-Market application, touch >... -
Page 56: Adding An Account
10.1.1 Adding an Account When you add an account, the Contacts application compares contacts from the newly synchronized account with contacts from your existing mobile phone accounts and attempts to merge duplicates into a single entry in Contacts. While it is presented as a single contact entry, the contact data itself is not merged. -
Page 57: Customizing Your Account Synchronization
10.2 Customizing Your Account Synchronization You can configure background data use and synchronization options for all the applications on your phone. You can also configure what kind of data you synchronize for each account. For some accounts, synchronization is bi-directional; changes that you make to the information on your mobile phone are made to the copy of that information on the web. -
Page 58: Using Other Applications
11 Using Other Applications 11.1 Calendar Use Calendar to create and manage events, meetings, and appointments. Depending on your synchronization settings, the calendar on your phone can be synchronized with the internet-based calendar you use. 11.1.1 Opening Calendar On the Home screen, touch >... -
Page 59: Setting An Event Reminder
11.1.3 Setting an Event Reminder 1. In any calendar view, touch an event to view its details or an event summary. 2. Touch the Add reminder button to add a reminder, or touch the reminder’s “-” button to delete an existing reminder. 3. -
Page 60: Clock
• Vibrate: Select to vibrate the mobile phone when you receive an event notification. • Default reminder time: Touch to select the default time before an event for event reminders to occur. 11.2 Clock In addition to displaying the date and time, the Clock application displays information about the weather and your phone. -
Page 61: File Manager
11.3 File Manager File Manager is like having a pocket-sized personal assistant (PA), letting you organize, edit, and delete files and folders. 11.3.1 Opening File Manager On the Home screen, touch > File Manager to open the application. 11.3.2 Creating a Folder 1. - Page 62 5. A list of search results will be displayed. Touch a file in the list to open it. 6. Touch New search for a new search or touch the back key to return to the file manager screen. 11.3.5 Compressing or Extracting Files Your phone supports compressing and extracting files.
-
Page 63: Calculator
11.4 Calculator Use Calculator to solve simple arithmetic problems or use its advanced operators to solve more complex equations. 11.4.1 Opening Calculator On the Home screen, touch > Calculator to open the application. 11.4.2 Switching Between Basic and Advanced panel On the Calculator screen, flick the screen to the right or left to switch between Advanced panel and Basic panel. -
Page 64: Managing Your Mobile Phone
12 Managing Your Mobile Phone To configure your mobile phone, touch > Settings. 12.1 Setting the Date and Time When your mobile phone is using the date and time settings provided automatically by the network, you cannot manually set the date, time, and time zone. -
Page 65: Setting Ringers
12.2.2 Adjusting the Time Before the Screen Turns Off If your mobile phone is idle for several minutes, it will turn off the screen to save battery power. To set a longer or shorter idle time: 1. On the Settings screen, touch Display >... -
Page 66: Setting Phone Services
12.3.5 Setting Your Phone to Vibrate for Incoming Calls 1. On the Settings screen, touch Sound. 2. Touch Vibrate, and then select one of the options. 12.4 Setting Phone Services 12.4.1 Customizing Call Settings Mobile phone service providers offer different services such as call forwarding, call waiting, fixed dialing numbers, and voicemail. -
Page 67: Protecting Your Mobile Phone
12.5.2 Adjusting the Speech Rate 1. On the Settings screen, touch Voice input & output > Text-to-speech settings > Speech rate. 2. Select a speed at which the text is to be spoken. 12.6 Protecting Your Mobile Phone 12.6.1 Protecting Your Mobile Phone with a Screen Lock To keep your data more secure, lock the screen and/or require a screen unlock pattern every time your mobile phone is turned on or wakes up from sleep mode. -
Page 68: Managing Applications
12.6.3 Unlocking Your Mobile Phone If You Forget the Screen Lock Pattern If you have already created a Google™ account, you can unlock your mobile phone using the following methods. • After you have entered the wrong sequence five times, a Forgot pattern? button will appear. -
Page 69: Resetting Your Mobile Phone
12.7.3 Moving an Application to the microSD™ Card Some applications are designed to be stored on your phone’s USB storage or microSD card (depending on the model of your phone), rather than in its internal storage. Others are designed so you can change where they are stored. -
Page 70: Online Update
12.8.2 Restoring Factory Data If you reset your phone to its factory settings, all of your personal data stored on the phone, including information about your Google account, any other accounts that you have configured, your system and application settings, and any applications you have installed will be erased. -
Page 71: Appendix
13 Appendix 13.1 Warnings and Precautions This section contains important information pertaining to the operating instructions of your device. It also contains information about how to use the device safely. Read this information carefully before using your device. Electronic Device Power off your device if using the device is prohibited. -
Page 72: Traffic Security
watch out for areas that have potentially explosive atmospheres that are often, but not always, clearly marked. Such locations include areas below the deck on boats, chemical transfer or storage facilities, and areas where the air contains chemicals or particles such as grain, dust, or metal powders. Ask the manufacturers of vehicles using liquefied petroleum gas (such as propane or butane) whether this device can be safely used in their vicinity. - Page 73 • When you are on a call, do not touch the antenna. Touching the antenna affects the call quality and results in increase in power consumption. As a result, the talk time and the standby time are reduced. • While using the device, observe the local laws and regulations, and respect others' privacy and legal rights.
- Page 74 • Do not connect two poles of the battery with conductors, such as metal materials, keys, or jewelries. Otherwise, the battery may be short-circuited and may cause injuries and burns on your body. • If battery electrolyte leaks out, ensure that the electrolyte does not touch your skin and eyes.
- Page 75 Cleaning and Maintenance • The device, battery, and charger are not water-resistant. Keep them dry. Protect the device, battery, and charger from water or vapor. Do not touch the device or the charger with a wet hand. Otherwise, it may lead to a short circuit, a malfunction of the device, and an electric shock to the user.
- Page 76 Certification Information (SAR) This device meets guidelines for exposure to radio waves. Your device is a low-power radio transmitter and receiver. As recommended by international guidelines, the device is designed not to exceed the limits for exposure to radio waves. These guidelines were developed by the independent scientific organization International Commission on Non-Ionizing Radiation Protection (ICNIRP) and include safety measures designed to ensure safety for all users, regardless of age and health.
- Page 77 Caution Changes or modifications made to this device not expressly approved by Huawei Technologies Co., Ltd. may void the FCC authorization to operate this device. Hearing Aid Compatibility (HAC) regulations for Mobile phones In 2003, the FCC adopted rules to make digital wireless telephones compatible with hearing aids and cochlear implants.
-
Page 78: Faqs
Your phone meets the M4/T3 level rating. Hearing devices may also be rated. Your hearing device manufacturer or hearing health professional may help you find this rating. For more information about the FCC Hearing Aid Compatibility please go to http://www.fcc.gov/cgb/dro. 13.2 FAQs How Do I Set a Song As a Phone Ringtone? In Music, touch and hold the song to be set as ringtone, and then touch Use... - Page 79 How Do I Hide the Keyboard? Touch to hide the keyboard. How Do I Forward a Message? Touch and hold a message, and then touch Forward in the menu that opens. Why Am I Unable to Use Navigation? Navigation is unavailable in some countries or regions.
- Page 80 All the pictures in this guide are for your reference only. The actual appearance and display features depend on the mobile phone you purchase. Android is a trademark of Google Inc. Use of this trademark is subject to Google Permissions. © Huawei Technologies Co., Ltd. 2012. All rights reserved. V100R001_01 31010HNP...