Table of Contents
Advertisement
Advertisement
Table of Contents

Summary of Contents for Roadhawk Ride RIDE Bullet Camera system
- Page 1 RIDE DIGITAL RIDER PROTECTION CAMERA USER MANUAL...
-
Page 2: Table Of Contents
Contents Contents Contents ....... . . 02 Introduction ....... 03 Features . -
Page 3: Introduction
The RoadHawk RIDE also has a built-in Li-Poly battery that can record for approx. 90 minutes. If your journeys are short then you can use the camera purely on its own battery without connecting it to an external power source. -
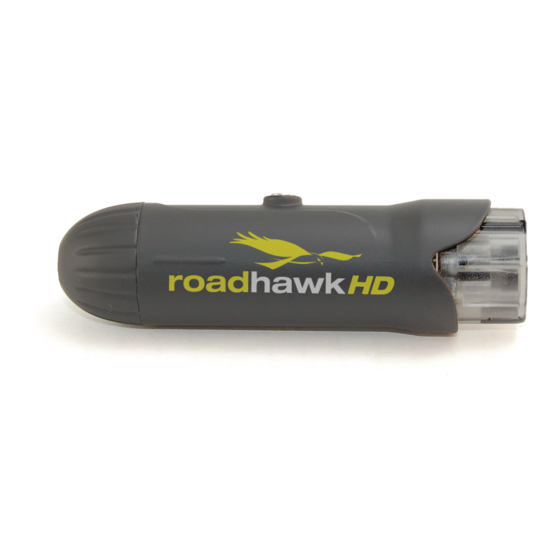
Page 4: Features
● USB and Hardwiring 12v Power Kit supplied ● Helmet and Bike Mounts Supplied ● 8GB MicroSD Card Supplied Box Contents ● RoadHawk Ride Bullet Camera ● 8GB MicroSD Card and adapter ● Camera Locking Clamp ● Rotating camera mount ●... -
Page 5: Warning
WARNING WARNING The RoadHawk RIDE camera always records video on a constant loop. It records video and audio in 5 minute segments. When the SD card becomes FULL the camera will start to record over the earliest files. If you are involved in an accident or you capture some footage that you want to keep then you must be prepared to turn the camera OFF. -
Page 6: Explaining The Cables
Explaining the Cables Cables 1. Camera Cable 2. USB Cable 3. Hard Wiring Cable 4. Camera Extension Cable 1. The camera cable connects to the rear of the camera and provides a connection for all of the other cables supplied in the kit. 2. - Page 7 Explaining the Cables Explaining the Cables The RoadHawk Ride camera can be powered from its own internal battery for around 90 minutes before it will require charging again. To operate the camera in this way please use the waterproof rear cap and ensure it is fitted correctly to retain the camera’s waterproof properties.
-
Page 8: Explaining The Leds On The Camera
Explaining the Camera’s LEDS Camera’s LEDs 1. The camera has three small coloured LEDs positioned at the front of the camera near to the lens. RED = Charging internal battery GREEN = Internal Battery fully Charged RED/BLUE flash = Camera is recording video RED/BLUE/GREEN flash = SD Card Error If the camera flashes RED/BLUE/GREEN and then goes off within a few seconds then make sure the SD card is fully inserted. -
Page 9: Charging The Camera
GREEN when it is fully charged. You can also use many modern USB phone chargers to charge the battery inside the RoadHawk RIDE camera. A full charge from flat will take 2 to 3 hours. It is not possible to over-charge the battery in this camera. -
Page 10: Installing The Sd Card
Installing the SD Card Installing the SD Card 1. Insert the Micro SD card with the text on the card facing UP and the electrical contacts facing downwards and inwards. 2. Do not force the Micro SD card in to place. Gently push it with your finger nail. 3. -
Page 11: Installing The Camera
Installing the Camera Installing the Camera The camera can be used on just about any bike/cycle helmet or bike fairing. Helmet mounting the camera will give the benefit of recording video in the direction the rider is looking but can also produce video with a lot of movement which may not be comfortable to watch for long periods of time. - Page 12 Installing the Camera Installing the Camera 1: Experiment with the camera and make sure you know where you want to mount it before sticking the adhesive mount in place. Once it is stuck down, it is not easy to move again. 2: Ensure the area you wish to place the adhesive mount is fully clean and dry.
-
Page 13: Video Playback
Video Editing In order to edit videos from the RoadHawk RIDE camera system you will first need to transcode the video file. You can do this using FREE software called HandBrake downloadable from the internet. Full instructions on how to transcode video can be found on the main RoadHawk website. -
Page 14: Setting The Time/Date
Setting the Time/Date The RoadHawk Ride camera embeds the time and date on to any video being recorded. In order to set the time and date you need to put a file on to the SD card so the camera can be set accordingly. -
Page 15: Formatting The Sd Cards
Formatting the SD Card Formatting the SD Card We recommend high quality class 6 Micro SD Cards for use with this camera. Formatting your SD card is an important part of maintaining your camera. In fact, this advice can be applied to any camera using SD cards, especially those that record video and audio. -
Page 16: Limited Warranty
Limited Warranty Limited Warranty Statement This Limited Warranty shall apply to the Roadhawk RIDE Product including all accessories as contained within the original RIDE box “the Product” . Roadhawk warrants the product from its authorized distributor and will meet the applicable product specifications and be free from all defects in material and workmanship for an applicable period herein “Limited Warranty”). - Page 17 Limited Warranty Before returning any units for service, the Customer is solely responsible for backing up data and removing any confidential, proprietary, or personal information from the Product. Roadhawk is not responsible for damage to or loss of any programs, data, or removal storage media. This Warranty does NOT cover recovery from any software updates, installation and removal of the application software, or any loss of data storage.
- Page 18 Notes NOTES...
-
Page 19: Camera Specification
Speci cation Speci cation: Product Size: 22mm (dia) 78mm (l) USB: USB 2.0 hs Physical Weight: Resolution: 1280 x 720p Video Format: H.264 Power Duration: 1.5 to 2 hours Frame Rate: 30fps Sensor: Battery: 500mAh Li-Poly Memory: Up to 32gb Micro SD Working Temp: -5 to 40 Degrees C Storage Temp:...
Need help?
Do you have a question about the RIDE Bullet Camera system and is the answer not in the manual?
Questions and answers