
Summary of Contents for eZip Ezip
- Page 1 HYBRID ELECTRIC BICYCLE OWNER’S MANUAL Enlightened Series Rack Mount (RMB) Series Additional information covering Seat Tube Batteries (STB) Series included in this manual...
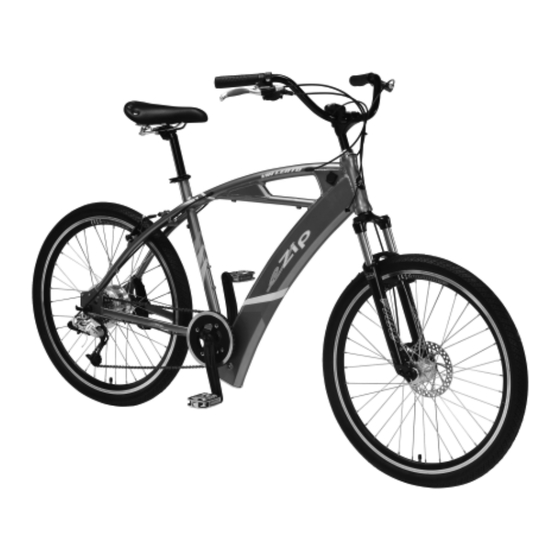
- Page 2 SLA (Sealed Lead Acid) batteries 6-8 hours With proper care and maintenance your Currie Technologies® Hybrid Electric Bicycle will provide ease of use and be fun to ride. Below are points that will help you to maximize the enjoyment you get from your new hybrid electric bicycle.
- Page 3 HELMETS SAVE CORRECT FITTING - MAKE SURE YOUR HELMET COVERS LIVES !!! YOUR FOREHEAD. • ALWAYS WEAR A PROPERLY FITTED HELMET WHEN YOU RIDE YOUR BICYCLE. • DO NOT RIDE AT NIGHT. • CPSC RECORDS SHOW THAT ABOUT 35% OF BICYCLE RELATED DEATHS OCCUR AFTER DARK.
-
Page 4: Personal Care From Currie Technologies
Our Service Department is dedicated to your satisfaction with Currie Technologies® and its products. For questions regarding performance, assembly, operation, parts or returns, contact the experts at Currie Technologies® directly by calling toll free 1-800-377-4532 Monday - Friday 8:00 am - 4:00 pm (PST) IMPORTANT –... - Page 5 Monday - Friday 8:00 a.m. to 4:00 p.m. (PST) Serial Number Location Bike Shown Upside Down # # # # Serial Number CURRIE TECHNOLOGIES® 9453 Owensmouth Avenue | Chatsworth, CA 91311 Phone (818) 734-8123 | Fax (818) 734-8199 www.CurrieTech.com | www.iZipUSA.com Customer Service (800) 377-4532...
- Page 6 Please Retain your Sales Receipt as Proof of Purchase. Attach receipt here. Notes: _______________________________________________________________ _______________________________________________________________________ _______________________________________________________________________ _______________________________________________________________________ _______________________________________________________________________ _______________________________________________________________________ _______________________________________________________________________...
- Page 7 PART 1 Parts Identification and Tools ......9-13 PART 2 Before You Ride ........14-30 PART 3 Electrical Components .
-
Page 8: Table Of Contents
1. PARTS IDENTIFICATION ... 9-13 3. ELECTRONIC COMPONENTS ..31-48 V-Style Brake ....76-77 Crank Set. -
Page 9: Parts Identification
MOUNTAIN BICYCLES . Mountain bicycles are designed to give maximum comfort over a wide variety of road surfaces. The wider handlebars and convenient shift lever position make them very easy to control. Wider rims and tires give them a softer ride with more traction on rough surfaces. The frame and fork on mountain style bicycles are generally much sturdier than those on racing style bicycles. - Page 10 BMX BICYCLES - BMX style bicycles are a popular general purpose type most suited for young riders. They are valued because of their sturdy and simple construction, and low maintenance. Front Brake Lever Handlebar Seat Handlebar Grip Brake Control Cable Seat Post Handlebar Stem Seat Post Binder Bolt or...
-
Page 11: Electric Bikes
FOLDING BICYCLES - Super portable, and easy folding design. Perfect for camping, and fits perfectly in RV's, boats and car trunks. Seat Handlebar Seat Post Throttle Quick Release Brake Lever Battery Pack Throttle Cable Rear Reflector Brake cable Rear Brake Front Brake Front Fender Front Fork... - Page 12 ENLIGHTENED SERIES - Lightweight, hidden, NiMH (nickel metal hydride) or Li-Ion (Lithium Ion) battery pack in a modern designed frame. Perfect for Commuting and City Riding Controller...
-
Page 13: Tools Required
Your new bicycle was partially assembled in the factory and then partially disassembled for shipping. You may have purchased the bicycle already fully assembled and ready to ride OR in the shipping carton in the partially disassembled form. The following instructions will enable you to prepare your bicycle for years of enjoyable cycling. -
Page 14: Part 2 Before You Ride
BEFORE YOU RIDE ABOUT THIS MANUAL It is important for you to understand your new bicycle. By reading this manual before you go out on your first ride, you’ll know how to get better performance, comfort, and enjoyment from your new bicycle. It is also important that your first ride on your new bicycle is taken in a controlled environment, away from cars, obstacles, and other cyclists. -
Page 15: Correct Frame Size
CORRECT FRAME SIZE When selecting a new bicycle, the correct choice of frame size is a very important safety consideration. Most full sized bicycles come in a range of frame sizes. These sizes usually refer to the distance between the center of the bottom bracket and the top of the frame seat tube. -
Page 16: Riding Position
RIDING POSITION Seat Height In order to obtain the most comfortable riding position and offer the best possible pedaling efficiency, the seat height should be set correctly in relation to the rider’s leg length. The correct saddle height should not allow leg strain from over-extension, and the hips should not rock from side to side when pedaling. -
Page 17: Handlebar Height
Handlebar Height Maximum comfort is usually obtained when the handlebar height is Stem Wedge Bolt equal to the height of the seat. You may wish to try different heights to find the most comfortable position. Handlebar Binder Bolt Maximum Height/ Minimum Insertion Mark Exceeds 2 1/2”... -
Page 18: Safety Checklist
SAFETY CHECKLIST Before every ride, it is important to carry out the following safety checks: 1. Brakes • Ensure front and rear brakes work properly. • Ensure brake shoe pads are not over worn and are correctly positioned in relation to the rims. •... -
Page 19: Bearings
5. Bearings • Ensure all bearings are lubricated, run freely and display no excess movement, grinding or rattling. • Check headset, wheel bearings, pedal bearings and bottom bracket bearings. 6. Cranks and Pedals • Ensure pedals are securely tightened to the cranks. •... -
Page 20: Helmets
Helmets It is strongly advised that a properly fitting, ANSI or SNELL approved, bicycle safety helmet be worn at all times when riding your bicycle. In addition, if you are carrying a passenger in a child safety seat, they must also be wearing a helmet. The correct helmet should: - be comfortable - be lightweight... -
Page 21: Reflectors
Reflectors Your bicycle is supplied with one front (white), one rear (red), two wheel (white), and four pedal (orange) reflectors. (Please Note: Sidewalk bikes, 12” and under, may not have reflectors.) These are an important safety and legal requirements, and should remain securely fitted and in good, clean condition at all times. -
Page 22: Reflectors
Seat and Handlebar Mounting Reflectors First attach the reflector to the reflector bracket with the reflector screw, see the top diagram. Next, remove the clamp screw and open the clamping reflector bracket. Place clamping reflector bracket around the handlebar or seatpost. If the clamp is too loose, insert a rubber spear inside of the clamp. -
Page 23: Riding Safely
RIDING SAFELY General Rules When riding obey the same road laws as all other road vehicles, including giving way to pedestrians, and stopping at red lights and stop signs. For further information, contact the Road Traffic Authority, police department or Department of Motor Vehicles in your State. -
Page 24: Wet Weather Riding
Wet Weather IT IS RECOMMENDED TO NOT RIDE IN WET WEATHER This hybrid electric bicycle is not meant for use in the water (damp roads, puddles, rain, streams, etc.). Never immerse this product in water as the electrical system may be damaged. •... -
Page 25: Hill Technique
Hill Technique • Gear down before a climb and continue gearing down as required to maintain pedaling speed. • If you reach the lowest gear and are struggling, stand up on your pedals. You will then obtain more power from each pedal revolution. -
Page 26: Gears
GEARS - HOW TO OPERATE Drivetrain Derailleur Control Cable Freewheel Derailleur Gears Front Derailleur Cogs Most multi-speed bicycles today are equipped with what are known as derailleur gears. They operate using a system of levers and mechanisms to move the drive chain between different sized driving gears or cogs. -
Page 27: Hand Grip Shifters
These combinations are These combinations are NOT RECOMMENDED for NOT RECOMMENDED for Middle High High optimal performance. optimal performance. Recommended Chainwheel/Rear Sprocket Gear Combinations Hand Grip Shifters Front Low Gear Rear Low Gear Some bicycles are now being equipped with a shifting mechanism called Grip Shift™, which is built into the handlebar grips and does not make use of separate levers. -
Page 28: Below The Bar Shifters
Below the Bar Shifters Left hand lever Right hand lever Many mountain style bicycles now use a shift lever arrangement mounted on the underside of the handlebars, which use two levers operated by the thumb and index finger. To select a lower gear push the larger (lower) right shifter with your thumb to engage a larger rear cog. -
Page 29: Bicycle Care
BICYCLE CARE Basic Maintenance The following procedures will help you maintain your hybrid electric bicycle for years of enjoyable riding. Properly maintain the batteries by keeping them fully charged when not in use. Do not ride your hybrid electrical bicycle in the water (damp roads, puddles, rain, streams, etc.) and never immerse it in water as the electrical system may be damaged. -
Page 30: Storage
Storage Keep your bicycle in a dry location away from the weather and the sun. Direct sunlight may cause paint to fade or rubber and plastic parts to crack. Before storing your bicycle for a long period of time, clean and lubricate all components and wax the frame. -
Page 31: Electronic Components
ELECTRONIC COMPONENTS Battery Gauge When the throttle or sensor is engaged (powering the motor) and the bicycle is in motion, the LED’s on the battery gauge (on the throttle or separate unit) indicate instantaneous line voltage as measured at the battery terminals -- and not the available energy in the battery pack. -
Page 32: Battery Terminal Covers
Battery Gauge with Power Adjuster This unit is featured on the Enlightened series of bicycles. Not only does it act like a battery gauge but it also enables the rider to vary the level of power assistance (1 LED = least amount of power assistance, 5 LED's = maximum amount of power assistance). -
Page 33: Throttles
Throttles Throttles are equipped on some models of electric bicycles. Throttles operate by rotating the throttle towards the rider much like a motorcycle. They generally are the inner half of the right side handlebar grip and may also contain a battery gauge. The more you twist the throttle, the faster the motor system will propel the bicycle. -
Page 34: Pedal Torque Sensor (Pts)
Torque Sensors Electric bicycles with this system have no throttle. They must be pedaled like a normal bicycle in order to engage the motor drive system. PTS ( Pedal Torque Sensor) Electric bicycles with this system have no throttle. They must be Crankset with pedaled like a normal bicycle in order to engage the motor drive system. -
Page 35: Taking Care Of Batteries
Taking Care of Your Batteries Proper maintenance of the batteries will maximize their lifespan and available ride time. Currie Technologies® warrants your new batteries from the date of purchase but only if properly cared for. Refer to the limited warranty for details. -
Page 36: Battery Faq's
Q: What happens if I leave the power switch on longer than 5 minutes? A: Currie bikes are equipped with a 5 minute shut-off mode. If no activity is detected after 5 minutes the bike will turn itself off to protect the batteries. -
Page 37: Charging Batteries
A: No, once the batteries are fully charged (as indicated by the light on the charger) it is best to unplug them from the charger. Leaving the batteries charging longer than necessary is called “overcharging” and will not increase performance. Currie-supplied chargers are designed to avoid over-charging a battery. -
Page 38: Charger
The charger may get warm to the touch, so make sure you charge them in an open area and do not lay anything on the charger unit while charging. Although you cannot over-charge the batteries using the Currie “Smart Charger”, we recommend that you do not leave the charger plugged in for more than 24 hours. -
Page 39: Part 3 Electrical Components
Charge for the full time. If the battery still has not charged, you may need to replace it. Voltage selector switch Use only Currie Authorized Li-Ion chargers with bicycles equipped with Li-Ion batteries. Using any other charger will damage the batteries and void your warranty. -
Page 40: Charger
Charge for the full time. If the battery still has not charged, you may need to replace it. XLR Plug 2v1h Plug Use only Currie Authorized SLA chargers with bicycles equipped with SLA batteries. 3v Plug Using any other charger will damage the batteries and void your warranty. -
Page 41: Power Switches
Main Power Switches STANDARD POWER SWITCHES The power switch may be located, depending on the model of bike, in the following locations • On the battery pack itself (CX and STB Series) • On the side of the downtube (Enlightened Series) •... -
Page 42: Fuses
Fuses All Currie Technologies® Hybrid Electric Bicycles are equipped with fuses. The fuse may be located, depending on the model of bike, in the following locations • CX Series (40a glass type fuse) - On the battery pack, externally accessible •... -
Page 43: Wiring Diagrams
Wiring Diagram - Via Mezza (TAG system) w/ STB Bicycles (Diagram is for representational purpose only. Your bicycle's wiring system may differ) BRAKE LEVER, RIGHT BRAKE LEVER, LEFT THROTTLE FULL HALF BATTERY CASE (Complete) SWITCH CONTROLLER FUSE CONNECTOR IN USE BATTERY BATTERY WHEEL, REAR W/ HUB MOTOR... - Page 44 Wiring Diagram - TAG/PAS w/ RMB Bicycles (2007) (Diagram is for representational purpose only. Your bicycle's wiring system may differ) CONTROLLER 24v / 35a S/N 070104525 Make Date 2007-01-17 THROTTLE ENCLOSED BATTERY BOX (Box 1 is standard with bike) (The fuse is accessible externally) BRAKE INHIBITOR (Front Brake Lever) FUSE...
- Page 45 Wiring Diagram - TAG/PAS w/ RMB Bicycles (2008-) (Diagram is for representational purpose only. Your bicycle's wiring system may differ) THROTTLE ASSIST CONVERTER (a.k.a. “WHITE BOX”) BATTERY CASE (Complete) 1:1 ASSIST SENSOR (a.k.a. “BLACK BOX”) WIRE HARNESS, BATTERY CASE CHARGER PORT BRAKE LEVER, LEFT Secondardy Battery Box CONTROLLER...
- Page 46 Wiring Diagram - PTS w/ NiMH Battery Bicycles (Diagram is for representational purpose only. Your bicycle's wiring system may differ) Rear View of Crankset (PTS Sensor is removeable from crankset) Controller 4th pin not used Connector not used BATTERY NiMH 24v / 9a FUSE Blade Type...
- Page 47 Wiring Diagram - PTS w/ Li-Ion Battery Bicycles (Diagram is for representational purpose only. Your bicycle's wiring system may differ) BATTERY SWITCH WHEEL, REAR w/ HUB MOTOR CHARGER PORT CONTROLLER CRANKSET w/ PTS SENSOR BATTERY GAUGE w/ TORQUE ADJUSTER BATTERY GAUGE POWER ADJUST Rear View of Crankset (PTS Sensor is removeable and...
-
Page 48: Wiring Diagrams
Wiring Diagram - TMM4 w/ Li-Ion Battery Bicycles (Tentative diagram is for representational purpose only. Your bicycle's wiring system may differ) BATTERY SWITCH WHEEL, REAR w/ HUB MOTOR CHARGER PORT CONTROLLER ? ? ? ? ? ? ? ? ? ? ? ? ? TMM4 SENSOR BATTERY GAUGE w/ TORQUE ADJUSTER BATTERY GAUGE... -
Page 49: Assembly
DERAILLEUR GEARED BICYCLES We recommend that you consult a bicycle specialist if you have doubts or concerns Includes 20", 24” and 26" Wheel Mountain Bikes as to your experience or ability to properly assembly is the same for men’s and women’s bikes. assembly, repair, or maintain your bicycle. -
Page 50: Handlebars, Stems And Shifters
NOTE: Some models of bicycles may be equipped with a stem that has an adjustable angle. In addition to the normal assembly, these stems will require angling the stem to the desired position, and securely tightening the 6mm Allen bolt located underneath the stem. -
Page 51: Standard Stem
Standard Stem Bolt System Remove the protective shipping cap from the stem wedge. Remove the Stem Plug from the stem. Loosen the Stem Bolt with a 6mm allen wrench or 13mm box wrench. Insert the stem into the headtube of the bicycle. Ensure that the Minimum Insertion Line is below the top nut of the headset. -
Page 52: Shifters
Shifter binder bolt (2.5 Allen key) Brake lever binder bolt (5mm Allen key) Bar end (5mm Allen key) Shifters Tighten all bolts that clamp the shifters, brake levers and bar ends to the handlebar using a 5mm Allen key or Phillips head screwdriver. (Figure 1) Handlebar with Grip Shifter. -
Page 53: Forks
Forks Steering Tube There are two different types of forks that vary in styles and dimensions. One type is a rigid fork (Figure 1) consisting of sta- Brake Boss tionary tubing with curved blades. The other type is a suspension fork (Figure 2) consisting of inner stanchion tubes Drop-out riding on elastomers or springs inside of a straight outer fork leg. -
Page 54: Seat And Seat Post
Seat and Seat Post Attach the seat to the seat post by loosening the nuts on the seat clamp. Insert the tapered end of the seat post into the seat clamp until it is at the top of the clamp. Partially tighten the nuts on the seat clamp until the seat Seat is snug, but can still be turned. -
Page 55: Pedals & Crank Set
Note: In addition to normal assembly, please be aware that the preload adjusting screw must be flush with the bottom of the post. Some bicycles may come equipped with a shim that should be positioned over the lower half of the seat post and inserted into the seat tube of the frame. Failure to do this may cause irreparable damage. -
Page 56: Front Wheel
Front Wheel Quick Release Adjusting Axle Quick Check the wheel hub before attaching it to the fork by rotating the Release threaded axle. It should be smooth with no lateral movement. Insert Lever the front wheel into the fork dropouts. Tighten the wheel nuts using the appropriate 14mm or 15mm wrench. -
Page 57: Rear Wheel
The wheel is tightly secured when the serrated surfaces of the quick release clamping parts actually begin to cut into the bicycle frame/fork surfaces. Note that the same procedure applies when operating a quick release seat post binder mechanism. If you can fully close the quick release without wrapping your fingers around the fork blade for leverage, and the lever does not leave a clear imprint in the palm of you hand, the tension is insufficient. -
Page 58: Front Brake
Front Brake Determine which type of brake your bike is equipped with and refer to the appropriate assembly instructions. For more information on brake adjustment and maintenance, refer to pages 74-77. V-Style Brakes Brake Outer If not already assembled, take the brake noodle from the parts box and Cable Cable slide the cable through the larger opening. - Page 59 V - Brake While holding the shoe against the rim, adjust the amount of shoe protrusion by interchanging the position of the B washers (i.e. 6 mm and 3 mm) so that If fitted with V-Brakes, insert the brake body into dimension A is kept at 39 mm or more.
- Page 60 While holding the shoe against the Adjust the balance with the spring rim, tighten the shoe fixing nut. tension adjustment screws. shoe fixing nut 5 mm Allen key 1 mm 1 mm Spring tension Spring tension adjustment screw adjustment screw Pass the inner cable through the inner Depress the brake lever about 10 times as cable lead.
-
Page 61: Check Your Brakes
Check your Brakes Press each brake lever to make sure that there is no binding and that the brake pads press hard enough on the rims to stop the bike. The brake pads should be adjusted so they are 1 mm to 2 mm away from the rim when the brakes are not applied. Brake pads should be centered on the rim and “toed-in”... -
Page 62: Disc Brakes
Disc Brakes (if equipped) Brake Cable If fitted with a front disc brake, the components should already be Housing attached. However, please check all connections before attempting Barrel Adjuster to ride the bicycle. Secure tightly the 6 bolts that hold the disc to the Lock Nut front wheel hub and the 2 bolts that hold the brake mechanism to the fork. -
Page 63: Disc Brakes
Centering Bolt Fork Leg Disc Mounting Bolts Brake Cable Housing Rotating Caliper Body Disc Cable Boot with Spring inside Centering Bolt (inside) Actuating Cable Anchor Bolt Fork Drop Out Caliper Mounting Quick Release Bolts with spacers lever These brakes require breaking in! Ride and use the brakes gently for 13 miles before using the brakes in downhill conditions, for sudden stops, or any other serious braking. -
Page 64: Derailleur
Derailleur Although the front and rear derailleurs are initially adjusted at the Freewheel factory, you will need to inspect and readjust both before riding Pulley Adjustment the bicycle. Screw Rear Derailleur Begin by shifting the rear shifter to largest number indicated, disconnect the cable from the rear derailleur cable anchor bolt, and place the chain on the smallest sprocket. -
Page 65: Front Derailleur
Front Derailleur Low Adjusting Screw Shift both shifters to the smallest number indicated and place the chain on the corresponding cog and chainwheel. Disconnect the front High Adjusting Cable Anchor Bolt derailleur cable from the cable anchor bolt. Check the position of the front Screw derailleur;... -
Page 66: Dual Suspension
Dual Suspension Dual Suspension bikes (DS) are equipped with a front fork as well as a rear suspension generally located below the seat. The piston works in conjunction with a spring to allow the bike to rotate on a pivot point. Ensure all attaching hardware is secured and there is no lateral movement of the rear swingarm. -
Page 67: Rear Pivots
Rear Pivots The pivot assembly is a simple mechanism that allows the rear swingarm to move up and down in combination with a rear suspension. Size, shape, and compounds will vary between models; however, operating principles are the same. A shaft will pivot inside of two bushings secured in Attaching Bolt place with bolts. -
Page 68: Accessories
Accessories If your bike is supplied with a water bottle and cage, attach the Saddle Bag cage to the bicycle using the Allen bolts provided. Frame Bag Some bikes come equipped with a saddle bag or frame bag. The saddle bag installs under the seat with the zipper facing Reflector Reflector the rear wheel. -
Page 69: Fenders
Fenders figure 1 Front Fender The front fender is mounted at the fork crown. There are two ways in which to mount your front fender. The first is the caliper brake mounting system (see figure 1), and the second is the 10mm nut and bolt system (see figure 2). -
Page 70: Rear Fender
Rear Fender The rear fender is mounted at the seatstay brace. There are two ways in which to mount your rear fender. The first is the screw mounting system (see figure 3), and the second is the 10mm bolt and screw system (see figure 4). Identify the mounting system used on your bicycle and follow the given instructions for that particular type of mounting system. -
Page 71: Final Check
Final Check • After all adjustments have been made, shift through every gear several times at varying speeds. This will ensure all your adjustments are correct and will allow you to pinpoint any trouble areas. If you encounter any problems, refer to the appropriate section and make any necessary adjustments. -
Page 72: Single Speed & Bmx
SINGLE SPEED & BMX Includes 16" and 20" BMX Bikes Foreword: Assembling a bicycle is an important responsibility. Assembly is the same for boy’s and girl’s bikes. Proper assembly not only gives the rider more enjoyment of the bicycle; it also offers an important measure of safety. Getting Started Open the carton from the top and remove the bicycle. -
Page 73: Seat
Seat Loosen nut on the seat clamp and add 3 or 4 drops of oil onto the threads of the bolt. Place the smaller end of the seat post into the seat clamp until it stops with the bolt to the rear of the seat post. Thread the nut on the seat clamp loosely. -
Page 74: Front Wheel
Front Wheel Retaining Make sure the brakes are loose enough to allow the wheel to Washer Axle Nut pass through the brake pads easily. Axle Place wheel into fork drop outs. Install retaining washers with raised lip pointed towards the fork, and insert into the small hole of the fork blade. -
Page 75: Side Pull Brake
Side Pull Brake Side Pull Cable Loosen the cable anchor nut and thread the brake cable through it. Brakes Adjusting Barrel Tighten the nut by hand until it holds the cable in place. Squeeze the brake arms together against the rim of the wheel. Loosen the nuts on the Center Bolt brake shoes and turn until they match the angle of the rim. -
Page 76: V-Style Brake
V-Style Brake While holding the shoe against the rim, adjust the amount of shoe protrusion by interchanging the position of the B washers (i.e. 6 mm or 3 mm) so that If fitted with V-Brakes, insert the brake spring dimension A is kept at 39 mm or more. into the center spring hole in the frame mounting boss, and then secure the brake body to the frame with the pin fixing bolt. - Page 77 While holding the shoe against Adjust the balance with the spring the rim, tighten the shoe fixing nut. tension adjustment screws. 5 mm Allen key 1 mm 1 mm 1 mm Spring tension Spring tension adjustment screw adjustment screw Pass the inner cable through the inner Depress the brake lever about 10 times as cable lead.
-
Page 78: Rotors
Rotors Screw the adjusting barrels in the upper plate in (or out) to set the bearing for maximum travel. The bearing should be as far down Some freestyle BMX bicycles come equipped with a cable detangler as it can go without resting on the lower plate or the adjusting system that will allow the handlebar to spin 360-degrees without barrels screwed into the lower plate. - Page 79 Failure to adjust correctly may result in loss of braking power and personal injury. Single Cable Casing Cable Adjuster Cable Splitter Upper Cable Barrel End (long casing) Upper Cable (short casing) Adjusting Barrel Locknut Upper Plate Set for Max. Travel 37mm + or - 1mm Keyed Washer Bearing...
-
Page 80: Axle Peg Assembly
Repeat for all the remaining pegs. PLEASE NOTE: Not all axles are able to accept axle pegs. Please consult the Currie Technologies® Service Department if you have any questions. Some BMX bicycles come with two or four pegs. If your bicycle is a Dirt Jumping style bicycle, you will receive only two pegs. -
Page 81: Training Wheels
Repeat for both training wheels. It is very important to check the training wheel connection to the bicycle. Failure to properly tighten may cause the training wheel to dis- lodge. Please contact Currie Technologies® Option 2 Service with any questions. -
Page 82: Wheels To Brace
Attaching Training Wheel Brace to Bicycle There are two different braces used to attach the training wheels to the bicycle: the C-Shape Brace and the Flat Brace. Determine which brace was included with your bicycle and follow the given instructions for that particular brace. C-Shape Brace Remove the axle nut and washer from the rear wheel axle. -
Page 83: Stabilizer Bracket
NOTICE: Not all bicycles will accept training wheels. If your bike did not come stock with training wheels, please call Currie Tech- nologies® to help determine if after-market training wheels can be attached. -
Page 84: Assembly
Final Check Install any additional parts that are supplied with your bike. Pads NOTE: Your bicycle may be equipped with different style components than the ones illustrated. Reflectors: Attach the white reflector to the front bracket and the red reflector to the rear bracket using an 8mm wrench or a Phillips head screwdriver. -
Page 85: Servicing
Correct routine maintenance of your new bike will ensure smooth running - Longer lasting components - Safer riding - Lower running costs Every time you ride your bicycle, its condition changes. The more you ride, the more frequently maintenance will be required. We recommend you spend a little time on regular maintenance tasks. -
Page 86: Schedule 2 - Service Checklist
Schedule 2 - Service Checklist Frequency Task Page Reference Before every ride Be sure batteries are fully charged 35-40 Check tire pressure Check brake operation 99-102 Check wheels for loose spokes Perform safety check 18-19 After every ride Be sure to fully charge batteries 35-40 Quick wipe down with damp cloth Weekly... -
Page 87: Tools Required
Frequency Task Page Reference Check all points as per monthly service Check and replace brake pads, if required Check chain for excess play or wear Yearly Lubrication as per schedule 1 Tools Required Open ended wrench or ring wrenches: 8mm, 9mm, 10mm, 12mm, 13mm, 14mm, 15mm Open end or pedal wrench 15mm Allen key wrenches: 2.5mm, 3mm, 4mm,... -
Page 88: Part 6 Detailed Maintenance
DETAILED MAINTENANCE WHEELS AND TIRES Wheel Inspection It is most important that wheels are kept in top condition. Properly maintaining your bicycle's wheels will help braking performance and stability when riding. Be aware of the following potential problems: •Dirty or greasy rims: Caution: These can render your brakes ineffective. -
Page 89: Tire Inspection
Tire Inspection Tires must be maintained properly to ensure road holding and stability. Check the following areas: Inflation: Ensure tires are inflated to the pressure indicated on the tire sidewalls. It is better to use a tire gauge and a hand pump than a service station pump. Caution: If inflating tires with a service station pump, take care that sudden over inflation does not cause tire to blow out. -
Page 90: Hub Bearing Adjustment
Hub Bearing Adjustment Ball Bearings When checked, the hub bearings of either wheel will require Bearing Lock adjustment if there is any more than slight side play. Cone Washer Hub Body Check to make sure neither locknut is loose. To adjust, remove wheel from bicycle and loosen the locknut on one side of the hub while holding the bearing cone on the same side with a flat open end wrench. - Page 91 Remove the tire completely and inspect for a nail, glass, etc. and remove if located. Also inspect the inside of the rim to ensure there are no protruding spokes, rust or other potential causes. Replace the rim tape which covers the spoke ends, if damaged.
-
Page 92: Handlebar Stem
HANDLEBARS AND STEM Handlebar Stem The handlebar stem fits into the steering column and is held firmly by the action of a binder bolt and expander wedge which, when tightened, binds with the inside of the fork steerer tube. When removing the stem, loosen the stem bolt two or three turns, then give it a tap to loosen the wedge inside. -
Page 93: Handlebars
When re-fitting the stem, make sure the handlebars are correctly aligned and tightened using the appropriate hex wrench or allen key. Grip Do not over tighten. Test the security of the handlebar within the stem, and the stem within Stem Bolt Handlebar the fork steerer tube, by clamping the front wheel between your knees Handlebar Stem... -
Page 94: Grip Shift Installation
Grip 7/8” Plastic Washers Barrel Adjuster Cable GRIP SHIFTERS Grip Shift™ - Installation Slide front Grip Shift™ assembly over left side of handlebar leaving proper clearance for handlebar grip. If necessary, move the brake lever to accommodate Grip Shift™ and handlebar grip. Rotate assembly until cable exits beneath brake lever with adequate clearance for brake lever movement. -
Page 95: Cables & Cable Housing
Cables and Cable Housing Cables and housing are one of the most overlooked parts on the bicycle. The first indication that your cables and housing need to be replaced is an increased amount of pressure needed to operate the brakes or shifters. Before every ride, check that there are no kinks or frays in the cables and housing. -
Page 96: Headset
HEADSET Standard Headset Inspection The headset bearing adjustment should be checked every month. This is Lock Nut important as it is the headset which locks the fork into the frame, and if loose, can cause damage or result in an accident. While standing over the frame top tube with both feet on the ground, apply the front brake firmly Lock Washer and rock the bicycle back and forth;... -
Page 97: Seat & Seat Post
SADDLE AND SEAT POST Inspection The seat fixing bolt and the seat post binder bolt should be checked for tightness and adjustment every month. On removing the seat post from the frame, you will notice a mark about 65mm up from the bottom with the words “max. -
Page 98: Adjustment
Adjustment As mentioned in Part 2, the seat can be adjusted in height, angle and distance from the handlebars to suit the individual rider. Seat angle is a matter of personal preference but the most comfortable position will usually be found when the top of the seat is almost parallel to the ground, or slightly raised at the front. -
Page 99: Brakes
BRAKES The correct adjustment and operation of your bicycle's brakes is extremely important for safe operation. Brakes should be checked for effective operation before every ride. Frequent checking of adjustment is necessary as the control cables will stretch and the brake pads will become worn with use. Never ride a bicycle unless the brakes are functioning properly. -
Page 100: Lubrication
Some brakes have a quick release mechanism to allow easier wheel removal. Whenever you adjust the brakes, make sure the quick release mechanism is in the closed position. Never ride unless the quick release is firmly locked in the closed position. Lubrication Cable Adjusting Barrel The brake lever and brake caliper pivot points should be oiled with 2-3 drops... -
Page 101: Adjustment V-Style Brakes
Some brakes have a special mechanism which enables you to set the clearance on either side of the rim using a screwdriver. Brake pads should finally be adjusted so that the leading edge of the pad makes first contact with the rim. Some brakes have special curved washers to allow this, but on less complex models it will be necessary to apply a little force to the pad and its mounting. -
Page 102: Brake Pad Adjustment
On some brakes, the main brake cable continues through the central cable Tread Tread Worn Off carrier to an anchor bolt on one of the brake arms. Adjustment of the cable length is made after loosening the anchor bolt on the brake arm. Adjust the brake pad position so that it is parallel to the wheel rim and so that the leading edge makes first contact. -
Page 103: Drivetrain
DRIVETRAIN The drivetrain of a bicycle refers to all parts that transmit power to the rear wheel including the pedals, chain, chainwheel, crank set and freewheel. PEDALS Pedals are available in a variety of shapes, sizes and materials, and each are designed with a particular purpose in mind. Some pedals can be fitted with toe clips and straps. -
Page 104: Lubrication & Adjustment
Lubrication and Adjustment Many pedals cannot be disassembled to allow access to the internal bearings and axle. However, it is usually possible to inject a little oil onto the inside bearings, and this should be done every six months. If the pedal is the type that can be fully disassembled, then the bearings should be removed, cleaned and greased every six to twelve months. -
Page 105: Crank Set
CRANK SET The crank set refers to the bottom bracket axle and bearings, the crank arms, and chainrings. Crank Bolt Your bike may be fitted with either a one piece crank, where the crank arms and bottom bracket are a single component, or a standard crank set, where each crank arm bolts onto the bottom bracket axle using nuts or bolts. -
Page 106: Lubrication & Adjustment
Lubrication and Adjustment - One Piece Cranks To adjust the free play in a one piece type bottom bracket, loosen the locknut on the left side by turning it clockwise and tighten the adjusting cone counter-clockwise using a screwdriver in the slot. When correctly adjusted, re-tighten the locknut counter- clockwise. -
Page 107: (One Piece Crankset) Lubrication & Adjustment
Lubrication and Adjustment - Standard Cranks Bottom Bracket To adjust the free play in a three piece type bottom bracket, loosen the lockring on the left side by turning it counter-clockwise, then turn the adjusting cup as required. Re-tighten the lockring taking care not to alter the cup adjustment. - Page 108 Standard Crank Replacement: Screw in the removal tool. Replace the crank arm onto the axle. Tap the crank arm lightly with a mallet. Turn the screw bolt Refit the washer and tighten flange nut or bolt securely to a clockwise. torque of 27Nm.
-
Page 109: Chain
CHAINS Rear Sprocket Front Chainwheel Inspection The chain must be kept clean, rust free and frequently lubricated in Pull up order to extend its life as long as possible. It will require replacement if it stretches, breaks, or causes inefficient gear shifting. Make sure that there are no stiff links, they must all move freely. -
Page 110: Adjustment & Replacement
Adjustment and Replacement On derailleur geared bicycles the rear derailleur automatically tensions the chain. To adjust the chain on single speed freewheel, coaster hub braked or 3-speed hub geared bicycles: Loosen the rear axle nuts (and coaster brake arm clip if fitted) and move the wheel forward to loosen, or backward to tighten, in the frame. -
Page 111: Electric Motor Chain Adjustment
Motor Drive Chain Adjustment • Tools Required: • 5mm Allen wrench • 10mm Box wrench CX Bikes 1. Loosen the 4 Allen bolts that mount the motor bracket from underneath the frame. Adjust the motor chain tensioner bolt until there is only about 10mm (3/8”) slack in the motor drive chain. - Page 112 Electric Bikes with Rack Mounted Battery Packs and Horizontal Mounted Motors (Motor is mounted on the horizontal plane of the wheel axle) Loosen (do not remove) the two 5mm motor bracket mounting bolts. Loosen the 15mm outer axle nut. Loosen the 17mm thin inner axle nut. Slide the motor with the motor plate forward or backward to adjust the chain (not shown) tension to allow only about 5mm slack (3/16”).
-
Page 113: Freewheel
FREEWHEEL Inspection Like the chain, the freewheel must be kept clean and well lubricated. If the chain has become worn and needs replacing, then it is likely that the freewheel will also have become worn and should also be replaced. Take the chain off the freewheel and rotate it with your hand. -
Page 114: Derailleur Systems
DERAILLEUR SYSTEMS The derailleur system includes the font and rear derailleurs, the shift levers, and the derailleur control cables, all of which must function correctly for smooth gear shifting to occur. There are several different types of derailleur systems, but all operate using similar principles. -
Page 115: Lubrication
Lubrication Top Gear Freewheel All the pivoting points of the front and rear derailleurs should be Pulley Adjustment lubricated with light oil at least every month. Be sure to wipe off any Screw excess oil to prevent attraction of dirt into the mechanisms. The shifting cables should be cleaned and re-coated with a thin layer of grease every six months, or whenever new cables are being installed. -
Page 116: Adjustment (Front)
Adjustment - Front Derailleur Low Adjusting Screw Shift the rear shifter to the smallest number indicated, then shift the front shifter to the smallest number indicated. Disconnect the front High Adjusting Cable Fixing Bolt derailleur cable from the cable anchor bolt and place the chain on the Screw smallest chainwheel. -
Page 117: Reflectors
REFLECTORS Your bicycle is supplied with one front (white), one rear (red), two wheel (white), and two pedal (orange) reflectors. These are an important safety and legal requirement, and should remain securely fitted and in good, clean conditions at all times. Periodically, inspect all reflectors, brackets and mounting hardware for signs of wear or damage. -
Page 118: Miscellaneous Accessories
MISCELLANEOUS ACCESSORIES Your bicycle might be shipped with accessories that can be added onto you new bicycle. The following will detail how and where to attach your miscellaneous accessories. Basket Assembly Your bicycle may be supplied with an attachable front basket. -
Page 119: Troubleshooting
Problem Possible Cause Remedy Gear shifts not working properly - Derailleur cables - Lubricate/tighten/replace cables sticking/stretched/damaged - Front or rear derailleur not adjusted - Adjust derailleurs properly - Indexed shifting not adjusted properly - Adjust indexing Slipping chain - Excessively worn/chipped chainring - Replace chainring, sprockets and or freewheel sprocket teeth chain... - Page 120 Problem Possible Cause Remedy Freewheel does not rotate - Freewheel internal pawl pins are - Lubricate. If problem persists, jammed replace freewheel Brakes not working effectively - Brake blocks worn down - Replace brake blocks - Brake blocks/rim greasy, wet or dirty - Clean blocks and rim - Brake cables are binding/stretched/damaged...
- Page 121 Problem Possible Cause Remedy Steering not accurate - Wheels not aligned in frame - Align wheels correctly - Headset loose or binding - Adjust/tighten headset - Front forks or frame bent - Take bike to a bike shop for possible frame realignment Frequent punctures - Inner tube old or faulty...
-
Page 122: Electrical
PROBLEM POSSIBLE CAUSE REMEDY Bicycle has reduced range and/or Low batteries Charge batteries for recommended time speed Faulty batteries Replace batteries Low tire pressure Infl ate tires to recommended pressure Brakes dragging against rim Adjust brakes and/or rim Riding in hilly terrain, headwind, etc. Reduced range to be expected in these types of terrain and/or weather conditions Hub motor (Enlightened Series) - Page 123 PROBLEM POSSIBLE CAUSE REMEDY Bicycle runs at full speed without Faulty PTS sensor (Enlightened Series) Replace PTS sensor and retest pedaling Faulty TTM sensor (Enlightened Series) Replace TTM sensor and retest Faulty throttle Replace throttle and retest Faulty controller Replace controller and retest Bicycle (RMB or STB Series) Sensor and sensor ring not aligned Realigned so gap between sensor and...
-
Page 124: Part 5 Servicing
6. How Things Work It’s important to your performance, enjoyment and safety to understand how things work on your bicycle. Even if you’re an experienced bicyclist, don’t assume that the way things work on your new bike is the same as how they work on older bikes. Be sure to read and to understand this section of the Manual. - Page 125 2. Front Wheel Secondary Retention Devices Many bicycles have front forks which utilizes a secondary wheel retention device to keep the wheel from disengaging if the quick release is incorrectly adjusted. Secondary retention devices are not a substitute for correct quick release adjustment. Secondary retention devices fall into two basic categories: The clip-on type is an accessory part which the manufacturer adds to the front wheel hub or front fork.
- Page 126 Open the lever; turn the tension adjusting nut clockwise a quarter turn; then try again. (5) If the lever cannot be pushed all the way to a position parallel to the fork blade, return the lever to the OPEN position. Then turn the tension adjusting nut counterclockwise one-quarter turn and try tightening the lever again.
- Page 127 4. Removing and Installing Bolt-On Wheels a. Removing a Bolt-On Front Wheel (1) Open up the brake shoes. (2) With a 15mm box wrench or a six inch adjustable wrench, loosen the two axle nuts. (3) If your front fork has a clip-on type secondary retention device, disengage it and go to step (4). If your front fork has an integral secondary retention device, loosen the axle nuts about six full turns;...
-
Page 128: Seatpost Quick Release
B. Seatpost Quick Release Many mountain bikes are equipped with quick-release seat post skewers. The seatpost quick-release skewer works exactly like the wheel quick-release. While a quick release looks like a long bolt with a lever on one end and a nut on the other, the quick release uses a cam action to firmly clamp the seat post. - Page 129 The braking action of a bicycle is a function of the friction between the brake surfaces -- usually the brake shoes and the wheel rim. To make sure that you have maximum friction available, keep your wheel rims and brake shoes clean and free of lubricants, waxes or polishes.
-
Page 130: Shifting
Everything changes when you ride on loose surfaces or in wet weather. Tire adhesion is reduced, so the wheels have less cornering and braking traction and can lock up with less brake force. Moisture or dirt on the brake shoes reduces their ability to grip. - Page 131 The number of possible gear combinations (“speeds”) is the product of multiplying the number of sprockets at the rear of the drivetrain by the number of sprockets at the front (6 x 2 = 12, 6 x 3 = 18, 7 x 3 = 21 and so on). a.
- Page 132 2) Shifting the Front Derailleur: The front derailleur, which is controlled by the left shifter, shifts the chain between the larger and smaller chainrings. Shifting the chain onto a smaller chainring makes pedaling easier (a downshift). Shifting to a larger chainring makes pedaling harder (an upshift).
-
Page 133: Toeclips & Straps
confidence. Once you’ve learned the basics, experience will teach you which gear is appropriate for which condition, and practice will help you shift smoothly and at precisely the optimum moment. E. Toeclips & Straps Toeclips and straps are the traditional means which experienced cyclists use to keep their feet correctly positioned and engaged with the pedals. -
Page 134: Tires And Tubes
G. Tires and Tubes 1. Tires Bicycle tires are available in many designs and specifications, ranging from general-purpose designs to tires designed to perform best under very specific weather or terrain conditions. Your bicycle has been equipped with tires which the bike’s manufacturer felt were the best balance of performance and value for the use for which the bike was intended. -
Page 135: Bicycle Suspension
Some special high-performance tires have unidirectional treads: their tread pattern is designed to work better in one direction than in the other. The sidewall marking of a unidirectional tire will have an arrow showing the correct rotation direction. If your bike has unidirectional tires, be sure that they are mounted to rotate in the correct direction. - Page 136 CAUTION: Changing suspension adjustment can change the handling and braking characteristics of your bicycle. Never change suspension adjustment unless you are thoroughly familiar with the suspension system manufacturer’s instructions and recommendations, and always check for changes in the handling and braking characteristics of the bicycle after a suspension adjustment by taking a careful test ride in a hazard-free area.
-
Page 137: Purchase Record
Purchase Record Card Fill in Immediately and retain as a record of your purchase. *Please retain your sales receipt for any possible warranty claims. Your Name:___________________________________________________ Address: _____________________________________________________ Date Purchased: _______________ Place of Purchase: _____________ Model & Brand Information: _____________________________________ Wheel Size: ____________________ Serial Number Location Color: _________________________... -
Page 138: Limited Warranty
® The Currie Technologies Limited Warranty does not cover or apply to any Currie product used for rental or commercial ® purposes unless the specific product is designated, labeled or marketed by Currie Technologies as acceptable for rental or commercial use. - Page 139 IMPORTANT – Please activate your warranty by registering your new Currie product within 10 days of purchase by visiting our web site www.CurrieTech.com and clicking the “Register Your Product” link.
- Page 140 SLA (Sealed Lead Acid) batteries 6-8 hours With proper care and maintenance your Currie Technologies® Hybrid Electric Bicycle will provide ease of use and be fun to ride. Refer to the inside front cover for points that will help you to maximize the enjoyment you get from your new hybrid electric bicycle.
Need help?
Do you have a question about the Ezip and is the answer not in the manual?
Questions and answers