Table of Contents
Advertisement
Quick Links
Installation and Operation Guide
30" and 36" Gas/Electric Professional Style
Note: Please read these instructions thoroughly before attempting to install this unit. Failure
to follow installation instructions will result in costly service calls.
This appliance can only be installed in the state of Massachusetts by a Massachusetts
licensed plumber or gasfitter.
These symbols on the nameplate mean the product has been design
certified by C.S.A International Laboratories
Save these instructions for future use
#3937 032205
1050 Fountain St. N., Cambridge, Ontario, Canada N3H 4R7
ATTENTION INSTALLER: Leave this manual with appliance
Bus. (519) 650-5775 or Fax (519) 650-3773
Toll Free Phone 1-800-361-1517
Toll Free Fax 1-800-327-5609
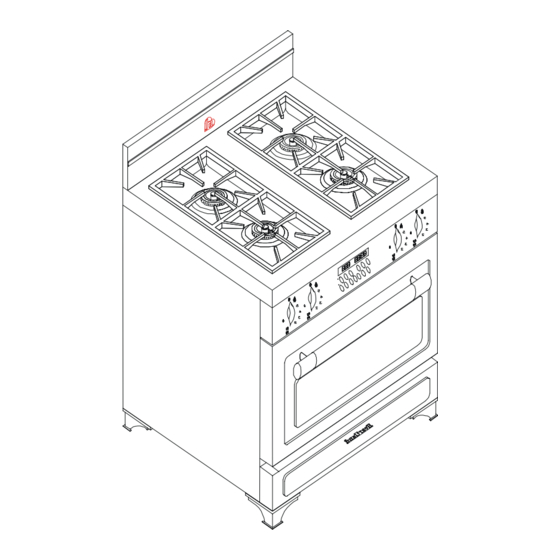
Model 3535-3635
Cook Stove
NOTE: Clock must
be set or your
oven will not
© 2005 HEARTLAND APPLIANCES INC.
Model 3530-3630
function!
®
C
US
Advertisement
Table of Contents
Troubleshooting

Related Manuals for Heartland Appliances Legacy 3530


Summary of Contents for Heartland Appliances Legacy 3530
- Page 1 #3937 032205 Bus. (519) 650-5775 or Fax (519) 650-3773 Toll Free Phone 1-800-361-1517 Toll Free Fax 1-800-327-5609 Model 3530-3630 Model 3535-3635 Cook Stove NOTE: Clock must be set or your oven will not function! © 2005 HEARTLAND APPLIANCES INC. ®...
- Page 2 Installation and Operation Guide Models 3530-3630 Models 3535-3635 WARNING All ranges can tip Injury to persons could result Install anti tip devices packed with range See installation instructions...
-
Page 3: Terms And Conditions
HEARTLAND warrants the oven heating elements against defects in material or workmanship for an additional two years. These parts will be repaired or replaced at the option of Heartland without charge, but you pay for labour and transportation subject to the terms and conditions set out below. -
Page 4: Table Of Contents
Accessories ... 50 Conversion Kits and Information ... 50 Parts Drawing ... 51 Parts Description ... 52 Heartland Kitchens ... 53 Appendix A: Cooking Guides ...56 Meat Roasting Guide ... iii Poultry Roasting Guide ... iv Broiling Guide ... v Baking Guide ... -
Page 5: Setup And Assembly
Metal shears • Hammer You must have a qualified electrician con- nect the new range to be sure all electrical codes and regulations are observed except when range is equipped with a cord and plug. A qualified gas technician must install this appliance to ensure local installation codes and regulations are observed. -
Page 6: Exhaust Hood
Should you wish to install an exhaust hood of your own choice, ensure that the exhaust hood you purchase is the correct size and capacity for your Heartland range. Please follow the exhaust hood manufacturers installation instructions. When installing an after market... -
Page 7: Metro / Legacy Series
• Oven door vents must be 2" from any combustible. Door vents are required on Metro units to allow oven door ventilation. • Minimum distance between the range and a side wall above the cooking top surface is 6” (see dim "O" in Table 2 below) •... - Page 8 • Oven door vents must be 2" from any combustible. Door vents are required on Metro units to allow oven door ventilation. • Minimum distance between the range and a side wall above the cooking top surface is 6” (see dim "O" in Table 2 below) Electrical requirements: •...
- Page 9 Clearances • Minimum distance between the range and a side wall above the cooking top surface is 6” (see dim "O" in Table 2 below) • 0” Clearance to the back of the stove may be obtained when installing the appliance against a non - combustible wall or with the installation of our Splashback Kit.
- Page 10 Clearance Diagrams - 30” Legacy Figure 1 Clearances • Minimum distance between the range and a side wall above the cooking top surface is 6” (see dim "O" in Table 2 below) Electrical requirements: • Electrical hookup must be done by a licenced electrician •...
-
Page 11: Preparing The Range For Installation
Two people are required to lift the stove into position. In order not to damage the range, refrain from lifting by the top. Only lift the range around the bottom of the oven body – one person on each side. -
Page 12: Positioning The Range
Place both hands on the front. Carefully push the range into place. Do not forget to plug in the main power cord before the range is in it’s final position. -
Page 13: Section 2: Safety Guidelines
Storage in or on appliance – flammable materials should not be stored in an oven, near surface units or in range cabinet. Do not use water on grease fires – smother fire or flame or use dry chemical or foam-type extinguisher. -
Page 14: Self Clean Safety Instructions
Section 2: Safety Guidelines Exhaust Hood Safety Caution: Do not store items of interest to children in cabinet above the range or on top of range cabinet. Children climbing on range to reach items could be seriously injured. Clean exhaust hood frequently – grease should not be allowed to accumulate on hood or filter. -
Page 15: Selecting The Proper Cookware
Metro / Legacy Series Selecting the Proper Cookware Utensils will affect the overall safety and per- formance of cooktop cooking. It is important to select them carefully. An improperly selected utensil will not cook efficiently or evenly. For best results, follow these guidelines: Use medium to heavy gauge metal cookware with flat and smooth bottoms for greatest efficiency. -
Page 16: Section 3: Cooking Controls
The cooking controls are located on the front of the cooktop. These controls offer an infinite number of heat settings for ease and accuracy in cooking. Oven functions are controlled through the electronic clock. Refer to figure 8 for features described below. Cooktop Features Burners feature 15,500 BTU (4.4kW) easy clean, sealed style, dual head burners. -
Page 17: Cooking Controls Diagrams
Metro / Legacy Series Cooking Controls Diagrams (fig 8) OVEN VENTS THRU THESE SLOTS, LEGACY VENTS FROM SAME AREA ONLY VENT IS COVERED BY A DECORATIVE STRIP... -
Page 18: Control Panel Lay Graphic
Section 3: Cooking Controls Control Panel Graphic (fig 9) These illustrations show the control panel layout of each model. Legacy is shown, however, Metro has a similar layout. 4 burner 6 burner and 4 burner with Grill... -
Page 19: Electronic Oven Control Features
Metro / Legacy Series Electronic Oven Control Features (fig 10) Broil Indicator Convection Broil Indicator Convection Bake Bake Indicator Indicator minute minder clock cook time Features: • Time of day display, selectable 12 hr/24 hr clock mode. • Count down timer display. •... -
Page 20: Section 4: Oven & Clock Operation
Oven and Clock Operation 1. General Information 2. Safety Features 3. Oven Light 4. Clock Operation 5. Minute Minder 6. Bake 1. General Information • Clock must be set before any other operation of the electronic oven control. No other setting is possible until the clock is set. -
Page 21: Safety Features
Metro / Legacy Series 2. Safety Features • The electronic oven control can be temporarily locked (out of service) to prevent children from switching the oven on. This feature can also be useful when cleaning the control panel glass. (see Section 4B - “Clock Safety Lock Out” section for details) •... - Page 22 4A. Clock Set Up (please read all steps prior to setting the clock) Time of Day: Press clock symbol. (colon between hours and minutes stops flashing and indicator light begins to flash) Within 5 seconds of step 1, press day in hours and minutes. (fast scrolling begins after holding symbol keys for over 5 seconds) Press start symbol to finish clock set up or wait without pressing any key for 5...
-
Page 23: Minute Minder
Metro / Legacy Series 5. Minute Minder 5A. Set Minute Minder (please read all steps prior to setting the minute minder) Press minute minder symbol. (clock will display 00:00). Press increase symbol until desired length of time is displayed. (fast scrolling begins after holding increase symbol key for over 5 seconds) To correct time press... -
Page 24: Bake
6. Bake 6A. Regular Bake (please read all steps prior to setting the regular bake function) Press bake symbol. (temperature is automatically set at 350F or 175C and the bake indicator light begins to flash) Press increase or be set between 100F to 550F or 65C to 290C. (fast scrolling begins after holding increase or decrease symbol keys for over 5 seconds). - Page 25 Press start symbol to begin timed bake function. tor lights will glow. After 5 seconds the time of day and temperature in oven will be displayed. Temperatures will be displayed in increments of 5F or 5C until programmed temperature is reached.
- Page 26 Press increase symbol until desired delayed time bake is set. (fast scrolling begins after holding increase symbol key for over 5 seconds). To correct time set press Press start symbol to begin delayed time bake function. Display will show time of day. At the start of the delayed time bake cooking cycle, the and temperature in oven will be displayed.
-
Page 27: True Convection
7. True Convection 7A. True Convection (please read all steps prior to setting the regular convection function) Press convection symbol. (temperature is automatically set at 325F or 160C and the convection indicator light begins to flash) Press increase or decrease symbols to change temperature setting. Temperature may be set between 100F to 550F or 37C to 290C. - Page 28 To correct time set press Press start symbol to begin timed convection function. cook time indicator lights will glow. After 5 seconds the time of day and temperature in oven will be displayed. Temperatures will be displayed in increments of 5F or 5C until pro grammed temperature is reached.
- Page 29 Metro / Legacy Series Press increase symbol until desired delayed time true convection is set. (fast scrolling begins after holding increase symbol key for over 5 seconds) To correct time set press Press start symbol to begin delayed time convection function. Display will show time of day.
-
Page 30: Convection Bake
8. Convection Bake 8A. Convection Bake (please read all steps prior to setting the convection bake function) Press convection symbol. (temperature is automatically set at 325F or 160C and the convection indicator light begins to flash) Press bake symbol. (temperature is automatically set at 325F or 160C and the bake indicator light begins to flash) Press increase or... - Page 31 Metro / Legacy Series Press increase symbol until desired cook time is set. (fast scrolling begins after holding increase symbol key for over 5 seconds) To correct time set press Press start symbol to begin timed convection bake function. cook time indicator lights will glow. After 5 seconds the time of day and temperature in oven will be displayed.
- Page 32 Press stop time symbol to set desired time for cooking to be completed. indicator will flash and clock will automatically display the time the oven would normally shut off if its duration were not delayed. (for example, if at 3 o’clock in the afternoon, then after pressing begins after holding increase symbol key for over 5 seconds) To correct time set press...
-
Page 33: Broil
Metro / Legacy Series 9. Broil 9A. Regular Broil (please read all steps prior to setting the broil function) Press broil symbol. (temperature is automatically set at 550F or 290C and the broil indicator light begins to flash) Press decrease symbol to change temperature setting. Temperature may be set between 100F to 550F or 65C to 290C. - Page 34 Press start symbol to begin convection broil function. broil indicator lights will glow. After 5 seconds the time of day and temperature in oven will be displayed. Temperatures will be displayed in increments of 5F or 5C until programmed temperature is reached. Once set temperature is reached, an audible signal will sound.
-
Page 35: Sabbath Mode
Metro / Legacy Series 11. Sabbath Mode 11A. Sabbath Mode Bake (please read all steps prior to setting the sabbath mode bake function) Press bake symbol. (temperature is automatically set at 350F or 175C and the bake indicator light begins to flash) Press decrease symbols to set desired temperature below 295F or 145C. - Page 36 11C. Sabbath Mode Convection Bake (please read all steps prior to setting the sabbbath mode convection bake function) Press convection symbol (temperature is automatically set at 325F or 160C and the convection indicator light begins to flash) Press bake symbol. (temperature is automatically set at 325F or 160C and the bake indicator light begins to flash) Press decrease symbols to set desired temperature below 295F or 145C.
-
Page 37: Self Clean
Metro / Legacy Series 12. Self Clean Warning: remove all cookware, racks, and rack supports from oven during self clean cycle to prevent them from becoming dull and blue-gray. Refer to Section 7 : Care and Clean- ing for additional information prior to self cleaning the oven. 12A. - Page 38 Press stop time symbol to set desired time for delayed self clean to be completed. stop time indicator will flash and clock will automatically display the time the self cleaning would normally shut off if its duration were not delayed. (for example, if self clean is set for a two hour cleaning cycle at 3 o’clock in the afternoon, then after pressing stop time the clock will automatically display 5:00 p.m.
-
Page 39: Metro / Legacy Series
Top Burner and Grill Operation Lighting the Top Burners and Grill Range is equipped with a spark ignition system that is electrically operated. Pushing in and turning the knob to position 3 or lower will provide best lighting results. When the knob is turned, a distinct clicking noise will be heard. -
Page 40: Section 6: Baking, Broiling & Roasting
Baking, Broiling and Roasting Standard Baking This is the traditional “radiant heat” style of cooking. You may choose this method of cook- ing for your tried and true recipes. As with all radiant style ovens, it will be necessary to preheat the oven, especially for baked goods. -
Page 41: True Convection
Metro / Legacy Series True Convection Convection means conveying. In convection cooking the heat from a dedicated convection element is circulated by a fan. The circulating hot air penetrates food faster than motionless air in a standard oven. This means food surfaces are cooked on all sides sealing in natural juices and flavour. -
Page 42: Broiling Tips
Broiling Tips Prepare meat, allowing frozen meat to thaw before broiling. Slit the fat around the edge of the meat about every inch (2.5 cm), to prevent curling. Arrange meat on the broiler pan. A small amount of water placed in the broiler pan will reduce the smoke and splattering from hot drippings. -
Page 43: Care And Cleaning
Avoid abrasive cleaners. If any acid based food or liquid, such as lemon juice or tomato juice, is spilled on the range, wipe it at once to prevent staining. Care and Cleaning Stainless Steel – Metro Series DO NOT USE A STEEL WOOL PAD. -
Page 44: Oven Cleaning - Self Clean
Oven Cleaning - Self Clean Range is equipped with a standard self clean feature. Self cleaning requires the use of the clock timer. Read and follow the safety and pre- cleaning instructions below. Then refer to “Clock and Oven Operation” section for self clean details and procedures. -
Page 45: Surface Burners
Windex and a soft cloth. If any acid based food or liquid, such as lemon juice or tomato juice, is spilled on the range, wipe it at once to prevent staining. Oven Light Replacement Before replacing oven lights, disconnect the power at the main fuse or circuit breaker panel. -
Page 46: Grill
Grill The easiest way to clean the grill is immediately after cooking. First, turn the control valves to the OFF position. ( “O” ) Wearing an oven mitt, to protect hands from the heat and steam, dip a barbecue brush in tap water. -
Page 47: Interior Oven Rack
Metro / Legacy Series Interior Oven Rack The oven rack is designed with stop-locks so that when placed correctly on the supports it will stop before coming completely out of the oven and will not tip when placing or removing food. To install: Push the oven rack all the way to the back. -
Page 48: Oven Door Removal
Oven Door Removal Removal of the oven door for thorough cleaning is easy: Open oven door, and latch brass catches on to upper leg of the hinge. Make sure catch is securely hinged. With a hand on each side of door, lift the door slightly, and pull out. -
Page 49: Section 8: Trouble Shooting
Metro / Legacy Series Burner Set Up and Adjustment The range was carefully set up and inspected at the factory but some final adjustments may be necessary once the unit is installed. Important: ensure burner rings are assembled properly First, check to ensure there are no gas leaks. -
Page 50: Problem Solver - Range Oven
Use this manual to diagnose the problem and then follow the recommended solution(s). Oven will not work • Plug on range is not completely inserted in the wall receptacle. • The household circuit breaker has been tripped, or a fuse has blown in the switch panel. -
Page 51: Power Failure Operation
Metro / Legacy Series Power Failure Operation If electrical power is interrupted, meals can still be cooked on the top burners of the Heartland gas/electric range. The oven will be inoperable. By following these simple directions you will be able to use the top burners without the benefit of electricity. -
Page 52: Gas Trouble Shooting Chart
Check positioning of shrink sleeving on receptacle – should be flush w ith end of receptacle – trim if necessary Replace m odule Check ground/earth connection of range chassis and ground/earth lead connection to m odule Reduce size of air shutter opening until... -
Page 53: Section 9: Reference
How to order conversion kits: Kits can be ordered from your dealer or directly from Heartland Appliances. For more informa- tion please call our order desk: (519) 650-5501 Fax (519) 650-3773 Note: Gas conversions to be performed by a qualified gas technician. -
Page 54: Parts Drawing
Parts Drawing (fig 27) 3653 6455 3551 - 36” 3552 - 30” 3551 - 36” 3656 - 30” 3658 - 36” 3650 - 30” 3655 - 36” Section 9: Reference 3483 30495 3364 3457 3699 3663 3665 3486 3484 3350 3660 3662 3661... -
Page 55: Parts Description
3424-C Oven door outer shell 30" Legacy 3430-C Kick plate 30" Legacy 3439-C Stove top 30" Legacy 3530-C Kick plate 36" Legacy 3569S Door stainless steel hinge 39951S Backguard: Standard profile 30" Metro (4 1/4" high) 39971S Backguard: Standard profile 36" Metro (4 1/2" high) -
Page 56: Heartland Kitchens
Cowl. Energy efficiency rating 481 kwh/year. Also available in Metro 3315 and Legacy 3165 models. 3530- Legacy Gas / Electric kitchen range - 4 sealed gas burners, electric convection oven fits in a 30" opening! Also available in stainless steel as model 3535 Metro. -
Page 57: For Your Safety
Do not attempt to extinguish a grease fire with water. Cover grease fires with a pot lid or baking soda. • Avoid the use of aerosol containers near the range. • Never place pans, cookie sheets or roasters directly on the oven bottom - use the rack in its lowest position. - Page 58 Air Shutter Adjustment - Metro & Legacy II IMPORTANT: ALL GAS WORK TO BE PERFORMED BY A QUALIFIED GAS TECHNICIAN. Air Shutter Adjustments may be needed in the field after conversion or new appliance installation. Step 1: remove backguard held by 3 screws and washers.
-
Page 59: Appendix A: Cooking Guides
Appendix A: Cooking Guides ... Meat Roasting Guide ... Poultry Roasting Guide ... Broiling Guide ... Baking Guide ... Please note: Rack locations are described as “position 1” “position 2”, etc. Position 1 is the lowest rack location, posi- tion 2 is the next rack location and so on. The last available location in the rack (position 4) is to be used only with the “offset rack”. -
Page 60: Meat Roasting Guide
Metro / Legacy Series Cooking Guides Meat Roasting Guide Please refer to guide on following page. All times are approximate since variables such as size, shape, thickness and temperature of meat will affect the cooking time. Use a meat thermometer inserted in thickest part of meat, avoiding bone and muscle to accurately determine doneness. - Page 61 Meat Beef Sirloin or rib roast Rump, round - roast at 275F/140C Veal Leg, loin, rib roasts Pork Leg, loin Crown roast Shoulder roast Smoked, pre-cooked Lamb Leg, shoulder roasts Rack - roast at 400F/200C Meat Roasting Guide Degree of Internal “Doneness”...
-
Page 62: Poultry Roasting Guide
Poultry Roasting Guide All times are approximate since variables such as size and temperature of poultry will affect the cooking time. Use a meat thermometer inserted in inner thigh, avoiding bone to accurately determine doneness. Rub surface lightly with oil. Poultry cooked by convection mode will be moist and juicy on the inside and seared and browned on the outside. -
Page 63: Broiling Guide
Broiling Guide All times are approximate since variables such as thickness, temperature and individual prefer- ences will affect the cooking time. Broiling is done with the door shut and the broil temperature may be adjusted in 5-degree increments. High is 550°F/290°C and generally used for quick searing and for rare meats. -
Page 64: Baking Guide
Baking Guide For best results preheat the oven for standard conventional or convection cooking. Convection mode may cook faster and in some cases the temperature may be lowered by 25°F /15 °C. Foods that require surface browning are greatly enhanced by convection cooking. Bake cookies on baking sheets provided for convection mode so that the air can circulate properly. -
Page 65: Grilling Guide
Grilling Guide (For 36” units with grill feature) Generally we recommend preheating the grill 10 minutes on high. Then follow the guide below. When grilling roasts and thick meats sear on high then reduce heat to allow food to cook throughout and not burn.
Need help?
Do you have a question about the Legacy 3530 and is the answer not in the manual?
Questions and answers