Zenith DTT901 Installation And Operating Manual
Digital tv tuner converter box with analog pass-through
Hide thumbs
Also See for DTT901:
- Specification sheet (2 pages) ,
- Installation and operating manual (36 pages)
Table of Contents
Advertisement
Installation and Operating Guide | Warranty
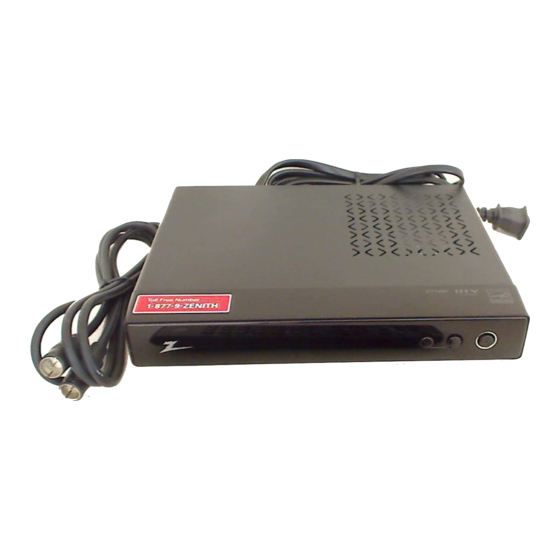
Model Number | DTT901 | Digital TV Tuner Converter Box
As an E
has determined that this product
or product models meet the
E
NERGY
energy efficiency.
E
S
®
is a U.S. registered mark.
NERGY
TAR
© Copyright 2007, LG Electronics U.S.A., Inc.
With Analog Pass-Through
S
®
Partner, LG
NERGY
TAR
S
®
guidelines for
TAR
For service/
support Call:
Toll Free Number
1-877-9-ZENITH
(http://www.zenithservice.com)
Advertisement
Table of Contents

Related Manuals for Zenith DTT901


Summary of Contents for Zenith DTT901
- Page 1 Installation and Operating Guide | Warranty Model Number | DTT901 | Digital TV Tuner Converter Box With Analog Pass-Through For service/ As an E ® Partner, LG NERGY has determined that this product support Call: or product models meet the Toll Free Number ®...
- Page 2 Phone: 1-201-816-2000. if its appearance indicates damage or deterioration, unplug it, discontinue use of the appliance, and have the cord replaced with an exact replacement part by an authorized Zenith-brand consumer electronics products are marketed by LG Electronics USA, Inc. servicer.
-
Page 3: Table Of Contents
IMPORTANT SAFE- 14. Refer all servicing to qualified service per- sonnel. Servicing is required when the apparatus has been damaged in any way, TY INSTRUCTIONS such as power-supply cord or plug is dam- aged, liquid has been spilled or objects Please read and observe all warnings and have fallen into the apparatus, the appara- instructions in this owner’s manual. -
Page 4: Introduction
To program the remote control to control this unit, set the remote control’s operation mode to TV or Settop Box, and set your remote control to the manufacturer codes of LG or Zenith. Connection Panel Overview a From Antenna c VIDEO and AUDIO OUTPUT Connect to digital signal source;... -
Page 5: Remote Control Key Functions
Remote Control MENU Accesses or closes main menu. EXIT POWER POWER Removes all on-screen displays and returns to SLEEP TV viewing from any menu. SIGNAL ZOOM Arrow Buttons (U / u / I / i) MENU DISPLAY GUIDE Selects options in a menu. (Select) Selects highlighted menu function. -
Page 6: Connections With Tv And Over-The-Air Antenna
Connections with TV and Install Guide over-the-air antenna The Install Guide is a convenient way for you to customize the settings of this unit. 1. Connect the antenna to the “From When the unit is turned on for the first Antenna”... -
Page 7: Setup
Menu Overview Note A password is required to gain access to Auto By using the menu, you can make vari- Tuning and Manual Tuning menu if the Lock ous adjustments to menu options such as System option is set to “On” (See page 10). picture and sound. -
Page 8: Option Menu Features
2. Use I or i to select your time zone Setup Menu Features (Continued) then press u to move to “Day Light Manual Tuning Saving” option. This feature manually adds or deletes 3. Use I or i to select a “Day Light channels. -
Page 9: Option Menu Features
Option Menu Features (Continued) Audio Output Select the appropriate audio output mode Caption of the unit depending on your TV connec- Allows you to select an option for display- tion. ing Caption Data from the unit. Stereo – When your TV is connected with stereo audio cable (L/R). - Page 10 Block Channel 2. Select the “Age”, “Dialogue”, “Language”, “Sex”, or “Violence” Blocks any channel that you do not want (Select) or i. option then press to view or that you do not want your chil- dren to watch. If you tune in a blocked Age: Selection applies regardless of channel, a black screen with a pop-up content category of rating.
- Page 11 Canadian Rating Downloadable Rating Blocks Canadian TV program that you or The rating information can be updated if your family may not wish to watch, based the TV station sends the downloadable on the Canadian English/French rating information. Language Rating system. 1.
-
Page 12: Operation
Channel Selection Auto Off You can select channels as described below. This unit will be automatically turned off, • Use Number (0-9) and – (dash) buttons in case of no button input for a preset to select a channel directly. time. -
Page 13: Simple Guide
Simple Guide Program Information Display Use the Simple Guide to see the informa- The Information Display appears if you tion for a current or next program easily press the DISPLAY button on the remote and conveniently. control while viewing a program. To display or exit the Simple Guide The Program Information shows items Press the GUIDE button on your remote... -
Page 14: Reference
Celera Motorola Totevision America Action Changhong Anam Citizen Multitech Vector Research Anam National Clarion Victor Contec Vidikron Apex Digital Craig Nikko Vidtech Audiovox Crosley Norcent Wards Baysonic Crown White Westinghouse Bell&Howell Curtis Mathes Onwa Yamaha Bradford Optimus Zenith Broksonic Daewoo... -
Page 15: Troubleshooting
Troubleshooting Specifications No power. General • Plug the power cord into the wall outlet • Television System: DTV standard securely. ATSC Fragmented picture and unclear sound. • Channel Coverage: Terrestrial 2-69 • Check your antenna input, location, and • Dimensions (W x H x D): signal strength. - Page 16 ANALOG PASS-THROUGH FEATURE Federal law requires that all “full-power” television stations must end analog broadcasts after February 17, 2009, but this does not include “low-power” TV stations (such as “low-power” or “community” stations of very restricted range (LPTV), “Class A” stations, and “translator” or “booster” stations). These stations may continue to broadcast in analog after the February 17, 2009, digital conversion deadline for full-power television stations.
- Page 17 Limited Warranty - USA This Zenith Electronics product, will be repaired or replaced, at Zenith’s option, if it proves to be defective in mate- rial or workmanship, under normal use, during the warranty period (“Warranty Period”) listed below, effective from the date (“Date of Purchase”) of original consumer purchase of the product.
Need help?
Do you have a question about the DTT901 and is the answer not in the manual?
Questions and answers
I changed the tv code from 3 to 4, accidentally. how to fix it?
@Virginia L Moss
To change the TV code back from 4-digit to 3-digit on the Zenith DTT901 remote, try using 3-digit codes compatible with Dish remotes, as the DTT901 uses 3-digit codes. You can find these codes on universal remote code lists. There is no specific instruction in the context for switching between 4-digit and 3-digit modes, so you may need to reset the remote and enter a valid 3-digit code to switch back.
This answer is automatically generated
When I turn TV screen to show "video", it pulls up the video. When I turn it to " Zenith DTT901 Digital TV Tuner Converter Box with Analog Pass-Through