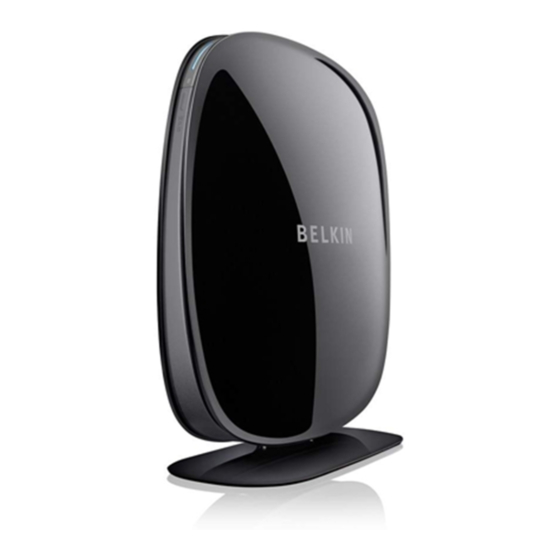
Belkin N600 DB User Manual
Wireless n+ router
Hide thumbs
Also See for N600 DB:
- User manual (43 pages) ,
- Specifications (2 pages) ,
- Specifications (2 pages)
Table of Contents
Advertisement
Advertisement
Table of Contents

Related Manuals for Belkin N600 DB


Summary of Contents for Belkin N600 DB
- Page 1 Wireless N + rOUTer N600 DB User Manual F9K1102V3 8820xx01233xx Rev. A00 English...
-
Page 2: Table Of Contents
Enabling Auto Update on Your Belkin Router . . . . . . . . . . . . . . . . . -
Page 3: Getting Started
GettInG StaRted What’s in the Box Initial Setup N600 DB Wireless N+ Router Where to Place Your Router Ethernet cable (attached to router) For the best results, place the Router next to your modem in Power supply (attached to router) an open location, away from large metal objects and magnets such as those found in speakers. -
Page 4: How To Set It Up
GettInG StaRted How to Set It Up Connect Your n600 dB Router Turn off your modem by disconnecting its power supply. Some modems have a battery backup; this will need to be disconnected at this time as well. Connect your Router to your modem using the cable (already attached). - Page 5 GettInG StaRted Connect to Your Router Retrieve the network ID card from the foot of your new Belkin Router. When requested, please enter the password (security key) provided on the card. When your device has connected to the Router, use a browser Can’t find the card? The default network name and...
- Page 6 GettInG StaRted If the page does not load, then try visiting http://192.168.2.1 to see the router homepage. Click the “Detect my connection” button in green. (If you would rather set up the Router manually, click the “set it up manually” link and proceed to page 11.) After several moments, your Router should automatically detect your Internet connection and restart.
- Page 7 GettInG StaRted Once your Router is online, it will determine if there is a firmware update available and offer to install it. Please allow up to 5 minutes for the firmware to update.
- Page 8 GettInG StaRted If there are no updates available, then setup will proceed.
- Page 9 GettInG StaRted At the next screen you will be invited to change your If you changed your network name and password, make note network name and password. Re-using your previous of it on the service card located on the foot of the Router. network name (SSID) and password makes connecting You will then have to connect to the new network.
- Page 10 GettInG StaRted Please take this opportunity to register your Router. This will Simply complete each of the required fields and click help technical support if there is a problem with your Router. “Complete Registration.” If you don’t want to register right now, click “Register Later”...
- Page 11 GettInG StaRted At the next screen you can download optional When finished installing optional software, click software that was bundled with your Router. “Thanks, take me to the dashboard.” This screen shows you optional software that is available Congratulations! You are now at your Router’s dashboard. for your Router, such as the USB software to allow you Your Router is set up and ready to use.
- Page 12 GettInG StaRted Using the WPS Button 1. Start WPS Push Button Connection (WPS PBC) on your computer or other Wi-Fi device that you would like to connect wirelessly to your Router. Often there will be a button for this purpose in software that came with the device, or a physical “WPS,”...
- Page 13 GettInG StaRted Manually Set Up Your Internet Connection Use a browser to visit http://router/. You can also try visiting http://192.168.2.1/. The Router’s Welcome page should appear. Click the “Set it up manually” link. Please select the type of connection your ISP provides. Refer to page 16 for a description of the connection types.
- Page 14 GettInG StaRted If you decide to change these settings, then enter the Click “Great, what’s next?” new values and click “Save and Continue.” (Note: The password must be at least 8 characters long.) If you changed your network name and password, make note of it on the service card located on the foot of the Router.
- Page 15 GettInG StaRted Please take this opportunity to register your Router. This will This screen shows you optional software that is available help technical support if there is a problem with your Router. for your Router, such as the USB software to allow you to print through the Router’s USB port.
- Page 16 GettInG StaRted Congratulations! You are now at your Router’s dashboard. Your Router is now set up and ready to use. The status of your Internet connection is shown in the upper left corner of the Router’s homepage. If it does not say “Online,” troubleshooting information will be displayed.
- Page 17 GettInG StaRted Manually Configuring Your Router’s Internet from the dashboard To set up your ISP connection manually, select “Connection Type” from the list under the header Internet WAN.
- Page 18 GettInG StaRted dynamic Connection Cable and fiber customers generally require a dynamic connection. Some DSL customers require a PPPoE connection. Let’s try dynamic first. Select “Dynamic” from the menu that appears and press “Next.”...
- Page 19 GettInG StaRted If after a few minutes your Internet Status says A host name is generally not required. Hit “Online,” you’re done! You can surf the Internet. “Save.” The Router will restart. If these steps do not work, try restarting your modem and repeating the process.
- Page 20 GettInG StaRted PPPoe Connection Some DSL customers require a PPPoE connection. Select PPPoE this time and press “Next.”...
- Page 21 GettInG StaRted Enter the username and password supplied by your If after a few minutes your Internet Status says Internet provider and click “Save.” Ignore the other fields “Connected,” you’re done! You can surf the Internet. unless required by your ISP. The Router will restart. If these steps do not work, try restarting your modem and repeating the process.
-
Page 22: Connect Your Wireless Devices
GettInG StaRted Connect Your Wireless devices Android ™ (phones and tablets) 1. Open the Settings app and select Wireless and Network. (iPhone, iPad, and iPod touch) 2. From there, select Wi-Fi to see the list of available networks. 1. Open the Settings app and select the Wi-Fi menu item. 3. - Page 23 GettInG StaRted Windows ® Your computer provides a menu of available wireless networks at the right end of the task bar. 1. Left-click on the icon that looks like signal strength bars. 2. Select your wireless network from the list. If asked, enter your network password (network key).
-
Page 24: Additional Capabilities
ADDITIONAL CAPABILITIES ADDITIONAL CAPABILITIES Adding USB Devices... - Page 25 You can manually check the status of your printer by visiting have difficulty sharing a drive on your network, please the USB Print and Storage Manager, found under the Belkin see the “Troubleshooting” section of this manual. icon displayed in your system tray (Windows) or menu bar (Mac).
- Page 26 Other USB devices may also be shared via your Router. Plug your device into the USB port located on the back of your Router. Computers running the Belkin USB Print and Storage Manager will be able to make use of the shared device.
-
Page 27: Bundled Software
ADDITIONAL CAPABILITIES Bundled Software USB Print and Storage Manager The USB Print and Storage Manager helps to manage and monitor the use of your USB printers, scanners, hard drives, and other devices that are connected to your Router’s USB port and shared across your network. - Page 28 ADDITIONAL CAPABILITIES Guest Access You can allow guests to use your Internet connection without joining your personal network. The network name and password for the guest network is located on the network information card found under the foot of your Router. A person using your guest network will be able to join without a password, but will be shown a login page when they attempt to surf the Web.
-
Page 29: Media Server By Mytwonky
ADDITIONAL CAPABILITIES Media Server by myTwonky Media Server by myTwonky lets your Router stream music, movies, and photos to different DLNA/UPnP devices on your network. In order to use Media Server by myTwonky, you will need to insert a USB storage device with media content into a free USB port on the back of your Router. - Page 30 ADDITIONAL CAPABILITIES There are four different filtering options: 1. Block malicious, adult, and other non-family-friendly sites 2. Block malicious and adult sites 3. Block malicious sites 4. No filters If you think a site should be added to the filtering list, submit a request at safeweb.norton.com.
-
Page 31: Intellistream Qos
ADDITIONAL CAPABILITIES Intellistream QoS Once complete you will see the results. Intellistream prioritizes video and gaming traffic for a better online entertainment experience. There are two ways to enable Intellistream: Run a Speed Test: In order for Intellistream to provide you the best media experience, your Router needs to know what your approximate Internet speeds are. - Page 32 ADDITIONAL CAPABILITIES If your Internet speed is greater than 70Mbps when downloading, Intellistream QoS will only improve your uploading experience. Refresh – This will retest your Internet speed. When you click “Save,” your Router will save your changes.
- Page 33 ADDITIONAL CAPABILITIES Manual set – This will let you set your approximate Internet speeds. If you do not know your Internet speeds, contact your ISP. When you click “Save,” your Router will save your changes. Intellistream is now enabled.
-
Page 34: Ipv6 Configuration
ADDITIONAL CAPABILITIES IPv6 Configuration A new version of Internet Protocol (IP) uses a 128-bit address to implement additional features that are not present in current IP addresses. Contact your ISP to inquire about their support for IPv6. Pass-Through Devices connected to your Router can talk to each other using native IPv6 packets, but information will be sent to all connected devices. -
Page 35: Getting To Know Your Router
GettinG to Know Your router Front Panel B) wi-Fi Protected Setup (wPS) Light and Button The WPS button on the front of your Router can be used to help establish a secure connection between your Router and other WPS-enabled Wi-Fi devices such as computers. To use the WPS feature on your Router, see “Getting Started >... -
Page 36: Back Panel
GettinG to Know Your router Back Panel A) Modem (wAn) Connector C) uSB Port D) reset Button Connect your modem to this USB printers, disks, and other This button is used to restart port using an Ethernet cable. USB devices plugged into this your Router in rare cases when it port will be shared on your functions incorrectly. -
Page 37: Technical Details
Belkin Router Monitor To save you the cost of adding IP addresses per computer in your house, your Belkin Router uses Network The Belkin Router Monitor application helps you to monitor Address Translation (NAT) technology, allowing you to your Router’s status and change network settings. -
Page 38: System Requirements
Technical DeTails system Requirements setup software A computer running Windows XP SP3 or higher, Windows ® Vista , or Windows 7; or Mac OS X v10.5 or v10.6 only ® ® Router Minimum 1GHz processor and 512M BRAM Broadband Internet connection such as a cable or DSL modem with RJ45 (Ethernet) connection 600MB of free hard-drive space for installation At least one computer with an installed network interface adapter... -
Page 39: Using Your Router
USING YOUR ROUTER Enabling Auto Update on Your Belkin Router The Router has the capability to automatically check for a newer version of firmware and alert you when it’s available. You can choose to download the new version or ignore it. Auto Update is disabled by default. - Page 40 USING YOUR ROUTER 4. Toward the lower-half side of the screen you will find “Auto Update Firmware Enabling.” 5. Select “Enable” by clicking the radio button and then click “Save” at the bottom of the screen.
-
Page 41: Updating The Router's Firmware Via The Web Interface
Internet as this interface is built into the Router itself. Setup steps: 1. Locate and download the firmware file from the Belkin support site. (Type your part number into the search box in the top right corner and look for “Firmware” in the title.) 2. - Page 42 USING YOUR ROUTER 6. Click on “Firmware Update” toward the bottom. 7. Click the “Choose File” button toward the middle of the screen to search for the file you saved previously. Note: The firmware version in the image above is depicted as an example.
- Page 43 USING YOUR ROUTER 8. Select the firmware file by left-clicking on it and then click 9. Click the “Update” button. the “Open” button in the lower-right corner of the window. This will take you back into the Router’s interface. 10. A prompt asking, “Are you sure you want to continue with upgrading?”...
-
Page 44: Resetting The Router
USING YOUR ROUTER Resetting the Router Restoring Your Router to Factory Defaults Press and hold the “Reset” button for at least 5 seconds, and then release it. The lights on the Router will momentarily Reset Button – Red flash. The “Router” light will begin to blink. When the “Router” The “Reset”... -
Page 45: Restoring The Router To Default Settings Using The Web Interface
USING YOUR ROUTER Restoring the Router to Default Settings Using the Web Interface Symptoms You need to restore the factory defaults using the web interface. This may be because the Router is not performing as expected or you wish to remove all previously configured settings. Setup steps 1. - Page 46 USING YOUR ROUTER 4. Click on the “Restore Defaults” button. 5. A warning box will open that says, “Warning: All your settings will be lost. Are you sure you want to do this?” Click “OK”. 6. The Router will begin the restoring process. Once the restore is complete, the Router will reboot.
-
Page 47: Troubleshooting, Support, And Warranty
TroubleshooTing, supporT, and WarranTy TroubleshooTing, supporT, and WarranTy i can’t connect to the internet wirelessly. If the light on the front of the Router is solid blue, then your Router is connected to the Internet. You may not be connected to the Router’s wireless network. - Page 48 TroubleshooTing, supporT, and WarranTy i can’t connect to the internet wirelessly and my My wireless network per formance is slow, inconsistent, network name is not listed in available networks. suffers from weak signal, or i’m having difficulty maintaining a Vpn connection. 1.
- Page 49 TroubleshooTing, supporT, and WarranTy limiting the wireless transmit rate—Limiting the wireless transmit i’ve installed this new router and some of my network clients rate can help improve range and connection stability. Most wireless (computers, game consoles, etc.) are now unable to connect. cards have the ability to limit the transmission rate.
- Page 50 TroubleshooTing, supporT, and WarranTy does the router support Wireless 5. Click “Apply Changes” to finish. Your wireless protected access (Wpa) security? connection is now encrypted. Each computer using your wireless network will need to use the new key. The Router ships with WPA/WPA2 security turned on. Windows XP and some older network hardware may note: If you are configuring the Router over a wireless require a software update to support WPA/WPA2.
- Page 51 TroubleshooTing, supporT, and WarranTy i am having difficulty setting up Wired equivalent 5. Click “Apply Changes” to finish. Your wireless privacy (Wep) security on my router. activity is now encrypted. Each computer using your wireless network will need to use the new key. 1.
- Page 52 3. The Router supports FAT16, FAT32-, or NTFS-formatted disks. Disks in other formats will not appear in the 3. The printer may not be set to auto-connect. Via the Belkin Router Finder (Mac OS X) or Windows Internet Explorer. Manager, open the USB Print and Storage Center. Check that the printer appears in the list of available devices.
- Page 53 If not, try unplugging and re-plugging the device. Please check that the USB connector is firmly plugged into the Router. 2. Via the Belkin Router Manager, open the USB Print and Storage Center. Check that the device appears in the list of available devices.
-
Page 54: Technical Support
NORWAY 81 50 0287 www.belkin.com/uk/networking/ POLAND 00800 - 441 17 37 www.belkin.com/uk/networking/ You can find technical-support information on our website, www.belkin.com, by navigating to the tech-support section. PORTUGAL 707 200 676 www.belkin.com/uk/networking/ RUSSIA 495 580 9541 www.belkin.com/networking/ If you want to contact technical support by phone,... -
Page 55: Belkin International, Inc., Limited 2-Year Product Warranty
What is not covered by this warranty? 2-year product Warranty All above warranties are null and void if the Belkin product is not provided to Belkin for inspection upon Belkin’s request at the sole expense of the purchaser, or if Belkin determines What this warranty covers. - Page 56 Belkin reserves the right to review the damaged Belkin product. 1. Contact Belkin Tech Support at the number listed All costs of shipping the Belkin product to Belkin for inspection on page 52, within 15 days of the Occurrence. Be shall be borne solely by the purchaser.
- Page 57 Some states do not allow limitations on how long an implied warranty lasts, so the above limitations may not apply to you. IN NO EVENT SHALL BELKIN BE LIABLE FOR INCIDENTAL, SPECIAL, DIRECT, INDIRECT, CONSEQUENTIAL OR MULTIPLE DAMAGES SUCH AS, BUT NOT LIMITED TO,...
-
Page 58: Regulatory And Safety Information
Class B digital device, pursuant to the requirements of EN 55022 and EN 55024. These limits are designed to provide reasonable We, Belkin International, Inc., of Schiphol-Rijk, Netherlands, protection against harmful interference in a residential installation. declare under our sole responsibility that the device, F9K1102,... -
Page 59: Europe - Eu Declaration Of Conformity
This device complies with the essential requirements of the R&TTE Directive 1999/5/EC, the EMC Directive 2004/108/EC, and the low-voltage Directive 2006/95/EC. A copy of the European Union CE marking “Declaration of Conformity” may be obtained at the website: www.belkin.com/doc For information on product disposal please refer to http://environmental.belkin.com... - Page 60 © 2012 Belkin International, Inc. All rights reserved. All trade names are registered trademarks of respective manufacturers listed. iPad, iPhone, iPod touch, Mac, Mac OS, and Safari are trademarks of Apple Inc., registered in the U.S. and other countries. Windows, Windows Vista, Internet Explorer, and DirectX are either registered trademarks or trademarks of Microsoft Corporation in the United States and/or other countries.
Need help?
Do you have a question about the N600 DB and is the answer not in the manual?
Questions and answers