Advertisement
Advertisement
Table of Contents

Summary of Contents for ILI DataLink GW1000
- Page 1 GW1000 User’s Guide Revision 1.04 – Mar 30, 2008 DataLink Technologies Gateways, Inc. Website: www.datalink-networks.com Tel : (604) 632-4278 / (866) 709-6390...
-
Page 2: Table Of Contents
Table of Contents 1.0 GW1000 General Operation & Applications..............3 2.0 Hardware Specifications ....................4 3.0 GW1000 Hardware Layout ....................5 4.0 Configuration........................6 4.1 Online Mode of Operation ......................6 4.3 Restore Factory Defaults ......................10 4.4 USB Driver Installation ......................12 4.5 Firmware Upgrade ........................ -
Page 3: Gw1000 General Operation & Applications
DC power supply when using laptops or PC’s in the field. The GW1000 has two communication ports. Channel A is designed to connect to your industrial Allen-Bradley DH+ network. Channel B is used to connect to your serial or USB device, the protocol depends on which model of the GW1000 you have ordered. -
Page 4: Hardware Specifications
• Configuration and Reset Pushbuttons to set up online configuration parameters and perform a full Hardware Reset as well as a Restore to Factory Defaults option. • Operating Parameters are stored in non-volatile flash memory. The GW1000 firmware can be upgraded via the Ethernet interface. -
Page 5: Gw1000 Hardware Layout
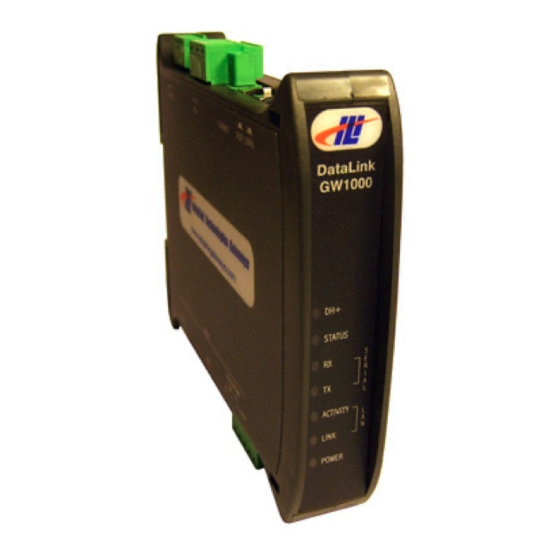
3.0 GW1000 Hardware Layout This Section contains information on the physical position and purpose of the components of the GW1000. Top side connectors • 3-pin power – 3.81mm pitch removable screw terminal plug • 3-pin A-B DH+ – 5.08mm pitch removable screw terminal plug •... -
Page 6: Configuration
Online mode. 4.2 Configuring the GW1000 Connect the GW1000 ethernet port to a switch or hub on the same network as your PC using a CAT5 network patch cord. Power on the GW1000 and wait 30 seconds for the bootup sequence to complete. Note the LAN LINK indicator LED should be on. From Windows, open a DOS command prompt window by clicking: START →... - Page 7 The following is the main menu: Hello Netsilicon DataLink GW1000-DHP1:DF1 to DH+ Interface Main Menu. Build : 0803.1.11 1.) Modify IP Parameters 2.) Modify Password 3.) View/Modify Online Parameters 4.) Online Diagnostic Statistics 5.) Save and Reboot 6.) Quit without save Enter Selection: To access a menu item, press the corresponding number followed by ENTER↵.
- Page 8 Note: The new parameters will be written to memory upon returning to the main menu by pressing 4 ENTER↵ ↵ ↵ ↵ . 2) Modify Password The login password can be modified with main menu option 2. Enter Selection: 2 Enter old password: ****** Enter new password: ****** Renter new password: ******...
- Page 9 Enter new DH+ Node address (Octal): To edit the DH+ baud rate, press “2” ENTER↵ and select a value and press ENTER↵.. Enter Selection: 2 DH+ Speed: [57.6 KBaud] 1.) 57.6K Baud 2.) 115.2K Baud 3.) 230.4K Baud 4.) Autobaud Detection 5.) or <CR>...
-
Page 10: Restore Factory Defaults
Enter Selection: 4.3 Restore Factory Defaults To restore factory defaults, connect the GW1000 to a PC using either a USB or RS232 connection. If using USB, first install USB drivers as explained in “USB Driver Installation”. Using a terminal program such as “Hyperterminal” included with Microsoft Windows, configure a connection to the RS232 port on the PC (typically COM1 or COM2) or the virtual COM port assigned by the USB driver. - Page 11 IP address of default gateway to other networks is 192.168.1.1 HARDWARE PARAMETERS: GW1000's serial number is A00800333 GW1000's Ethernet MAC Address is 00:50:C2:89:F0:29 After board is reset, start-up code will wait 5 seconds Default duplex setting for Ethernet connection: default...
-
Page 12: Usb Driver Installation
The USB driver is provided by Future Technology Devices International Ltd. Please see the Windows_XP_Installation_Guide.pdf in the Documentation folder on the CD included with the GW1000. The USB driver version on the CD is “CDM 2.02.04 WHQL Certified.” See section “2.1 Installing CDM drivers” on page 4. For reference, the document is also available here…... - Page 13 In the browser address bar, type 192.168.1.111 and press ENTER↵. (note: if you have changed the default IP address of the GW1000, enter the new address in the address bar. If you do not know the IP address programmed into the GW1000, first restore factory defaults.) In the “User Name”...
- Page 14 In this case, wait an extra minute to make sure the upload has taken place, repower the GW1000, and login as explained above. Examine the firmware release number in the lower right of the screen to check the version has been updated.
- Page 15 To finalize firmware update, you must cycle power on the GW1000. DataLink Technologies Gateways, Inc. Website: www.datalink-networks.com Tel : (604) 632-4278 / (866) 709-6390...
-
Page 16: Switch And Led Indicator Functions
5.1 Switch Functions The Reset pushbutton will perform a complete hardware reset of the GW1000. It is identical to a complete power cycle and will cause the GW1000 to go through its LED start-up sequence. The Configure pushbutton takes the GW1000 out of On-Line operation mode and allows the user to restore factory default settings. - Page 17 Status Flashes RED for 0.5 seconds if a NAK is received or transmitted in DF1 protocol or if all serial communication buffers are full. Flashes GREEN for 0.5 seconds if Good DF1 packets are being sent. If Characters are being received or transmitted rapidly, the LED might appear on SOLID.
-
Page 18: Gw1000 Wiring Diagrams
6.1 Online Cable GW1000-CHA DH+ GW1000-CHA DH+ Other DH+ Nodes Note: Clear & Blue might have to be swapped depending on existing DH+ wiring 6.2 Configuration Cable/Online Cable GW1000-CHB RS-232 – No Handshaking GW1000 – CHB PC/OEM Equipment DataLink Technologies Gateways, Inc. - Page 19 6.3 Online Cable GW1000-CHB RS-232 – With RTS/CTS Handshaking GW1000-CHB PC/OEM Equipment DataLink Technologies Gateways, Inc. Website: www.datalink-networks.com Tel : (604) 632-4278 / (866) 709-6390...
Need help?
Do you have a question about the GW1000 and is the answer not in the manual?
Questions and answers