Advertisement
Quick Links
Advertisement

Subscribe to Our Youtube Channel
Related Manuals for i-Pix BB4

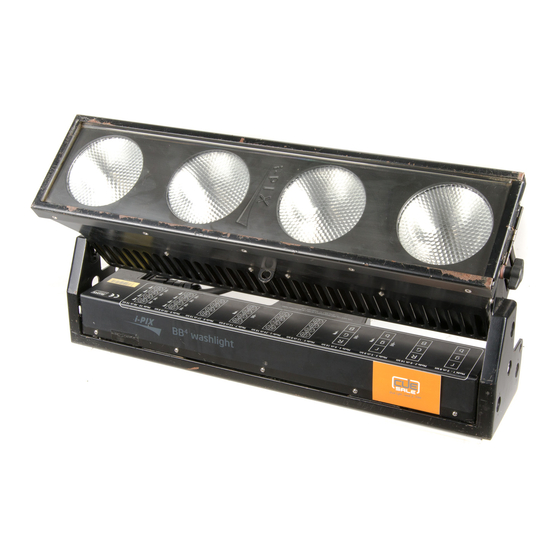
Summary of Contents for i-Pix BB4
-
Page 1: User Manual
User Manual i-PIX BB washlight... - Page 2 INTRO, RIGGING, SET UP & MODES INTRO, RIGGING, SET UP & MODES SAFETY FIRST page 3 SAFETY FIRST page 3 THE BB7 page 5 THE BB4 BB2x2 page 5 RIGGING page 6 RIGGING page 6 SET UP page 7...
-
Page 3: Safety First
If you have questions about how to operate the fixture safely, please contact I-Pix. Warning! Class 2M LED product. Do not look into the beam from a distance of less than 40 cm (16 inches). - Page 4 Provide a minimum clearance of 0.1 m (4 in.) around fans and air vents. Do not modify the fixture Apart from I-PIX accessories do not stick filters, masks or other materials directly onto the light. PROTECTION FROM INJURY Do not hang fixtures from each other. Use two OMEGA clamps per fixture or I-PIX SINGLE or DOUBLE YOLKS when suspending.
- Page 5 It is the homogenized source of the three saturate colours that makes our colour mixing so good. The performance of these light engines to i-pix's exacting colour specifications gives a tighter tolerance and improved colour performance, which makes tungsten lighting performance from the BB 4 possible. Daylight temperatures can also be found with ease and finally a fixture that does not need a nudge from amber to compensate.
- Page 6 Rigging a BB4 horizontally To rig a BB4 horizontally use the OMEGA brackets supplied with the lamp. These would have your clamp of choice bolted on to them. The OMEGA brackets can be attached to each end & the middle of the lamp using the camlocs.
- Page 7 Rigging a BB4 vertically To rig a BB4 vertically use the SINGLE or DOUBLE YOLK hanging brackets. The brackets can be supplied as accessories for the lamp. You would obviously have your clamp of choice bolted on to them. The YOLK brackets can be attached to the top, middle or the lamp using the camlocs.
- Page 8 One attached to the lamp through the safety point shown in fig 1 the other attached to the LAMP yolk through the safety point shown in fig 2. NEVER through or to the RIGGING yoke. fig 1 fig 2 BB4 USERS MANUAL - PAGE 8...
- Page 9 SET UP 1. Select appropriate dimmer curve The BB4 offers a choice of two dimmer curves. 1 LINEAR - the output increases directly with dmx input. 2 ENHANCED - the first 10% of the output is controlled over the first 50% of the DMX input.
- Page 10 3 Select appropriate operating mode The BB4 will gives you a choice of ten operating modes. These modes will enable you to set up the lamp in the most appropriate way for the many different jobs the lamp will be used for. The nuts and bolts of the modes are described in detail in pages 12 to 15.
- Page 11 MORE will change to LOCK. PRESS PRESS To unlock the interface depress the LOCK and ADDR buttons 1NORM4 ADDR 002 simultaneously and the LOCK will change to MORE. MODE 9 20CH LOCK PRESS BB4 USERS MANUAL - PAGE 11...
- Page 12 THE OPERATING MODES MODE 4 - 9 channels 16 bit The BB4 has 10 different operating modes to suit different uses, programming styles and dmx configurations. Ideal for fast programming or limited dmx line space with overall dimming & strobe control...
- Page 13 - blue cell 2 ch9 - red cell 3 ch10 - green cell 3 ch11 - blue cell 3 ch12 - red cell 4 ch13 - green cell 4 ch14 - blue cell 4 BB4 USERS MANUAL - PAGE 13...
- Page 14 - red low byte cell 4 ch33 - green high byte cell 4 ch34 - green low byte cell 4 ch35 - blue high byte cell 4 ch36 - blue low byte cell 4 BB4 USERS MANUAL - PAGE 14...
- Page 15 MODES A GRAPHICAL OVERVIEW MASTER STROBE INTENSITY CHANNEL Mode 5 Mode 1 Mode 2 Mode 3 Mode 4 12 ch 8 bit 3 ch 8 bit 6 ch 16 bit 5 ch 8 bit 9 ch 16 bit Mode 8 Mode 6 Mode 7 Mode 9...
- Page 16 Stand alone functions The BB4 is able to run in a stand alone mode without any need of data from a lighting desk. The light is capable of outputting up to 20 programmable memories and 1 chase that steps through these memories.
- Page 17 DOWN 0% - no strobe. In the same way if you wish to alter this value use the UP & DOWN buttons to give you the desired % value. BB4 USERS MANUAL - PAGE 17...
- Page 18 In the same way if you wish to alter this value use the UP, DOWN buttons to give you the desired %. If you require 100% press the DOWN button. PRESS When happy with the BLUE value press the button above BLUE 000% BLUE once. DOWN BB4 USERS MANUAL - PAGE 18...
- Page 19 If you are happy with you memory you should then MEM 04 assign it a number using the UP, DOWN buttons. DOWN STORE MEM 04 9 When happy with your memory number press STORE. DOWN STORE PRESS BB4 USERS MANUAL - PAGE 19...
- Page 20 THE LAMP POWER YOU WILL NEED TO PROGRAMME IT AS A TWO STEP CHASE WITH BOTH MEMORIES HAVING THE SAME VALUE” MEM 02 To return to the main menu press the DMX MODE button DOWN DMX MODE PRESS BB4 USERS MANUAL - PAGE 20...
- Page 21 003s Select the appropriate time (in seconds) using the UP, DOWN buttons. PRESS 5 Once you are happy with the XFADE TIME press the button above UP XFADE TIME DOWN 003s XFADE TIME once. BB4 USERS MANUAL - PAGE 21...
- Page 22 If you leave a chase running when the light is powered down the chase will resume as soon as the light is powered back up again. ! If the chase does not run try rerecording the first step again BB4 USERS MANUAL - PAGE 22...
- Page 23 Stand alone functions BB4 cell orientation The BB7 is able to run in a stand alone mode without any need of data from a lighting desk. The light is capable of outputting up to 20 programmable memories and 1 chase that steps through these memories.
- Page 24 Note; units comes complete with 16 amp cee form plug and 5 pin xlr male. A 1 metre combined power cable link is also supplied. Control RGB additive colour mixing DMX channels 3 channels minimum 36 channels maximum User interface weatherproof backlit lcd display with four membrane switches BB4 USERS MANUAL - PAGE 23...
- Page 25 USA / Canada ETL pending Lead and mercury free return to manufacturer for recycling IP Protection Patents filed in USA Manufactured in the United Kingdom by We reserve the right to improve this fixtures design. BB4 USERS MANUAL - PAGE 24...
- Page 26 BB4 USERS MANUAL - PAGE 25...
-
Page 27: Trouble Shooting
Please seek professional assistance if there is any doubt as to the efficacy of a remedy or of the exact nature of any encountered problem. I-pix provides the information contained herein only as a guide. No response from the light... - Page 28 Are you fitting right rating/type of fuse into unit? • Contact I-pix for more specific help with your problem, there may be an internal fault in the unit. • If you have the technical knowledge/skills you could look inside the unit and check the internal wiring for a lose connections/shorts and also the power supply is working with a 15v output when there is no load connected to it.
-
Page 29: Quick Reset
PRESS 4INVRT1 ADDR 001 Then the light will return to MODE 10 ADDR 001 MODE10 36CH MORE This is a fast way of readdressing a light, that will save you a few button presses BB4 USERS MANUAL - PAGE 28... - Page 30 PURPOSE - I-PIX Jan 01, 2009 WARRANTY STATEMENT I-Pix (seller) extends warranty on all the L.E.Ds in the BB4 produced by the Seller for one (1) year from original date of shipment, that the goods sold hereunder are new and free from substantive defects in workmanship and materials.
- Page 31 SERVICE CONTACT DETAILS Broadstone Mill Broadstone Road Houldsworth Village Cheshire SK5 7DL [Located 4 miles from Manchester airport and the city centre] Tel: 44 (0)161 443 4140 E-mail: service@i-pix.com www.i-pix.com BB4 USERS MANUAL - PAGE 30...
Need help?
Do you have a question about the BB4 and is the answer not in the manual?
Questions and answers