Advertisement
Quick Links
For Your Safety
These warnings are provided in the interest of safety. You
installing or using the appliance.
It is most important that this instruction book should be retained with the appliance for future
reference. Should the appliance be sold or transferred, always ensure that the book is left with
the appliance in order that the new owner can get to know the functions of the appliance and
the relevant warnings.
During Operation
•
This appliance has been designed to be operated by
adults and children under supervision. Young children
be allowed to tamper with the controls or
MUST NOT
play near or with the oven.
•
This appliance
has been designed for cooking
edible foodstuff and to be used for domestic non-
professional purposes only. It must not be used for
any other purpose.
•
It is dangerous to alter the specification in any way.
•
For hygiene and safety reasons, this appliance should
be kept clean at all times. A build-up of fats or other
foodstuff could result in a fire.
•
Accessible parts of this appliance may become hot
when it is in use. Children should be
it has cooled.
•
Under no circumstances should you attempt to repair
the appliance yourself. Repairs carried out by
unexperienced persons may cause injury or serious
malfunctioning. Refer to your local Zanussi Service
Centre. Always insist on genuine Zanussi spare
parts.
•
Ensure that all control knobs are in the OFF position
when not in use.
•
Should you connect any electrical tool to a plug near
this cooking appliance, ensure that electric cables
are not in contact with it and keep them far enough
from the heated parts of this appliance.
•
If the appliance is out of order, disconnect it from the
electric supply.
MANUFACTURER:
ELECTROLUX ZANUSSI ELETTRODOMESTICI S.p.A.
Viale Bologna 298 - 47100 FORLI' (Italy)
2
About Installation, Cleaning
and Manteinance
•
•
•
•
until
•
KEPT AWAY
•
•
•
-
-
-
-
read them carefully before
MUST
It is mandatory that all operations required for the
installation are carried out by a qualified or competent
person, in accordance with existing rules and
regulations.
Disconnect the appliance from the electrical supply,
before carrying out any cleaning or manteinance
work.
Ensure a good ventilation around the appliance. A
poor air supply could cause lack of oxygen.
Ensure that the gas supply complies with the gas
type stated on the identification label, placed near
the gas supply pipe.
Using a gas cooking appliance will produce heat
and moisture in the room which it has been
installed in. Ensure a continuous air supply,
keeping the air vents in good conditions or
installing a cooker hood with discharge tube.
In case of intensive or long time use of the
appliance, make the ventilation more efficient,
by opening a window or increasing the electric
exhaust fan power.
Once you removed all packaging from the appliance,
ensure that it is not damaged and the electric cable
is in perfect conditions. Otherwise, contact your
dealer before proceeding with the installation.
The manufacturer disclaims any responsability
should all the safety measures not be carried
out.
This appliance complies with the following
E.E.C. Directives:
73/23 - 90/683 (Low Voltage Directive);
89/336 (Electromagnetical Compatibility Directive);
90/396 (Gas Appliances)
93/68 (General Directives)
and subsequent modifications.
Advertisement

Related Manuals for Zanussi Electrolux Gas hobs

Summary of Contents for Zanussi Electrolux Gas hobs
-
Page 1: For Your Safety
For Your Safety These warnings are provided in the interest of safety. You read them carefully before MUST installing or using the appliance. It is most important that this instruction book should be retained with the appliance for future reference. Should the appliance be sold or transferred, always ensure that the book is left with the appliance in order that the new owner can get to know the functions of the appliance and the relevant warnings. -
Page 2: Table Of Contents
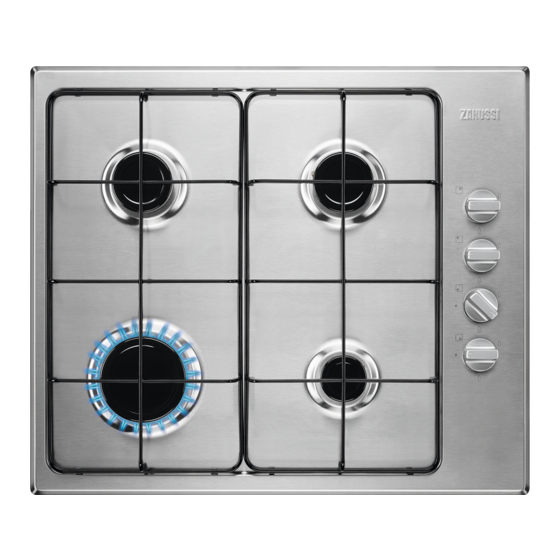
Contents 1. Instruction for the User ..... Page 5. Instruction for the Installer ..Page 6. Electrical Connection ....Page 2. Cleaning and Maintenance ..Page 7. Adaptation to different 3. Service - Spare parts ....Page. types of gas........ Page 8. - Page 3 HOTPLATES POTTERY The hotplates control knob can be adjusted on six Remember that a wide-bottomed pan allows a faster different positions, according to your cooking needs, cooking than a narrow one. from maximun heat (position 6) to minimum heat Always use pots which properly fit what you have to (position 1), as shown in Fig.
-
Page 4: Cleaning And Maintenance
2. Cleaning and Maintenance • Disconnect the appliance from the electrical PERIODIC MAINTENANCE supply, before carrying out any cleaning or Periodically ask your local Service Centre to check the manteinance work. conditions of the gas supply pipe and the pressure adjuster, if fitted. -
Page 5: Technical Data
4. Technical Data Gas Burners Rating Rapid (Double Crown) 3,5 kW Electric Supply 230 V 50 Hz Auxiliary (small) 1 kW HOB RECESS Semirapid (medium) 2 kW DIMENSIONS Category II 2H3+ Length 560 mm.(60 cm hob) - 830 mm.(90 cm hob) Setting L.P.G. -
Page 6: Electrical Connection
6. Electrical Connection The appliance is designed to be connected to 230 V ~ 50 Hz electricity supply. The connection must be carried out in compliance with the laws and regulations in force. Before the appliance is connected: 1) check that the main fuse and the domestic installation can support the load (see the rating label);... -
Page 7: Adaptation To Different Types Of Gas
7. Adaptation to different types of gas INJECTORS REPLACEMENT • Remove the pan supports. • Remove the burner's caps and crowns. • With a socket spanner 7 unscrew and remove the injectors (Fig. 6), and replace them with the ones required for the type of gas in use (see table 2). -
Page 8: Building In
8. Building In A = Auxiliary burner SR = Semirapid burner R = Rapid Burner (Double crown) These hobs can be inserted in a built-in kitchen unit whose depth is between 550 and 600 mm. The hobs dimensions are shown in Figures 8 to 11. FO 0941 FO 0940 Fig. - Page 9 INSTALLATION AND ASSEMBLY These hobs can be installed in a kitchen unit with an opening for insertion whose dimensions are shown in Fig. 12 and 13. The edge of the cut out must have a minimum distance from the rear wall of 55 mm. If there are side walls, or sides of the furniture unit near the hob, the cut out edges must have a minimum distance of 100 mm.
- Page 10 POSSIBILITIES FOR Fig. 16 Fig. 15 INSERTION Kitchen unit with door Proper arrangements must be taken in designing the forniture unit, in order to avoid any contact with the bottom of the hob which can be heated when it is operated. The recommended solution is shown in Fig.