Advertisement
Table of Contents
- 1 Table of Contents
- 2 Important Safety Instructions
- 3 Product Components
- 4 Installing the Drivers
- 5 Setting up the Product for Windows
- 6 Setting up the Product for Windows
- 7 Setting up the Product for Macintosh
- 8 Using the Product
- 9 Troubleshooting
- 10 Specifications
- 11 Legal Notices
- Download this manual
Advertisement
Table of Contents

Related Manuals for Dynex DX-EF101


Summary of Contents for Dynex DX-EF101
- Page 1 USB External Floppy Disk Drive DX-EF101 USER GUIDE...
-
Page 2: Table Of Contents
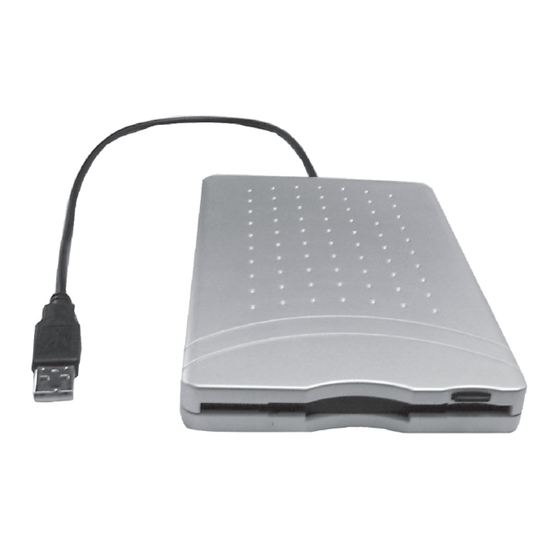
Floppy Disk Drive Introduction Thank you for the purchase of the DX-EF101, an external floppy disk drive (FDD) with a USB 2.0 interface. This User Guide provides a general description of the drive’ s features, setup instructions, and troubleshooting information Contents Important safety instructions ...............3... -
Page 3: Important Safety Instructions
Product components Package contents Make sure that the package contains the following items: • Dynex DX-EF101 USB Floppy Disk Drive • This User Guide • Driver CD If any components are missing, contact the supplier immediately. - Page 4 Product components General description The USB FDD is a portable and slim external floppy disk drive in a plastic housing for use with computers that have a USB connector. To use the USB FDD, a personal computer with a USB port is required, installed with an operating system that supports USB, and the USB FDD driver software.
-
Page 5: Setting Up The Product For Windows
Setting up the product for Windows Features The USB FDD features: • Plug-and-Play compatibility • Reads and writes high-density 3.5-inch floppy disks • No external AC power adapter required (self-powered via USB cable connection) • Supports iMac, iBook, G3, G4 and IBM PC compatible computers that have a working USB port •... -
Page 6: Setting Up The Product For Windows
Setting up the product for Windows Windows 2000 To install the USB FDD drivers in Windows 2000: 1 Connect the USB cable to the USB port on the computer. 2 Turn on your computer. After Windows 2000 automatically installs the drivers, a Found New Hardware message appears next to the clock on the Windows taskbar. - Page 7 Setting up the product for Windows 3 The USB FDD Driver Setup screen displays. Click Next to begin installation of the driver files. 4 Click Finish. 5 When you are prompted to restart your computer, click Yes. Your computer restarts and the driver installation is complete.
- Page 8 Setting up the product for Windows 6 After restarting the computer, connect the USB cable to the USB port on the computer. Windows 98 or Windows 98 SE automatically detects the USB FDD and adds the drive to the computer drive configuration. Note: Unlike a general disk drive, the USB FDD is not always assigned the “Drive A”...
-
Page 9: Setting Up The Product For Macintosh
Setting up the product for Macintosh Setting up the product for Macintosh Macintosh system requirements To use the USB FDD correctly, make sure that your system can at least support the following requirements: For Macintosh: • 32 MB RAM • 1 MB available hard drive space •... - Page 10 Setting up the product for Macintosh In Mac OS X 10.2.8, the message may read as shown. For instructions to initialize the floppy disk, see page 13. Mac OS X 9.x To install the USB FDD drivers: 1 Start the computer, then connect the USB cable to the USB port on the computer.
-
Page 11: Using The Product
Using the product Using the product Using the USB FDD with Windows USB Hub If using a USB Hub to power the USB FDD, be sure to use a self-powered hub that utilizes an AC power adapter. Do not use bus-powered hubs, such as USB hub dongles or the USB ports built into keyboards. - Page 12 Using the product Note: Unlike a general disk drive, the USB FDD is not always assigned the “Drive A” designation. The drive letter assigned depends on your computer’s configuration. Disconnecting the USB FDD using Windows XP: 1 Left-click the USB icon in the system tray. A message displays to safely remove the floppy drive.
- Page 13 Using the product Disconnecting the USB FDD using Windows 98 or Windows 98 SE: 1 Make sure the green LED indicator is not on and data is not being read or written to the USB FDD. 2 Unplug the USB FDD cable from the computer. Using the USB FDD with Macintosh USB Hub If using a USB Hub to power the USB FDD, be sure to use a self-powered hub that...
- Page 14 Using the product To initialize the disk for Mac OS X 10.1.5 and Mac OS X 10.2.8: 1 in Mac OS X 10.1.5, the message may read as shown. Click Initialize... to enter the Disk Utility program. 2 in Mac OS X 10.2.8, the message may read as shown. Click Launch Disk Utility...
- Page 15 Using the product 4 Click to confirm the disk (volume) should be erased. When the process completes, the floppy disk is ready for operation. Mac OS X 9.x If the floppy disk is not yet formatted for use, a message will appear indicating the disk will need to be initialized using the Disk Utility program prior to operation.
- Page 16 Using the product Ejecting the disk To remove a floppy disk: 1 Drag the floppy disk icon on to the trash can icon, which will change to an Eject icon. 2 Drop the floppy disk icon, and the floppy disk can be safely removed. Note: Only remove the floppy disk as outlined above.
-
Page 17: Troubleshooting
Troubleshooting Troubleshooting Problem Solution The drive cannot be recognized. • The drive hasn't been connected correctly. Make sure that the USB cable and power connector are tightly connected. • If you installed a USB 2.0 PCI card, make sure that the PCI card driver has been installed. •... -
Page 18: Specifications
Specifications Problem Solution Power Mac G4 freezes at startup if a There are reports of some problems with the USB FDD is connected Power Mac G4, iBook, and PowerBook running Mac OS 9.0.2 or Mac OS 9.0.3. See Apple Computer's Tech Info Library for more information. - Page 19 Specifications Physical Interface USB 1.1, A type, USB 2.0 Compatible USB connector Type A USB USB cable length 15.75 inches (400 mm) Voltage DC +5V ± 5%, 500mA (No AC power adapter required, self powered via USB) Dimensions 0.67 × 3.98 × 6.1 inches H ×...
-
Page 20: Legal Notices
Legal notices Legal notices FCC Compliance Statement This device complies with Part 15 of the FCC Rules. Operation is subject to the following two conditions: • This device may not cause harmful interference, and • This device must accept any interference received, including interference that may cause undesired operation. - Page 21 Product is determined to be defective by an authorized Dynex repair center or store personnel, Dynex will (at its sole option): (1) repair the Product with new or rebuilt parts; or (2) replace the Product at no charge with new or rebuilt comparable products or parts. Products and parts replaced under this warranty become the property of Dynex and are not returned to you.
- Page 22 • Damage due to incorrect operation or maintenance • Connection to an incorrect voltage supply • Attempted repair by anyone other than a facility authorized by Dynex to service the Product • Products sold as is or with all faults •...
- Page 23 Legal notices...
- Page 24 www.dynexproducts.com (800) 305-2204 Distributed by Best Buy Purchasing, LLC 7601 Penn Ave. South, Richfield, MN 55423 U.S.A. Distribué par Best Buy Purchasing, LLC ENGLISH 7601 Penn Ave. South, Richfield, MN 55423 É.-U. 08-1423 Distribuido por Best Buy Purchasing, LLC 7601 Penn Ave. South, Richfield, MN 55423 U.S.A.
Need help?
Do you have a question about the DX-EF101 and is the answer not in the manual?
Questions and answers