Table of Contents
Advertisement
Quick Links
Advertisement
Table of Contents

Related Manuals for Johnson J-STATION


Summary of Contents for Johnson J-STATION
- Page 1 J-STATION USER’S GUIDE...
-
Page 3: Declaration Of Conformity
8760 S. Sandy Parkway Sandy, Utah 84070, USA Tel: 801-566-8800 Fax: 801-566-7005 Effective March 31, 2000 European Contact: Your Local Johnson Amplification Sales and Service Office or Harman Music Group 8760 S. Sandy Parkway Sandy, Utah 84070, USA Tel. 801-568-7638... -
Page 4: Warranty
6.The consumer forfeits the benefits of this warranty if the product's main assembly is opened and tampered with by anyone other than a certified Johnson amplification technician or, if the product is used with AC voltages out - side of the range suggested by the manufacturer. -
Page 5: Table Of Contents
Making Connections................6 Set the Preset Level ................26 Mono/Stereo..................6 Store the Preset..................26 S/PDIF Digital Output ..............6 Applying Power ..................6 Section Five - Other Functions About the J-Station ................7 Utilities......................27 The Presets..................7 Assign Menu ..................27 Bypass Mode..................7 Output Mode..................28 Edit Mode ....................7 Dry Track ....................28... -
Page 6: Congratulations
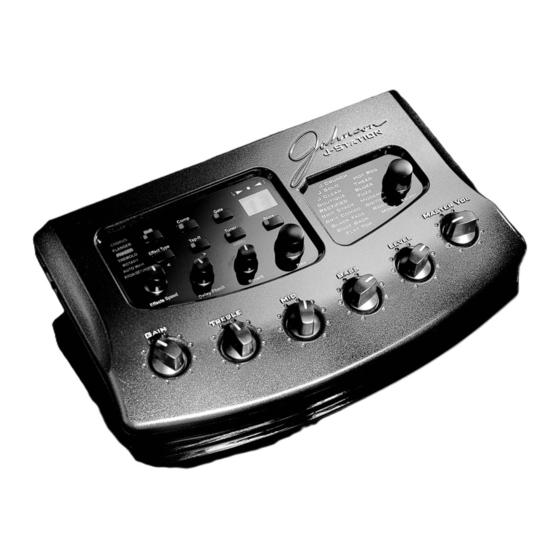
J-Station in the world.The J-Station includes 14 of the most popular guitar amp models, 3 bass amp models, 2 acoustic guitar models, and 12 different effects to choose from.The simple user interface provides intuitive controls and an obvious operating system.Although the... -
Page 7: Quick Start
Connect the plug of the power supply to the power jack on the J-Station. Connect the other end of the power supply to an AC outlet. Turn the power switch located on the left side of the J-Station to the on position.Turn your mixer’s power switch to the on position and adjust the volume(s) to their nominal... -
Page 8: Guided Tour
Guided Tour Front Panel 1. Shift - This button is used to access alternate functions for various editing functions. Pressing and holding this button for 3 seconds will access the Deep Level editing mode. See page 12 for more information on Deep Level editing. 2. - Page 9 8.Tuner Indicators - These LEDs provide a visual reference while the Tuner is active.The arrow on the left indicates the note is flat.The arrow on the right indicates the note is sharp, and the green LED in the middle lights when the note is in tune. 9.Numeric Display - The Display shows the currently active Preset number while in Performance mode, and Parameter values during certain editing functions.
-
Page 10: The Rear Panel
5. Footswitch Jack - Connect the J3 Footswitch to this jack for Bank Up, Bank Down, and Preset select. 6. S/PDIF Digital Output - This is the digital output from the J-Station.The signal at this output is in a stereo digital format, and is to be connected to a digital S/PDIF input such as those found on digital recording devices. -
Page 11: Getting Started
S/PDIF inputs on the receiving device in order to use this output.You may use the analog and digital outputs of the J-Station simultaneously. Be sure to use a 75 ohm or RCA video cable to connect from the Digital Output to a recording device. -
Page 12: About The J-Station
From the factory, the 30 User Presets are exact duplicates of the 30 Factory Presets.This allows you to make your own Presets without the worry of losing any of the sounds that the J-Station came with. When you first turn your J-Station on, it will default to the last preset that had been selected.When you select a Preset, the number of the Preset will be shown in the Display. -
Page 13: Tuner Mode
Tuner Mode The Tuner in the J-Station allows you to accurately tune your instrument prior to a recording session. Enter Tuner mode by pressing the Tuner button.The Tuner button will light, and the display will briefly show tu indicating that you are in Tuner mode. To begin tuning, play a note on your instrument (a harmonic at the 12th fret usually works best).The display window will show the note being played, and the Tuning LEDs... -
Page 14: Section Two - Editing Functions
Creating your own signature sound with the J-Station is easy and intuitive.The J-Station lets you create your own Presets, or fine tune existing Presets to suit your needs. There are two levels of editing in the J-Station. The Top Level editing allows simple adjustments such as level, and speed.The Deep Level editing allows all parameters of every effect to be adjusted. -
Page 15: Amp Controls
Amp Controls The amp control section consists of a Gain,Treble, Mid, Bass, and Level knob.These knobs adjust the selected amp models Drive, EQ, and Volume. Each amp model has a default knob setting when it is selected. When you first select an amp model, the knobs will not necessarily reflect the current values associated with the sound you are hearing. -
Page 16: Delay Editing
Delay Editing The Delay effect includes adjustments for the Delay Level, Delay Time, and Regeneration Parameters. Rotating the Delay knob will adjust the Level of the delay in the currently active Preset. Pressing the Shift button and rotating the Delay knob will adjust the Regeneration (number of repeats) of the Delay effect. The Tap-It button is used to adjust the Delay Time (the length of time between repeats). -
Page 17: Deep Level Editing
Deep Level Editing Select a Preset which will be your starting point by rotating the Data knob. Once you have selected a Preset, every aspect of the sound can be edited in the Deep Level edit mode.To access the Deep Level editing, press and hold the Shift button for 3 seconds.The Shift button will begin to blink and the word edit will briefly scroll across the display.Then the Display will show a number between 0 and 39 which corresponds to the 40 different Parameters available for adjustment. - Page 18 Cabinet Type 00 = No Cabinet 01 = Brit 4x12 02= Johnson 4x12 03 = Fane 4x12 04 = Johnson 2x12 05 = American 2x12 06 = Jennings Blue 2x12 07 = Tweed 1x12 08 = Blonde 2x12 09 = Bass 4x10 w/ T we e t e r...
- Page 19 Parameter Parameter Number Parameter Values Effects On/Bypass 00 = Bypass 01 = On Type 00 = Chorus 01 = Flanger 02 = Phaser 03 = Tremolo 04 = Rotary Speaker 05 = Envelope Filter 06 = Pitch/Detune Level Effect Dependent Speed/Pitch/Type Effect Dependent Depth/Detune...
-
Page 20: Storing/Copying A Preset
Storing/Copying a Preset After a Preset has been edited to your liking, the changes must be stored to a User Preset if the J-Station is to remember your modification. Selecting a new Preset, or turning the J-Station off before performing the Store function will cause the modifications that you had made to be lost.The Store button is used to save... -
Page 21: Section Three - Effects
The J-Station has the Effects connected in the most logical, and best sounding order. However, you do have the choice of running certain effects either before or after the Amp Modeling.The following chart shows the order of the... -
Page 22: Wah Wah
Gain - This is the output volume from the Compressor.This parameter should be used to balance the level of the Compressor in order to achieve unity gain. It is possible to clip other effects in the J-Station by setting the Compressor Gain too high.The compressor Gain is accessible in Top Level editing by pressing the Shift button and then pressing and holding the Compressor button, or by selecting Parameter number 3 in Deep Level editing. -
Page 23: Amp Modeling
Type - This Parameter selects the Amp Model, or Acoustic Model you wish to emulate.The Select knob on the right side of the J-Station is used to choose the Amp Model, or it can be accessed in Deep Level editing by selecting Parameter number 9.The choices and values include:... -
Page 24: Cabinet Emulator
Cabinet Emulator The J-Station goes above and beyond any other direct recording device on the market by including the most advanced and flexible Speaker Cabinet Modeling ever designed.There are 12 different types of simulated Speaker Cabinets Models which can be applied to the selected Amp Model.When a particular Amp Model is selected, the J-Station automatically applies a specific type of Cabinet. -
Page 25: Effects
Effects The Effects module in the J-Station is a multi-function module, allowing you to select effects such as; Chorus, Flanger, Phaser,Tremolo, Rotary Speaker, AutoWah (Envelope Filter), Pitch Shift and Detune effects. Only one of these effects can be used at a time.The Effect Type button is used to select the currently active Effect in Top Level editing.The selected Effect type will be indicated by the Effect name lighting in the Effect Matrix. -
Page 26: Phaser
As the phasing changes, differ- ent frequencies get canceled resulting in a warm sort of twisting sound.The J-Station breathes new life into this classic effect by adding regeneration. -
Page 27: Autowah
Parameter number 19.A value of 00 relates to bypass and 01 is on. Type - The J-Station Delay employs four types of Delay circuits.This Parameter is used to select which of these four Delays will be used. Delay Type is only available in the Deep Level edit mode and is accessed by selecting Parameter number 27.The values and Delay types are as follows:... -
Page 28: Reverb
Delay Time (course) - The Delay Time course adjusts the Delay Time in increments of 100 milliseconds. It is only available in Deep Level editing by selecting Parameter number 29.Values range from 00 to 30. Delay Time (fine) - The Delay Time fine adjusts the Delay Time in increments of 1 millisecond. It is only available in Deep Level editing by selecting Parameter number 30.Values range from 01 to 99. -
Page 29: Section Four - Tutorial
Noise Gate with a low Threshold to open quickly, a classic Phaser sound,no Delay, and a little bit of Reverb.The following steps will guide you through the procedure for creating just such a Preset in the J-Station using the Top Level editing mode. -
Page 30: Adjust The Noise Gate
Adjust the Noise Gate Now we can move on to our Noise Gate Parameters. Press and hold the Gate button.The Display will show the cur- rent value for the Gate Threshold.While continuing to hold the Gate button, rotate the Data knob to select 20 as the Threshold value.This should open the Gate easily with most guitars. -
Page 31: Turn The Delay Off
Turn the Delay Off In our example Preset we wanted no Delay to be heard. Rotate the Delay knob fully counterclockwise. For all practi- cal purposes, the Delay is now bypassed. Adjust the Reverb In our example Preset we also wanted a little bit of Reverb to provide some ambience. Rotate the Reverb knob to the 9 o’clock position which will provide just a hint of ambience. -
Page 32: Section Five - Other Functions
Assign Menu The Assign Menu allows you to select which J-Station Parameter you would like to assign to the Expression Pedal on the J8 Foot Controller. In addition to selecting a Parameter to be controlled, you can also set mini- mum and maximum values the Parameter will reach as you rock the Expression Pedal back and forth.The... -
Page 33: Output Mode
Output Mode The output mode is used to select whether the J-Station will produce a stereo image or a mono signal at the left and right outputs. Setting the Output mode to On will produce a Stereo image. Setting it to Off will produce a mono signal.The procedure for selecting the Output Mode is as follows:... -
Page 34: The Rear Panel
The MIDI Loop Back function selects whether the MIDI Out/Thru jack will merge incoming MIDI data with- out going MIDI data or send only MIDI data generated from with in the J-Station. If the Loop Back is set to on, all incoming MIDI data will be merged with outgoing MIDI data. If the Loop back is set to off, only inter- nally generated MIDI data will be sent.The procedure for selecting the MIDI Loop Back is as follows:... -
Page 35: Continuous Control
Continuous Control is a type of MIDI command capable of changing the value of a parameter on any MIDI device in real time. Every Parameter in the J-Station is assigned an individual CC number.These CC commands make up the backbone when using the Windows based Editor/Librarian software to control or program the J-Station. Sending value changes on these CC numbers will change the Parameter setting in real time. -
Page 36: Foot Controller Options
Out on the J-Station to your computer’s MIDI In.Then insert the CD ROM which came with your J-Station, into the CD ROM drive on your Windows PC. If the J-Station setup window does not appear on your moni- tor automatically, just select Run from your start menu, click on Run, and double click on the Setup.exe file in your CD ROM drive.The Editor/Librarian software is intuitive and includes help menus to answer any ques-... -
Page 37: Section Six - Appendix
Preset List 01. JCM900 w/Hall 51. Mike’s Tone 02. Classic Blackface 52. Octa Slam 03. Boutique Delay 53. Johnson Tremolo 11. Mr. Js Crunch 61. Bluesy Delay 12.Wide Acoustic 62. 78 Brit Stack 13. Rectifier March 63. Synth Guitar Swell 21. -
Page 38: Specifications
Specifications A/D Converter: 24 bit D/A Converter: 24 bit Sampling Frequency: 44.1 kHz DSP Section: Dual DSP architecture with true 24-Bit stereo processing @ 128 Million Instructions Per Second (MIPS) Connections: Guitar Input and Outputs: 1/4" TS Headphone: 1/4" Stereo TRS MIDI: In and Out/Thru Digital Output:... - Page 39 International Distribution 8760 S. Sandy Parkway Sandy, Utah 84070, USA Telephone 801-568-7642 FAX 801-568-7638 Johnson Amplification, and J-Station are trademarks of the Harman Music Group Incorporated Copyright 2000 the Harman Music Group Incorporated Printed in USA 3/00 Manufactured in the USA...
Need help?
Do you have a question about the J-STATION and is the answer not in the manual?
Questions and answers