Table of Contents
Advertisement
CONTENTS
1
2
3
3.1
3.2
3.3
3.4
3.5
3.6
3.7
3.8
4
4.1
4.2
4.3
4.4
4.5
4.6
4.7
4.8
4.9
4.10
4.11
4.12
4.13
4.14
4.15
4.16
4.17
4.18
Comp. Threshold
4.19
Comp. Attack & Release
4.20
Comp. Ratio
4.21
Comp. Gain Make-Up
4.22
Comp. Knee
4.23
Comp. Opto Mode
4.24
Comp. Hold Mode
4.25
Equaliser Section
4.26
LF & HF Bands
4.27
LM & HM Bands
4.28
4.29
4.30
4.31
4.32
4.33
4.34
4.35
4.36
4.37
4.38
4.39
Sampling Freq. Select
4.40
4.41
4.42
4.43
5
6
7
SPECIFICATIONS
Advertisement
Table of Contents

Subscribe to Our Youtube Channel
Related Manuals for TL Audio VP-1


Summary of Contents for TL Audio VP-1
-
Page 1: Table Of Contents
CONTENTS INTRODUCTION 4.25 Equaliser Section 4.26 LF & HF Bands 4.27 LM & HM Bands PRECAUTIONS 4.28 LM/HM Frequency 4.29 LM/HM Gain INSTALLATION 4.30 LM/HM Bandwidth AC Mains Supply 4.31 EQ Pre Audio Inputs 4.32 Stereo Link Operation Unbalanced Line Inputs 4.33 Ducking or Gating Instrument Inputs... -
Page 2: Introduction
- Variable Threshold Optical Limiter, - Optional digital output, selectable up to 24bit, 96Khz. The block diagram of the VP-1 is shown in fig.1. There are four input sources: microphone XLR, balanced line +4dBu XLR, unbalanced line -10dBu jack and front panel instrument jack socket. - Page 4 The VP-1 includes a four band equaliser, which utilises four triode valve stages. The EQ may be switched to pre or post the compressor. The LF and HF bands are shelving and feature switched frequencies, whilst the LM and HM bands are fully parametric peaking stages with variable frequency and bandwidth.
-
Page 5: Precautions
PRECAUTIONS The TL Audio VP-1 processor requires very little installation, but like all electrical equipment, care must be taken to ensure reliable, safe operation. The following points should always be observed: - All mains wiring should be installed and checked by a qualified... -
Page 7: Audio Inputs
Audio Inputs. The VP-1 has two female, 3 pin XLR connectors, for mic and line sources. Both are compatible with either balanced or unbalanced signals, when the mating connectors are appropriately wired: Balanced inputs: - Pin 1 = Ground (screen). -
Page 9: Insertion Points
Insertion Points. The insertion points are interfaced via a 3 pin, 0.25” switched jack socket on the rear of the unit. The pin connections are: - Sleeve = Ground, - Tip = Send, - Ring = Return. The insertion points are unbalanced, and operate at a nominal level of -2dBu . If used as an additional send only (e.g. -
Page 10: Operation
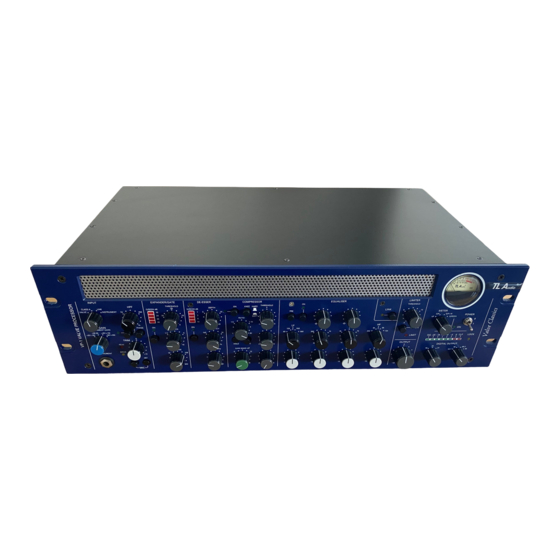
The VP-1 may be free standing, or mounted in a standard 19” rack where it will occupy 3U of space. OPERATION Input Select. The VP-1 is designed to accept mic, line and instrument signals, and the relevant source is selected via a four position selector switch. The four positions are: Valve - selects the microphone input as the signal source, and feeds the mic signal through an all-valve preamp circuit. -
Page 11: Pad
Activating the pad switch will cure this. Phantom Power. This switch applies 48V phantom power to the mic input, allowing the VP-1 to be used with condenser microphones. CAUTION: Operation of the phantom power switch, or plugging a microphone in with phantom power applied, may cause a click or thump in your loudspeakers. -
Page 12: Gate Threshold
When the signal level returns to a level above the threshold, the gain is rapidly restored to ensure that no transient edges are lost. The Expander/Gate is perfect for removing unwanted background noise during quiet periods of recording. A typical example would be removing the background noise, breathing etc that occurs between vocal phrases when miking a singer. -
Page 13: De-Esser Frequency
4.17 Compressor Section. The VP-1 compressor stage is a very effective tool in controlling signal dynamics, offering a range of sounds and very flexible control over compression parameters. Valve compression is routinely used to limit the dynamic range of a signal, helping it to sit correctly within a mix and lending fatness and warmth, particularly when recording onto a digital medium. - Page 14 the opposite direction, but our feeling is that as you turn the control ‘up’ it should have more effect! 4.19 Compressor Attack and Release. The attack time governs how quickly the compressor acts to ‘squash’ a signal that has exceeded the Threshold, and is variable from 0.5msec to 50msec. At 0.5msec attack, the compressor is fast enough to reduce the gain of a 1KHz signal in less than half a cycle, effectively preventing an overload of any following equipment which has limited headroom, such as a digital processor, tape machine or transmitter.
- Page 15 4.25 Equaliser Section. The VP-1 boasts a four band valve EQ stage with low and high frequency shelving and two fully parametric mid bands, giving an ideal combination of simplicity and flexibility. Before switching the EQ into circuit, it is advisable to set the cut/boost controls to their centre, or flat, position.
-
Page 16: Lm/Hm Frequency
HF shelving at 2.2kHz, 5kHz, 8kHz and 12kHz The EQ slopes have a second order 12dB/octave response, and the frequency values are -3dB points. An associated gain control on both bands provides up to 15dB of cut or boost on each selected frequency, controlling the full range of frequencies below the LF corner frequency and above the HF corner frequency. -
Page 17: Stereo Link Operation
If the compressor is switched out on the master unit, gain reduction will only occur on the slave unit. The threshold and ratio controls on the master VP-1 will determine the extent of the gain reduction in the slave unit. -
Page 18: Output Level
4.36 VU Meter. The VP-1 is equipped with an illuminated VU meter, which via the four way meter selector switch can be used to monitor input level, output level or compressor gain reduction. In output mode (“O/P”), the meter is calibrated for nominal level of +4dBu at the balanced output = 0VU. -
Page 19: Bit Rate Select
4.41 Lock Status. The Lock LED will illuminate when the VP-1 is locked to an external clock source connected via the rear panel Wordclock input, assuming that the rear panel switch is set to ‘External’ and the correct sample rate is selected (see 4.43). At all other times the VP-1 will be synced to its own internal clock. -
Page 20: User Tips / Faqs
A rear panel Wordclock Input is provided for connecting the VP-1 to an external master clock source. An associated switch on the rear panel selects between external synchronisation and internal clock. In external mode the front panel sample rate selection switch is still active and needs to be set to match the frequency of the incoming wordclock source. - Page 21 EQ section of the VP-1 can be used to help identify the troublesome frequencies - once found and noted, they can be set for reduction on the de- esser section. How should I use the Limiter? The limiter is designed to prevent overload in the equipment that the VP-1 is...
-
Page 22: Service
VP-1. Note that the ‘Limit’ LED is active even when the limiter is in bypass mode, thus acting as a useful output peak indicator.
Need help?
Do you have a question about the VP-1 and is the answer not in the manual?
Questions and answers