Table of Contents
Advertisement
Advertisement
Table of Contents

Related Manuals for VANTAS DPA-S50

Summary of Contents for VANTAS DPA-S50
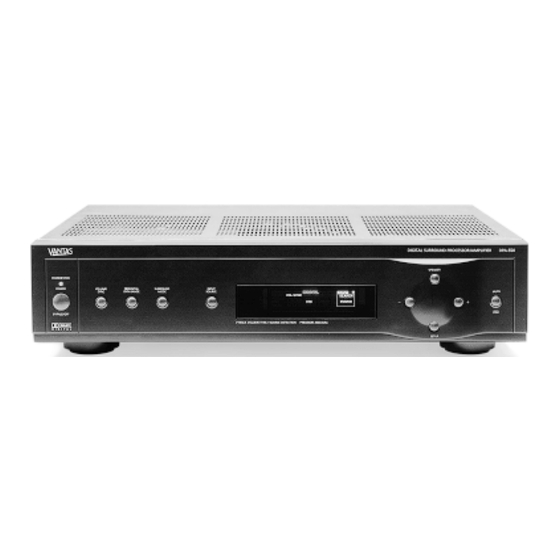
- Page 1 OWNER’S MANUAL DPA-S50 Digital Surround Processor / Amplifier...
-
Page 2: Safety Precautions
Class B digital device, pursuant to PRODUCT, NOT EXPRESSLY APPROVED IN THIS MANUAL OR BY part 15 of the FCC Rule. These limits are designed to provide VANTAS, COULD VOID THE USER’S AUTHORITY TO OPERATE THE reasonable protection against harmful interference in a residential PRODUCT. -
Page 3: Important Safety Instructions
SAFETY PRECAUTIONS IMPORTANT SAFETY INSTRUCTIONS 1. Read Owner’s Manual - To assure the finest performance, 14. Power-Cord Protection - Power-supply cords should be please read this manual carefully. All the safety and operating routed so that they are not likely to be walked on or pinched instructions should be read before the product is operated. - Page 4 FEATURES • 3 x 100W Center and Surround Channel Power Amplifiers • 5.1 Channel Dolby Digital (AC-3) Decoder • Pro Logic, MPEG, 2 and 4 Channel Stereo Processing in the Digital Domain • 3 Center Channel Modes (Wide/Normal/Phantom) • Dolby Digital Karaoke Playback •...
-
Page 5: Table Of Contents
TABLE OF CONTENTS Introduction Rear Panel Connections System Connections Front Panel Controls Speaker Placement Surround Modes Operating Your Stereo System with the DPA-S50 Basic Setup Advanced Setup Troubleshooting Servicing Specifications... -
Page 6: Introduction
DPA-S50 into a stand-alone decoder. When the DPA-S50 detects a source, it automatically turns on and switches to the active source. When there is no source, the DPA-S50 is bypassed allowing full operation of the existing stereo system. The user-friendly DPA-S50 becomes virtually invisible providing remote-free operation. -
Page 7: Rear Panel Connections
MAIN-AUDIO LINE OUT, a duplicate set of TAPE PLAY IN jacks are provided for reconnecting a cassette deck. Connect the tape play out jacks of the cassette deck to the TAPE PLAY IN jacks on the DPA-S50. The TAPE PLAY IN signals are passed through to the MAIN-AUDIO LINE OUT when the DPA-S50... - Page 8 REAR PANEL CONNECTIONS TAPE REC The TAPE REC jacks on the DPA-S50 are used to record sources connected to the DPA-S50 and your stereo receiver/preamp. Connect TAPE REC IN to your stereo receiver/preamp’s tape play out and connect TAPE REC OUT to a cassette deck’s tape record in. When recording sources connected to your stereo receiver/preamp the DPA-S50 must be shut off or in “BYPASS”.
-
Page 9: System Connections
SYSTEM CONNECTIONS As a precaution, before making any connections, make sure the stereo amp and the DPA-S50 are turned off (no power) to prevent damage to any amplifiers or loudspeakers. • Maintain correct polarity when connecting all wires and cables. Make certain that the positive (+) and negative (-) terminals on the DPA-S50 are connected to the respective positive (+) and negative (-) terminals on the stereo amp and loudspeakers. - Page 10 Connecting a DPA-S50 into a Stereo System The following diagram is the most common hook-up configuration for the DPA-S50. It converts a stereo system into a Dolby Digital system. The step-by-step instructions for this configuration are on the next page.
- Page 11 SYSTEM CONNECTIONS QUICK FACTS: Connect the DPA-S50’s MAIN (L, R)-AUDIO LINE OUT jacks to the tape play (L, R) input jacks on the Although the MAIN stereo receiver/preamp. (Cables are provided for your convenience.) (L,R)-AUDIO LINE OUT can be connected to any...
- Page 12 If you are using a self-powered speaker or separate amp for the center channel, you do not need to use the DPA-S50’s built-in amplifiers to drive it. However, it is imperative that the speaker isn’t connected to the DPA-S50’s center speaker terminal as described in the previous system configuration. It is important that only a line level connection is made to a self-powered speaker or it can be irreparably damaged.
- Page 13 Since the basic hook-up requires the use of the stereo receiver/preamp’s tape play in jacks, another set of jacks receiver/preamp the has been supplied on the DPA-S50 for connecting a cassette deck into the system. If your previous system DPA-S50 should be in “BYPASS”...
- Page 14 It requires six interconnect cables that directly connect the DPA-S50’s AUDIO LINE OUT connections to the corresponding audio line inputs on the receiver/integrated amp, as shown in the following diagram. 1. Connect the DPA-S50’s MAIN (L, R)-AUDIO LINE OUT jacks to the main left and right audio line in jacks on the receiver/integrated amp.
- Page 15 DIGITAL AUDIO SOURCE 1 SOURCE 2 SOURCE 3 Installing Analog Components Components in your system may also be connected to the DPA-S50’s AUDIO INPUT jacks, as shown in the following diagram. ANALOG AUDIO INPUT CONNECTIONS DIGITAL IN AUDIO INPUT DIGITAL IN...
-
Page 16: Front Panel Controls
POWER The POWER button turns the unit on and off. While in the “on” position, the DPA-S50 will always stay in a low power standby mode until it detects a signal at the inputs, when it then switches to an active mode. - Page 17 FRONT PANEL CONTROLS 2 DIGITAL DYN RANGE QUICK FACTS Pressing this button repeatedly scrolls through three separate Dolby Digital Dynamic Range Dolby Digital soundtracks that are not specified settings “MAX, STD or MIN” when listening to Dolby Digital sources. Dynamic range is the for dynamic range difference between the maximum level and the minimum level of sound.
- Page 18 “SEARCH”, allowing the DPA-S50 to automatically select the active input. When the DPA-S50 detects an analog and digital signal at the same time the search priority is digital over analog. Once a digital signal is locked on, the DPA-S50 will stop searching for other sources.
-
Page 19: Speaker Placement
Main Speakers surround delay on the DPA-S50 so that sound The left and right speaker should be equidistant from the TV. It may be necessary to tilt from these speakers them slightly inward toward the main listening area. -
Page 20: Surround Modes
DPA-S50 to ensure it is compatible with current and future digital formats. The DPA-S50 also employs a digital Pro Logic decoder. Pro Logic can be used to create a surround effect on 2-channel sources. Dolby Surround sources can be found on CDs, Laserdiscs, videotapes, many TV/Cable broadcasts, etc. -
Page 21: Operating Your Stereo System With The Dpa-S50
OPERATING YOUR STEREO SYSTEM WITH THE DPA-S50 When all the connections are made between your existing stereo system and the DPA-S50, you are ready to operate your new Dolby Digital surround sound system. Power up all the components in your stereo system, including the DPA-S50. -
Page 22: Basic Setup
There are five set-up procedures and you cycle through them by depressing the SETUP button (at the bottom of the diamond shaped configuration on the right side of the DPA-S50). The following five setup procedures are accessed with each push of the SETUP button: •... - Page 23 The corresponding speaker icon is displayed. This test tone pattern continues until amp so that the the speaker balancing procedure is completed. Listen to the tone as it cycles through a couple times to DPA-S50’s three amplifiers are perfectly determine which speaker(s) needs to be trimmed up or down.
-
Page 24: Advanced Setup
QUICK FACTS Trim levels are unaffected When the DPA-S50 is in the manual volume mode (see the section titled Front Panel Controls - Volume Sync) by this setting. the master volume setting on the stereo receiver/preamp defines the main left and right speaker’s maximum volume. - Page 25 Disable Amplifiers The DPA-S50 can be operated as a stand-alone decoder when used with a “5.1 Ready” receiver/integrated amp or external power amplifiers. If you wish to operate the DPA-S50 in this configuration, we recommend disabling the DPA-S50’s internal amplifiers.
-
Page 26: Troubleshooting
To restore all parameters to the factory default settings, reset the unit by holding down the mute button while turning on the DPA-S50. Turn the unit off and then back on and the factory settings are restored. -
Page 27: Servicing
If the Remedy(s) in the Troubleshooting guide fails to solve your problem, please call or write for technical assistance. When calling or writing about the DPA-S50, be sure to refer to its serial number (located on the rear panel) and the dealer from whom it was purchased. -
Page 28: Specifications
SPECIFICATIONS Rated Continuous Power Output: Center (20Hz - 20kHz 0.05% THD, 8 ) --------------------------------------------------100W Surround (20Hz - 20kHz 0.05% THD, 8 ) --------------------------------------------------100W 2 channels driven (0.05% THD, 8 ) ---------------------------------------------85W + 85W Dual transformer design with dedicated toroid for amplifiers with thermal protection Dynamic power per channel (4 /6 /8 ) ----------------------------------150W/120W/100W Frequency response --------------------------------------------------------------0 0.5dB 20Hz-20kHz... - Page 29 © 1999 by VANTAS...
- Page 30 3715 Doolittle Drive Redondo Beach, CA 90278 Phone: 310-297-5700 Fax: 310-297-5757 www.vantas.com...
Need help?
Do you have a question about the DPA-S50 and is the answer not in the manual?
Questions and answers