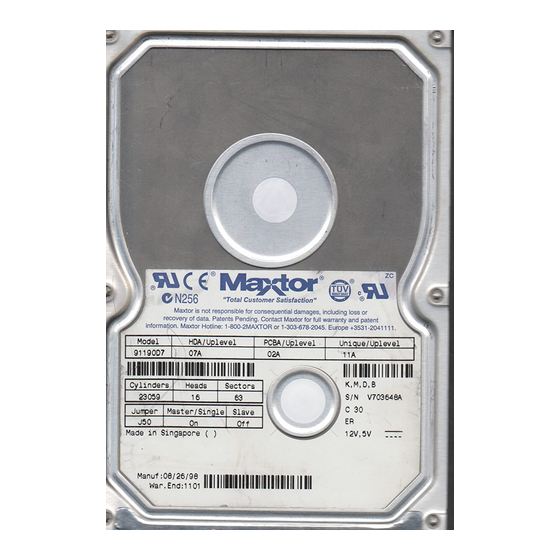
Maxtor 91360D8 Installation And Use Manual

Maxtor 91360D8 Installation And Use Manual

Diamondmax 3400

Advertisement

This document is a condensed version of the full Product Reference Manual.
This version only includes the Maxtor Information about the Product. Information
that can be found in the ANSI specification is not included in this document to
reduce its over all size. Also eliminated are the Table of Contents and Glossary.
This condensed version is created to allow faster downloading from Maxtor's
Internet home page and MaxFax services. This document contains 24 pages, the
full document contains 68 pages.
DiamondMax™ 3400
91360D8, 91190D7, 91020D6, 90845D5
90680D4, 90510D3, 90340D2
Part #1399/A
All material contained herein Copyright © 1998 Maxtor Corporation.
DiamondMax™, DiamondMax™ 1280, DiamondMax™ 1750, Diamond-
Max™ 2160, DiamondMax™ 2880, DiamondMax™ 3400 and MaxFax™ are
trademarks of Maxtor Corporation. No Quibble
trademark of Maxtor Corporation. Other brands or products are trademarks
or registered trademarks of their respective holders. Contents and specifi-
cations subject to change without notice. All rights reserved.
Corporate Headquarters
510 Cottonwood Drive
Milpitas, California 95035
Tel: 408-432-1700
Fax: 408-432-4510
Research and Development
Engineering Center
2190 Miller Drive
Longmont, Colorado 80501
Tel: 303-651-6000
Fax: 303-678-2165
®
Service is a registered

Advertisement

Table of Contents
loading
Need help?

Need help?

Do you have a question about the 91360D8 and is the answer not in the manual?

Questions and answers

Subscribe to Our Youtube Channel

Summary of Contents for Maxtor 91360D8

  • Page 1 This document is a condensed version of the full Product Reference Manual. This version only includes the Maxtor Information about the Product. Information that can be found in the ANSI specification is not included in this document to reduce its over all size. Also eliminated are the Table of Contents and Glossary.
  • Page 2 Revisions Manual No. 1399...
  • Page 3: Before You Begin

    Before You Begin Thank you for your interest in the Maxtor DiamondMax™ 3400 AT hard disk drives. This manual provides technical information for OEM engineers and systems integrators regarding the installation and use of DiamondMax hard drives. Drive repair should be performed only at an authorized repair center. For repair information, contact the Maxtor Customer Service Center at 800-2MAXTOR or 408-432-1700.
  • Page 4: Manual Organization

    DiamondMax™ 2880, DiamondMax™ 2160 and DiamondMax™ 1750 series hard drives deliver industry-leading capacity, performance and value for many PC applications. Support No matter which capacity, all Maxtor hard drives are supported by our commitment to total customer ® satisfaction and our No Quibble Service guarantee.
  • Page 5 DIAMONDMAX 3400 – INTRODUCTION Conventions If there is a conflict between text and tables, the table shall be accepted as being correct. Key Words The names of abbreviations, commands, fields and acronyms used as signal names are in all uppercase type (e.g., IDENTIFY DRIVE).
  • Page 6: Product Description

    SECTION 2 Product Description Maxtor DiamondMax™ 3400 AT disk drives are 1-inch high, 3.5-inch diameter random access storage devices which incorporate an on-board ATA/Ultra DMA controller. High capacity is achieved by a balanced combination of high areal recording density and the latest data encoding and servo techniques.
  • Page 7: Product Features

    DiamondMax 3400 drives power-up in a translate mode: (*) The fields LZone (Landing Zone) and WPcom (Write Pre-comp) are not used by the Maxtor hard drive and the values may be either 0 or the values set by the BIOS. All capacities listed in the above table are based on 10 or one million bytes.
  • Page 8 PRODUCT DESCRIPTION Logical Block Addressing The Logical Block Address (LBA) mode can only be utilized in systems that support this form of translation. The cylinder, head and sector geometry of the drive, as presented to the host, differs from the actual physical geometry.
  • Page 9: Cache Management

    PRODUCT DESCRIPTION Cache Management Buffer Segmentation The data buffer is organized into two segments: the data buffer and the micro controller scratch pad. The data buffer is dynamically allocated for read and write data depending on the commands received. A variable number of read and write buffers may exist at the same time. Read-Ahead Mode Normally, this mode is active.
  • Page 10: Major Hda Components

    (depending on the model), read pre-amplification and write drive circuitry. Read/Write Heads and Media Low mass, low force magneto-resistive read/write heads record data on 3.5-inch diameter disks. Maxtor uses a sputtered thin film medium on all disks for DiamondMax 3400 drives.
  • Page 11: Subsystem Configuration

    PRODUCT DESCRIPTION Subsystem Configuration Dual Drive Support Two drives may be accessed via a common interface cable, using the same range of I/O addresses. The drives are jumpered as device 0 or 1 (Master/Slave), and are selected by the drive select bit in the Device/Head register of the task file.
  • Page 12: Product Specifications

    PRODUCT SPECIFICATIONS SECTION 3 Product Specifications Models and Capacities Drive Configuration Performance Specifications 3 – 7...
  • Page 13: Physical Dimensions

    PRODUCT SPECIFICATIONS Physical Dimensions Figure 3 - 1 Outline and Mounting Dimensions 3 – 8...
  • Page 14: Power Mode Definitions

    This is the lowest power state – with the interface set to inactive. A software or hardware reset is required to return the drive to the Standby state. EPA Energy Star Compliance Maxtor Corporation supports the goals of the U.S. Environmental Protection Agency’s Energy Star program to reduce the electrical power consumption of computer equipment. Environmental Limits...
  • Page 15: Shock And Vibration

    Maxtor. MTBF Maxtor does not differentiate between various usage profiles (e.g., > 500,000 hours power-on hours, power saving modes, non-operating periods or operating temperatures within the published specification.) Quality Acceptance Rate TBD (<...
  • Page 16: Safety Regulatory Compliance

    Canada. Safety Regulatory Compliance All Maxtor hard drives comply with relevant product safety standards such as CE, CUL, TUV and UL rules and regulations. As delivered, Maxtor hard drives are designed for system integration before they are used.
  • Page 17: Handling And Installation

    There are a number of system BIOS’s currently in use which do not support hard drives with more than 4095 cylinders (2.1 gigabytes). This section contains information describing the conditions which may identify this limitation. In order to obtain the full capacity of your Maxtor drive, you will need to follow the recommended installation instructions.
  • Page 18: Unpacking And Inspection

    As they are removed, inspect drives for evidence of shipping damage or loose hardware. If a drive is damaged (and no container damage is evident), notify Maxtor immediately for drive disposition. Figure 4 - 1 Multi-pack Shipping Container 4 –...
  • Page 19: Physical Installation

    Single Pack Shipping Container (Option A) Single Pack Shipping Container (Option B) Repacking If a Maxtor drive requires return, repack it using Maxtor packing materials, including the antistatic bag. Physical Installation Recommended Mounting Configuration The DiamondMax™ 3400 drive design allows greater shock tolerance than that afforded by larger, heavier drives.
  • Page 20: Handling Precautions

    Please read this Installation Sheet completely before installing the Maxtor hard drive. It gives general information for installing a Maxtor hard drive in a typical computer system. If you don’t understand the installation steps, have a qualified computer technician install the hard drive. DO NOT use any low-level formatting software on this drive.
  • Page 21: System Hardware Requirements

    System Hardware Requirements Maxtor does not recommend installing drives greater than 8.4 GB in a 486 (50 MHz or slower), 286, 386 or older systems. These systems are not designed to support large capacity hard drives. Even if an EIDE interface card or drive management software are used the performance and reliability of the drive in older systems cannot be predicted.
  • Page 22: Hard Drive Identification

    The jumper illustration below shows three valid jumper settings for Maxtor hard drives – Master, Slave and Cable Select. Maxtor hard drives can be set as either a Master or a Slave device. There are no other jumpers to set when the Maxtor hard drive is installed on the same ribbon cable with another IDE device.
  • Page 23: Systems Using Cable Select

    Before installing the drive in the computer, you must determine how the jumpers on the Maxtor hard drive are to be set for your system based upon the use of the Maxtor hard drive as either a Master or Slave device.
  • Page 24: Mounting Drive In System

    Installing 5.25-inch Mounting Brackets and Rails If the Maxtor hard drive is being mounted in a 5.25 inch drive bay, the following figure shows how to attach the brackets and/or rails to the drive. If the drive is being installed in a 3.5 inch bay which requires the use of rails, they may be installed directly on the drive without brackets.
  • Page 25: Attaching Interface And Power Cables

    Attach an available IDE interface connector to J1 on the Maxtor hard drive. The connector on the cable provided with the Maxtor Hard Drive Kit is keyed and will only fit in one orientation. Do not force the connector. If the cable from the Maxtor kit is being connected to an IDE device or interface connection that is not keyed, the plastic plug in the connector at pin 20 may be removed.
  • Page 26: System Setup

    BIOS (CMOS) Parameters In order for the computer system to recognize the new Maxtor hard drive, it is necessary to set the system BIOS with the correct information about the hard drive. To do this, run the system SETUP (BIOS) program.
  • Page 27 The fields LZone (Landing Zone) and WPcom (Write Pre- comp) are not used by the Maxtor hard drive. These values may be either 0 or the values set in BIOS. Only the cylinder, head and sector values listed in the table must be entered. All other values may be zero (0).
  • Page 28: Hard Drive Preparation

    8.4 GB. If the system or interface card correctly supports the Maxtor hard drive, the drive may be partitioned and formatted using the operating system software. If the cylinder limitation jumper (J46) is installed or the BIOS does not support the hard drive, MaxBlast installation software must be used to prepare the hard drive.
  • Page 29 Maxtor Technical Assistance representative in the event that you call for assistance. The Maxtor hard drive model number and serial number are also located on the top cover label of the hard drive. System information should be available in the computer users’s manual or in the documentation for the different devices attached to the system.
  • Page 30: System Hangs During Boot

    System Hangs During Boot If the system hangs during the boot process after installing the Maxtor hard drive – either before or after setting the system BIOS – the system many have a BIOS with a cylinder limitation. This may occur for hard drives that exceed 2.1 GB.

Table of Contents