Table of Contents
Advertisement
Advertisement
Table of Contents

Related Manuals for Harman Kardon DVD 23


Summary of Contents for Harman Kardon DVD 23
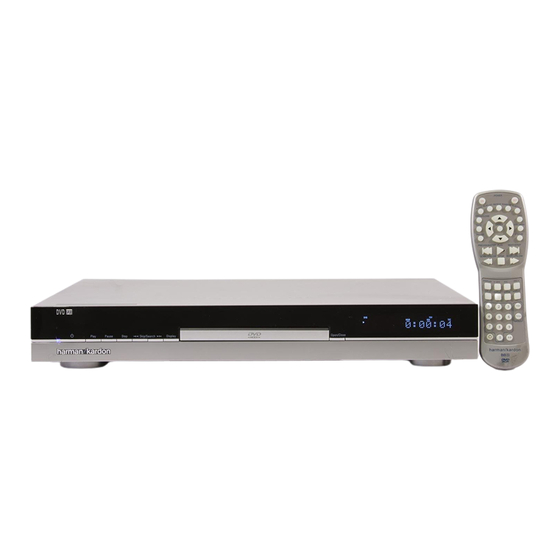
- Page 1 DVD 23 Digital Versatile Disc Player OWNER’S MANUAL...
-
Page 2: Table Of Contents
Table of Contents Introduction Terminology Features, Packing List Front Panel Controls Front Panel Information Display Remote Control Rear Panel Connections Setup and Connections to a Stereo TV and Stereo or Pro Logic Amplifier/Receiver to a Dolby Digital/DTS Amplifier/Receiver to a TV or monitor with SCART or Component Connectors Remote Control Digital Audio Connections... -
Page 3: Introduction
CD audio discs with the highest fidelity and access to future software upgrades via the Internet. Along with conventional Video and CD audio discs, the DVD 23 is also compatible with MP3, CD-R and CD-RW as well as DivX ®... -
Page 4: Terminology
Laser Disc. However, if this is your first DVD product, some of the terms used to describe the features of a DVD player may be unfamiliar. The following explanations should solve some of the mysteries of DVD, and help you to enjoy all the power and flexibility of the DVD format and the DVD. -
Page 5: Disc Formats Supported By This Player
Compatible with CD as well as DVD • The DVD 23 will play any conventional Audio CD or recordable (CD-R) or erasable CD (CD-RW), MP3, WMA (v8) or any DivX or VCD or DVD/Video with the region code 0 or 2. -
Page 6: Front Panel Controls
DVD player. Power On/Off (Standby): Press the button once to turn the DVD player on, press it again to put the unit in the Standby mode. Open/Close: Press this button to open or close the Disc Tray. -
Page 7: Front Panel Information Display
Front Panel Information Display VCDVD RANDOM TITLE A Disc Type Indicators B Playback-Mode Indicators C Progressive Scan Indicator D Chapter/Track Number Indicators E Time Indicators A Disc Type Indicators: The CD, DVD or DVD Audio indicator will illuminate to show the type of disc currently being played. -
Page 8: Remote Control
Remote Control Functions POWER ON POWER OFF SUBTITLE TITLE ANGLE AUDIO ENTER OPEN/CLOSE ARROWS INFO MENU PAUSE STATUS SKIP/STEP (PREVIOUS) SKIP/STEP (NEXT) PLAY SEARCH/SLOW REVERSE STOP SEARCH/SLOW FORWARD DISPLAY PIC +/PIC - ZOOM PLAYLIST RANDOM A-B Repeat V.OFF LIGHT NUMERIC KEYS REPEAT CLEAR VIDEO OUTPUT... -
Page 9: Remote Control Functions
V VIDEO OUTPUT: Press to toggle between the S-Video, Component Video Outputs and SCART RGB video output of the DVD player. Note that the Composite and SCART Composite Video Outputs on the player are always active, which could help you make your initial setup. -
Page 10: Rear Panel Connections
¶ SCART OUT (TV): If your TV has a SCART socket, you can connect a SCART cable to your TV and to your DVD Player for improved video quality. The SCART cable carries both audio and video. You can select Composite Video or RGB video for that SCART connector’s video output... -
Page 11: To A Stereo Tv And Stereo Or Pro Logic
Setup and Connections I Ensure that the power switch of this unit and other equipment to be connected is set to off before commencing connection. I Do not block ventilation holes of any of the equipment and arrange them so that air can circulate freely. - Page 12 Normally you´ll hear the sound from your AV-system´s speakers, so the TV volume should be completely turned down. If you plan to use your DVD player also without having to turn on your complete system, this connection must exist, then you can turn up the TV´s volume as needed.
-
Page 13: To A Tv Or Monitor With Scart Or
DVD to the corresponding input jacks on your television. If you are using a progressive scan television or projector, you must also change the Scan Type in the DVD player's Video Set-Up Menu from ”Interlaced” to ”Progressive”. To power outlet... -
Page 14: Remote Control
Remote Control Battery installation Insert the batteries supplied while observing the correct (+) and (–) polarities. Service life of batteries I The batteries normally last for about one year, although this depends on how often, and for what operations, the remote control is used. I If the remote control unit fails to work even when it is operated near the player, replace the batteries. -
Page 15: Digital Audio Connections
Remember, that Dolby Digital or DTS will only play 5.1-channel sound if you’ve connected the optical or coaxial output of the DVD player to a DTS or Dolby Digital receiver or decoder and if the disc was recorded in the Dolby Digital or DTS format. -
Page 16: Playback Basics
Fast Playback (Search) may not function. About DivX Movie Files The DivX disc compatibility of this DVD player is limited by the following: • the available resolution size of the DivX file should be below 720x576 (W x H) pixels. -
Page 17: System Setup
General Functionality of the OSD Menu The complete setup and control of the DVD 23 takes place in an advanced user-guided On Screen Display (OSD) menu system. The OSD can be activated by pressing the OSD button on the remote control. -
Page 18: System Settings
Screen Save: Activates a Screen Saver to prevent an image to “burn” into a video display device. If you connect the DVD 23 to a LCD or plasma screen or video projector, we recommend you activate the screen saver at all times. -
Page 19: Video Adjustment
System Setup Video Adjustment The Video Adjustment Submenu contains access to the Test Screen. First adjust the video display device (TV) with the help of the Test Screen. After that the output settings of the player can be fine-tuned with the Color, Contrast, Brightness, Tint and Black Level settings. -
Page 20: Test Screen
Test Screen Test Screen When you activate the Test Screen via the OSD you can activate a still image to test all settings and the video performance of your TV. With the vertical color bars you can test the following: I proper color intensity setting on your TV, I the proper color of each bar, showing if the proper video standard is turned on: the colors... -
Page 21: Player Menu
PLAYER Menu Once all the settings have been made, you are ready to enjoy your DVD 23. Once you have inserted a disc into the drawer you can explore the other Main Menu, that is the PLAYER Menu. -
Page 22: Dvd Language Codes
DVD Language Codes The availability of specific languages for the main audio track or subtitles is dependent on the choices made by a disc’s producer. You should always consult the disc’s jacket for information on languages for any disc. In the case of some languages, you may be required to enter a code from the list below to access that language. -
Page 23: Specifications
AND MAY CAUSE ARTIFACTS TO BE DISPLAYED IN THE PICTURE. IN CASE OF 525 OR 625 PROGRESSIVE SCAN PICTURE PROBLEMS, IT IS RECOMMENDED THAT THE USER SWITCH THE CONNECTION TO THE ‘STANDARD DEFINITION’ OUTPUT. IF THERE ARE QUESTIONS REGARDING OUR TV SET COMPATIBILITY WITH THIS MODEL 525p AND 625p DVD PLAYER, /75 Ohms, sync negative polarity 2 Hz - 22 kHz +0/-0.5 dB (48 kHz sampling) - Page 24 250 Crossways Park Drive, Woodbury, New York 11797 www.harmankardon.com Harman Consumer Group International: 2, Route de Tours, 72500 Château-du-Loir, France © 2005 Harman Kardon, Incorporated Partnumber: 01.00.YS.SM1.314...
Need help?
Do you have a question about the DVD 23 and is the answer not in the manual?
Questions and answers