Table of Contents
Advertisement
Quick Links
Advertisement
Table of Contents

Related Manuals for Sansui STB-HD01


Summary of Contents for Sansui STB-HD01
- Page 1 Your life, your style. STB-HD01 High Definition Digital Receiver...
-
Page 2: Safety Information
Safety Information CAUTION RISK OF ELECTRIC SHOCK DO NOT OPEN CAUTION: TO REDUCE THE RISK OF ELECTRIC SHOCK, DO NOT OPEN. NO USER-SERVICEABLE PARTS INSIDE. REFER SERVICING TO QUALIFIED SERVICE PERSONNEL ONLY. The lightning flash with arrowhead symbol within an equilateral triangle, is intended to alert the user to the presence of uninsulated "... - Page 3 Important Safeguard This sheet lists important safeguard that will help to assure your enjoyment and proper use of the HD-STB and accessory. Please read them carefully before operating and using your HD-STB product. 1. Read and Retain these User's Guide All the safety and User's Guide should be read before the HD-STB is operated.
- Page 4 Important Safeguard 7. Keep Away from Moisture Do not use this HD-STB near water or wet place. For example, near a bathtub, wash bowl, kitchen sink, laundry tub, in a wet basement, or near a swimming pool and the like. Caution: Maintain electrical safety, Power line operated equipment or accessories connected to this unit should bear the CE listing mark or C-Tick certification mark on the accessory itself and should not be modified so as to...
-
Page 5: Table Of Contents
C O N T E N T S 1. Overview of the equipment - - - - - - - - - - - - - - - - Front Panel - - - - - - - - - - - - - - - - - - - - - - - - - - - - - - - - - - - - - - - - - - - - - - Rear Panel - - - - - - - - - - - - - - - - - - - - - - - - - - - - - - - - - - - - - - - - - - - - - - Remote Controller... - Page 6 Contents Wake Up Timer - - - - - - - - - - - - - - - - - - - - - - - - - - - - - - - - - - - - - - - Off Timer - - - - - - - - - - - - - - - - - - - - - - - - - - - - - - - - - - - Sleep Timer...
-
Page 7: Overview Of The Equipment
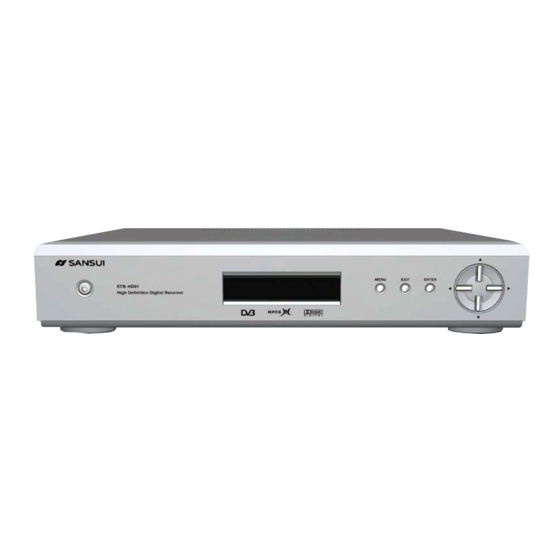
Overview of the equipment This section summarizes the buttons, controls, and terminals that you will use with your HD-STB. Front Panel POWER Press to turn the HD-STB on or off. Display Panel Display information to assist you in operating the HD-STB successfully. MENU Activate the menu system. -
Page 8: Rear Panel
Overview of the equipment Rear Panel 13 14 19 20 22 23 ANT IN terminal Attach an external Antenna to this terminal DVI Output terminal This terminal ca be used with your TV DVI input. Refer to Video Connection Pages. 11. -
Page 9: Remote Controller
Overview of the equipment Remote Controller POWER Turn your HD-STB on or off. 0~9 (Number Button) Direct change the desired channel. To change the channel, simply press desired channel number. The button operation should be less then 2 seconds between button pressing. If it is over 2 seconds then this HD-STB will discard the pressed number and go back to current channel. -
Page 10: Tv Control Section
Overview of the equipment 8. LOCK (Parental Lock ) Activate PARENTAL GUIDE menu. For the Parental Guide menu system, you should enter the PIN code. The default PIN code is 0 0 0 0 9. FREEZE Freezing the picture for viewing with still image. Sound mute is also activated. 10. -
Page 11: Installing The Remote Control Batteries
Overview of the equipment Installing the remote control batteries. ¡ Do not mix different types of batteries, or mix an old and a new battery. ¡ Remove and replace weak batteries, Weak batteries can leak and damage your Remote controller. ¡... -
Page 12: Accessories
Overview of the equipment Accessories. Carefully remove the HD-STB from the carton. Check that the HD-STB has not been damaged. The following accessories are included. Wireless Universal Two AAA size Remote Control batteries. A/V Cable This User's Guide SD A/V Cable (Yellow/White/Red) HD Video Cab le (Green/Blue/Red) RF Cable... -
Page 13: Connecting Your Hd-Stb
Connecting your HD-STB You should connect your HD-STB to an external antenna. Follow the direction Antenna Connection. Next you will connect the HD-STB to the TV, HDTV or HD Monitor. Follow instructions from the Video Connection section in this manual. To connect the HD-STB to TV Audio or Home Theater Audio system, follow the instructions from the Audio Connection section in this manual. -
Page 14: Video Connection
Connecting your HD-STB 2. Video Connection Connecting to a HDTV with DVI Connect DVI Video cable to the DVI output terminal on the rear of HD-STB. Connect the other end of DVI Video cable to the HD DVI Input terminal on the HDTV . Setting Up the Display Switch to HD1 (Native Mode) and Mode Switch to desired Resolution. -
Page 15: Connecting To A Hdtv With Hd Ypbpr
Connecting your HD-STB Connecting to a HDTV with HD YPbPr Connect YPbPr Video cable to the HD terminal on the rear of HD-STB. Connect the other end of YPbPr Video cable to the HD YPbPr Input terminal on the HDTV . Usually, the Y is Green, Pb is Blue and Pr are RED colour assigned. -
Page 16: Connecting To A Sdtv With Sd Ypbpr
Connecting your HD-STB Connecting to a SDTV with SD YPbPr Connect YPbPr Video cable to the SD terminal on the rear of HD-STB. Connect the other end of YPbPr Video cable to the SD YPbPr Input terminal on the TV . Usually, the Y is Green, Pb is Blue and Pr are RED colour assigned. -
Page 17: Connecting To A Conventional Tv With S-Video
Connecting your HD-STB Connecting to a Conventional TV with S-Video Connect a S-Video cable to the S-Video terminal on the rear of HD-STB. Connect the other end of S-Video cable to the S-Video input terminal on the TV . Setting up the Display Switch to SD and Mode Switch to M1. ( Refer to Fig. 9 ) Fig.9 TV with S-Video Connection Connecting to a Conventional TV with Composite Video Connect a Video Cable to the TV Video terminal on the rear of the HD-STB. -
Page 18: Audio Connection
Connecting your HD-STB 3. Audio Connection This HD-STB can support four different options for connecting audio signals . Each of the audio connections delivers the same audio sound. You can select desired audio connection by following the Audio connection Diagrams below. Stereo Audio Connection Audio 1 and Audio 2 deliver analog stereo sound or Dolby Digital Downmixed 2 Channel analog stereo sound. -
Page 19: Setting Up The Display Mode
Connecting your HD-STB 4. Setting up the Display Mode. This HD-STB supports all High Definition/ Standard Definition Video resolution of Australian Standard. You can select the correct one for your HDTV/TV's receptions ability. For setting up the correct display resolution, adjust two switches on the rear of the HD-STB. -
Page 20: Getting Started
Getting Started Step 1. Check the contents in the gift box. After opening the gift box, you should check and find the following items. Digital HD-STB Universal Remote Control User's Guide Batteries (2 AAA size) SD A/V Cable (Yellow/White/Red) & HD Video Cable (Green/Blue/Red) RF Cable If you find a missing or broken part, then ask your supplier or contact the service center. -
Page 21: Step 6. Install Remote Control Battery And Tv Control Section Code Setting
Getting Started Step 6. Install Remote Control battery and TV Control Section Code Setting Install Remote Control battery. The battery has polarity so when insert the batteries, make sure the "+" and " " terminals are oriented correctly. Setting up the TV Control Section Code. After finished the TV Control Section Code setting, the universal key of the HD-STB can control for your TV. -
Page 22: Using Menu System
Using the MENU System From here you can adjust whole setting and function of HD-STB. If you press the MENU button, the menu screen will display. You can move up and down using CH (UP) / (DOWN) button, move left and right using (LEFT) / PR (RIGHT) button in the menu system. -
Page 23: Screen H Position
Using the MENU System Screen H Position Select best fitting Horizontal position for your TV screen. The whole picture will moved left or right. Screen V Position Select best fitting Vertical position for your TV screen. The whole picture will moved up or down. -
Page 24: Audio Downmix
Using the MENU System Audio Downmix For the stereo analog audio output, you can select Lt/Rt or Lo/Ro output mode. For the analog stereo connection, set the Lt/Rt for correct audio information. For the digital audio connection, set the Lo/Ro for full 5.1 channel support. Also you can set up this function using DOWNMIX button on the remote control. -
Page 25: Time Setting
Using the MENU System 2. Time Setting From here you can adjust time, timer and time related setting. For using timer related function, you should setting up the clock. Clock Setting From here you can setup the current clock. If you set the Clock Setting to Off, the timer related function will disable and current time information will not display. -
Page 26: Time Zone
Using the MENU System Time Zone From here you can setup the Time Zone. You should enter the time zone information for correct time display when EPG information is display. 1) Press MENU button to display the menu. Press UP or DOWN to select TIME SETTING menu ENTER or RIGHT to select the TIME SETTING menu. -
Page 27: Off Timer
Using the MENU System Off Timer From here you can setup the Off Timer for automatic turn off the HD-STB. When the setting time is reached, the HD-STB will automatic turn off. You should enter the desired off time. For correct Off Timer operation, you should set up the Clock Setting first. 1) Press MENU button to display the menu. -
Page 28: System Setup
Using the MENU System 3. System Setup From here you can setup the System Value of HD-STB. Also, you can restore the Factory Reset value. The PIN Code is not changed even factory value restored. Power Restore This HD-STB has the Power Restore function. If you setup the Power Restore On and when AC Power is applied, the HD-STB will automatic turn on and display final memorized channel. -
Page 29: Display Dimmer
Using the MENU System Display Dimmer You can adjust Front seven segment display brightness. If you feel the Front Display is too brighter or darker, you can adjust the brightness of Display using Display Dimmer setup. TV Remote Cnt'l Code List This HD-STB Remote Control can operate common functions on your TV. -
Page 30: Parental Guide
Using the MENU System 4. Parental Guide From here you can setup the PARENTAL GUIDE. You can block or unblock each program followed by parental guide information. You can access the PARENTAL GUIDE using LOCK button on the remote control. For the PARENTAL GUIDE setup, you should enter the PIN code. -
Page 31: Rating Setup
Using the MENU System Rating Setup You can select block/ unblock the each rating one by one. If user select block the rating, that rating program will internal block and display violation of ratings message. 1) Press MENU button to display the menu. Press UP or DOWN to select PARENTAL GUIDE menu ENTER or RIGHT to enter the PARENTAL GUIDE menu. -
Page 32: Channel Setup
Using the MENU System 5. Channel Setup From here you can do automatic and manual channel search, favorite channel setup, edit program and setting program preference. Automatic CH Tuning From here the HD-STB will automatic search the whole frequency for available channels. -
Page 33: Favorite Ch
Using the MENU System MENU C H A N N E L S E T U P Manual Channel Search CH:10 Search CH RF Search Press ENTER or to enter. Press to move. Press EXIT to exit. Press to go back. Favorite CH From here, you can select Favorite CH memory block. -
Page 34: Edit Program
Using the MENU System Edit Program From here, you can Edit, Move and Delete the memorized channels. After performed the Automatic or Manual Channel Search, the whole channels are listed in the memory. So, you can change the Channel name, sequence and delete from the memory. After delete the channel, it can not appear in the CH LIST , at that time you should perform Automatic or Manual Channel Search for re-appear the channel in the CH LIST. -
Page 35: Edit Program - Move
Using the MENU System Edit Program - Move You can move the channel position in the memorized sequence. It is change the order of the memorized channels. And it is affected for CH p /q , PR t /u operation using remote control. 1) Press MENU button to display the menu. -
Page 36: Edit Program - Delete
Using the MENU System Edit Program - Delete You can delete the unwanted channel in the internal memory. Once you delete the channel, you cannot access using CH p /q , PR t /u . For access deleted channels, you should perform Automatic CH Tuning or Manual CH Search operation to recover the memory. -
Page 37: Program Preference
Using the MENU System Program Preference In the Program Preference menu, you can assign the Favorite Memory block for each channels. And blocking the selected channels. The favorite memory block has three kinds, Fav1, Fav2 and Fav3. Followed by FAV button or Favorite CH setting, you can access the Favorite Block CH LIST with CH LIST button. -
Page 38: Aerial Signal Strength
Using the MENU System Aerial Signal Strength For the correct digital broadcasting reception, your signal level should be green level. The yellow level is partly received the digital broadcasting, but it is possible to unstable the picture quality. The red level is unavailable digital broadcasting reception. 1) Press MENU button to display the menu. -
Page 39: Info Button And Epg Information Display
INFO button and EPG Information Display This HD-STB can display EPG information using INFO buttons. Press INFO button while watching TV you will get NOW and NEXT program information. By pressing INFO button again, you will get the more detailed information of NOW. Press INFO button third time, you will get the more detailed information of NEXT. -
Page 40: Channel Information Display
INFO button & EPG Display 2. Channel Information Display Each time you change channels, the Channel Information will display right upper side automatically. It will display 5 seconds for your reference. You can see the current channel number, name, video source resolution, digital audio information and rating information. -
Page 41: Troubleshooting
Trouble Shooting Your HD-STB is designed to give you trouble-free performance for many years. If you have a problem with your HD-STB, try the solutions listed below. Problem Possible causes What to do Check up the Power cable which The display on the front panel Power cable is not connected. -
Page 42: Specifications
Specifications Explanation Section Detailed section VHF: 174MHz to 230MHz Terrestrial Input Signal Input Frequency UHF: 520MHz to 820MHz Transmission System DVB-T/OFDM Channel Assignment Australian Channel Assignment Channel Bandwidth 7MHz Channel Offset +/- 125KHz Input Signal Level -90dBm ~ -20dBm Antenna Input Female IEC-Connector (PAL Type) Loop Output Male IEC-Connector (PAL Type) - Page 43 Specifications Explanation Section Detailed section Controller Features Main CPU 32 bit RISC Upgrade via RS-232C (9 pin D-SUB connector) S/W Download Menu System Graphic User Interface Channel Memory Max. 256 Channel IR Remote Controller with Universal TV Key Remote Controller Power Power AC 100 - 250V ~...
-
Page 44: Universal Code Setting For Remote Control
TV Control Section Code Setting for remote control You can use your HD-STB remote control for common function on your TV. ( might not work on some model of TVs). After change the remote control battery, you should reset the TV Control Section code for your TV. - Page 45 Konka 063, 030, 048 Samsung 021, 143, 100, 040, 151, 134, 067, 020 Lemair 048, 100, 134, 151, 036, 080, Sansui 048, 030 021, 028 165, 020, 092, 101, 093, Loewe 046, 048, 141, 101, 100 Sanyo 089, 100, 016, 067, 104,...
- Page 46 Manufactured under license from Dolby Laboratories Dolby, Pro Logic and the double-D symbol are trademarks of Dolby Laboratories. Confidential unpublished works. Copyright 1992-1997 Dolby Laboratories. All rights reserved...
Need help?
Do you have a question about the STB-HD01 and is the answer not in the manual?
Questions and answers