Table of Contents
Advertisement
Quick Links
Advertisement
Table of Contents

Subscribe to Our Youtube Channel
Related Manuals for Pantech GF 200


Summary of Contents for Pantech GF 200
- Page 1 USER’S MANUAL G G F F 2 2 0 0 0 0...
-
Page 2: Welcome To Pantech Gf200
Pantech GF200 Welcome to the wireless mobile communication network with this tri-band GSM mobile phone, GF200. We, Pantech, are pleased to introduce this brand new portable handset. Our product always keeps you connected to the network. Thank you for choosing Pantech GF200. -
Page 3: Characteristic Specification Of Gf200
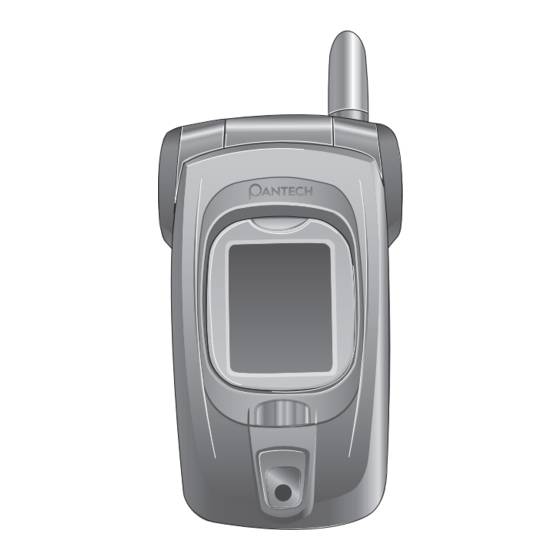
haracteristic Specification of GF200 Power Management (Performance) Display Dual clamshell 262,000 TFT LCD both internal and external. • 28.032 mm x 35.04 mm display for 1.8” internal LCD Battery Type Capacity Standby Time Talk Time • 19.008 mm x 23.76 mm display for 1.2” external LCD •... - Page 4 Pantech GF 200 Earpiece Internal LCD Earjack Antenna Left Softkey Right Softkey 4-way Menu 7- Colour LED Wap Access key Navigation Select/Menu Special Menu Camera Confirm key Short key External LCD Volume up/down Power On/Off Dial key Menu Scroll...
-
Page 5: Quick & Easy
uick & Easy Keys Functions Keys Functions Performs the functions shown at the bottom line of Quickly connects to the voice mail server if pressed LCD. longer in the standby mode. Scrolls through the menu option in the Menu mode. Enters numbers, letters or special characters. -
Page 6: Safety Precautions
afety Precautions Using a handset while driving is prohibited. Using Medical Equipment With regards to the regulation about prohibition of handset • Please turn your handset off while you are in the hospital. • Please abide by the regulations or rules of the hospital. usage while driving, please check relevant laws and •... -
Page 7: Menu Tree (Gf200)
enu Tree (GF200) Messages Text Messages Write New Memory Info Inbox Call Logs Missed Calls Outbox Received Calls Saved Box Dialled Calls Text Templates Delete Call Logs Missed Calls Settings Message Centre Received Calls Message Lifetime Dialled Calls Message Type All Calls Memory Info Call Timer... - Page 8 Games Security Settings SIM Lock Java Midlet List Change PIN Memory Info Phone Lock Auto Answer Auto Answer Change Lock Recorded Message Application Lock International Calls Response Message Call Barring Only Local/Home Response Time Incoming Calls User Message Incoming Calls when Voice Memo Abroad Int.
-
Page 9: Table Of Contents
MAKING THE EMERGENCY CALL .............41 POWER MANAGEMENT (PERFORMANCE)..........5 ANSWERING A CALL..................42 OPERATING FREQUENCY................5 ANSWERING A CALL ..................42 VIEWS OF PANTECH GF 200 ..............6 VIEWING MISSED CALLS................42 QUICK & EASY..................8 REJECTING A CALL..................43 SAFETY PRECAUTIONS ...............10 ADJUSTING THE VOLUME DURING A CALL ..........43 MENU TREE (GF200)................12... - Page 10 KEY TONE ....................114 USING THE SYMBOL MODE ..............60 FLIP OPEN TONE..................114 USING THE BOPOMOFO INPUT MODE ............61 SOUND EFFECT..................115 USING THE PINYIN INPUT MODE .............62 PROFILE NAME..................115 USING THE STROKE INPUT MODE............62 RESET......................115 APPLICATIONS SETTINGS .....................116 DISPLAY SETTINGS .................116 MESSAGES .....................66 CALL SETTINGS..................119 TEXT MESSAGES ..................66 LANGUAGE....................121...
- Page 11 SIM TOOLKIT ....................141 APPENDIX PIN (PERSONAL IDENTIFICATION NUMBER) ........151 PUK (PIN UNBLOCKING KEY)..............152 ACCESS CODE .....................144 ROAMING ....................152 PIN CODE (4 TO 8 DIGITS)...............144 SIM (SUBSCRIBER IDENTIFICATION MODULE) ........152 PIN2 CODE (4 TO 8 DIGITS)..............144 SMS (SHORT MESSAGE SERVICE) ............152 LOCK CODE (4 DIGITS) ................144 SOFT KEYS ....................152 PUK AND PUK2 CODES (8 DIGITS) ............145...
-
Page 12: Getting Started
ETTING STARTED 1 Package Contents 2 Views of Pantech GF200 3 Internal & External Displays 4 SIM Card 5 Using the battery... -
Page 13: Package Contents
ackage Contents nternal & External Displays This handset has 2 LCDs (internal and external) and icons on the top of the LCD display to show the phone condition. Internal LCD Display Icons Area Text and Graphic Area Display in Standby screen with information •... - Page 14 Icon(s) Description Icon(s) Description You have set the alert type for incoming call to quite You have a new multimedia message. If the (7- colour LED flashes for incoming call alerting). multimedia message memory is full, this icon will look like You have set the alert type for incoming call to vibrate only.
-
Page 15: External Lcd Display
In some functions, you may be prompted for a password or Display Off Mode. PIN. Enter the required code and press the [ ] Soft key. If you don’t press any key in a minute when the internal and external display are dimmed, the internal display goes into External LCD Display the Off Mode to save the power. -
Page 16: Sim Card
External Menu List IM Card Press the side volume [ ] key longer in the standby mode. • Profiles: Selects a menu among Normal, Silent, Meeting, Outdoor, or Car. SIM Card • Recent Calls: Lists up the recent calls. • Inbox: Lists up incoming SMS messages. When you subscribe to your network operator, you will get a •... -
Page 17: Using The Battery
2. If the SIM slot is empty, insert the SIM card into the slot. sing the battery Installing the battery Put the metal locators of the battery into the hole located at the bottom of the unit, as shown in the below figure. Press the upper side of the battery until you hear “click”... -
Page 18: Charging The Battery
Charging the battery Your handset is powered by a Lithium Ion (Li-ion) battery. This handset uses the Li-ion battery. Make sure to use the You can use the following Li-ion battery types for your handset. authorized battery and charger only. For more details, please (Contact your local dealer for more information.) inquire at your nearest dealer. -
Page 19: Basic Functions
ASIC FUNCTIONS 1. Switching the Phone On or Off 2. Making a Call 3. Answering a Call 4. Options in Calling 5. Using the Earpiece 6. Selecting the Menu Function 7. Entering the Texts... -
Page 20: Switching The Phone On Or Off
witching the Phone On or Off aking a Call Making a Call Switching the Phone On Enter the area code and the phone number to make a call in the standby mode, and press the [ ] key. Open the folder. NOTE If you have set the [Auto Redial] option (Menu 6.2.3) to [On], the Press the [... -
Page 21: Using Contacts
Press the [ ] key to select a number. Enter the country code, area code and phone number you want to make a call. Press the [ ] key for dialling. (See Call Logs for more details.) Press the [ ] key. -
Page 22: Answering A Call
nswering a Call Answering a Call Press the [ ] key to recall the missed call. When you receive a call, the phone rings (or vibrates) and Press the [ ] or [ ] key to close missed call notification screen will display the name or the number of the caller (If message network supports and you have subscribed to it). -
Page 23: Options In Calling
ptions in Calling Once a call is held, the name and icon of the caller will be During a call, press the [ ] key to show the call option. faded in gray. Switching the Microphone Off (Mute) To make a call while you have a call in progress: You can temporarily switch your phone’s microphone off so Enter the phone number that you want to dial or look it up in the that the other person cannot hear you. -
Page 24: Searching For A Phone Number In Contacts
To view the highlighted entry, press the [ ] Soft key. The first call is automatically put on hold. For further details about the Contacts feature, see menu 2 To switch between two calls, press the [Swap] Soft key. Using the DTMF tones To end the current call, press the [ ] key. -
Page 25: Using The Message Service
Using the Message Service To join the first participant to a multi-party call, press the [Option] Soft key and select the [Join All] option. You can read or write a new message during a call. Press the [Select] Soft key or [ ] key. -
Page 26: Using The Earpiece
Having a Private Conversion with One sing the Earpiece Participant Press the [Option] Soft key and select the [Private] option. Press the [Select] Soft key or [ ] key. You can send or receive a call without touching the handset, using he ear-microphone. -
Page 27: Selecting The Menu Function
electing the Menu Function haracteristic Specification of GF200 Using the Shortcut Key in the Standby Entering the Menu Function Mode Function if pressed If pressed longer Goes to the main menu in the standby mode. Menu Changes the menu style Goes to the Contacts menu theme between grid and list. -
Page 28: Entering The Text
ntering the Text hanging the Text Input Mode When you are at the area where you can input the text, the Input Mode text input mode indicator will be displayed at the bottom of On many occasions you need to input the text while you are the LCD. -
Page 29: Using The T9 Mode
Inserting a Space Shows symbol screen. ] Long press To insert a space between words, press the [ ] key. Or, at the end of line, press the [ ] key to add new space Enters a space Character ] short press character. -
Page 30: Using The Multi-Tap Mode
NOTE Enter the whole word before editing or deleting any keystrokes. The cursor moves to the right when you press a different key. When entering the same letter twice or a different letter on the same key, Upon searching a word, input the next text. just press the Right key or wait a few seconds for the cursor to move to the right automatically, and then enter the next letter. -
Page 31: Using The Number Mode
If you entered a symbol with the [ ] key, press the key Using the Number Mode again to proceed to a mode next to the Symbol mode. Using the Bopomofo Input Mode The Number mode enables you to enter numbers in the text. Press the key corresponding to the digit you want to enter. -
Page 32: Using The Pinyin Input Mode
Using the Pinyin Input Mode Press the number key longer for a text and the text will appear in the input window. Press short the [ ] key to add a special symbol to a Chinese character. (Component mode) Press short the [ ] key in the Component mode to reenter the previous stroke. -
Page 33: Applications
PPLICATIONS 1. Messages 2. Contacts 3. Call Logs 4. Fun & Tools 5. Profiles 6. Settings 7. Organiser... -
Page 34: Messages
essages Select ‘Menu>1.Messages’ Receiving a new message This menu allows you to create, send, read and save a When you receive a new message, the new message icon message with the Short Message Service (SMS: Text ) and a notification showing the number of the message message), Enhanced Message Service (EMS: Message will appear on the display. -
Page 35: Write New
- Outbox: Displays the message you have saved in the SIM • Add Picture: Loads the selected item. memory. • Add Animation: Loads the selected item. [10] represents the total number of messages saved in • Add Melody: The melody will be set up and played back the Outbox. - Page 36 • Move to Saved Box: Saves the selected messages in Saved Box. Inbox The old message will be deleted. Select ‘Menu >1.Messages>1.Text Messages>2.Inbox’. • Delete: Deletes the selected message. • Return Call: Makes a call to the sender. Select Inbox and press the [ ] key to see the received •...
- Page 37 Saved Box Settings Select ‘Menu>1.Messages>1.Text Messages>4.Saved Box’ lect ‘Menu>1.Messages>1.Text Messages>6.Settings’. The message in the Saved Box comes from Inbox or You can set up default SMS information using this menu with Outbox, or the draft message. All messages keep their the following options.
-
Page 38: Multimedia Messages
- Write New: Writes a new MMS. Multimedia Messages - Inbox: Displays the received message and saves it in the handset Select ‘Menu>1.Messages>2. Multimedia Msgs’. memory. - Outbox: Displays the sent or draft message and saves it in the Multimedia Message Service (MMS) is a messaging service handset memory. - Page 39 • Delete/Replace Object • Add Sound Deletes or Replaces the selected object (text, image or sound) Adds a sound in Sound Gallery. Press the [ ] key to select from the slide page. sound when the sound list appears. For further details, refer to •...
- Page 40 • Cut Objects: Displays all objects integrated with a message. Inbox • Cut Numbers: Selects any number in the received messages. Select ‘Menu>1.Messages>2. Multimedia Msgs.>2. Inbox’ Select a function from View to extract and list up and press the [ ] key.
-
Page 41: Mms Templates
• New: Creates a new template. (Refer to Write New.) You can choose the following options by pressing the [Option] Soft key [ ] to: Select a specific template and select the [Option] Soft key ]at the left to select the following menu. •... -
Page 42: Mms Profiles
- Read Rep. Allow - IP Port: Input the IP port number for yourself. - Login ID: Input the ID to sign into the gateway. When this option sets to [Off], your phone does not send a reply - Password: Input the password to sign into the gateway. to the receiver’s phone even if the sender asks for the read - APN: Input the Access Point Name for yourself. -
Page 43: Broadcast
Add My Topic: Adds My Topic. Broadcast Press the [Option] Soft key [ ] to; Select ‘Menu>1.Messages>3.Broadcast’ and press the ] or “3” key. • Insert: Inserts a topic. • Delete: Deletes a topic from the list. This function depends on your network service provider. •... -
Page 44: Contacts
ontacts You can make your personal contacts, which can be added Press the [ ] key to view the recorded numbers. or deleted at any time. You can save up to 800 contacts in the SIM or the handset memory. Press the [ ] key to view all. -
Page 45: Group Setting
Delete All Group Setting Deletes all information saved in Phone/ SIM Card. Select ‘Menu>2.Contacts>4.Groups’. Memory Info Changes the settings for the five predefined caller groups. Default Groups: No Group, Family, Friends, Business, Displays the status of the Phone/SIM memory in use. and VIP Service Number You can change the group ring tone by pressing [Group Ring... -
Page 46: Call Logs
all Logs Received Calls Press the [ ] key to see the recent call logs in the standby mode or select ‘Menu>3.Call Logs’. Select ‘Menu>3.Call Logs>2.Received Calls’. Displays the received call list accompanied by the time and This function displays missed calls, received calls, and dialled date of a received call as well as the number or name of the calls. -
Page 47: Delete Call Logs
This function has the following sub options. Delete Call Logs Select ‘Menu>3.Call Logs>4.Delete Call Logs’. • Read Unit: Reads the cost unit. It deletes the missed, received, or dialled calls or deletes all • Set Unit: Sets up the current cost unit and the cost per unit. the call records with ‘All Calls’. -
Page 48: Fun & Tools
un & Tools Camera Press the [ ] key or [Extra Key] shortly to shoot the image in the current preview. You can take a photo or video in various ways using your camera phone. The taken photo or video can be saved, and Press [ ] key to zoom in/out the image in proportion to the the photo can be edited. -
Page 49: Using The Camera Options
• Time Stamp: On / Off. When the camera mode is off, the setup value Function Available Menu Soft Key will return to the value as set by the setting • Multi-Shot: Controls the number and speed of continuous shot. On/Off Flash When the camera mode is off, the setup value will return... -
Page 50: Sticker Gallery
Press the [Option] Soft key [ ] to: Press [ ] key to record the preview image. • Sticker Shot: Moves to the Sticker Capture mode. Press the [Cancel] key to cancel recording and return to the • Rename: Renames a sticker frame. (User-defined sticker only) Preview screen •... -
Page 51: Media Gallery
• Search: Searches the album for a file with the name. Media Gallery • Rename: Renames a photo Select ‘Menu>4.Fun&Tool>2.Media Gallery’. • Crop Photo: Press the [Side Key] to zoom in or out a photo and use the Navigation key to scroll. Then save it again. This time, image size Photo Gallery will be converted into the LCD size. -
Page 52: Video Gallery
Video Gallery Press the 8 direction keys (1,2,3,4,6,7,8,9 key) to move to a location and press the [5] key and the tool will be executed Views or edits the video image saved in your. handset. depending on the current mode. Select ‘4.Fun&Tools>1.Camera>4.Video Gallery’... - Page 53 Memory Info Image Gallery Displays information on the memory usage status of Photo, You can view or edit the image or information recorded in Video, Image, Sound, Java, MMS and System used. your handset in this menu. Note : The ‘System’ memory information means the total used memory for the reserved objects, user-defined Select ‘Menu>4.Fun &Tools>2.Media Gallery>3.Image Gallery’...
-
Page 54: Game
Game Smokey The objective of this game is to help the sorcerer boy to push 2043 the monsters into the cages. In AD 2043, aliens attacked the earth. The only hope for the You can’t pull the monsters back. So think carefully when earth is resistant army organized to keep the peace of the you make a move. -
Page 55: Java
Java View of Java Application Memory Select ‘2.Memory Info’ to see the memory used You can download and execute the java application on your handset. The java application for a mobile handset is called a Midlet. Use the WAP browser to search a Midlet and download it for installation. -
Page 56: Auto Answer
Auto Answer User Message The Auto Answer function works like the automatic Displays your voice message set for the response message. answering machine. It sends the recorded message to the Press the [ ] key for playback. If no message is recorded, caller if you don’t answer the call for the specified period of only the recorder function will be used. -
Page 57: Voice Memo
Voice Memo rofiles The Voice Memo function records your voice message. You can use Record, Stop, Play, and Save for voice recording and playback. You can use the Text Editor for title input. Select ‘Menu>5.Profiles’ or press the [ ] key in the standby mode. -
Page 58: Message Alert
Sound Effect Message Alert Turns on or off the default sound effect. Select ‘Menu>5.Profiles.>2.Message Alert’ and press the Select ‘Menu>5.Profiles.> 5.Sound Effect’ and press the ] key, or press the [ ] key and [ ] key in the ] key, or press the [ ] key and [ ] key in the standby mode and select ‘2.Message Alert’... -
Page 59: Settings
ettings My Wallpaper: Sets up Wallpaper by “My W. My Wallpaper stores Select ‘Menu>6. Settings’. items to set up Wallpaper at Photo Gallery/Image Gallery. Other You can set up various handset functions at your choice in wallpapers than the default one may be deleted by the [ ] key the settings menu. -
Page 60: Call Settings
Call Settings Service Light Select ‘Menu>6.Settings>2.Call Settings’. This menu displays the On Service status in the external LED. You can set up the colour at your choice in this menu. Call Divert (Green / Red / Yellow / Cyan / Violet / White/ Blue) Select ‘Menu>6.Settings>2.Call Settings>1.Call Divert’. -
Page 61: Language
• Flip Open: You can answer incoming call by opening the phone flip. Language • Auto Receive: Your handset automatically answers calls after 10 Select ‘Menu>6.Settings>3.Language’. seconds. This feature is available only when the You can select a language to be displayed on the handset. handset is connected to the ear jack. -
Page 62: Security Settings
Security Settings Change Lock Changes a password. Default Password is 1234. Set ‘Menu>6.Settings>7.Security Settings’.. The security settings enable you to restrict the use of your Application Lock handset to the people and types of calls of your choice. Various codes and passwords are used to protect the Input a password and make an application at your choice features of your phone. -
Page 63: System Reset
System Reset NOTE Without existing record, the [ ] key would turn into [Add] and Select Menu>6.Settings> 8.System Reset.’ move to the name input screen for a new CUG registration. Deletes all user settings and data from your handset and Fixed Dialling initializes it as if it were just shipped out of the factory. -
Page 64: Organizer
rganizer Press the [ ] key to edit Alarm, and then press the Select ‘Menu>7.Organiser’. ] key in the ‘Edit Alarm’ screen to set up Set, Time, Organizer provides various functions including alarm setting, or Melody. main event record, memo, world time, calculator, unit conversion, stop watch and timer. -
Page 65: Daily View
Select ‘7.Organiser>2.Calendar’ from the menu to display • Delete All: Deletes all events. • On D-day / Off D-day: Sets up or cancels D-day. the Monthly View. • New: Adds a new event. Press the [Option] Soft key [ ] to; NOTE When you select D-day from Wallpaper Type, ‘D-Date, Event Memo •... -
Page 66: Memo
• Set as Local: Press the [Set] Soft key or select [Set as Local] Memo from the option menu and Target Area will be Select ‘Menu>7.Organiser>3.Memo’. replaced with Home Area. Save short notes in your phone. Calculator Press the [Option] Soft key [ ] to;... -
Page 67: Stop Watch
Press the [ ] Soft key to input a decimal point. Stop Watch Select ‘Menu>7.Organiser>7.Stop Watch’ Stop Watch measures the time for all sorts of sports. Press [ ] to operate Stop Watch. Press [ ] to pause Stop Watch and press [ ] to restart Stop Watch. -
Page 68: Advanced
DVANCED 1. WAP 2. Infrared Port 3. SIM Toolkit... -
Page 69: Wap
Home You can access to the Internet with a WAP (Wireless Application Protocol) browser. This menu contacts the network to load the Wireless Web That means you can connect to Internet at anywhere and service provider homepage. anytime. Resume The descriptions below can vary according to your Network You can reconnect to the latest web site. -
Page 70: Push Messages
• Profile Name: Sets Profile Name Push Messages • Home URL: Sets access Homepage URL to access Mobile can receive Push Messages from Service Provider. • GSM Settings: Sets up GSM network proxy. • Gateway (IP Address, IP Port, Login ID, Password) Inbox •... -
Page 71: Infrared Port
nfrared Port IM Toolkit This menu can vary depending on SIM and the network services. Provides the function to change the current status of Infrared port. • Internet Connection: Uses Infrared port for GPRS Modem purpose (Only some menus and functions are accessible.) •... -
Page 72: Appendix
PPENDIX 1. Access Code 2. Check List 3. All about performance and safety 4. Glossary 5. Guaranty 6. Memo... -
Page 73: Access Code
ccess Code PUK and PUK2 codes (8 digits) The following section describes various security codes. The PUK (Personal Unblocking Key) code is required to PIN code (4 to 8 digits) change a blocked PIN code. The PUK2 code is required to change a blocked PIN2 code. -
Page 74: Check List
heck List When audio quality is poor: If you experience any problem while using your cell phone, please refer to the following checklist. If the problem still End a call and try again. persists, contact your dealer or nearest service centre. When the other party cannot hear you When the “Insert SIM Card”... -
Page 75: When You Are Unable To Charge The Battery
When you are unable to charge the battery: ll about performance and safety This may be the result of one of the following three cases. 1. Your charger may be out of order. Contact your nearest dealer. The following list shows how to maintain your cell phone 2. -
Page 76: Glossary
lossary GPRS (General Packet Radio Service) To help you understand the main technical terms and abbreviations used in this booklet and take full advantage of New non-voice value-added service that allows information the features of your mobile phone, here are a few definitions. to be sent and received across a mobile telephone network. -
Page 77: Puk (Pin Unblocking Key)
PUK (PIN Unblocking Key) Voice Mail Security code used to unlock the phone when an incorrect Computerized answering service that automatically answers PIN has been entered three times in succession. The eight- your calls when you are not available, plays a greeting digit number is supplied by the service provider with the SIM (optionally in your own voice) and records a message. -
Page 78: Warranty
arranty...
Need help?
Do you have a question about the GF 200 and is the answer not in the manual?
Questions and answers