Table of Contents
Advertisement
Advertisement
Table of Contents

Subscribe to Our Youtube Channel
Related Manuals for Mio Digi Walker P350

Summary of Contents for Mio Digi Walker P350
- Page 1 www.mio-tech.be...
- Page 2 Revision: R00 Trademarks Microsoft, Windows, the Windows logo, Windows Media, Outlook and ActiveSync are registered trademarks or trademarks of Microsoft Corporation in the United States and/or other countries. Microsoft products are licensed to OEMs by Microsoft Licensing, Inc., a wholly owned subsidiary of Microsoft Corporation.
-
Page 3: Table Of Contents
Table of Contents Preface ....................v Getting Started ................1 1.1 Identifying Hardware Components ............1 Front Components ................1 Back Components ................3 Left-Side Components .................4 Right-Side Components...............5 Top Components .................5 Bottom Components ................6 1.2 Getting Your Device Ready for Use ............7 Performing Initial Startup ..............7 Connecting to AC Power and Charging the Battery ......8 1.3 Using Your Device in a Vehicle ............9... - Page 4 2.7 Notifications ..................17 2.8 Entering Information ................17 Entering Text Using the Input Panel..........18 Writing on the Screen ................20 Drawing on the Screen ..............22 Recording a Message................24 Using My Text..................25 2.9 Locking Your Pocket PC..............26 Managing Your Pocket PC ............29 3.1 Managing Power................29 Low Battery Signals and Actions ............29 Power-Saving Tips................30...
- Page 5 More Programs ................53 5.1 Microsoft ActiveSync .................53 Synchronizing Data................54 5.2 Word Mobile..................55 Creating a Document.................55 Opening a Document.................56 5.3 Excel Mobile ..................57 Creating a Workbook .................57 Opening a Workbook .................58 5.4 PowerPoint Mobile................59 5.5 Pocket MSN..................60 5.6 Windows Media Player for Pocket PC..........61 5.7 Pictures &...
- Page 6 Regulatory Information ............... 85 A.1 Regulations Statements..............85 European Notice ................85 A.2 Safety Precautions................86 About Charging..................86 About the AC Adapter................86 About the Battery ................87 Index ....................89...
-
Page 7: Preface
Preface Welcome Congratulations on purchasing this Windows® Mobile™ for Pocket PC with built-in GPS and Bluetooth functions. Due to the size and capabilities of the device, you can keep your most important business and personal information ® ® up-to-date and close at hand. Microsoft ActiveSync increases the power of your Pocket PC by allowing you to synchronize the information on your desktop... -
Page 8: Where To Find Information
Where to Find Information For information on See this source GPS navigation operation The manual supplied with the GPS software Programs on your Pocket PC This User’s Manual or online Help on your Pocket PC Connecting to and synchronizing Chapter 6 of this manual or ActiveSync with a desktop computer Help on your desktop computer The latest on Windows Powered... -
Page 9: Getting Started
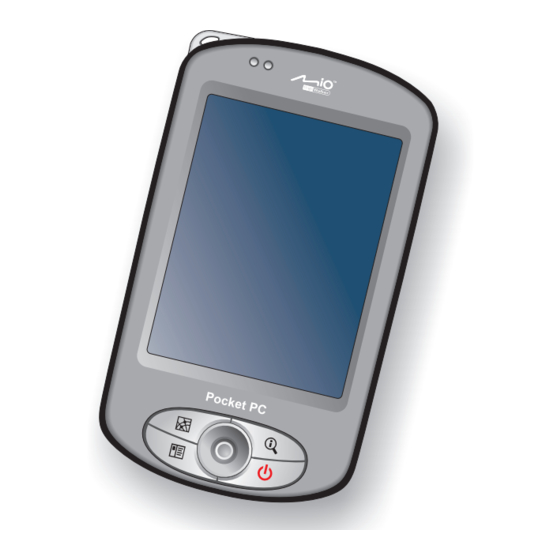
Getting Started This chapter introduces you to the external components of your Pocket PC and guide s you through the process of setting up your Pocket PC for use. NTOE: Depending on the model you purchased, the cabinet color and the look of t accessories may be different from the ones shown in this manual. - Page 10 Component Description Notification Flashes in red to inform you of scheduled appointments, Indicator alarms and reminders. Charge Indicator Glows in amber to indicate that battery charging is in progress and in green when the battery is fully charged. Displays the output of your Pocket PC. Tap the screen with Touch Screen the stylus to select menu commands or enter information.
-
Page 11: Back Components
Back Components Component Description Car Antenna This connector (under rubber dust cover) allows use of an optional external antenna with magnetic mount, which Connector may be positioned on top of the car for better signal reception in areas with poor reception. Stylus Tap on the touch screen to make selections and enter information. -
Page 12: Left-Side Components
Left-Side Components Component Description SD/MMC Slot Accepts an optional SD (Secure Digital) or MMC (MultiMediaCard) card for removable storage. Headphone Connects to a pair of stereo headphones. Connector IR Port Beams files to other mobile devices. -
Page 13: Right-Side Components
Right-Side Components Component Description Microphone Receives sound and voice to record voice. Top Components Component Description Hand String Hole Hand string attaches to this hole. GPS Antenna Receives signals from the GPS satellites overhead. -
Page 14: Bottom Components
Bottom Components Component Description Mini-USB Connects to the AC adapter or ActiveSync cable. Connector Reset Button Restarts your Pocket PC. ON/OFF Switch The main power/battery cutoff switch. -
Page 15: Getting Your Device Ready For Use
1.2 Getting Your Device Ready for Use Performing Initial Startup Initial startup includes setting the ON/OFF switch and completing the setup wizard. 1. Pull out the stylus and use it to slide the ON/OFF switch to the ON position. CAUTION: Always leave the ON/OFF switch in the ON position for normal operation. 2. -
Page 16: Connecting To Ac Power And Charging The Battery
Connecting to AC Power and Charging the Battery Fully charge the battery before starting to use your Pocket PC for the first time. 1. Fit the converter plug to the AC adapter ( ). Connect the mini-USB end of the AC adapter to your device ( ) and the other end to a wall outlet ( ). Converter Plug 2. -
Page 17: Using Your Device In A Vehicle
1.3 Using Your Device in a Vehicle Using the Car Holder CAUTION: When placing the car holder, make sure that the device does not obstruct the driver’s view, or interfere with the operation of vehicle airbags and safety devices. If the car’s windshield is tinted with a reflective coating, an external antenna (optional) may be needed to route the antenna to the top of the car through a window. -
Page 18: Turning Your Pocket Pc On And Off
1.4 Turning Your Pocket PC On and Off After the initial startup, your Pocket PC enters a suspend state when you turn it off and resumes when you turn it on. Turning Off to Suspend You suspend your Pocket PC by briefly pressing the power button. By default, your Pocket PC will also automatically suspend after 3 minutes of inactivity when operating on battery power. - Page 19 1. Turn on your desktop computer. 2. Insert the Getting Started CD into the CD-ROM drive of your desktop computer. 3. Click to continue. Next 4. The setup wizard will install Microsoft ActiveSync. Follow the onscreen instructions to install ActiveSync. 5.
-
Page 20: Expanding Your Pocket Pc
1.6 Expanding Your Pocket PC Using a SD/MMC Card Your Pocket PC has a SD/MMC slot where you can insert an optional Secure Digital or MultiMediaCard storage card. With the removable memory, you can store or backup your data and exchange data with other devices. NOTE: A storage card is also called a memory card. -
Page 21: Basic Skills
Basic Skills This chapter familiarizes you with the basic operations of your Pocket PC such as using the stylus, navigation stick, Today screen, menus, and programs. You will also know how to enter information and lock your Pocket PC. 2.1 Using the Stylus Use the stylus to navigate and select objects on the screen. -
Page 22: Using The Navigation Stick
2.2 Using the Navigation Stick With the navigation stick, you can move up, down, left and right within a menu. This is particularly useful for one-hand operation. Right Left To move in a direction, simply push the button toward the corresponding direction. Down To activate the selected item, press the button. -
Page 23: Landscape View
Landscape View You can use your Pocket PC in a landscape manner. There are two ways to change the screen view: Settings System Screen Landscape Portrait Press the Rotate button ( 2.4 Navigation Bar and Toolbar The Navigation bar is located at the top of the screen. It displays the active program and current time and allows you to switch programs and close screens. -
Page 24: Running Programs
Use the toolbar at the bottom of the screen to perform tasks in programs. The toolbar includes a left soft key, a right soft key, and the Input panel button in between. The right soft key is usually while the left soft key varies with Menu programs. -
Page 25: Notifications
Tap and hold to display the shortcut menu. Lift the stylus and tap the action you want. Tap outside the menu to close it without performing an action. 2.7 Notifications Your Pocket PC reminds you in a variety of ways when you have something to do. -
Page 26: Entering Text Using The Input Panel
Entering Text Using the Input Panel Use the Input panel to enter information in any program on your Pocket PC. You can either type using the soft keyboard or write using the soft keyboard, Block Recognizer, Letter Recognizer or Transcriber. In any case, the characters appear as typed text on the screen. - Page 27 NOTE: To change word suggestion options, such as the number of words suggested at one time, tap Settings Personal Input Word Completion. Block Recognizer With Block Recognizer, you can use the stylus to input characters using strokes that are similar to the Palm™ Graffiti® method. To type with Block Recognizer: 1.
-
Page 28: Writing On The Screen
For specific instructions on using Transcriber, open Transcriber and then tap the question mark in the lower-right corner of the screen. Writing on the Screen In any program that accepts writing, such as the Notes program, you can use your stylus to write directly on the screen. Write the way you do on paper. You can edit and format what you have written and convert the information to text later. - Page 29 2. Tap and hold the selected words and then tap an editing command (cut, copy or paste) on the shortcut menu or tap the command on the menu. Menu Edit If you accidentally write on the screen, tap and try again. Menu Undo Ink Converting Your Writing to Text...
-
Page 30: Drawing On The Screen
Tap to return to your original writing. Or, tap the word you want to use. Some tips for getting good recognition are listed below: Write neatly. Write on the lines and draw descenders below the line. Write the cross of the “t”... - Page 31 Creating a Drawing 1. Tap to enable drawing mode. A check (√) appears before the Menu Draw command. 2. To create a drawing, cross three ruled lines on your first stroke. A drawing box appears. 3. Subsequent strokes in or touching the drawing box become part of the drawing.
-
Page 32: Recording A Message
Recording a Message In any program where you can write or draw on the screen, you can also quickly capture thoughts, reminders and phone numbers by recording a message. In the Notes program, you can either create a stand-alone recording or include a recording in a written note. -
Page 33: Using My Text
Recording Formats Your Pocket PC supports several formats for voice notes. The formats vary in both the quality of the recording and the size of the sound file. When selecting a recording format, you should consider the quality you need as well as how much storage memory the recording will use on your Pocket PC. -
Page 34: Locking Your Pocket Pc
Tap to select a prewritten message. NOTE: After inserting a My Text message, you can add text to it before you send the message. To edit a My Text message, tap . Select Menu My Text Edit My Text Messages the message you wish to edit and make desired changes. - Page 35 Tap to lock the device. Tap to unlock To unlock, tap (left soft key) and tap Unlock Unlock...
-
Page 37: Managing Your Pocket Pc
Managing Your Pocket PC This chapter tells you how to effectively manage power, memory, settings, data and programs of your Pocket PC. 3.1 Managing Power A fully charged battery should provide power for up to 8 hours of use. The operating time of a fully charged battery depends on how you are using the Pocket PC. -
Page 38: Power-Saving Tips
Power-Saving Tips Follow these suggestions to maximize the battery’s operating time, particularly when you are relying solely on the battery power for extended time periods. Suspend frequently. By default, the screen backlight will automatically turn off and the Pocket PC will also turn off when it has been idle for a period of time. You can shorten the length of the idle time using Settings System... -
Page 39: Additional Memory
Your Pocket PC automatically manages the allocation between storage and program memory. However, in some situations, such as when the memory is running out, your Pocket PC may not be able to automatically adjust the allocation. (For information on solving memory problems, see section 7.4.) Additional Memory You can buy a SD/MMC storage card for backup, storage, archives or to transfer large files to other devices. - Page 40 Items Descriptions To show the hardware information of the Pocket PC and About System to define the device name that your Pocket PC uses for identifying itself to other computers. Backlight To adjust the brightness level of the display and to set the automatic turnoff for power saving purposes.
-
Page 41: Searching And Organizing Information
Items Descriptions Connections Beam To send and receive information and files between IR ports. Connections To set up or change connection information. (See Section 6.1 for more information.) Network To configure the network card, if installed. (See Section Cards 6.1 for more information.) 3.4 Searching and Organizing Information The Search feature on your Pocket PC helps you quickly locate information. -
Page 42: Adding Or Removing Programs
3.5 Adding or Removing Programs You can install any program created for your Pocket PC as long as your Pocket PC has enough memory. The most popular place to find software for your Pocket PC is on the Pocket PC Web site (http://www.pocketpc.com). Adding Programs To Add Programs Using ActiveSync You will need to install the appropriate software for your Pocket PC on your... -
Page 43: Removing Programs
NOTE: You can also use Pocket Internet Explorer to download some programs from the Internet directly to your Pocket PC if your Pocket PC is connected to Internet. Once installation is complete, tap and tap the program icon to Program switch to it. -
Page 45: Microsoft Pocket Outlook
Microsoft Pocket Outlook This chapter tells you how to use Microsoft Pocket Outlook that includes Calendar, Contacts, Tasks, Notes, and Messaging. You can use these programs individually or together. For example, e-mail addresses stored in Contacts can be used to address e-mail messages in Messaging. 4.1 Calendar: Scheduling Appointments and Meetings Use Calendar to schedule appointments, including meetings and other events. -
Page 46: Creating An Appointment
Creating an Appointment 1. In Day or Week view, tap the desired date and time for the appointment. 2. Tap Menu New Appointment Tap to return to the calendar (the appointment is saved automatically). Tap to choose from predefined text. Tap to choose from previously entered locations. -
Page 47: Using The Calendar Summary Screen
Using the Calendar Summary Screen When you tap an appointment in Calendar, a summary screen is displayed. To change the appointment, tap Edit View appointment details. View notes. Tap to change appointment. -
Page 48: Contacts: Tracking Friends And Colleagues
4.2 Contacts: Tracking Friends and Colleagues Contacts maintains a list of your friends and colleagues so that you can easily find the information you are looking for, whether you are at home or on the road. to switch to the program. Contacts Tap and enter part of a name or number to quickly find a contact... - Page 49 Tap to return to the contact list (the contact is saved automatically). 2. Using the Input panel, enter a name and other contact information. You will need to scroll down to see all available fields. 3. Tap to save and return to the contact list. NOTE: For more information, tap Help.
-
Page 50: Using The Contacts Summary Screen
Using the Contacts Summary Screen When you tap a contact in the contact list, a summary screen is displayed. To change the contact information, tap Edit Tap to view notes. Tap to change contact information. -
Page 51: Tasks: Keeping A To Do List
4.3 Tasks: Keeping a To Do List Use Tasks to keep track of what you have to do. to switch to the program. Programs Tasks Tap to quickly create a task with only a subject Tap to display or edit the task details. -
Page 52: Using The Tasks Summary Screen
2. Using the Input panel, enter a description. 3. You can enter a start date and due date or enter other information by first tapping the field. If the Input panel is open, you will need to hide it to see all available fields. -
Page 53: Notes: Capturing Thoughts And Ideas
4.4 Notes: Capturing Thoughts and Ideas Quickly capture thoughts, reminders, ideas, drawings and phone numbers with Notes. You can create a written note or a recording. You can also include a recording in a note. If a note is open when you create the recording, it will be included in the note as an icon. - Page 54 Tap to return to the note list (the note is saved automatically) 3. Tap to save and return to the note list. NOTE: For more information, tap Help.
-
Page 55: Messaging: Sending And Receiving E-Mail Messages
4.5 Messaging: Sending and Receiving E-mail Messages You can use Messaging to send and receive email messages in two ways: By synchronizing email messages with Microsoft Exchange or Microsoft Outlook on your desktop computer. By connecting directly to an e-mail server through an ISP (Internet Service Provider) or a network. -
Page 56: Connecting Directly To An E-Mail Server
Connecting Directly to an E-mail Server You can send and receive email messages by connecting to a POP3 or IMAP4 e-mail server if you can connect to your ISP or local area network. (For information on connection, see Section 6.1.) Setting up an Email Service You can use multiple email services to receive your messages. - Page 57 Select the service and folder you want to display. Select the sort order for messages. Tap to open a message. Tap and hold to display the shortcut menu. When you receive a message, tap it to open it. Tap to return to the message list. When you connect to your email server or synchronize with your desktop computer or server, by default, you will receive messages from the last three days only, the first 100 lines of each new message file attachments of less than...
-
Page 58: Composing And Sending Messages
You can mark the messages that you want to retrieve in full during your next synchronization or email server connection. In the message list, tap and hold the message you want to retrieve. On the shortcut menu, tap . The Mark for Download icons in the Inbox message list give you visual indications of message status. -
Page 59: Managing Email Messages And Folders
5. To check spelling, tap Menu Spell Check 6. If you want to attach a file to the message, tap and select the Menu Insert desired file. NOTE: OLE objects cannot be attached to Inbox messages. 7. Tap when you have finished the message. If you are working offline, Send the message is moved to the Outbox folder and is sent the next time you connect. - Page 60 If you use POP3 and you move email messages to a folder you created, the link is broken between the messages on the Pocket PC and their copies on the mail server. The next time you connect, the mail server sees that the messages are missing from the Pocket PC Inbox and deletes them from the server.
-
Page 61: More Programs
More Programs In addition to Microsoft Pocket Outlook, there are other programs built into your Pocket PC. This chapter tells you how to use these programs. 5.1 Microsoft ActiveSync NOTE: ActiveSync is already installed on your Pocket PC. You need to install ActiveSy on your desktop computer. -
Page 62: Synchronizing Data
Synchronizing Data Once you have created a synchronization relationship and completed the first synchronization, you can initiate synchronization from your Pocket PC. 1. Connect your Pocket PC to your desktop computer. 2. On your Pocket PC, tap Programs ActiveSync 3. Tap to begin synchronization. -
Page 63: Word Mobile
5.2 Word Mobile Microsoft Word Mobile works with Microsoft Word on your desktop computer to give you easy access to copies of your documents. You can create new documents on your Pocket PC or you can copy documents from your desktop computer. to switch to the program. -
Page 64: Opening A Document
Tap and hold to see a shortcut menu of actions. Tap to return to the document list (changes are saved automatically). Tap to format text. 3. When you have finished entering the information and tap , the document is automatically saved and named according to the first characters of text entered in the document. -
Page 65: Excel Mobile
5.3 Excel Mobile Microsoft Excel Mobile works with Microsoft Excel on your desktop computer to give you easy access to copies of your workbooks. You can create new workbooks on your Pocket PC or you can copy workbooks from your desktop computer to your Pocket PC. -
Page 66: Opening A Workbook
4. When you have finished entering the information and tap , the workbook is automatically saved and named according to the first characters of text entered in the workbook. NOTE: For more information, tap Help. Opening a Workbook Whenever you switch to Excel Mobile, you will see the workbook list. Tap the desired workbook to open it. -
Page 67: Powerpoint Mobile
5.4 PowerPoint Mobile With PowerPoint Mobile, you can open and view slide show presentations created on your desktop computer. Slide shows created in *.ppt and *.pps format with PowerPoint ’97 and later can be viewed on your Pocket PC. 1. Tap to switch to the program. -
Page 68: Pocket Msn
5.5 Pocket MSN Pocket MSN provides practically instant access to your up-to-date MSN Hotmail Inbox, your MSN Messenger Contacts list, and options for customizing your Pocket MSN experience. With Pocket MSN, you get: MSN Hotmail Read, write and send e-mail. Delete e-mail and manage your Hotmail folders. -
Page 69: Windows Media Player For Pocket Pc
5.6 Windows Media Player for Pocket PC Use Microsoft Windows Media Player for Pocket PC to play digital audio and video files that are stored on your Pocket PC or on a network, such as on a Web site. to switch to the program. Windows Media Library Screen Playback Screen... -
Page 70: Pictures & Videos
5.7 Pictures & Videos Use Pictures & Videos to view and edit pictures as well as launch video clips stored on your Pocket PC or on a storage card. You can also send pictures and video clips to others, or set a picture as the background on the Today screen. You can see your pictures individual, as thumbnails, or as part of a slide show. -
Page 71: Additional Programs
If Mio Map is pre-installed in your device, you have the option of keeping the software. To perform a “Clean Boot,” tap and follow the onscreen Start instructions. -
Page 72: Econverter
you to unlock it within 5 seconds. As long as there is no response from you within 5 seconds, the device turns off again. This helps saving battery power. (See Section 2.9 to know how to unlock.) eConverter eConverter provides three modes: Calculator, Currency, and Metrology. You can use these modes to perform basic arithmetic and convert currency and measure. - Page 73 Before performing the currency conversion, you can edit the exchange rate to the most up-to-date one. Tap button on the currency screen. Enter the Edit exchange rate and tap the √ button to save and go back to the currency screen. Using Metrology Mode Tap the button on the calculator screen to...
-
Page 75: Getting Connected
Getting Connected To take full advantage of your Pocket PC, you will want to get connected. This chapter tells you how you can get your Pocket PC connected through a variety of ways including modem, and network card. It also describes Internet Explorer for Web browsing. -
Page 76: Network (Ethernet) Card Connection
Creating a Modem Connection 1. Tap Settings Connections Connections 2. In , tap . To view My ISP My Work Network Add a new modem connection additional settings, tap NOTE: To change modem connection settings, in either My ISP or My Work Network, tap Manage existing connections. - Page 77 so you should not have to change these settings unless your network administrator instructs you to do so. 4. If necessary, connect the network card to the network by using a network cable. NOTE: You may need proxy server and VPN connection settings. For more information, see Pocket PC online help and your network administrator.
-
Page 78: Using Internet Explorer Mobile
6.2 Using Internet Explorer Mobile Use Internet Explorer Mobile to view Web pages in either of these ways: Connect to an ISP or network and browse the Web. To do this, you will need to create the connection first, as described in section 6.1. During synchronization with your desktop computer, download your favorite links and mobile favorites that are stored in the Mobile Favorites subfolder in Internet Explorer on the desktop computer. -
Page 79: Browsing The Internet
Tap the favorite you want to view. Tap to add or delete a folder or favorite link. You will see the page that was downloaded the last time you synchronized with your desktop computer. If the page is not on your Pocket PC, it will be dimmed in the Favorites list. - Page 80 Favorite Links During synchronization, the list of favorite links in the Mobile Favorites folder on your desktop computer is synchronized with Pocket Internet Explorer on your Pocket PC. Both computers are updated with changes made to either list each time you synchronize. Unless you mark the favorite link as a mobile favorite, only the link (and not the page) will be downloaded to your Pocket PC, and you must connect to your ISP or network to view the content.
-
Page 81: Conserving Memory
NOTE: If you do not specify an update schedule, you must manually download content to keep the information updated on your desktop computer and Pocket PC. Before synchronizing, in Internet Explorer on your desktop computer, click Synchronize on the Tools menu. You will see the last time content was downloaded to the desktop computer, and you can manually download content if needed. -
Page 83: Troubleshooting And Maintenance
Troubleshooting and Maintenance Troubleshooting and Maintenance This chapter gives solutions to common Pocket PC problems you may ncou nter. It also provides guidelines on taking care of your Pocket PC. NOTE: If you encounter a problem you cannot solve, contact your dealer for assistance. 7.1 Resetting Your Pocket PC CAUTION: Resetting will cause unsaved data to be lost. -
Page 84: Restoring Last State
7.2 Restoring Last State Follow this procedure to restore your Pocket PC to the last state when your Pocket PC does not respond after being reset. 1. Disconnect all cables, including t he AC adapter, from your Pocket PC. Slide the ON/OFF switch to the OFF position. 3. -
Page 85: Power Problems
7.3 Power Problems er does not turn on when using battery power The remaining battery power may be too low to run your Pocket PC. Connect the AC adapter to your P ocket PC and to external AC power. Then, turn on your Pocket PC. -
Page 86: Screen Problems
saved by closing open items and returning the program to list view. Then, st the p rogram by tapping on the tab. Stop Stop All Running Programs Rese our Pocket PC as described in section 7.1. If you have a storage card, move data to the storage card as described . -
Page 87: Connection Problems
Screen freezes Reset your Pocket PC as described in section 7.1. Screen is hard to read Make sure that the backlight of the display is on. Move to a location with enough light. If you’re having a hard time reading a document on the screen, try adjusting the zoom percentage or text size. -
Page 88: Modem Connection Problems
Make sure that your Pocket PC and your desktop computer are both turn on before establishing the connection. Make sure that the cable is securely plugged into the U SB port on your desktop computer. Connect the USB cable directly to your desktop computer—do not run the cable through a USB hub. -
Page 89: Network Connection Problems
Modem connection is unreliable Make sure that the modem is installed properly. Make sure that the telephone line is connected correctly. Network Connection Problems Make sure that the network card is compatible with your Pocket PC. Make sure that you have installed the proper drivers for your Pocket PC. In the properties for your network card, make sure that you hav e correctly configured the IP settings, and the addresses of your DNS server... -
Page 90: Taking Care Of Your Pocket Pc
7.7 Taking Care of Your Pocket PC Taking good care of your Pocket PC will ensure trouble-free operation and reduce the risk of damage to your Pocket PC. General Guidelines Keep your Pocket PC away from excessive moisture and extreme temperatures. -
Page 91: Travel Guidelines
Travel Guidelines Before traveling with your Pocket PC, back up your data. As an added precaution, bring along a backup copy. Turn off your Pocket PC and disconnect all external devices. Make sure that the battery is fully charged. Take the AC adapter with you. Use the AC adapter as the power source and as a battery-recharger. -
Page 93: Regulatory Information
Regulatory Information NOTE: Marking labels located on the exterior of your device indicate the regulations that your model complies with. Please check the marking labels on your device and refer to the corresponding statements in this chapter. Some notices apply to specific models only. A.1 Regulations Statements European Notice Products with the CE marking comply with Radio &... -
Page 94: Safety Precautions
The manufacturer cannot be held responsible for modifications made by the User and the consequences thereof, which may alter the conformity of the product with the CE Marking. A.2 Safety Precautions About Charging Use only the AC adapter (PSC05R-050 PH) supplied with your Pocket PC. Use of another type of AC adapter will result in malfunction and/or danger. -
Page 95: About The Battery
About the Battery Use a specified charger approved by the manufacturer. Do not mutilate, puncture, or dispose of battery in fire. The battery can burst or explode, releasing hazardous chemicals. Important instructions Caution: Risk of explosion if battery is replaced by an incorrect type. Dispose of used batteries according to the instructions. -
Page 97: Index
Index Settings, 31 AC adapter Cautions, 86 Calculator, 64 Connecting, 8 Calendar, 37 Accessory, 12 Creating an appointment, 38 ActiveSync, 53 Summary screen, 39 Installing on desktop computer, 10 Car charger, 9 Synchronizing data, 54 Car holder, 9 Synchronizing e-mail messages, 47 Certificate, 32 Synchronizing mobile favorites, 71 Charging the battery, 8... - Page 98 Notification, 2 Infrared, 4 Input, 17 eConverter, 64 Settings, 31 E-mail service setting up, 48 Input panel, 18 Entering information, 17 Internet Error reporting, 32 Browsing, 71 Ethernet, 68 Internet Explorer Mobile, 70 Excel Mobile, 57 IR port, 4 Features, 1 Landscape view, 15 File Explorer, 33 Letter Recognizer, 19...
- Page 99 Updating schedule, 72 Checking remaining battery power, Viewing, 70 Modem connection, 67 Connecting, 8 MP3, 61 Low battery, 29 MSN. See Pocket MSN Saving, 30 MultiMediaCard, 4, 12 Settings, 32 My ISP, 67 Troubleshooting, 77 My Text, 25 Power button, 2, 10, 30 My Work Network, 67 PowerPoint Mobile, 59 Program buttons, 2...
- Page 100 Landscape view, 15 Summary screen, 44 Landscape/Portrait view, 32 Time, 32 Realigning, 79 Today screen, 14 Troubleshooting, 78 Settings, 31 SD card, 12 To-do list. See Tasks SD slot, 4 Touch screen. See Screen Search, 33 Transcriber, 19 Secure Digital, 4, 12 Traveling, 83 Shortcut menu, 16 Troubleshooting, 75...
Need help?
Do you have a question about the Digi Walker P350 and is the answer not in the manual?
Questions and answers