
Related Manuals for LG PB62G


Summary of Contents for LG PB62G
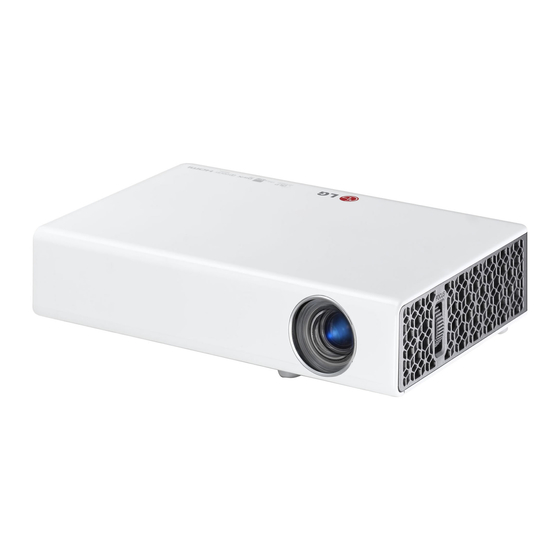
- Page 1 Owner's Manual DLP PROJECTOR Please read this manual carefully before operating your projector and retain it for future reference. PB62G www.lg.com (Brazil : www.lge.com)
-
Page 2: Licenses
LICENSES LICENSES Supported licenses may differ by model. For more information about licenses, visit www.lg.com. Manufactured under license from Dolby Laboratories. “Dolby “and the double-D symbol are trademarks of Dolby Laboratories. ABOUT DIVX VIDEO: DivX® is a digital video format created by DivX, LLC, a subsidiary of Rovi Corporation. -
Page 3: Safety Instructions
SAFETY INSTRUCTIONS SAFETY INSTRUCTIONS Please take note of the safety instructions to prevent any potential accident or misuse of the projector. FCC NOTICE Warning - Class B (b) For a Class B Digital device or peripheral, the instructions furnished the user shall include the following or The lightning flash with similar statement, placed in a prominent arrowhead symbol, within... - Page 4 SAFETY INSTRUCTIONS Read these instructions. Do not use the projector in a damp Keep these instructions. place such as a bathroom where it is Heed all warnings. likely to get wet. Follow all instructions. - This may cause a fire or an electric shock.
- Page 5 Use only the official power cord which positioned so it is easy to access for is provided by LG Electronics, Inc. Do operation. not use other power cords. - This may cause a fire or an electric...
- Page 6 LG Elec- distance of more than four times the tronics Service Center. diagonal length of the screen.
- Page 7 LG Electronics Service Center. contact an authorized service center. - If not, this may cause a fire or an - Otherwise, this may cause a fire or electric shock.
- Page 8 Always use batteries approved and certified by LG Electronics. - Otherwise, this may result in fire or explosion. Store the battery away from metallic objects, such as keys and paper clips.
- Page 9 SAFETY INSTRUCTIONS Keep the battery out of reach of chil- dren. - This may result in personal injury or damage to the product. Make sure that the battery is installed correctly. Incorrect battery replacement may cause fire. CAUTION Unplug the power cord if the projec- tor is not used for a long period.
-
Page 10: Table Of Contents
Contents Contents LICENSES - MOVIE LIST - PHOTO LIST - MUSIC LIST SAFETY INSTRUCTIONS - FILE LIST PREPARATION 3D FUNCTION Accessories Before Watching 3D Optional Extras - While Watching 3D Parts and Components Requirements for Watching 3D Images Installation - Installation Precautions - To Use DLP-LINK (DLP-Ready) Type - Projection Distance per Screen Size Glasses... -
Page 11: Preparation
PREPARATION PREPARATION Accessories Check enclosed accessories. The picture may be different from an actual product. Remote Control Mercury battery Owner's Manual CD Owner's manual AC-DC Adaptor (CR 2032) Computer Cable Composite Gender Power Cord Pouch USB Extension Wi-Fi dongle Cable When connecting a cable to the HDMI or USB port, it may not be connected properly if the size of jack to the USB/HDMI port is too big. -
Page 12: Optional Extras
PREPARATION Optional Extras To purchase optional extras, visit an electronics store or online shopping site or contact the retail store where you purchased the product. Without prior notice, optional extras are subject to change in order to improve the per- formance of the product, and new accessories may be added. -
Page 13: Parts And Components
PREPARATION Parts and Components * The projector is manufactured using high-precision technology. You may, however, see tiny black dots and/or bright colored dots (red, blue or green) that continuously appear on the projector screen. This is a normal result of the manufacturing process and does not indicate a malfunction. -
Page 14: Installation
PREPARATION Installation Do not place the projector in a hot or humid environment. - Do not place the projector in a Installation Precautions hot, cold, or humid environment. (See 57Page regarding operating Place the projector in a well-ventilat- temperature and humidity.) ed environment. -
Page 15: Projection Distance Per Screen Size
PREPARATION Projection Distance per Screen Size Place the projector on a sturdy, level surface, together with the PC or audio/video source. Place the projector at an appropriate distance from the screen. The distance be- tween the projector and the screen determines the actual size of the image. Position the projector so that the lens is set at a right angle to the screen. -
Page 16: How To Install The Projector Using A Tripod
PREPARATION How to Install the Projector Using a Tripod You can install this projector using a camera tripod. As shown below, you can mount the projector instead of a camera on the tripod. When stabilizing the tripod, we recommend using the locking bolt of standard size 4.5 mm or less. -
Page 17: Remote Control
REMOTE CONTROL REMOTE CONTROL Open the battery cover on the back of the remote control and insert the specified batteries as per instructions ② ① POWER Turns the projector on or off. INPUT Changes the input source. MUTE Mutes all sounds. VOLUME +, - Adjusts the volume level. - Page 18 REMOTE CONTROL STILL Freezes the moving image. (Available in any mode other than USB mode.) RATIO Resizes an image. Accesses USB mode. MARK Allows you to select optional functions. KEY.S ▲▼ Adjusts Keystone. Playback Control Buttons Controls playback of MY MEDIA. Shows 3D images.
-
Page 19: Using The Projector
Using the PROJECTOR Using the PROJECTOR Watching Projector Watching Projector In Standby mode, press the POWER button to turn the projector on. Turning on the Projector Press the INPUT button and select Connect the power cord correctly. the input signal you want. After waiting for a moment, press Control the projector using the fol- the POWER button on the remote... -
Page 20: Using Additional Options
Using the PROJECTOR Using Additional Options Adjusting Aspect Ratio 4:3: Resizes images to the 4:3 Resize an image to view at its optional aspect ratio. size by pressing RATIO while you are using the projector. NOTE Zoom: Enlarges an image to fit the screen width. -
Page 21: Using The Keystone Function
Using the PROJECTOR Using the Keystone Using the Input List Function Using the Input List To prevent the screen image from Press the INPUT button to access becoming trapezoidal, Keystone adjusts the input sources. the top and bottom width of the image if the projector is not set at a right angle - The connected input mode appears to the screen. -
Page 22: Blank Function
Using the PROJECTOR Using the Quick Menu Blank Function Using the Blank Function You can customize frequently used menus. This function may be effective when you Press Q.MENU to access the quick need to draw attention during a meeting menus. or training. -
Page 23: Entertainment
ENTERTAINMENT ENTERTAINMENT Using WiDi Connecting to WiDi WiDi refers to Intel's Wireless Display technology. If you have a notebook that supports Intel WiDi, you can use the projector as an eternal monitor without using a video cable. WiDI requires a strong signal. If you experience interference, use the use the USB Extension Cable provided with the Wi-Fi dongle. -
Page 24: Widi (Wireless Display) Setup
ENTERTAINMENT WiDi (Wireless Display) Setup Set the external input of the projector to WiDi. Run the WiDi( ) program on your notebook. After running the WiDi program on your notebook, a list will show all available devices that were detected. In the list, select the Projector you want and click Connect. Enter the 4 - digit number shown(ⓐ) on the screen (ⓑ) and then click Continue. -
Page 25: My Media
ENTERTAINMENT MY MEDIA To disconnect the USB storage device, Press the Q.MENU button. Connecting USB Storage Use the ︿ or ﹀ button to move to Devices USB Device and press the OK button. Connect a USB memory stick as shown Remove the USB device. - Page 26 ENTERTAINMENT Tips for Using USB Devices Please connect a USB storage device with a cable provided by the USB Only a USB storage device is recog- manufacturer. When you use a cable nizable. that is not provided by a USB manu- USB hubs are not supported.
-
Page 27: Movie List
ENTERTAINMENT MOVIE LIST In the Movie List, you can watch movies stored on the connected USB device. Tips for Playing Video Files Some subtitles created by a user may Streaming files which include GMC not work. (Global Motion Compensation) or Some special characters are not sup- Qpel (Quarterpel Motion Estimation) ported in subtitles. -
Page 28: Supported Video Formats
ENTERTAINMENT Supported Video Formats File Audio/ Codec Profile/Level Support Extensions Video Advanced Profile @ Level 3 (e.g.720p60, 1080i60, 1080p30) VC-1 Advanced Profile Only streams compliant to SMPTE 421M VC-1 standard are supported. Video Simple Profile @ Medium Level (e.g.CIF, QVGA) .asf VC-1 Simple Main Profile @ High Level (e.g.1080p30) - Page 29 ENTERTAINMENT Supported Audio Files Audio Codec Bit rate Sampling rate Remark 32 kbps - 320 kbps 32 kHz - 48 kHz 32 kbps - 640 kbps 32 kHz, 44.1 kHz, 48 kHz MPEG 32 kbps - 448 kbps 32 kHz - 48 kHz DTS Audio codec is Korea only.
-
Page 30: File List
ENTERTAINMENT Browsing Movie List Play a video fi le stored in the connected Control playback by using the follow- ing buttons. device. Connect a USB storage device. Press the USB button. Use the ︿, ﹀, ︿ or ﹀ button to select Movie List and press the OK ��... - Page 31 ENTERTAINMENT Options for Movie List Setting Description Subtitle Speed: If a subtitle is Press the Q.MENU button. Lan- not synchronized with its Use the ︿ or ﹀ button to move to a guage video, you can adjust its desired option and press the speed at 0.5 sec unit.
- Page 32 ENTERTAINMENT To deregister the DivX code PICTURE Settings You can change video settings. Use the DivX deregistration code to (Refer to "PICTURE Settings" on page deactivate the DivX DRM function. 45.) In the Home menu, move to OPTION AUDIO Settings and press DivX(R) VOD.
-
Page 33: Photo List
ENTERTAINMENT PHOTO LIST ❶ ❷ ❸ ❹ ❺ You can see the photos stored on a con- nected device. Page 1/1 ꘧ Page Change Photo List USB STORAGE DEVICE Supported Photo Files book Page 1/1 Butterfly_... 01:34:33 PHOTO (*.JPEG) Baseline: 64-pixel (width) x 64-pixel (height) - 15360-pixel (width) x 8640-pixel (height) ꔅ... - Page 34 ENTERTAINMENT Setting Description Control playback by using the follow- ing buttons. Hide Hides the menu on the full size screen. To see the menu, press 01_a.jpg 2008/12/10 the OK button on the 1920 x 1080 479 KB remote control. [1/4] Exit Exit from full screen photo view.
-
Page 35: Music List
ENTERTAINMENT MUSIC LIST Options for Photo List Press the Q.MENU button. You can play audio fi les stored on the connected device. Use the ︿ or ﹀ button to move to a desired option and press the OK but- Supported Music Files ton. - Page 36 ENTERTAINMENT Description Setting Description Hide ❶ Thumbnails Hides the playback bar. Press the OK button to Abnormal file make the playback bar appear. Exit Returns to the Music List File not supported screen. ❷ File List Options for Music List ❸...
-
Page 37: File List
ENTERTAINMENT FILE LIST You can see document fi les stored on a ❶ ❹ ❷ ❸ connected device. Page 1/1 ꘧ Page Change File List Supported File Formats USB STORAGE DEVICE Drive1 Page 1/1 Butterfly_... 01:34:33 XLS, DOC, PPT, TXT, XLSX, PPTX, DOCX, PDF, Microsoft Offi ce 97/ 2000/ 2002/ 2003/ 2007... - Page 38 ENTERTAINMENT Set FileViewer Option Control playback by using the follow- Setting Description ing buttons. y Click Go Page then the pop-up Single On Loads and displays window for selecting the number of Page pages one by one. page appears. Loading The initial loading y Input the page to move to the page time is short but a...
-
Page 39: 3D Function
3D FUNCTION 3D FUNCTION 3D technology uses different video frames for each eye to add depth to the video. Before Watching 3D Warning about photosensitivity sei- While Watching 3D zures - Some users may experience a WARNING seizure or other abnormal symptoms when they are exposed to a flash- If you view 3D images too closely for ing light or particular pattern from... - Page 40 The 3D glasses must be DLP-LINK (DLP Ready) type. Please use 3D glasses certified by LG You may not be able to watch 3D Electronics. properly if there is an obstacle between the projector and 3D glasses.
-
Page 41: Requirements For Watching 3D Images
3D FUNCTION Requirements for Watching 3D Images * Optimum viewing angle: Top/Bottom/Left/Right 9° Optimum viewing distance: Between 3 m and 5 m Recommended screen size: 101 cm * Basically, Watching 3D videos should be done in dark room environments only. * For 3D watching, set the energy saving mode to Minimum. - Page 42 3D FUNCTION Please check the minimum system requirements for your computer. Minimum re- quirements are as follows: Microsoft® Windows® XP, Vista 32/ 64 bit ,Windows 7 32/ 64 bit Intel® Core 2 Duo or AMD Athlon™ X2 CPU or higher More than 1 GB of system memory (2 GB recommended) Free space of 100 MB or more DirectX 9 or higher...
-
Page 43: To Use Dlp-Link (Dlp-Ready) Type Glasses
3D FUNCTION To Use DLP-LINK (DLP-Ready) Type Glasses While watching 3D images from the projector, press buttons on the glasses. When you press the button, the glasses flicker to be synchronized with the 3D images. (The flickering is a unique operation method of DLP-LINK type glasses. It may be different depending on the glasses type.) If the glasses flicker or problems occur while watching 3D, first turn the lights off to make the room darker. -
Page 44: Customizing Settings
CUSTOMIZING SETTINGS CUSTOMIZING SETTINGS SETUP Menu Press the SETTINGS button. Use the ︿, ﹀, ︿ or ﹀ button to select a desired item and press the OK button. Use the ︿, ﹀, ︿ or ﹀ button to set up a desired item and press the OK button. When you are finished, press EXIT. -
Page 45: Picture Settings
CUSTOMIZING SETTINGS PICTURE Settings Press the SETTINGS button. PICTURE ꔂ Move ꔉ OK Use the ︿, ﹀, ︿ or ﹀ button to select PICTURE • Energy Saving : Medium • Picture Mode : Standard and press the OK button. • Contrast Use the ︿, ﹀, ︿... - Page 46 CUSTOMIZING SETTINGS Setting Description Picture Restores the options of each mode to the factory default. Reset Aspect Changed the image size to view images at its optimal size. (see page20) (see page20) Ratio Picture By following the instructions, using the remote control, you can eas- Wizard II ily adjust the picture quality to technical standards without needing an expensive pattern device or a picture quality expert.
- Page 47 CUSTOMIZING SETTINGS Setting Description Real Cinema Provides the optimal picture quality for watching a movie. Color Gamut Selects the range of colors to display. Standard: Displays the original colors of an input signal regardless of the display features. Wide: Sets to use the rich colors of the display. Edge Provides much sharper and clearer edges to the picture.
-
Page 48: Audio Settings
Select when you watch movies. Sport Select when you watch sports events. Game Select when you play games. Infi nite LG's unique sound option provides 5.1 channel stereo sound from Surround two speakers. Treble Adjusts the treble sound. Bass Adjusts the base sound. -
Page 49: Time Settings
CUSTOMIZING SETTINGS TIME Settings Press the SETTINGS button. TIME ꔂ Move ꔉ OK Use the ︿, ﹀, ︿ or ﹀ button to select TIME and • Sleep Timer : Off press the OK button. • Auto Off : 60 min. Use the ︿, ﹀, ︿... -
Page 50: Option Settings
CUSTOMIZING SETTINGS OPTION Settings Press the SETTINGS button. OPTION ꔂ Move ꔉ OK Use the ︿, ﹀, ︿ or ﹀ button to select OPTION • Language • PJT Mode : Front and press the OK button. • Auto Keystone : On •... - Page 51 CUSTOMIZING SETTINGS Setting Description Auto Makes the projector turn on automatically when the adaptor plug is in- Power serted. Option When the DC plug is connected to the projector, it turns on automatically. When the DC plug is connected to the projector, it goes into standby mode.
-
Page 52: Making Connections
MAKING CONNECTIONS MAKING CONNECTIONS You can connect various external devices to the ports on the projector. Computer/Notebook Video Digital Device HDMI - 53Page Component - 55Page Game Console INPUT (AV) - 54Page Headphones RGB - 53Page Memory - 25Page Headphones - 55Page... -
Page 53: Connecting To An Hd Receiver, Dvd, Or Vcr Player
MAKING CONNECTIONS Connecting to an HD Connecting to a PC Receiver, DVD, or VCR The projector supports Plug & Play. Player A PC will automatically recognize the projector and requires no driver to be Connect an HD receiver, DVD, or VCR installed. -
Page 54: Connecting To The Av Input
MAKING CONNECTIONS Connecting to the AV INPUT Connect the output ports of an external device and the AV INPUT port of the projector. Press the INPUT button to select AV. AUDIO OUT RGB OUT (PC) You can connect the audio cable without using a gender as shown in the illustra- tion above. -
Page 55: Component Connection
MAKING CONNECTIONS Connecting to Component Connection Headphones You can enjoy vivid images when you connect an external device with a RGB You can listen to the audio through a IN port to the component port of the headphone. projector. Press the INPUT button on the remote control to select Component. -
Page 56: Maintenance
MAINTENANCE MAINTENANCE Clean your projector to keep it in opti- mum condition. Cleaning the Projector Cleaning the Lens If there is any dust or staining on the lens surface, you must clean the lens. Use an air spray or a cleaning cloth to clean the lens. -
Page 57: Specifications
SPECIFICATIONS SPECIFICATIONS MODELS PB62G (PB62G-JE) Resolution (Pixel) 1280 (Horizontal) × 800 (Vertical) Aspect ratio 16:10 (Horizontal:Vertical) Panel size (mm) 11.623 Projection distance 0.80 m - 3.25 m (63.5 cm - 254.0 cm) (Video size) Ratio of upward 100 % projection... - Page 58 SPECIFICATIONS Supported Monitor Display HDMI/DVI-DTV/WiDi supported mode Horizontal Vertical Resolution Frequency Frequency Horizontal Vertical (kHz) (Hz) Resolution Frequency Frequency 640*350 31.468 70.09 (kHz) (Hz) 720*480 31.469 59.94 720*400 31.469 70.08 31.5 640*480 31.469 59.94 720*576 31.25 800*600 37.879 60.31 1280*720 37.5 1024*768 48.363...
- Page 59 SPECIFICATIONS Open Source Software Information To obtain the source code under the GPL, LGPL, MPL and other open source licenses, which is contained in this prod- uct, please visit http://opensource.lge.com. In addition to the source code, all re- ferred license terms, warranty disclaim- ers and copyright notices are available for download.
- Page 60 The model and serial number of the projec- tor are located on the back or on the side of the projector. Record them below should you ever need service. MODEL SERIAL...
Need help?
Do you have a question about the PB62G and is the answer not in the manual?
Questions and answers