Table of Contents
Advertisement
Quick Links
Advertisement
Table of Contents

Summary of Contents for Eycos USER GUIDE
- Page 1 1 | S 30.12CI H User Manual...
- Page 2 2 | S 30.12CI H User Manual Notice This manual can help you to become familiar with how-to-use and the many great features of the digital satellite receiver S 30.12CI H. All the safety and operating instructions should be read before the digital satellite receiver S 30.12CI H is operated.
-
Page 3: Safety And Precautions
Contents | 3 Safety and Precautions <Attention when installing the receiver> Install on an even plane. Don t install in the cold or under direct sunlight. Leave a minimum 10cm gap all around the product. Don t disassemble, repair, or reorganize the product. <Use and care of the receiver >... -
Page 4: Table Of Contents
4 | S 30.12CI H User Manual Table of Contents Chapter 1. Before You Begin ············· 5 4.9.5 Changing Satellite Group ··········· 32 1.1 Features ········································· 6 4.9.6 Editing Channels ·························· 33 1.2 Package Contents ·························· 7 4.10 Managing Favorite Channel Lists ·· 35 1.3 Names of Each Parts ·····················... -
Page 5: Chapter 1. Before You Begin
5 | S 30.12CI H User Manual ==> Chapter 1 Before You Begin... -
Page 6: Features
6 | S 30.12CI H User Manual 1.1 Features Enjoy a full of thrills and excitement with Arion’s new product! The S 30.12CI H is a set-top box perfectly suited for receiving digital satellite broadcasts. You can enjoy the various TV and radio programs. The simple connection and easy-of- use operation, user-friendly three-dimensional OSD, highest quality audio output with Dolby AC-3 Digital Audio, and Multi-channel screen are all designed to enrich the user experience. -
Page 7: Package Contents
Ch1. Before You Begin | 7 1.2 Package Contents Please check to make sure the following contents are in the product’s package. Product contents may be subject to change. Cables not specified above must be purchased separately. -
Page 8: Names Of Each Parts
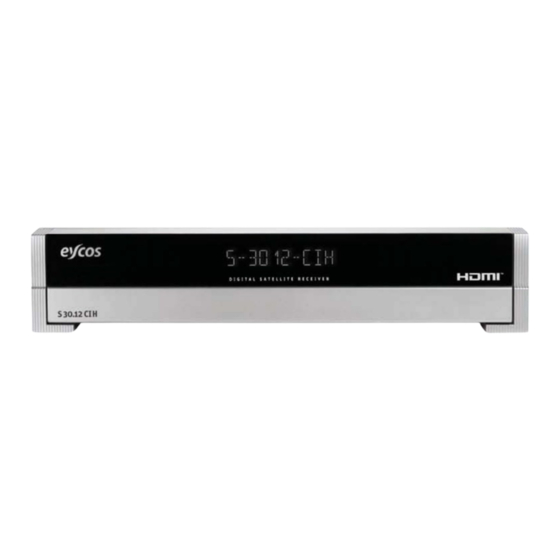
8 | S 30.12CI H User Manual 1.3 Names of Each Parts 1.3.1 Front Panel 1. STANDBY To switch the receiver on/off. 2. OK To select a menu or confirm the user’s action and display the channel list during watching a TV. 3. -
Page 9: Rear Panel
Ch1. Before You Begin | 9 1.3.2 Rear Panel 1. HDMI Connect this connector to your TV via a HDMI cable. 2. S/PDIF Connect S/PDIF to audio input of your amplifier with optical digital port via an optical cable. 3. VCR SCART(*Optional) Connect this connector to your VCR via a SCART cable. -
Page 10: Names Of Remote Control
10 | S 30.12CI H User Manual 1.4 Names of Remote Control MUTE To mute the sound. STANDBY To switch the receiver On/Standby. CH-/ + To change the TV/radio channels Up/Down. VOL -/+ To increase or decrease TV/Radio volume level or change the value of an item with preprogrammed values. - Page 11 Ch1. Before You Begin | 11 NUMERICAL (0~9) BUTTONS To enter a TV/Radio channel number or characters. Guide To display the Electronic Program Guide. Press again to return to the normal mode. You can register the favorite channels by pressing the “MENU” button, and then change the channel modes by pressing the “FAV”...
- Page 12 12 | S 30.12CI H User Manual : Angle of remote control use The remote control can be used at a distance of up to 7 to 10 meters, and at an angle of 30 degrees from the remote control led.
-
Page 13: Chapter 2. Connections
13 | S 30.12CI H User Manual Chapter 2 Connections... -
Page 14: Connecting To Tv & Vcr
14 | S 30.12CI H User Manual This chapter describes how to connect the receiver. Choose the most appropriate procedure depending on your environments. : If you encounter with any problem during connecting the receiver, please contact your local product distributor. 2.1 Connecting to TV &... - Page 15 Ch2. Connections | 15 3. Connecting to TV and VCR with RF 1) Connect the TV antenna to the RF-IN of the receiver. 2) Connect the RF-IN of VCR to the RF-OUT of the receiver. 3) Connect the -OUT of VCR to the RF-IN of TV. 4) Connect the Video and Audio of TV to the VIDEO and AUDIO L/R of the receiver.
-
Page 16: Connecting To Dish
16 | S 30.12CI H User Manual 2.2 Connecting to Dish 1. Dish Connect the satellite antenna cable to the LNB IN. 2 Fixed Dishes Using DiSEqC Connect the output of DiSEqC to the LNB IN of the receiver. -
Page 17: Connect To The Optical S/Pdif
Ch2. Connections | 17 2.3 Connect to the Optical S/PDIF(Optional) If you watch a program encoded by a Dolby Digital, you can enjoy the higher quality sound of the Dolby Digital audio Connect the optical S/PDIF to Dolby digital decoder or Digital television. S/PDIF is an optional port. -
Page 18: Starting Up
18 | S 30.12CI H User Manual 2.5 Starting Up Connect the power cord of the receiver to a power outlet and press the “Power” button at the rear panel to turn the receiver on. The first time you power up the receiver, it will display the initial screen, then some parameters for system configuration should be set. -
Page 19: Chapter 3. Basic Settings
19 | S 30.12CI H User Manual Chapter 3 Basic Settings... -
Page 20: Language
20 | S 30.12CI H User Manual If you use the receiver for the first time after connecting, you have to perform basic settings. Once the setup procedure is finished correctly, you can start watching TV or listening to radio. Turn on your TV and the receiver. -
Page 21: Antenna Setting
Ch3. Basic Settings | 21 2. Select the appropriate GMT Offset value using the “ ” button or enter the local time using the “0~9” button. 3. Press the “Red” button to move to the next setting. Or press the “EXIT” button to return to the previous screen. - Page 22 22 | S 30.12CI H User Manual 7. When completing Channel Search, the following message will appear. Move cursor to the “OK” button and press the “OK” button to save the changes. If you encounter with any problems or have any questions when setting up the antenna, please contact your local product installer or distributor.
-
Page 23: Chapter 4. Operations
23 | S 30.12CI H User Manual Chapter 4 Operations... -
Page 24: [Basic Functions ]
24 | S 30.12CI H User Manual [Basic Functions ] 4.1 Changing Channel There are several ways to change the channel. Press the “ ” button on the remote control to access the channels sequentially. Enter your desired channel number using the “0~9“ buttons directly. Press the “OK”... -
Page 25: Viewing Program Information
Ch5. Settings | 25 4.3 Viewing Program Information You can view the program information window by pressing the “INFO” button while watching a program. Press the “EXIT” or “INFO” button to hide the program information. 1. Basic Information The Basic Information is displayed as following on the screen. 2. -
Page 26: Switching Tv And Radio
26 | S 30.12CI H User Manual 4.4 Switching TV and Radio Press the “TV/RADIO” button to switch TV/Radio. 4.5 Freezing Screen/Zooming Screen You can zoom in or out the current screen. 1. Press the “Yellow” button to pause the current program. 2. -
Page 27: Changing Subtitle Language
Ch5. Settings | 27 4.6 Changing Subtitle Language If the current program provides Subtitle information, you can select the subtitle language. 1. Press the “SUBT” button to display the subtitle language list. 2. Select the desired subtitle language using the “ button, and press the “OK”... -
Page 28: Changing Audio Language
28 | S 30.12CI H User Manual 4.7 Changing Audio Language If the current program provides multiple audio languages, you can select the desired language. 1. Press the “Red” button to display the audio language list. 2. Select the desired audio language using the “ button, and press the “OK”... -
Page 29: [ Advanced Functions ]
Ch5. Settings | 29 [ Advanced Functions ] 4.9 Managing Channel List 4.9.1 Displaying Channel List You can see various channel lists and change the channels from the channel list more conveniently. 1. Press the “OK” button while watching a program to display the selected channel list. RED: Sorts the channel lists by alphabetic order. -
Page 30: Searching Channel
30 | S 30.12CI H User Manual 4.9.2 Searching Channel You can search the specific channel among various channel lists more conveniently. 1. Press the “OK” button while watching a program to display the selected channel list. 2. Press the “Red” button to sort the channel lists by alphabetic order. : Press the “Green button to sort the channel lists by FTA/CI order. -
Page 31: Viewing Multi-Channels Window
Ch5. Settings | 31 4.9.3 Viewing Multi-Channels Window You can display multi-channels window and select a channel to watch. 1. Press the “OK” button while watching a program to display the selected channel list. 2. Press the “Yellow” button to display the number of the multi-channel among 2, 4, 9, or 16. 3. -
Page 32: Hdmi Color Adjust
32 | S 30.12CI H User Manual 4.9.4 HDMI Color Adjust 1. Press the “OK” button while watching a program to display the selected channel list. 2. Press the “Blue” button while the channel list is displayed to view the Hdmi Color Adjust. 4.9.5 Changing Satellite Group You can change the satellite group. -
Page 33: Editing Channels
Ch5. Settings | 33 4.9.6 Editing Channels You can edit(such as lock, delete, move, and rename) all channels or each channel. Press the “EXIT” or “MENU” button to save the changes and return to the previous menu. 1. Press the “MENU” button. Move to the Edit menu using the “... - Page 34 34 | S 30.12CI H User Manual INFO: Selects a satellite list group. Red : Locks/unlocks channel(s). Green: Deletes channel(s). Yellow: Moves channel(s) to the desired location. Blue: Renames a channel name.
- Page 35 Ch5. Settings | 35 4.10 Managing Favorite Channel Lists You can create and edit favorite channel list(s) or group(s). 1. Press the “MENU” button. Move to the Edit menu using the “ ” button, and press the “OK” button. Select the Edit Favorite menu using the “OK”...
- Page 36 36 | S 30.12CI H User Manual 4. You can edit favorite channel list(s) or group(s). If you want to add channel(s), select the desired channel, and then press the “OK” button. : Switches Right column. : Switches Left column. FAV : Changes the Favorite mode on FAV : Changes the Favorite mode on the left the Right column.
-
Page 37: Managing Favorite Channel Lists
Ch5. Settings | 37 4.11 Changing Channel Mode You can change the channel mode by group. 1. Whenever you press the “FAV” button, the channel mode changes sequentially such as ALL FAV1 FAV2 … Channel Mode 2. Press the “OK” button to display All Channel or Favorite Channel lists according to the current channel mode. -
Page 38: Viewing Teletext
38 | S 30.12CI H User Manual 4.13 Viewing Teletext Teletext Service is text data service from Service Provider. It is available only when the program provides teletext data service. 1. Press the “TEXT” button. Teletext Service Data is displayed. Select the desired language using the “... -
Page 39: Chapter 5. Settings
Ch5. Settings | 39 Chapter 5 Settings... - Page 40 40 | S 30.12CI H User Manual This chapter describes how to search for channels, edit channel, setup for language(OSD, Timer, etc.), and show tools. 1. Press the “MENU” button to display the Menu OSD. 2. Move to the appropriate Menu using the “ ”...
-
Page 41: Search Channel
Ch5. Settings | 41 5.1 Search Channel You can set the antenna's properties and search channel. Antenna Setting: Sets the Antenna properties. Automatic Search: Searches the satellite automatically. Manual Search: Searches the channel manually. Advanced Search: Finds the specific channel. Blind Scan: Searches the TP information. -
Page 42: Automatic Search
42 | S 30.12CI H User Manual : When using Universal LNB, select Universal for LNB Type (9750/10600 MHz). Also, if you select Universal, 22KHz tone value is disabled. 4. When you complete the setting, press the “Red” button to search the channel. 5. -
Page 43: Manual Search
Ch5. Settings | 43 : Please wait for finishing the Automatic Search. If you want to stop the Automatic Search, press the “EXIT” button anytime. If Automatic Search is stopped or finished, the-searched information is automatically saved. 4. When Satellite Search is finished, the confirmation message will appear. Move cursor to the “OK”... -
Page 44: Advanced Search
44 | S 30.12CI H User Manual 5.1.4 Advanced Search You can find the desired channel by entering Video, Audio and PCR PID directly. Move to the Search Channel menu using the “ ” button, and press the “OK” button. Move to the Advanced Search sub-menu using the “... -
Page 45: Usals
Ch5. Settings | 45 5.1.6 USALS You can set the angle of the antenna by entering the values directly. Move to the Search Channel menu using the “ ” button, and press the “OK” button. Move to the USALS sub-menu using the “ ”... -
Page 46: Edit Channel
46 | S 30.12CI H User Manual 5.2 Edit Channel You can edit channel(s), favorite channel(s), transponder and remove satellite. Edit Channel: Locks/deletes/moves/renames channel. Edit Favorite: Creates/edits favorite channel. Edit Transponder: Creates/edits transponder. Remove Satellite: Removes satellite. 5.2.1 Edit Channel You can edit(such as lock, delete, move, and rename) all channels or each channel. -
Page 47: Remove Satellite
Ch5. Settings | 47 5.2.4 Remove Satellite You can remove the channel(s) for the only added satellite. Move to the Edit menu using the “ ” button, and press the “OK” button. Move to the Remove Satellite sub-menu using the “ ”... -
Page 48: Setup
48 | S 30.12CI H User Manual 5.3 Setup You can setup additional function such as Language Setting, OSD, Output Setting, Time & Timer Setting, and Lock Control. Language: Selects the language. OSD Setting: Sets the OSD. Output Setting: Sets the connected devices. -
Page 49: Osd Setting
Ch5. Settings | 49 5.3.2 OSD Setting You can set the interval for the program information bar hide-out or the OSD transparency. Infobar Hide-Out : Selects the infobar hide out time. OSD Transparency : Sets the transparency of On Screen Display. Move to the desired item using the “... -
Page 50: Hdmi Setting
50 | S 30.12CI H User Manual : TV, Aspect Ratio (You can adjust 16:9 stream to 4:3 TV, In case 4:3 stream no change). TV – 4: 3 (You can adjust 4:3 stream to 16:9 TV, In case 16:9 stream no change). TV –... -
Page 51: Timer Setting
Ch5. Settings | 51 5.3.6 Timer Setting You can set the timer. Mode : Selects one mode between Power Off and Power On. Channel : Selects the desired channel. Cycle : Selects one among One Time/Every Day/Every Week. Time : Selects the time. Day of Week : If Every Week is selected in the Cycle menu, you can select the menu. -
Page 52: Tools
52 | S 30.12CI H User Manual 5.4 Tools You can view the receiver information, restore to the default setting, upgrade the program, and etc. Information: Shows the receiver version. Factory Setting: Restores to the default setting. Software Transfer: Upgrades the program. -
Page 53: Factory Setting
Ch5. Settings | 53 5.4.2 Factory Setting Factory Setting restores the receiver to the default settings. 5.4.3 Software Transfer You can update software from menu. 5.4.4 Firmware Upgrade The latest s/w can be downloaded by on-air. - Page 54 54 | S 30.12CI H User Manual 5.4.5 Utility This product provides calendar and calculator. 5.4.6 Game This product provides games such as Tetris, Block Out and Sokoban.
-
Page 55: Common Interface
Ch5. Settings | 55 5.5 Common Interface You can view the information about each slot. If you want to watch TV programs from a Service Provider you must use a CI module with a Smart Card. If no CI module is used, you can only watch FREE TO AIR TV programs. - Page 56 56 | S 30.12CI H User Manual...
-
Page 57: Chapter 6. Appendix
Ch6. Appendix | 57 Chapter 6 Appendix... -
Page 58: Trouble Shooting
58 | S 30.12CI H User Manual 6.1 Trouble Shooting If the receiver does not work properly after checking it, please contact the dealer. Don't open the receiver. It may result in a dangerous electric shock and will invalidate your warranty Problem Possible Causes What to do... -
Page 59: Specification
Ch6. Appendix | 59 6.2 Specification 1. Tuner & Demodulator RF input Connector F-Type(Female), IEC 169-24 RF Frequency Range 950Mhz to 2150 MHz Input Impedance 75 Unbalanced Input Signal Level -65 dBm to -25 dBm IF Frequency ZERO IF LNB POWER Vertical : 13.0Vdc Horizontal : 18.0Vdc Current : 500mA(MAX) - Page 60 60 | S 30.12CI H User Manual 3. Main system uPD61120(EMMA2L) Flash Memory 2 Mbytes Graphic & System DDR SDRAM 16 Mbytes(CL2.5) 4. A/V Data In/Out TV SCART Video Output (CVBS, RGB) Audio Output VCR SCART Video Output (CVBS) Video Input (CVBS, RGB) Audio In/Output RCA VIDEO Video Output (CVBS)
-
Page 61: Power Supply
Ch6. Appendix | 61 6. Power Supply Input Voltage 100 to 240 Vac, 50Hz/60Hz Type SMPS Power Consumption Max 30W 7. Environment Operating Temperature +5 ~ +50 Storage Temperature -40 ~ +65 8. Physical Specification Size(W X D X H) 360 x 230 x 63 mm Weight(Net) 2.0kg... - Page 62 62 | S 30.12CI H User Manual...
- Page 63 Ch6. Appendix | 63 C/EYS/S30.12CI H/EOSD1.0/REV1.0/ENG...
- Page 64 64 | S 30.12CI H User Manual...
Need help?
Do you have a question about the USER GUIDE and is the answer not in the manual?
Questions and answers