Table of Contents
Advertisement
Owner's manual
Mode
..i' ..... ,"""' ....
i"",
Manual de instrucciones
Istruzioni per I'uso
CMD4A
WATERTIGHT MARINE AM/FM/CD MULTIMEDIA
CONTROLLER
COiMBiiNE NAUTIQUE
RADIO
AM/FM~
LECTEUR CD MULTIMEDIA
CONTROLADOR MULTIMEDIA MARINO DE AM/FM/DISCOS
CD IMPERMEABLE
DI CONTROllO MULTIMEDiALE PER
usa
MARITTIMO AM/FM/CD IMPERMEABllE
Advertisement
Table of Contents

Subscribe to Our Youtube Channel
Related Manuals for Clarion CMD4A


Summary of Contents for Clarion CMD4A
- Page 1 Owner's manual Mode i"", ..i' ..,"""' ..Manual de instrucciones Istruzioni per I'uso CMD4A WATERTIGHT MARINE AM/FM/CD MULTIMEDIA CONTROLLER AM/FM~ COiMBiiNE NAUTIQUE RADIO LECTEUR CD MULTIMEDIA CONTROLADOR MULTIMEDIA MARINO DE AM/FM/DISCOS CD IMPERMEABLE DI CONTROllO MULTIMEDiALE PER MARITTIMO AM/FM/CD IMPERMEABllE...
- Page 2 Thank you for purchasing this Clarion product. Please read this owner's manual in its entirety before operating this equipment. After reading this manual, be sure to keep it in a handy place (e.g., glove compartment). Check the contents of the enclosed warranty card and keep it with this manual.
- Page 3 (2) THIS DEVICE MUST ACCEr-r ANY INTERFERENCE RE:CEIVED CAUS~ INCLUDING INTErtFERENCE THAT MAY UNDESIRED OPERATION n·ns PRODUCTlON COMPLIES WITH DHHS RULES 21 CFR SUBCHAPTER APPL:CAI:lLE AT DATE MANUFACTURE CLARION CO"LTD, 50 KAMITODA. TODA-SHI, SAITAMA·KE::r'I.i, JAPAN I_~.C.LA.S.S .1.L.AS.E.R.P.RO.D.U.CT_..0051 722 877 Bottom View of Source Unit CMD4A...
-
Page 4: Handling Compact Discs
4. When closing the front panel, do not press the [OPEN] button. Be sure to unfold and read the next page. Veuillez deplier et vous reterer la page suivante. Cercidrese de desplegar y de leer la pagina siguiente. Assicurarsi di aprire e Jeggere la pagina 5uccessiva. CMD4A... - Page 5 Remarque: VeuilJez depil8r ceffe page et vous referer aux schemes quand vous lisez cheque chapitre< Nota: Cuando lea los capitu/os, despliegue esta pagina y consulte los diagramas. Nota.· Assicurarsi di aprire questa pegina e fare riferimento questi diagrammi quando legge ciascull capitola. CMD4A...
-
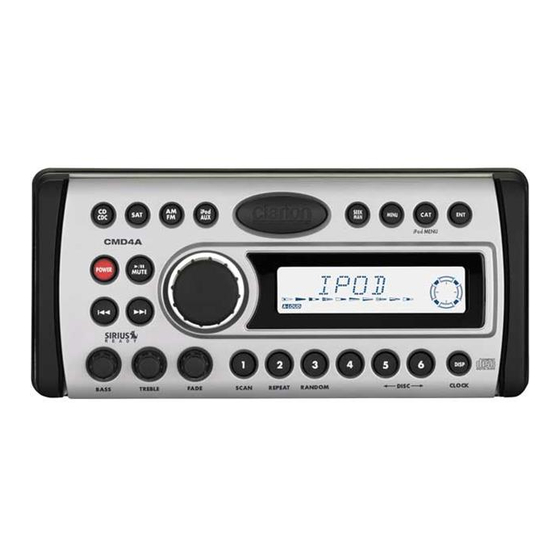
Page 6: Controls
[OPEN] button settings. • Press and hold the button for 1 second or • Open the panel by pressing the "Clarion longer to switch to fast-forward/fast-rewind. Marine" oval latch button. Audio will mute with the front panel open. -
Page 7: Major Button Operations When External Equipment Is Connected To This Unit
• Use to select the ARTISTS menu in the iPod random play when the button is pressed and MENU mode. held. [REPEAT] button • Perform repeat play. When this button is pressed and held, single disc repeat play is performed. CMD4A... - Page 8 1 secOtlB or longer to switch to fast-rewind. • Use to return to the previous menu in the iPod MENU mode. [.,./II/MUTE] (Play/Pause/Mute) button • When held depressed for 1 second or longer, performs Play or Pause. CMD4A...
-
Page 9: Display Items
Display Items Disc In indications • Lights when a disc is loaded. Operation status indication • Titles, frequency, clock, etc. are displays. (t~~ P~eset chann~1 i~di~ation to 6) {fLP DIsc number mdlcatlon to 6) Satellite indication SAT : : A-LOUD indication Category indication ICAT} : Manual indication... -
Page 10: Remote Control
• Following operations are enabled by remote control with the Wired Remote Control Unit CMRC1 or CMRC2 (sold separately). U..->] [< ..Display Items Operation status indication Frequency, clock, etc. are displayed. Stereo indication : Satellite indication : Mute indication Preset channel indication (1 to 6) Disc number indication (1 to 6) [A],[T] CMD4A... - Page 11 FM1 -. FM2 -. FM3 -. AM -+ FM1 ..Changing the disc (in CD changer mode) Each time the [BAND] button is pressed, the disc switches in the following order: 1-+2-+3-+4~5-+6~1 ..CMD4A...
-
Page 12: Operations
Selecting mode adjustment. 1. Press the [CD/CDC], [SAT], [AM/FM] or [iPod/AUX] button to change the operation mode. External equipment not connected with CeNET is not displayed. CMD4A... -
Page 13: Radio Operations
2. Press the [AMlFM] button to select the radio band. Each time the button is pressed, the radio reception band changes in the following order: FM1 ... 3. Press the or [..-t] button to tune in the desired station. CMD4A... - Page 14 Radio Operations Mute Recalling preset station Use this function to turn off the sound A total of 24 preset positions (6-FM1, 6-FM2, 6- immediately. FM3, 6-AM) exist to store individual radio stations in memory. Pressing the corresponding 1. Press the [..-/II/MUTE] button. [DIRECT] button recalls the stored radio The sound turns off and "MUTE"...
-
Page 15: Cd Operations
2. To cancel the scan play, press the [SCAN] mechanism. button again. • If CO (12 em) left in the ejected position for 15 seconds, the CO is automatically reloaded (Auto reload). • 8 cm CDs are not auto reloaded. Be sure to remove it when ejected. CMD4A... -
Page 16: Operations Common To Each Mode
CD Operations Repeat play Random play Repeat play continuously plays the current Random play selects and plays individual tracks track. This function continues automatically until on a disc in no particular order. This function it is cancelled. continues automatically until it is cancelled. 1. - Page 17 Operations Common to Each Mode Performing system check Adjusting the non-fader The factory default setting is "NFVOL +6". This function verifies the devices hooked up (Adjustment range: -6 to +6) through CeNET. 1. Press the [MENU] button to switch to the 1.
-
Page 18: Sirius Satellite Radio Operations
SIRIUS 10 and a few other details. an antenna issue exists. • INVLD CH : a channel without a broadcast Verifying your SIRIUS 10 has been selected, or the 1. Press the [MENU] button to switch to the receiver may not be activated. menu mode. CMD4A... - Page 19 2 seconds or longer to store the current while channels without broadcasts and channels channel into preset memory. not covered by the contract are automatically skipped. [.,.~] 1. Press the ..] or button. The receiver seeks the next available channel below or above the current channel. CMD4A...
- Page 20 [f-tftfJ • Press the button within 7 seconds after channel has been set to continue seeking channels up or down. The category selection mode canceled and normal reception resumed if no operation performed for 7 seconds. CMD4A...
-
Page 21: Ipod Operations
Each time you press and hold the [DISP] button "PAUSE" appears in the display. for 1 second or longer, the display switches in the 2. To resume playback, press and hold the following order: [.-/li/MUTE] button for 1 second or longer again. CMD4A... - Page 22 [DIRECT](5) "GENRES" "Settings" "Repeat (ALL)" from the menu of the iPod. [DIRECT](6) "COMPOSER" 1. Press and hold the [REPEAT] button for 1 second or longer. 2. To cancel All repeat playback, press the [REPEAT] button again. CMD4A...
-
Page 23: Cd Changer Operations
. • Track-down 1. Press the [..] button to move back to the beginning of the current track. 2. Press the [..] button twice to move to the beginning of the previous track. CMD4A... - Page 24 This function continues automatically until it is cancelled. 1. Press and hold the [REPEAT] button for 1 second or longer. 2. To cancel disc repeat play, press the [REPEAT] button again. CMD4A...
- Page 25 Perform a system check..does not stored the proper CeNET "Operations Common to Each Mode", recognize CeNET information. performing a system check section. source connection. The CeNET cable is not Ensure the CeNET cables are properly connected. connected properly. CMD4A...
-
Page 26: Error Displays
9. ERROR DIS-PLA'lS If an error occurs, one of the following displays is displayed. Take the measures described below to eliminate the problem. Error Display Cause Measure ERROR A CD is caught inside the CD deck and is This is a failure of CD deck's mechanism. not ejected. -
Page 27: Specifications
}10. SPECIFICATIONS Source unit harness wire connections AM Tuner Frequency Range: Wire Color Function U.S.A : 530 kHz to 1710 kHz Yellow + 12V DC Constant Power Europe : 531 kHz to 1602 kHz Source/Memory Australia : 531 kHz to 1629 kHz + 12V DC Switch Lead/ Usable Sensitivity: 25 Accessory... - Page 28 Clarion Co., Ltd. AU Rights Reserved. Copyright © 2006: Clarion Co., Ltd. PE-26868 Printed in China /Imprime en Chine / lmpreso en China / Stampato in Cina 2006/4 280-8401-00...
- Page 29 Drill appropriately prepared holes at the 6 places for fixing the screw depending on the materials and plate thickness of the panel. INSTALLATION TEMPLATE...
- Page 30 SAMPLE SYSTEMS I EXEMPLES DE SYSTEMES EJEMPLOS DE SISTEMAS I ESEMPIO DEL SISTEMA Source unit ® RCA extension cable (sold separately) ® ; 4-Channel power amplifier (3) • Ampliffcateur puissance canaux r®! Front speakers Haut-parleurs avant Rear speakers Haut-parleurs arriere ®...
- Page 31 CAUTIONI PLEASE OPEN THE CONTROL PANEL BEFORE REMOVING THE SIDE COVERS. PLEASE GRASP CENTER OF THE SIDE COVERS THEN PULL STRAIGHT BACK. DO NOT TWIST THE SIDE COVERS. PLEASE REINSTALL THE SIDE COVERS STRAIGHT ON PINS AFTER INSTALLING RADIO 285-1988-00...
- Page 32 2004/12 284·0155·00 InstaliationlWire Connection Guide I nll~in9 GUla de instalaci6n/conexi6n de cables I """'u.uo GIlD BEFORE STARTING PREPARATIFS ANTES DE COMENZAR t""rUIVIA 1. Read the instructions carefully. 1. Usez attenlivement les instructions. 1. Lea cuidadosamente las instrucciones. 1. Leggere attentamente Ie istruzioni. 2.
- Page 33 .. -- INSTALLING THE SOURCE UNIT ,mIll.Dlf"'''''II"H''"lIIIIoooIL.._''''II"ii_1Io.1 INSTALACION DE LA UNlOAD FUENTE' • Marine stereo mounting dimensions II Dimensions de montage de i'appareil stereo • Dimensiones de montaje en una II1II Dimension! d! montaggio della stereo Using the supply template to cut the hole and marin embarcacion marittimo...
-
Page 34: Precautions
amID CAUTIONS ON WIRING / PRECAUTIONS PRECAUCIONES PARA LA CONEXION DE CABLES / 1. Be sure to turn the power off when wiring. 1. S'assurer de mettre I'appareil hors circuit 1. Antes de hacer las conexiones, asegurese de 1. Assicuralevi di spegnere la corrente prima dl avant de faire Ie cablage. - Page 35 AUX INPUT LEFT Red (White) ® NON FADER RIGHT Purple (Red) Entrada auxiliar (AUX INPUT) del canal Izquierdo (Blanco) NON FADER LEFT Purple (White) SIN BALANCE DELANTERO-TRASERO ® DERECHO Purpura (Rojo) SIN BALANCE DELANTERO-TRASERO IZQUIERDO Purpura (Blanco) Clarion Co., Ltd.
- Page 36 5. The sole responsibility of Clarion under this limited warranty shall be limited to the repair of the product or replacement of the product, at the sole discretion of Clarion.
Need help?
Do you have a question about the CMD4A and is the answer not in the manual?
Questions and answers