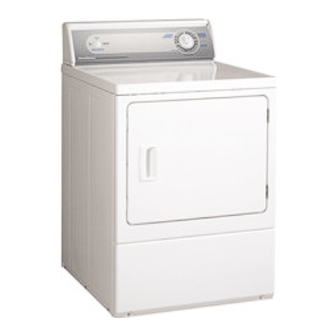
Page 1
Installation Instructions for Dryers Inside ........Dimensions ................ Before You Start ..............Installing the Dryer ............Installer Checklist ..........Back Cover Para bajar una copia de estas instrucciones en espafiol, visite www.speedqueen.com. Keep these instructions for future reference. (If this machine changes ownership, this manual must accompany machine.)
Page 2
WARNING FOR YOUR SAFETY, the information in this manual must be followed to minimize the risk of fire or explosion or to prevent property damage, personal injury or death. W033 ° Do not store or use gasoline or other flammable vapors and liquids in the vicinity of this or...
Dimensions 22.38 in. (56.85 cm) / 0.4 in. 23.5 in. 28 in. (1.1 cm) (68.3 cm) (59.7 cm) (71.1 cm) *4.0 in. (10.2 cm) ELECTRIC DRYERS DRY2203N * With leveling legs turned into base. 22.38 in. 8.0 in. (20.3 cm) 15.4 in.
Before You Start Parts Included An accessories bag has been shipped inside your dryer. Supplies It includes: For most installations, the basic supplies you will need • Installation Instructions are: • User's Guide • Product Registration Card • Dryer Rack Reply Card •...
Installing the Dryer No other fuel burning appliance should be installed the same closet with the dryer. Step 1" Position and Level the Dryer The dryer must not be installed or stored in an area where it will be exposed to water and/or weather.
Page 6
Place the dryer in position, and adjust the legs until the dryer is level from side to side and front to back. The WARNING dryer must not rock. This gas appliance contains or produces chemical or chemicals which can cause death or serious illness and which known to the State of California...
Page 7
Exhaust Direction • In mobile home installations, dryer exhaust duct must be secured to mobile home structure. The dryer can be exhausted to the outdoors through the • Dryer exhaust duct MUST NOT terminate under back, left, right or bottom of the dryer. EXCEPTION: mobile home.
Page 8
Step 3: (Gas Dryer Only) Connect Natural Gas Altitude Adjustments Supply Pipe Altitude Orifice Size Part No. feet inches WARNING 3000 0.0890 2.26 503778 6000 1830 0.0860 2.18 58719 To reduce the risk of gas leaks, fire or 8000 2440 0.0820 2.08 503779...
Page 9
Grounding Information Tighten all connections securely. Turn on gas and check all pipe connections (internal & external) This dryer must be connected to a grounded for gas leaks with a non-corrosive leak detection metal, permanent wiring system; or an fluid. equipment-grounding conductor must be run...
Page 10
Connecting Power Cord with Three-Wire Plug NOTE: Four-wire cord is required for mobile homes or where codes do not permit grounding through neutral. NOTE: The power cord is NOT supplied with the electric dryer. Type of power cord and gauge of wire must conform to local codes and instructions.
Page 11
Connecting Power Cord with Four-Wire Plug 4. Use the three screws from the accessories bag to attach the power cord wires to the terminal block. NOTE: Four-wire cord is required for mobile Refer to Figure 9. homes or where codes do not permit grounding through neutral.
Page 12
3. Remove ground screw and save for use in Step 5. 5. Attach power cord ground (green) wire to rear Remove wire and use in Step 6. bulkhead using ground screw removed in Step 3. D6971 Ground Screw Figure 12 DRY1920N Use a strain relief and insert end of power cord White...
Page 13
Remove door strike from door liner and reinstall Step 5: Reverse Door, if Desired on opposite side. The door on this dryer is completely reversible. reverse door proceed as follows: 1. Remove four hinge attaching screws. DRY1917N Insert liner under flange on bottom of door, then push top of door liner into place.
Page 14
Gas Dryer 9. Reinstall four hinge attaching screws, removed Step 1. Dryer requires 120 Volt, 60 Hertz electrical supply and comes equipped with a 3-prong grounding plug. Refer to serial plate for specific electrical requirements. !7.,d_ ///1: NOTE: The wiring diagram is located inside the...
Page 15
Grounding Information The dryer must be grounded. In the event of malfunction or breakdown, grounding will reduce the risk of electric shock by providing a path of least resistance for electric current. The dryer is equipped with a cord having an equipment-grounding conductor and a 3 prong grounding plug.
Page 16
Loosen the air shutter lockscrew. Gas Dryers Turn the air shutter to the left to get a luminous To view the burner flame, remove the lower front yellow-tipped flame, then turn it back slowly to panel of the dryer. the right to obtain a steady, soft blue flame. Close the loading door, start the dryer in a heat setting After the air shutter is adjusted for proper flame,...
Installer Checklist Fast Track for Installing the Dryer (Refer to the manual for more detailed information) • Position • Wipe Out Inside of Level the Dryer. Dryer. LEVEL D6181 CHECK CHECK D2591 Connect Dryer • Plug_heD_ Electric D2751 D2541 DRY1915N CHECK CHECK -- GAS ONLY...
Need help?
Do you have a question about the AGS20AWF and is the answer not in the manual?
Questions and answers