Table of Contents
Advertisement
Advertisement
Table of Contents

Related Manuals for AEG Dishwasher


Summary of Contents for AEG Dishwasher
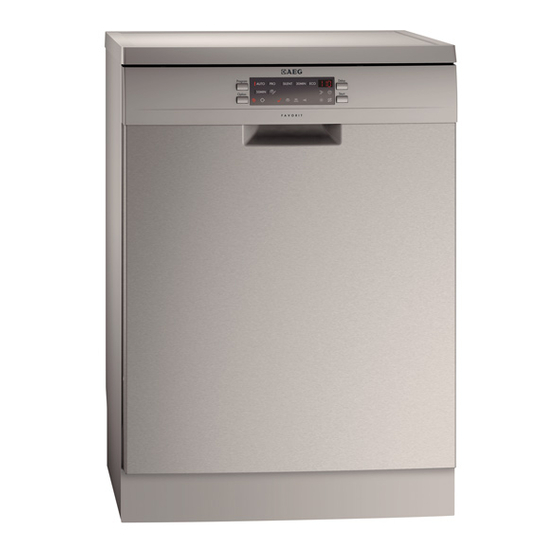
- Page 1 FAVORIT 77000 DISHWASHER USER MANUAL...
-
Page 2: Table Of Contents
Return the product to your local recycling facility or contact your municipal office. VISIT OUR WEBSITE FOR: - Products - Brochures - User manuals - Trouble shooter - Service information www.aeg.com LEGEND Warning - Important Safety information. General information and tips Environmental information Subject to change without notice... - Page 3 ENGLISH FOR PERFECT RESULTS Thank you for choosing this AEG product. We have created it to give you impeccable performance for many years, with innovative technologies that help make life simpler – features you might not find on ordinary appliances. Please spend a few minutes reading to get the very best from it.
-
Page 4: Safety Information
SAFETY INFORMATION Before the installation and use of the • Make sure not to cause damage to appliance, carefully read the supplied the water hoses. instructions. The manufacturer is not re- • Before you connect the appliance to sponsible if an incorrect installation and new pipes or pipes not used for a use causes injuries and damages. - Page 5 • Remove the door catch to prevent to fall on it. children and pets to get closed in the • Do not sit or stand on the open door. appliance. • Dishwasher detergents are danger- ous. Obey the safety instructions on the detergent packaging.
-
Page 6: Product Description
PRODUCT DESCRIPTION Worktop Water hardness dial Top spray arm Rinse aid dispenser Upper spray arm Detergent dispenser Lower spray arm Cutlery basket Filters Lower basket Rating plate Upper basket Salt container... -
Page 7: Control Panel
ENGLISH CONTROL PANEL A B C On/off button Delay button Programme guide Start button Program button Indicators Programme indicators Option button Display Indicators Description Multitab indicator. ExtraHygiene indicator. Washing phase indicator. Rinsing phase indicator. Drying phase indicator. End indicator. Rinse aid indicator. This indicator is off while the programme operates. -
Page 8: Programmes
PROGRAMMES Programme Type of soil Programme phases Options Type of load Prewash ExtraHygiene Crockery, cutlery, Wash 45 °C or 70 °C pots and pans Rinses Heavy soil Prewash Crockery, cutlery, Wash 70 °C pots and pans Rinses Normal soil Prewash Crockery and cut- Wash 50 °C lery... - Page 9 ENGLISH Energy (kWh) Water (l) Programme 0.9 - 1.0 9 - 11 1.0 - 1.2 10 - 11 1) The display shows the programme duration. The water pressure and temperature, the variations of the mains supply, the options and the quantity of dishes can change the programme duration and the consumption values.
-
Page 10: Options
Activate this function only when you to use separately detergent, rinse aid use the combi detergent tablets. and dishwasher salt, do these steps: This function deactivates the flow of 1. Deactivate the multitab function. rinse aid and salt. The related indicators 2. -
Page 11: Before First Use
2. Fill the salt container. als. 3. Fill the rinse aid dispenser. The dishwasher salt keeps the water 4. Open the water tap. softener clean and in good conditions. 5. Processing residues can stay in the Refer to the table to adjust the water appliance. -
Page 12: Manual Adjustment
6. Deactivate the appliance to confirm. (A), (B) and (C) flash. 4. Press Program. FILLING THE SALT CONTAINER CAUTION! Only use dishwasher salt. Other products can cause damage to the appliance. Water and salt can come out from the salt container when you fill it. -
Page 13: Filling The Rinse Aid Dispenser
ENGLISH FILLING THE RINSE AID DISPENSER CAUTION! Only use rinse aid for dishwash- ers. Other products can cause damage to the appliance. The rinse aid, during the last rinsing phase, helps to dry the dishes without streaks and stains. 1. Press the release button (D) to open the lid (C). -
Page 14: Daily Use
• Only use the appliance to wash items that are dishwasher-safe. • Do not put in the appliance items made of wood, horn, aluminium, pewter and copper. -
Page 15: Setting Mode
ENGLISH USING THE DETERGENT CAUTION! Use only detergents for dish- washers. 1. Press the release button (B) to open the lid (C). 2. Put the detergent in the compart- ment (A) . 3. If the programme has a prewash phase, put a small quantity of de- tergent on the inner part of the ap- pliance door. -
Page 16: At The End Of The Programme
• The display shows the pro- Press and hold Delay and Start at the gramme duration that decreases same time until: with steps of 1 minute. • All the programme indicators come Starting a programme with • The display shows two horizontal sta- delay start tus bars. -
Page 17: Care And Cleaning
ENGLISH CARE AND CLEANING WARNING! Dirty filters and clogged spray arms decrease the washing re- sults. Before maintenance, deactivate the ap- Make a check regularly and, if pliance and disconnect the mains plug necessary, clean them. from the mains socket. CLEANING THE FILTERS 1. -
Page 18: Troubleshooting
TROUBLESHOOTING The appliance does not start or it stops • - The appliance does not drain during operation. the water. First try to find a solution to the prob- • - The anti-flood device is on. lem (refer to the table). If not, contact WARNING! Service. - Page 19 ENGLISH THE WASHING RESULTS AND DRYING RESULTS ARE NOT SATISFACTORY Problem Possible cause Possible solution The dishes are not The filters are clogged. Clean the filters. clean. The filters are not correctly Make sure that the filters are assembled and installed. correctly assembled and in- stalled.
- Page 20 Problem Possible cause Possible solution The quantity of detergent Make sure that you add the was too much. correct quantity of detergent in the dispenser before you start a programme. Dry water drop The released quantity of Increase the released quanti- stains on glasses rinse aid was not sufficient .
-
Page 21: Installation
ENGLISH INSTALLATION WARNING! Refer to “SAFETY INFORMA- TION”. INSTALLATION UNDER A KITCHEN COUNTER 1. Make sure that the dimen- 570-600 mm sions of the recess agree with the dimensions in the figure. 820 mm 2. Put the appliance adjacent to a water tap and a water drain. -
Page 22: Technical Information
WATER DRAIN CONNECTION Connect the water drain hose to: • The sink spigot. Attach the water drain hose under the kitchen counter. max. 850 mm This prevents that waste water from the sink goes back to the appliance. max. • A stand pipe with vent-hole. The in- 4000 mm ternal diameter must be minimum 40 min. - Page 23 ENGLISH...
- Page 24 117927790-A-272011...