Haier HWF5300AW User Manual
Haier washer user manual
Hide thumbs
Also See for HWF5300AW:
- User manual (88 pages) ,
- Energy manual (1 page) ,
- User manual (30 pages)

Related Manuals for Haier HWF5300AW


Summary of Contents for Haier HWF5300AW
-
Page 1: User Manual
Front Load Washer Rondelle avant de chargementl Lavadora delantera de la carga User Manual Guide de l’Utilisateur Manual del Usuario Designed to use only HE (High Efficiency) Detergent HWF5300AW... -
Page 3: Important Safety Instructions
4. Unplug your washer before cleaning. 5. Never unplug your washer by pulling on the power cord. Always grasp the plug firmly and pull straight out from the outlet. 6. Do not operate your washer in the presence of explosive flames. -
Page 4: Grounding Instructions
Do not modify the plug provided with the washer - if it does not fit the outlet, have a proper outlet installed by a qualified electrician. -
Page 5: Electrical Connecting
Occasionally there may be power interruptions due to thunderstorms or other causes. Remove the power cord from AC outlet when a power outage occurs. When power has been restored re-plug power cord to AC outlet. If outage is for a prolonged period, clean washer before using it again. -
Page 6: Table Of Contents
AND FeAtURes ... 5 Front ... 5 Back ... 6 INstALLAtIoN INstRUctIoNs ... 7 Tools and Materials Required ... 7 Unpacking Your Washer ... 8 Installation ... 10 opeRAtIoNAL INstRUctIoNs ... 12 Touch Sensitive Control Panel ... 12 Washer Operating Procedure ... 14 Features ... -
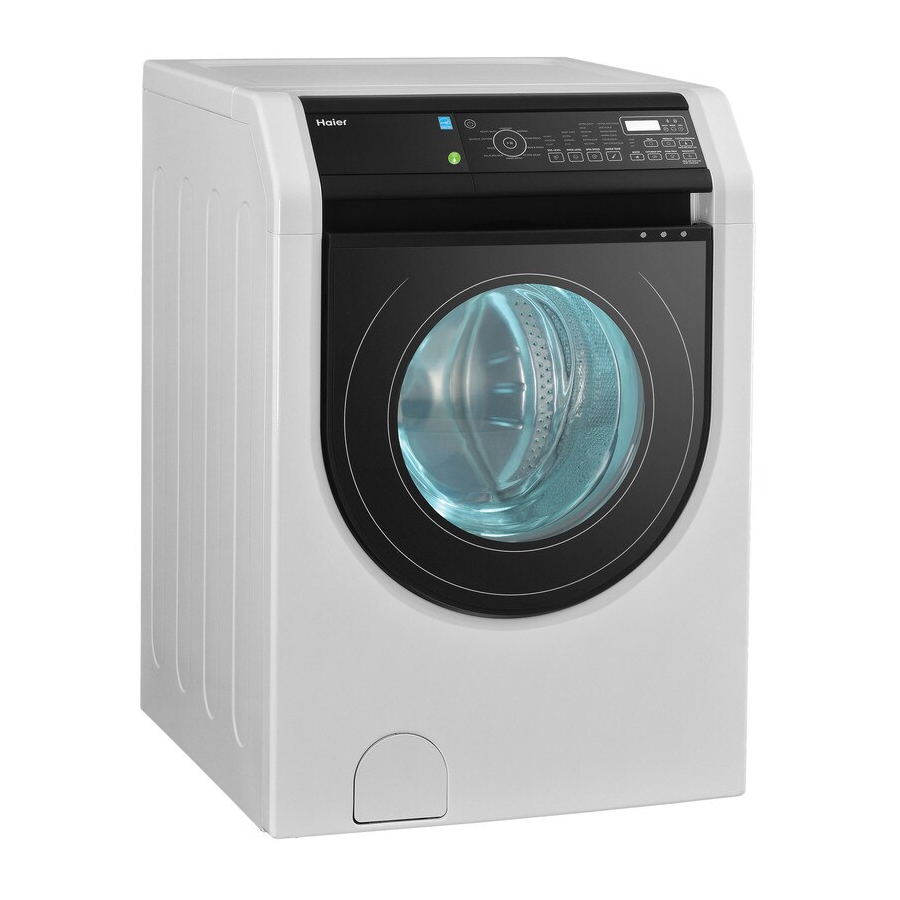
Page 7: Parts And Features
English pARts AND FeAtURes FRONT 1. Detergent / Bleach / Softener Dispenser 2. See-through Glass Door 3. Button / Coin Trap Cover 4. Control Panel 5. Door Handle 6. Adjustable Leveling Legs (2) -
Page 8: Back
pARts AND FeAtURes BACk 1. Top Cover 2. Brace 3. Power Cord 4. Transportation Bolt (2 Per Brace) 5. Air Vent for Safety 6. Water Inlet Valve (C & H) 7. Drain Hose Connection 8. Transportation Bolt (2 Per Brace) 9. -
Page 9: Installation Instructions
English INstALLAtIoN INstRUctIoNs TOOLS AND MATERIALS REqUIRED you will need to have the following tools to help you in the installation of your washer: • Scissors • Standard Screwdriver • Pliers • Wrench • Tape Measure • Gloves • Level Accessories supplied 1. -
Page 10: Unpacking Your Appliance
WARNING: Two or more people may be needed to install and move the appliance. Follow the procedure below to unpack your washer remove packing materials. As shown in the figure, remove all the packing materials. Upon opening of the package, water drops may be seen on the plastic bag and the porthole. -
Page 11: Removing Transportation Bolts
Removing transportation Bolts 1. Unscrew the 4 bolts with a wrench. At first undo the lower side to remove easily. One of the bolts retains the power cord of the washer to prevent operating with out removing bolts. 2. Remove the bolts and the sleeves to release the power cord. Keep the 4 bolts and sleeves for future use. -
Page 12: Installation
INSTALLATION Location Requirements 1. The proper location for your washer should have a flat and even floor. This will improve performance, minimize noise and decrease washer movement. 2. The unit can be installed under a custom counter, in basement, laundry room, closet, or other recessed area. -
Page 13: Drain System
English Note: This washer is to be connected to the water mains using new hoses. Old hoses should not be used. Do not install your washing machine in a room where temperatures may be below freezing. Frozen hoses may burst under pressure. -
Page 14: Operational Instructions
"Important Safety Instructions" before operating this appliance. 1) Power ON/OFF Pad • Touch pad to power ON or turn OFF the washer. In off status touch power pad for 1 second washer will turn on in default program status (Normal/Casual Cycle). To turn off washer touch pad for at least 2 seconds during running or just one second during the pause and stand by status. - Page 15 Touch pad to select this option. The washer will now switch off the wash mode and will be in the rinse and spin cycle. Touching the pad for a second time will set the washer to spin only.
-
Page 16: Washer Operating Procedure
During activation of the child lock function, the child lock LED is on. 6. You could pause the washer and if the door lock light on the control panel will be Off during this time the door of the washer can be opened to Add a Garment. -
Page 17: Cycles
English Custom Cycle: You do not have to remember your favorite setting. Simply program and set it. Automatic Setting: Once you choose your required wash cycle, the soil level, rinse level, spin speed, water temperature and signal will set automatically making the unit automatic operation. -
Page 18: Normal Washing Sounds
NORMAL WAShING SOUNDS The following sounds are normally heard during the operation of the washer: • Tumbling sounds: This is normal as the heavy wet clothes in the washer are continuously being tossed around • Air rushing noise: This happens when the washer tub spins at a very high RPM. -
Page 19: Cycle Selection
English cycLe seLectIoN Select Cycles Desired According To Fabric Types And Soil Level Cycle Fabric type Soil Level Medium Clothes of cot- tons, linens and Normal / synthetic fabrics, Casual Heavy work clothes, Light jeans, shirts Dress shirt / Medium pants wrinkle Perm free clothing,... -
Page 20: Washing Methods
• Carefully check all pockets and cuffs for small items. They may damage the drum. • Pre-treat all stains and heavily soiled areas for best results. • Do not overload the washer. • Close the door properly after loading the clothes. -
Page 21: Using The Dispenser
HE detergents make less suds improve washing and rinsing performance, and help to keep the interior of your washer clean. If a regular detergent is used, it may cause oversudsing and unsatisfactory performance. For the best washing and rinsing performance, low-suding HE detergents are strongly recommended. -
Page 22: After Washing
* The fabric softener will be automatically dispensed during the last rinse cycle. Note: If there is a leak or spill with laundry products (soap, detergent, bleach, softener, etc.) on the top of your washer, clean immediately. These products can damage the finish or controls if left there too long. -
Page 23: Care And Cleaning Guide
WARNING: To reduce the risk of electric shock, disconnect this appliance from the power supply before attempting any user maintenance. Turning the power OFF does not disconnect this washer from the power supply. You must disconnect the plug from the electrical source. -
Page 24: Cleaning The Door Seal
3. Only use HE detergents. For optimal washer freshness and keep washer open to allow drum to air dry. Cleaning the dispenser • To pull the dispenser drawer out press down the lock lever to remove. -
Page 25: Moving And Vacationing And Storage
Drain water from hoses and keep washer door open to allow drum to air dry. • Start Up After Washer is Stored: Flush water pipes and reconnect hoses and power. Run one empty load with HE detergent to clean out drum. Choose sanitary cycle and run without loading clothes. -
Page 26: Troubleshooting
* Are all the feet resting firmly on the ground? * Fill hose connection is loose at tap or washer. * House drain pipes are clogged. * Too much detergent or unsuitable detergent. * Water supply is not adequate in area. - Page 27 Repairs to the washing machine must only be carried out by qualified personnel. Repairs carried out by inexperienced persons may cause injury or serious malfunctioning. Contact your local service center. Problem Water in the washer does not drain or drains slowly Washer does not start Washer won’t spin...
- Page 28 If error still exist, please contact service personnel. Please contact service personnel. The washer will auto drain out of water, and then auto clean up; If error still occur, please contact service personnel. Please contact service personnel.
-
Page 29: Technical Specification
English Problems with clothes: • Clothes are too wrinkled: This is due to improper sorting, overloading and washing in too hot water repeatedly. Avoid overloading and resort your load. Do not mix heavy clothes such as work clothes with light clothes such as blouses, light shirts and delicate items. -
Page 30: Limited Warranty
Limited Warranty After one year from the original retail purchase date, Haier will provide a part at no cost, as indicated below, to replace said part as a result of a defect in materials or workmanship. Haier is solely responsible for the cost of the part. -
Page 32: Do Not Return This Product To The Store
No regrese este producto a la tienda si tiene algún problema con este producto, por favor contacte el "centro de servicio al consumidor de Haier" al 1-877-337-3639 (Válido solo en e.U.A). NecesItA UNA pRUeBA De coMpRA FecHADA pARA eL seRVIcIo De LA GARANtIA...
Need help?
Do you have a question about the HWF5300AW and is the answer not in the manual?
Questions and answers