
Summary of Contents for NVision NV6000 Series
- Page 1 NV6000 and NV8000 Series Universal Routers User Guide ENVOY6128 ENVOY6256 ENVOY6064 ENVOY6257 POWER SUPPLY ENVOY8256 November 2002 UG8000-00...
-
Page 2: Front Matter
In no event shall NVISION be liable for any damages resulting from loss of data, loss of use, or loss of profits and NVISION further disclaims any and all liability for indirect, incidental, special, consequential or other similar damages. This disclaimer of liability applies to all products, publications, and services during and after the warranty period. -
Page 3: About This Manual
UG8000-00 November 2002 ABOUT THIS MANUAL This manual provides overview, installation, operation, and maintenance information about the product. Sections included are the following: • Section 1: System Descriptions - Unpacking, overview, and specifications. • Section 2: Installation - Physical installation, cabling, and power on. •... -
Page 4: Important Safeguards And Notices
The fuse symbol indicates that the fuse referenced in the text must be replaced with one having the ratings indicated. The presence of this symbol in or on NVISION equipment means that it has been designed, tested and certified as complying with applicable Underwriter's Laboratory (USA) regulations and recommendations. -
Page 5: General Warnings
UG8000-00 November 2002 General Warnings A warning indicates a possible hazard to personnel which may cause injury or death. Observe the following general warnings when using or working on this equipment. • Heed all warnings on the unit and in the operating instructions. •... -
Page 6: Power Cord Wiring
UG8000-00 November 2002 POWER CORD WIRING The power cord differs depending on your location. See the information below. Also note that the power cords supplied with this equipment provide the only means of mains disconnection. The socket-outlet must be installed near the equipment and must be easily accessible. NORTH AMERICAN POWER SUPPLY CORDS The North American power cords supplied with this equipment have a molded grounding plug (NEMA 5- 15P) at one end and molded grounding receptacle (IEC 320-C13) at the other end (see figure below). -
Page 7: Fcc Emission Limits
CE mark (See “Symbols and Their Meanings” above.) When shipped into member countries of the European Community, this equipment is accompanied by authentic copies of original Declarations of Conformance on file in NVISION offices in Grass Valley, California USA. -
Page 8: Technical Support
UG8000-00 November 2002 TECHNICAL SUPPORT NVISION has made every effort to ensure that the equipment you receive is in perfect working order. In the event that problems arise which you cannot resolve, or if there are any questions regarding this equipment... -
Page 9: Table Of Contents
UG8000-00 November 2002 TABLE OF CONTENTS Content Page FRONT MATTER COPYRIGHT AND TRADEMARKS ..........ii REVISION HISTORY. - Page 10 UG8000-00 November 2002 Content Page NV8256 Electronics Frame Rear Panel ....... . 1-24 NV8256 Specifications .
- Page 11 UG8000-00 November 2002 Content Page SECTION 4: MAINTENANCE MAINTENANCE ............4-2 Washing Air Filters .
- Page 12 UG8000-00 November 2002 Page xii...
- Page 13 UG8000-00 November 2002 Section 1: System Descriptions This manual describes the NV6064, NV6128, NV6256, and NV8256 routers. Other routers in the ENVOY series, such as the NV6904 and the NV7256, are described in separate manuals. This section covers the following topics: Contents Page INTRODUCTION .
-
Page 14: Introduction
UG8000-00 November 2002 INTRODUCTION NVISION manufactures the 6000 and 8000 Series ENVOY Universal Digital Routers. Each router, identified below, combines compact frame size (with optional redundant power supplies) and the capability of managing a wide range of signal formats. • NV6064 provides up to 64 x 64 Inputs and Outputs with dual outputs. - Page 15 UG8000-00 November 2002 SDI Input Card 143, 177, 270, 360 Mb/s SWB Input SDI Output High Speed Card 3 Mb/s Card 143, 177, to 1.5 Gb/s Crosspoint 270, 360 Mb/s Matrix SWB Output Card 3 Mb/s to 1.5 Gb/s Clock Generator Control System Interface and CPU ENVOY 6000 Series SDI Input Card 143, 177, 270, 360 Mb/s SWB Input SDI Output High Speed Card 3 Mb/s Card 143, 177, to 1.5 Gb/s Crosspoint 270, 360 Mb/s Matrix SWB Output Card 3 Mb/s to 1.5 Gb/s Clock Generator Control System Interface and CPU ENVOY 8000 Series Figure 1-1.
-
Page 16: Nv6064 System Description
UG8000-00 November 2002 NV6064 SYSTEM DESCRIPTION The NV6064 Universal Digital Router system is housed in a single frame, including electronics and power supplies. The frame is 12 RUs high and designed to be installed in a standard 19” equipment rack. In addition to those discussed on the previous pages, features of the NV6064 include: •... - Page 17 UG8000-00 November 2002 64 x 64 CROSSPOINT MAIN UNUSED SLOT MAIN REDUNDANT POWER SUPPLY POWER SUPPLY Figure 1-2. NV6064 Front Panel Page 1-5...
-
Page 18: Nv6064 Rear Panel
Video Reference 1 and 2. Connect analog PAL or NTSC composite video. Ethernet and SMS7000 GSC Node Bus control system connectors. Ethernet connectors may be used for the NVISION NV9000 Series Control System, and the GSC Node Bus connectors are used for the GVG SMS7000 Control System. - Page 19 VIDEO REF 1 REF 2 LOOP THRU ALARMS OUTPUTS INPUTS COMMON TO TIMECODE PRI & SEC PS 1 LEFT CAUTION CONTROL NO. 9K50 PLEASE READ INSTRUCTION PROFESSIONAL VIDEO/AUDIO MANUAL BEFORE CONNECTING EQUIPMENT TO THE MAINS NVISION, INC. T 8.0A 250V FOR 90-130V~ ENVOY 6064 T 6.3A 250V FOR 180-250V~ Æ 90-130/180-250V FUSES LOCATED LISTED CAUTION 7.0A/3.75A ON POWER SUPPLIES THIS EQUIPMENT HAS MORE THAN ONE 50/60Hz PS 2 POWER SUPPLY CORD. TO REDUCE THE RISK 660 WATTS MAX RIGHT OF ELECTRIC SHOCK DISCONNECT 2 POWER SUPPLY CORDS BEFORE SERVICING. "THIS DEVICE COMPLIES WITH PART 15 OF THE FCC RULES.
-
Page 20: Nv6064 Specifications
UG8000-00 November 2002 NV6064 Specifications Table 1-1 lists the specifications for the NV6064 Router. Table 1-1. NV6064 SPECIFICATIONS TYPE PARAMETER Electrical AC Power 90-130/180-250 VAC, 50/60Hz, Auto-ranging Fuses Crosspoint Module - 7A, 125V (F) F1 Fast & 1A, Auto Reset. I/O Modules - 1A, Auto Reset. -
Page 21: Nv6128 System Description
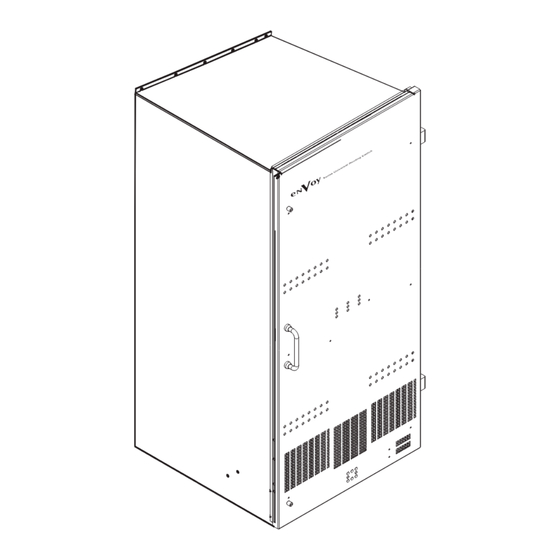
UG8000-00 November 2002 NV6128 SYSTEM DESCRIPTION The NV6128 Universal Digital Router system is housed in a single frame, including electronics and power supplies. The frame is 18 RUs high and is designed to be installed in a standard 19” equipment rack. In addition to those discussed on the previous pages, features of the NV6128 include: •... -
Page 22: Nv6128 Front Panel
UG8000-00 November 2002 NV6128 Front Panel Figure 1-4 illustrates the NV6128 front panel (door open). The front panel provides access to the following assemblies: Up to 16 Output Cards (can be a combination of SDI and SWB), 8 outputs per card. Output Monitor (optional). - Page 23 UG8000-00 November 2002 128X32 CROSSPOINT OUTPUTS 1-32 128X32 CROSSPOINT OUTPUTS 33-64 128X32 CROSSPOINT OUTPUTS 65-96 128X32 CROSSPOINT OUTPUTS 97-128 MAIN MAIN POWER SUPPLY 1 POWER SUPPLY 2 REDUNDANT REDUNDANT POWER SUPPLY 1 POWER SUPPLY 2 Figure 1-4. NV6128 Front Page 1-11...
- Page 24 Video Reference 1 and 2. Connect analog PAL or NTSC composite video. Ethernet and SMS7000 GSC Node Bus control system connectors. Ethernet connectors may be used for the NVISION NV9000 Series Control System and the GSC connector may be used for the GVG SMS7000 Control System.
- Page 25 MANUAL BEFORE CONNECTING EQUIPMENT TO THE MAINS EQUIPMENT TO THE MAINS PS 3 PS 1 TOP RIGHT TOP LEFT PS 4 PS 2 BOTTOM RIGHT BOTTOM LEFT PS ALARMS PS ALARMS 3 AND 4 1 AND 2 CONTROL NO. 9K50 PROFESSIONAL CAUTION VIDEO/AUDIO T 8.0A 250V FOR 90-130V~ NVISION, INC. THIS EQUIPMENT HAS MORE THAN ONE NORMALLY ENVOY 6128 T 6.3A 250V FOR 180-250V~ NORMALLY POWER SUPPLY CORD. TO REDUCE THE RISK Æ CLOSED CLOSED 90-130/180-250V FUSES LOCATED OF ELECTRIC SHOCK DISCONNECT 4 POWER LISTED 15.0A/7.5A ON POWER SUPPLIES SUPPLY CORDS BEFORE SERVICING. 50/60Hz 1320 WATTS MAX "THIS DEVICE COMPLIES WITH PART 15 OF THE FCC RULES.
-
Page 26: Nv6128 Specifications
UG8000-00 November 2002 NV6128 Specifications Table 1-2 lists the specifications for the NV6128 Router. Table 1-2. NV6128 SPECIFICATIONS TYPE PARAMETER Electrical AC Power 90-130/180-250 VAC, 50/60Hz, Auto-ranging Fuses Crosspoint Module - 7A, 125V (F) F1 Fast & 1A, Auto Reset. I/O Modules - 1A, Auto Reset. -
Page 27: Nv6256 System Description
UG8000-00 November 2002 NV6256 SYSTEM DESCRIPTION The NV6256 Universal Digital Router system consists of two frames. One frame houses the electronics and the other contains the (6257) power supplies. The electronics frame is 24 RUs high and the Power Supply frame is 5 RUs high. Both frames are designed to be installed in a standard 19”... -
Page 28: Nv6256 Electronics Frame Front Panel
UG8000-00 November 2002 NV6256 Electronics Frame Front Panel Figure 1-6 illustrates the NV6256 Electronics frame front panel (door open). The front panel provides access to the following assemblies: Up to 16 Output boards (can be a combination of SDI and SWB), 8 outputs per board. - Page 29 UG8000-00 November 2002 128X32 CROSSPOINT OUTPUTS 1-32 128X32 CROSSPOINT OUTPUTS 33-64 128X32 CROSSPOINT OUTPUTS 65-96 128X32 CROSSPOINT OUTPUTS 97-128 128X32 CROSSPOINT OUTPUTS 1-32 128X32 CROSSPOINT OUTPUTS 33-64 128X32 CROSSPOINT OUTPUTS 65-96 128X32 CROSSPOINT OUTPUTS 97-128 Figure 1-6. NV6256 Electronics Frame Front Page 1-17...
-
Page 30: Nv6256 Electronics Frame Rear Panel
Looping connectors provided. Ethernet and SMS7000 GSC Node Bus connectors. Ethernet connectors are for use with NVISION NV9000 Series Control Systems, and GSC connectors are for use with GVG SMS7000 Control Systems. See the documentation for those systems for connection details. - Page 31 COMMON TO TIMECODE PRI & SEC AIR EXHAUST AIR EXHAUST KEEP CLEAR 6" MIN KEEP CLEAR 6" MIN FAN SERVICE ACCESS FAN SERVICE ACCESS AIR EXHAUST AIR EXHAUST KEEP C;EAR 6" MIN KEEP C;EAR 6" MIN INPUTS 2 2 2 POWER POWER INPUT INPUT POWER SUPPLY MONITORS AIR EXHAUST AIR EXHAUST KEEP CLEAR 6" MIN KEEP CLEAR 6" MIN INPUTS NVISION, INC. ENVOY 6256 LISTED CONTROL NO. 9K50 PROFESSIONAL VIDEO/AUDIO Figure 1-7. NV6256 Rear Page 1-19...
-
Page 32: Nv6256 Specifications
UG8000-00 November 2002 NV6256 Specifications Table 1-3 lists the specifications for the NV6256 Universal Digital Router. Table 1-3. NV6256 FRAME SPECIFICATIONS TYPE PARAMETER Electrical AC Power 90-130/180-250 VAC, 50/60Hz, Auto-ranging Fuses Crosspoint Module - 7A, 125V (F) F1 Fast & 1A, Auto Reset. I/O Modules - 1A, Auto Reset. -
Page 33: Nv8256 System Description
UG8000-00 November 2002 NV8256 SYSTEM DESCRIPTION The NV8256 Universal Digital Router system consists of two frames. One frame houses the electronics and the other contains the power supplies. The electronics frame is 22 RUs high and the Power Supply frame is 5 RUs high. Both frames are designed to be installed in a standard 19”... -
Page 34: Nv8256 Electronics Frame Front Panel
UG8000-00 November 2002 NV8256 Electronics Frame Front Panel Figure 1-8 illustrates the NV8256 electronics frame front panel (door open). The front panel provides access to the following assemblies: Up to 16 Output boards (can be a combination of SDI and SWB), 16 outputs per board. - Page 35 UG8000-00 November 2002 Figure 1-8. NV8256 Electronics Frame Front Page 1-23...
-
Page 36: Nv8256 Electronics Frame Rear Panel
Looping connectors provided. Ethernet and SMS7000 GSC Node Bus connectors. Ethernet connectors are for use with NVISION NV9000 Series Control Systems, and GSC connectors are for use with GVGSMS7000 Control Systems. See the documentation for those systems for connection details. - Page 37 UG8000-00 November 2002 AIR EXHAUST KEEP CLEAR 6" MIN IN 1 IN 2 OUT 1 OUT 2 MONITORS POWER POWER INPUT INPUT POWER REDUNDANT SUPPLY CROSSPOINT MONITORS CONTROL OUTPUTS OUTPUTS 129-256 1-128 INPUTS INPUTS 129-256 1-128 SEC CTRL SEC CTRL NETWORK GSC NODE BUS E146905...
-
Page 38: Nv8256 Specifications
UG8000-00 November 2002 NV8256 Specifications Table 1-4 lists the specifications for the NV8256 Universal Digital Router. Table 1-4. NV8256 FRAME SPECIFICATIONS TYPE PARAMETER Electrical AC Power 90-130/180-250 VAC, 50/60Hz, Auto-ranging Fuses Input Modules - Auto Reset Output Modules - 1.25 (T) SLOBLO Crosspoint Modules - 3 fuses, all 1.6A(T) SLOBLO Controller Module - 3A, 125V (F) F1 Fast. -
Page 39: Nv6257 Power Supply Frame For 6256/8256
UG8000-00 November 2002 NV6257 POWER SUPPLY FRAME FOR 6256/8256 The 6257 Power Supply frame which powers the NV6256 and NV8256 routers contains four PS6000 main power supplies and four PS6000 redundant power supplies. Referring to the frame front shown in Figure 1-10, the power supplies are arranged in two banks of four. - Page 40 Æ Æ PS6000 PS6000 POWER POWER Æ Æ PS6000 PS6000 6257 Power Supply Front (Door Open) CAUTION PLEASE READ INSTRUCTION MANUAL BEFORE CONNECTING EQUIPMENT TO THE MAINS OUTPUT OUTPUT POWER FRONT VIEW OF PS POWER NVISION, INC. ENVOY PS FRAME 90-130/180-250V~ 30.0A/15.0A 50/60Hz 2640 WATTS MAX T 8.0A 250V FOR 90-130V~ T 6.3A 250V FOR 180-250V~ POWER FUSES LOCATED SUPPLY ALARMS MONITORS ON POWER SUPPLIES CAUTION THIS EQUIPMENT HAS EIGHT POWER SUPPLY CORDS. TO REDUCE THE RISK OF ELECTRIC SHOCK DISCONNECT ALL POWER SUPPLY CORDS BEFORE SERVICING. CONTROL NO. 9K50 "THIS DEVICE COMPLIES WITH PART 15 OF THE FCC RULES.
-
Page 41: Control Connectors (All Models)
UG8000-00 November 2002 CONTROL CONNECTORS (ALL MODELS) Connect RS-422 serial data cables from your control system to the router CTRL1 9-pin D connectors. One cable is required for the Primary Control module (PRIMARY CTRL1) and another cable for the Secondary Control module (SECONDARY CTRL1). If you use more than one control system, connect the alternate control system to the CTRL2 connectors. -
Page 42: Diagnostic Connectors (All Models)
UG8000-00 November 2002 DIAGNOSTIC CONNECTORS (ALL MODELS) The Diagnostic ports on the back of the router frame and on the front of the Control modules are used to connect a PC and communicate with the router using the UniConfig diagnostic software (see the UniConfig manual for details). These ports are set to RS-232 by default. -
Page 43: Alarms Connector (All Models)
UG8000-00 November 2002 ALARMS CONNECTOR (ALL MODELS) The ALARMS connector on the back of all router models provides a means of monitoring the health of various frame parameters as explained below. When a monitored item fails or is disconnected, an “alarm” is generated through the ALARMS connector. - Page 44 UG8000-00 November 2002 ALARMS 9-Pin D Female Connector Alarm_COM - 1 6 - Alarm_5 Alarm_1 - 2 7 - Alarm_6 Alarm_2 - 3 8 - Alarm_7 Alarm_3 - 4 9 - Alarm_COM Alarm_4 - 5 Wiring Side TYPICAL CIRCUIT 1 TYPICAL CIRCUIT 2 Normally ON LEDs turn OFF Normally OFF LEDs turn ON to indicate failure. to indicate failure. DC Power Source DC Power Source Use relay normally closed contact Internal connection of alarm pins to COM is closed when alarm is off, open when alarm Internal connection of alarm is on. pins to COM is closed when alarm is off, open when alarm is on. Figure 1-14. Typical Alarm Connections Page 1-32...
-
Page 45: Power Supply Alarms Connector (6064/6128)
UG8000-00 November 2002 POWER SUPPLY ALARMS CONNECTOR (6064/6128) Alarms to indicate a power supply failure are provided for both the main and redundant power supplies. The PS ALARMS connector includes normally closed connections from pin 1 to COM and pin 2 to COM, corresponding to Power Supply 1 (main) and Power Supply 2 (redundant), respectively. -
Page 46: Power Supply Alarms Connector (6256/8256)
UG8000-00 November 2002 POWER SUPPLY ALARMS CONNECTOR (6256/8256) The NV6256 and NV8256 routers use the 6257 external power supply frame, containing up to 8 main and redundant power supply modules. Alarms to indicate a power supply module failure are provided for each of the main and redundant power supplies contained in the 6257 Power Supply frame. - Page 47 UG8000-00 November 2002 6257 PS ALARMS 25-Pin D Female Connector, Wiring Side Internal connection of alarm PS8_Opto_COM - 1 pins to COM is closed when 14 - GND PS7_Opto_COM - 2 alarm is off, open when alarm 15 - GND is on. PS6_Opto_COM - 3 15 - GND PS5_Opto_COM - 4 17 - PS2_Opto_COM PS4_Opto_COM - 5 18 - PS2_Opto_C PS3_Opto_COM - 6 Connection examples are shown 19 - GND PS8_Opto_C - 7 below for power supplies 1 and 2. 20 - GND Connections may be made for all PS7_Opto_C - 8 21 - GND 8 power supplies in the 6257 frame. PS6_Opto_C - 9 22 - GND PS5_Opto_C - 10 23 - PS1_Opto_COM PS4_Opto_C - 11 24 - PS1_Opto_C PS3_Opto_C - 12 25 - NC GND - 13 TYPICAL CIRCUIT 1 TYPICAL CIRCUIT 2 Normally ON LEDs turn OFF Normally OFF LEDs turn ON to indicate failure.
- Page 48 UG8000-00 November 2002 Page 1-36...
- Page 49 UG8000-00 November 2002 Section 2: Installation This section provides installation instructions for the NV6064, the NV6128, the NV6256 and the NV8256 routers. The following topics are covered: Contents Page RECEIVING INSPECTION AND UNPACKING ........2-2 PREPARING FOR INSTALLATION .
-
Page 50: Receiving Inspection And Unpacking
• If you find any shipping damage to the product, notify the shipping carrier immediately. • Compare what you received against the packing slip. If anything is missing or has suffered damage unrelated to shipping, contact NVISION immediately. See "TECHNICAL SUPPORT" on page viii” near the front of this manual for contact information. -
Page 51: Preparing For Installation
UG8000-00 November 2002 PREPARING FOR INSTALLATION Follow the instructions in this section in the order given. If necessary, refer to the general system descriptions and specifications in Section 1 of this manual for additional information. Installation generally includes mounting the frame in an equipment rack, making connections to the frame, and checking and configuring the system using diagnostic software. -
Page 52: Power Supply Safety For All Models
UG8000-00 November 2002 POWER SUPPLY SAFETY FOR ALL MODELS To meet safety requirements and to ensure proper functionality of redundant operation, connect Power Supplies to individual branch circuits according to the ampacities given in the following tables. Table 2-1. NV 6256/8256 Power Supply Branch Circuit Ampacities AMPACITY PER INDIVIDUAL INDIVIDUAL... -
Page 53: Installing The Router
UG8000-00 November 2002 INSTALLING THE ROUTER These instructions are divided into four parts, one for each router model: • "Installing the NV6064" on page 2-6 • "Installing the NV6128" on page 2-7 • "Installing the NV6256" on page 2-8 • "Installing the NV8256" on page 2-10 Use the part that applies to your router and then turn to the information at the end of the section that applies to all models. -
Page 54: Installing The Nv6064
UG8000-00 November 2002 Installing the NV6064 To install an NV6064 router, follow the steps below: 1. Determine the placement of the NV6064 frame in the rack. Note that the NV6064 requires 12 RUs of vertical rack space. Note: The power cords supplied with this equipment provide the only means of AC mains disconnection. -
Page 55: Installing The Nv6128
UG8000-00 November 2002 Installing the NV6128 To install an NV6128 router, follow the steps below: 1. Determine the placement of the NV6128 frame in the rack. The frame requires 18 RUs of vertical rack space. Note: The power cords supplied with this equipment provide the only means of AC mains disconnection. -
Page 56: Installing The Nv6256
UG8000-00 November 2002 Installing the NV6256 To install an NV6256 router, follow the steps below: 1. Determine the placement of the NV6256 in the rack. The electronics frame requires 24 RUs of vertical rack space, and the Power Supply frame requires 5 RUs. - Page 57 UG8000-00 November 2002 8. Lift the Power Supply frame into position and attach it to the front of the rack with the appropriate screws, being sure to place screws in all mounting screw holes. The Power Supply frame must be close enough to the electronics frame to allow connection of the 6 foot (1.83 meter) power cables, as explained below in Step 10.
-
Page 58: Installing The Nv8256
UG8000-00 November 2002 Installing the NV8256 To install an NV8256 router, follow the steps below: 1. Determine the placement of the NV8256 in the rack. The electronics frame requires 22 RUs of vertical rack space, and the Power Supply frame requires 5 RUs. - Page 59 UG8000-00 November 2002 8. Lift the Power Supply frame into position and attach it to the front of the rack with the appropriate screws, being sure to place screws in all mounting screw holes. The Power Supply frame must be close enough to the electronics frame to allow connection of the 6 foot (1.83 meter) power cables, as explained below in Step 10.
- Page 60 UG8000-00 November 2002 Rear Handle (one each side) Installation Handle Frame Slots (two each side) Installation Handle Wing Nut ENVOY6256/8256 (two each side) Front Figure 2-1. NV6256/8256 Installation Handles, Front and Rear Page 2-12...
-
Page 61: Verification And Configuration (All Models)
• Monitor system health and status. • View crosspoint status and make crosspoint selections to test for proper crosspoint switching. • Build and execute crosspoint take salvos. • View software versions and download new software from NVISION to the router’s EPROMs. Page 2-13... -
Page 62: Redundant Crosspoint Operation
UG8000-00 November 2002 REDUNDANT CROSSPOINT OPERATION The standard dimension of the 8256 crosspoint module is 256x128, therefore two modules are required for router output dimensions that exceed 128. If desired, a third crosspoint module can be installed to provide a ‘hot’ standby backup for either of the primary cards in use. -
Page 63: Replacing A Primary Crosspoint
UG8000-00 November 2002 Replacing a Primary Crosspoint If it becomes necessary to remove a crosspoint for service, simply depress the ‘Replace XPT’ button (on the center, redundant crosspoint module) for the appropriate output bank (LH = 1–128, RH = 129–256). The yellow, ‘active’, LED on the selected primary will go out. - Page 64 UG8000-00 November 2002 Page 2-16...
-
Page 65: Envoy Routers System Theory Of Operation
UG8000-00 November 2002 Section 3: Theory of Operation Included in this section is a brief technical overview of the ENVOY Routers and a simplified block diagram of the system. Router operational procedures are not discussed in this manual because they are a function of the control system or panel used to control the router. -
Page 66: Envoy Routers System Theory Of Operation
UG8000-00 November 2002 ENVOY ROUTERS SYSTEM THEORY OF OPERATION Figure 3-1. Input signals enter the ENVOY Routers backplane connectors and are connected directly to the active Input cards. The Inputs cards buffer the input signals. The signals from these cards feed the Crosspoint cards which handle switching of selected input signals to the Output cards. - Page 67 UG8000-00 November 2002 SDI Input Card 143, 177, 270, 360 Mb/s SWB Input SDI Output High Speed Card 3 Mb/s Card 143, 177, to 1.5 Gb/s Crosspoint 270, 360 Mb/s Matrix SWB Output Card 3 Mb/s to 1.5 Gb/s Clock Generator Control System Interface and CPU ENVOY 6000 Series SDI Input Card 143, 177, 270, 360 Mb/s SWB Input SDI Output High Speed Card 3 Mb/s Card 143, 177, to 1.5 Gb/s Crosspoint 270, 360 Mb/s Matrix SWB Output Card 3 Mb/s to 1.5 Gb/s Clock Generator Control System Interface and CPU ENVOY 8000 Series Figure 3-1.
- Page 68 UG8000-00 November 2002 Page 3-4...
- Page 69 UG8000-00 November 2002 Section 4: Maintenance This section provides maintenance and troubleshooting information for the ENVOY 6000 Routers. The following topics are covered: Contents Page MAINTENANCE ............4-2 LED Indicators .
-
Page 70: Maintenance
UG8000-00 November 2002 MAINTENANCE An ENVOY Router does not require any periodic electrical or physical maintenance other than to periodically wash the air filters and check for proper cooling air flow, check the LED indicators, and replace a fuse if it opens. Procedures for checking these items are presented below. -
Page 71: Led Indicators
UG8000-00 November 2002 LED Indicators A simple way to monitor system health is to check the LED indicators listed below: Table 4-1. Module LED Indicators MODULE INDICATOR FUNCTION Power Supply Green Indicate power presence in each of the 5 branches on the power supply module. -
Page 72: Fan Servicing
UG8000-00 November 2002 Fan Servicing Fans are included on all ENVOY models and are easily accessible for cleaning and servicing. See the instructions by model below. NV6064 Fans The fans on the NV6064 router are located on a horizontal fan sled at the top of the frame. - Page 73 UG8000-00 November 2002 Loosen these screws and lift the fan assembly up and out. AIR EXHAUST AIR EXHAUST KEEP CLEAR 6" MIN KEEP CLEAR 6" MIN FAN SERVICE ACCESS FAN SERVICE ACCESS AIR EXHAUST AIR EXHAUST KEEP C;EAR 6" MIN KEEP C;EAR 6" MIN Cooling Cooling Fan #1 Fan #2 Figure 4-2. Rear Fan Removal in NV6128 and NV6256 Loosen these screws and pull on the fan assembly to slide it out.
- Page 74 UG8000-00 November 2002 Loosen these screws and pull on the fan assembly to slide it out. Figure 4-4. Front fan tray removal in the NV8256 One fan filter is located inside the router, and two are located in the door of the router Figure 4-5.
-
Page 75: Fuse Replacement
UG8000-00 November 2002 Fuse Replacement Most modules use automatically resetting fuses that are not user serviceable. These fuses reset themselves when the condition causing them to open has been removed. A replaceable AC fuse is used in the PS6000 Power Supply modules (see Figure 4-6): •... -
Page 76: Troubleshooting
4-7. Caution: A fuse that blows may indicate a larger problem and continuing to replace the fuse could cause equipment damage. 5. If the problem persists, contact NVISION as explained under the heading, "TECHNICAL SUPPORT" on page viii near the front of this manual. -
Page 77: Controller Checks
Secondary Controller to take over operation (its yellow LED should light). If the system now operates correctly, replace the faulty Controller. 5. If the problem persists, contact NVISION as explained under the heading, "TECHNICAL SUPPORT" on page viii near the front of this manual. -
Page 78: Signal Path Checks
Crosspoint cards and check the suspect input. If the signal is now present at the output, the Crosspoint card is bad. Replace the Crosspoint card. 5. If the problem persists, contact NVISION as explained under the heading, "TECHNICAL SUPPORT" on page viii near the front of this manual. -
Page 79: Ordering Replacement Assemblies
The normal shipping method is Second Day unless you specify that you need Next Day or Next Day A.M. shipping due to urgency. 8. NVISION will invoice you the amount quoted if the repair or replacement part is for out of warranty equipment. - Page 80 UG8000-00 November 2002 Page 4-12...
- Page 81 UG8000-00 November 2002 Index NV6256 Front Panel 1-16 Installing 2-10 Rear Panel 1-18 Specifications 1-20 System Description 1-15 About This Manual NV8256 AC Fuse Replacement Front Panel 1-22 Address viii Rear Panel 1-24 Air Filters, Washing Specifications 1-26 Alarm Connectors 1-31 System Description 1-21...
- Page 82 UG8000-00 November 2002 Maintenance System Theory of Operation N-on-1 redundancy operation 2-14 Technical Support viii Telephone Numbers viii Theory of Operation Tools, Installation Overview and Block Diagram, System Trademarks Overview, System Troubleshooting Troubleshooting Power Supplies Troubleshooting, Controller Card Phone Numbers viii Troubleshooting, Signal Path 4-10...
Need help?
Do you have a question about the NV6000 Series and is the answer not in the manual?
Questions and answers