Advertisement
Table of Contents
- 1 Table of Contents
- 2 Important Notes
- 3 Important Safety Instructions
- 4 Pellet Stove Operation Notes
- 5 Stove Accessories
- 6 Installation
- 7 Venting
- 8 Using Correct Fuel
- 9 Operating Instructions
- 10 Refill
- 11 Shut down Procedure
- 12 Cleaning and Maintenance
- 13 Specifications
- 14 Troubleshooting and Helpful Hints
- 15 Warranty
- Download this manual
Installation and Operating Manual
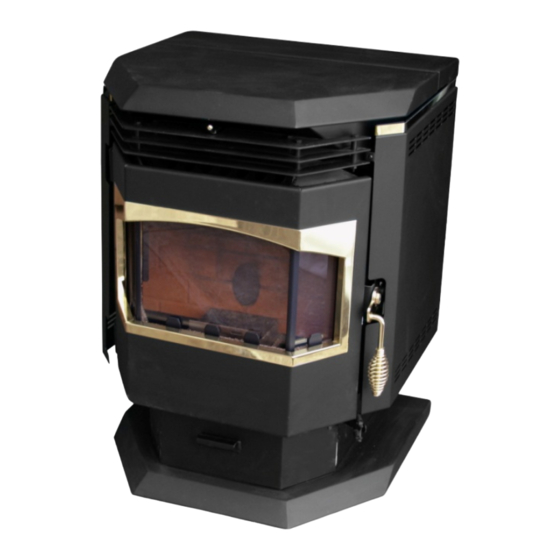
QCPS‐28000 Pellet Stove Owner's Manual
We suggest that our products
be installed and serviced by
professionals who are
certified in the US by the
National Fireplace Institute
(NFI) as NFI specialists.
PLEASE READ THIS ENTIRE MANUAL BEFORE YOU INSTALL AND USE YOUR NEW PELLET STOVE. FAILURE
TO FOLLOW INSTRUCTIONS MAY RESULT IN PROPERTY DAMAGE, BODILY INJURY, OR EVEN DEATH.
IF THIS PELLET STOVE IS NOT PROPERLY INSTALLED, A HOUSE FIRE MAY RESULT. FOR YOUR SAFETY
CAREFULLY FOLLOW INSTALLATION INSTRUCTIONS.
CONTACT YOUR LOCAL BUILDING OR FIRE OFFICIALS ABOUT RESTRICTIONS AND INSTALLATION
INSPECTION REQUIREMENTS IN YOUR AREA.
CONTACT YOUR LOCAL AUTHORITY (SUCH AS MUNICPAL BUILDING DEPARTMENT, FIRE DEPARTMENT,
FIRE PREVENTION BUREAU, ETC.) TO DETERMINE THE NEED FOR A PERMIT.
THIS UNIT IS FOR RESIDENTIAL USE BUT IS NOT SUITABLE FOR MOBILE HOMES.
SAFETY NOTICE
SAVE THESE INSTRUCTIONS
1
Advertisement
Table of Contents

Summary of Contents for Northern Tool and Equipment QCPS?28000
- Page 1 Installation and Operating Manual QCPS‐28000 Pellet Stove Owner’s Manual We suggest that our products be installed and serviced by professionals who are certified in the US by the National Fireplace Institute (NFI) as NFI specialists. SAFETY NOTICE PLEASE READ THIS ENTIRE MANUAL BEFORE YOU INSTALL AND USE YOUR NEW PELLET STOVE. FAILURE TO FOLLOW INSTRUCTIONS MAY RESULT IN PROPERTY DAMAGE, BODILY INJURY, OR EVEN DEATH. IF THIS PELLET STOVE IS NOT PROPERLY INSTALLED, A HOUSE FIRE MAY RESULT. FOR YOUR SAFETY CAREFULLY FOLLOW INSTALLATION INSTRUCTIONS. CONTACT YOUR LOCAL BUILDING OR FIRE OFFICIALS ABOUT RESTRICTIONS AND INSTALLATION INSPECTION REQUIREMENTS IN YOUR AREA. CONTACT YOUR LOCAL AUTHORITY (SUCH AS MUNICPAL BUILDING DEPARTMENT, FIRE DEPARTMENT, FIRE PREVENTION BUREAU, ETC.) TO DETERMINE THE NEED FOR A PERMIT. ...
-
Page 2: Table Of Contents
IMPORTANT NOTES This manual identifies hazards and has special safety messages that help you and others avoid personal injury and even death. Warning and Caution signal words are used to identify the level of hazard. However, regardless of the hazard, be extremely careful. WARNING TABLE OF CONTENTS Signals a hazard that may cause serious injury or death if you do not follow the recommended precautions. Important Notes 2 Important Safety Instructions 3 CAUTION Pellet Stove Operation Notes 4 Stove Accessories 5 Signals a hazard that might cause minor or moderate injury if you do not follow the Installation 5 recommended precautions. Venting 7 Using Correct Fuel 14 We suggest that our products be installed and serviced by Operating Instructions ... -
Page 3: Important Safety Instructions
IMPORTANT SAFETY INSTRUCTIONS We recommend the use of smoke detectors and carbon monoxide detectors with this type of product in your home. When using the smoke or carbon monoxide detectors, follow the manufacturer’s instructions for placement and operation in your home. WARNING • Do not touch the pellet stove while it is burning. Allow at least 30 minutes to cool down after the flame is extinguished for any refill, restart, cleaning, or maintenance. • Do not operate the unit with the hopper open. • The lid must be shut and tightly secured. • Do not operate with the door open. • Do not touch the unit while operating or is still hot. Contact can cause skin burns. • Keep children and small animals away from the pellet stove at all times. • Do not store or place flammable materials close the pellet stove. • Keep combustible materials (such as grass, leaves, etc.) at least 3 feet away from the flue outlet on the outside of the building. • Restrict the use of this product to persons who read, understand, and follow the warnings and instructions in this manual and on the unit. CAUTION • Professional installation is required for this stove. • The pellet stove must be electrically grounded in accordance with local codes or with national electrical code ANSI/NEPA 70 and CSA‐C22.1. • The stove is designed for use with pelletized wood only. Do not burn coal or wood logs of any kind. Only burn premium wood pellets. • This stove shall be operated with a power source for blowers, exhaust system, and fuel feeding system. • Never block the air supply to or from this stove as it will seriously degrade the performance and ... -
Page 4: Pellet Stove Operation Notes
PELLET STOVE OPERATION NOTES • Contact your local building or fire officials about restrictions and installation inspection requirements in your area. Call your homeowner’s insurance representative for inspection of your stove’s installation. • Read and comply with the instructions in this manual. • This stove is designed to burn Premium Wood Pellets only. Burning pea coal, cherry pits or anything other than premium wood pellets will void your warranty. Pellets with high ash content will not burn clean and will require the unit to be cleaned more often. This unit is designed for use with 6mm (1/4 in) diameter pellet fuel. Using pellets longer than 50 mm (2 in) can bind the auger and require frequent manual removal. • Be sure your pellets are not damp or wet. Keep sawdust out of the unit. • Use 76mm (3 in) UL approved Pellet Vent Twist‐Lock Pipe when installing this stove and follow the manufacturer’s specifications for installation and clearances. Even though this pipe interlocks, it is recommended to seal all connections with high temperature silicone. Use at least three screws to secure the pipe to this unit’s exhaust blower. If you do not use UL approved twist‐lock pellet pipe, be sure to use UL approved pellet vent pipe and fasten each joint with at least three screws. • Outside combustion air is mandatory for this unit to work properly. Make this connection using 48mm (1‐7/8 in) ID metal pipe and coupler. Be sure to secure the pipe to the unit with a clamp. The outside end should be covered (screened) to prevent any foreign matter from entering the system. Try to keep the number of bends in this pipe to a minimum. • Regularly inspect the burn pot area and if any crust forms, remove it with a poker. • The ash in the burn pot should be removed regularly depending on the burn rate. Keep the air holes of the burn pot clean for a more efficient burning. Check your exhaust system frequently. • Keep pellets and all other combustible materials at a safe distance from the unit. • This unit requires floor protection if installed on a combustible surface. The minimum floor protection should give at least 152mm (6 in) of protection at the rear, and 101 mm (4 in) on each side and 152mm (6 in) minimum at the front of the unit. • Horizontal runs should not exceed 1.2 m (4 ft) with a maximum vertical flue height of 10.6 m (35 ft). • This unit should be turned off and allowed to cool prior to cleaning. Any ashes should be kept in an ... -
Page 5: Stove Accessories
• This unit is for residential use but is not suitable for mobile homes. STOVE ACCESSORIES See below for accessories included with your unit. INSTALLATION Remove the factory packaging and find a suitable location according to the following guidelines. CLEARANCE TO COMBUSTIBLES This stove must be installed with the following minimum clearances to the side and back wall combustible material. Refer to Figure 1 for vertical installation and Figure 2 for vertical corner installation. Floor protection: Minimum 152 mm (6 in) in the front and 152 mm (6 in) on each side. The stove must be placed on continuous (grouted joints) of non‐combustible material such as ceramic tile, cement board, brick, 9.5 mm (3/8 in) millboard or equivalent or other approved material suitable for floor protection. Note: Ceramic tile or any tile must be laid on a continuous non‐combustible sheet to prevent the possibility of embers falling through the surface. See Figure 3. 5 ... - Page 6 INSTALLATION WARNING • Do not use makeshift materials or compromises in the installation of this unit. • Install vent with clearance specified by the vent manufacture. COMBUSTION AIR SUPPLY A flexible metal pipe is provided with this stove. Attach the pipe to the inlet at the stove’s rear. See Figure 4 for the air intake at the rear of stove. Attach a RODENT GUARD – not included with this unit – at the end and attach to the wall. Refer to Figure 5 for installation of air intake. Fasten the pipe by attaching the TRIM COLLAR to wall. All connections must be secured and made airtight by using either an appropriately sized hose clamp and/or UL‐181‐AP foil tape. 6 ...
-
Page 7: Venting
INSTALLATION If outside air is not used, it is important that combustion air be easily available to the air inlet. An air register that can be opened should be used in tightly insulated homes. VENTING This unit is certified for use with UL certified/ Listed 76 mm (3 in) or 101 mm (4 in) diameter in size. This unit can be vented in an existing chimney with the addition of a liner if the chimney is more than 101 mm (4 in) in diameter. Refer to the instructions provided by the vent or chimney manufacturer, especially when passing through a wall, ceiling or roof. This is a pressurized exhaust system. All vent connector joints must be sealed with 500F (260C) RTV silicone sealant to ensure consistent performance and avoid smoke and ash spillage. All horizontal connector joints must be sealed with UL181AP foil tape. We recommend that all vertical vent connector joints be secured with a minimum of 3 screws. WARNING • Do not install in a bedroom. CAUTION • Do not connect this unit to a chimney flue serving another appliance. • Do not install a flue damper in the venting system of this unit. • Install vent at clearances specified by the vent manufacture. • The structural integrity of the manufactured home floor, wall, ceiling, roof must be maintained. EQUIVALENT VENT LENGTH The longer the run of pipe in your installation, the more restriction there is in the system. Therefore larger diameter pipe should be used for longer runs. Use 76.2 mm (3 in) pipe if you have less than 4.57 m (15 ft) of Equivalent Vent Length (EVL). To calculate EVL, use the following conversion table: ... - Page 8 VENTING NOTE: AT ALTITUDES OF MORE THAN 914.4 m (3000 FT), WE SUGGEST THE USE OF 102 mm (4 IN) DIAMETER VENT AT AN EVL of 2.13 m (7 FT) OR MORE. INSTALLATION CONFIGURATION HORIZONTALLY INSTALL THROUGH WALL NOTE: FOLLOW L‐VENT CHIMNEY MANUFACTURER’S INSTRUCTIONS. 1. Position the stove as Figures 1 & 2 and maintain the clearance specified in Figure 3. 2. Determine the position of hole in wall where directly behind stove exhaust vent (refer to Figure 4). 3. Always maintain 152.4 mm (6 in) clearance from combustible materials. 4. Refer to Figure 7 for installation. 5. Install L‐vent wall thimble per L‐vent manufacturer’s instructions. 6. Attach enough piping to go through and extend at least 152.4 mm (6 in) beyond exterior wall. A 203.2 m (8 ft) vertical pipe run is suggested where possible to reduce the possibility of smoke spillage caused by negative pressure. 7. Attach cap and seal outside wall thimbles with non‐hardening water‐roof mastic. 8. Termination should not be located so that hot exhaust gases can ignite trees, shrubs or grasses or be a hazard to children. Exhaust gases can reaches temperature of 260˚C (500F) and cause serious burns if touches. 8 ...
- Page 9 VENTING 9. Located terminations: a) not less than 0.91 m (3 ft) above any forced air inlet located within 3.05 m (10 ft); b) not less than 1.22 m (4 ft) below or horizontally from, or one foot above, any door, window or gravity air inlet into any building; c) not less than 0.61 m (2 ft) from an adjacent building and not less than 2.13 m (7 ft) above grade when located adjacent to a public walkway. VERTICALLY WITH CHIMNEY SYSTEM 1. Follow L‐Vent chimney manufacturer’s instructions. 2. Option – to achieve a centered vertical installation, a 45 degree elbow and a clean‐out tee can be used to offset the pipe from the exhaust outlet to the rear center of the stove. 3. Option – install L‐vent elbow in place of clean‐out tee. Locate stove. Drop plumb bob to center of tee outlet, mark point on ceiling. Install ceiling support and L‐vent pipe as per L‐vent manufacturer’s instructions. 4. Always maintain 76.2mm (3 in) clearance from combustible materials. When passing through additional floors or ceilings, always install fire‐stop spacer. 5. After liner is up, cut either round or square hole in roof, always 76.2mm (3 in) larger all the way around pipe. Install upper edge and sides of flashing under roofing materials, nail to the roof along upper edge. Do not nail lower edge. Seal nail heads with flexible waterproof sealant. 6. Apply flexible, waterproof sealant where the storm collar meets the vent. Slide storm collar down until it sits on the flashing. Seal and install cap. 9 ...
- Page 10 VENTING 10 ...
- Page 11 VENTING VERTICALLY INTO EXISTING CHIMNEY SYSTEM As an alternate, 76.2 or 101.6 mm (3 or 4 in) L‐vent can be run inside existing chimney to termination (refer to Figure 10). VERTICALLY INTO EXISTING MASONRY FIREPLACE 1. Follow L‐vent chimney manufacturer’s instructions. 2. Have the masonry chimney inspected by a qualified chimney sweep or installer to determine its structural integrity. 3. Run the pipe from the stove outlet to 457.2 mm (18 in) above the top of chimney. 4. Install a blanket plate and the chimney pipe, and if used the outside air pipe as shown in Figure 11. 5. Attach the DuraVent adaptor, a section of pipe and clean out tee, make sure the clean out tee is centered in the chimney flue area. Use RTV, metallic tape and a minimum of three self‐taping screws at all joint connections to ensure a tight seal. 6. Position the stove adhering to the clearance specified in Figure 1 & 2. 7. Measure and build chimney top plate. Cut out holes for chimney pipe, and if used the outside air pipe. Install and seal with flexible waterproof sealant to prevent water leakage. Install vent cap. 11 ...
- Page 12 VENTING INSTALLATION THROUGH SIDE OF MASONRY CHIMNEY 1. Follow L‐vent chimney manufacturer’s instructions. 2. Position the stove, adhering to the clearance in Figures 1 & 2. Mark the center of the hole where the pipe is to pierce the masonry chimney. 3. It will be necessary to cut out the masonry around the location of the pipe center mark. Cut a 101.6 mm (4 in) diameter hole for 76.2 mm (3 in) pipe and 127 mm (5 in) diameter hole for 101.6 mm (4 in) pipe. 4. Measure and build chimney top plate. Cut out hole for chimney pipe and if used for the outside air pipe. 5. Install the tee on the bottom of the vertical pipe system and lower it down the chimney until the center branch of the tee is level with the center of the hole in masonry as shown in Figure 12. 6. Install and seal the top plate from step 3 with flexible waterproof sealant. Slip the storm collar over the pipe and while holding the pipe at the proper elevation, affix the collar with a minimum of three 6.35 mm (1/4 in) stainless steel metal screws. Seal all joints and seams around the collar. 7. Connect the horizontal pipe by pushing it through the hole in the masonry and lining it up with the branch in the tee. Push the pipe into the tee while twisting it to lock the tee. 12 ...
- Page 13 VENTING 8. If needed, once the horizontal pipe is in place, the space between the pipe and masonry may be filled with high temperature grout. 9. Install the trim collar. An adjustable pipe length and adaptor may be needed to align and complete the connection to the stove. CONNECTION OF COMBUSTION AIR SUPPLY STEP 1: Attach Trim Collar to the wall inside the house and attach with 4 screws. STEP 2: Attach Rodent Guard Cover to the wall outside the house and attach with 4 screws. STEP 3: Attach the Metal Pipe to Air Intake at the back of stove (See Figure 4 for location of Air Intake) and attach with Pipe Clamp. STEP 4: Route the Metal Pipe into the wall and fix the other end of Metal Pipe into Rodent Guard. STEP 5: Attach the Rodent Guard onto the cover. STEP 6: Attach Exterior Cover to Rodent Guard Cover and attach with 2 screws. 13 ...
-
Page 14: Using Correct Fuel
VENTING USING CORRECT FUEL This stove is designated for burning pelletized wood fuel only. Pellet of 6.35 mm (1/4 in) or 21.17 mm (5/6 in) in diameter and approximately 25.4 mm (1 in) long shall be used. Longer or thicker pellets sometime bridge the auger flights, which prevents proper pellet feed. Burning wood in forms other than pellets is not permitted. It will violate the building codes for which the stove has been approved and will void all warranties. This stove feed pellets at preset rates, adding fuel by hand will not increase heat output but may seriously impair the stove performance by generating considerable smoke. Do not burn wet pellets. The stove performance depends heavily on the quality of your pellet fuel. Avoid the use of pellet which is excess fines, with binder and high ash content. WARNING • Do not use any flammable liquids such as gasoline, gasoline‐type lantern fuel, kerosene, charcoal lighter fluid, or similar liquids to start or freshen‐up the fire! Keep all such liquids well away from the heater while it is in use. 14 ... -
Page 15: Operating Instructions
OPERATING INSTRUCTIONS 1. SET THE AIR INLET DAMPERS It is not possible for the manufacture to factory set your stove to work properly without some adjustments. The dampers help control the amount of airflow supplied for combustion. A damper PUSHED IN all the way, maximizes concentrated air flow to the burn pot. This will maintain a robust fire. The Auger timing is designed to be run, in most conditions, with the dampers closed. In some areas/conditions, it maybe be necessary to adjust the damper open slightly in order to slow down the flame Air inlet dampers and allow the pellets to keep pace with the rate of burn. This should be monitored closely to ensure you have the If dampers are opened proper feed rate established. too much, the rate of burn will be very slow and the pellets will build up. THIS SETTING NEEDS TO BE FINE TUNED TO ACCORDING TO YOUR LOCATION AND ELEVATION. IT IS RECOMMENDED THAT YOU START WITH THE DAMPERS PUSHED IN TO START. 2. OPENING AND CLOSING THE MAIN DOOR Open the stove door by rotating the handle counter clockwise, toward the top of the stove. Make sure the stove door is pushed firmly against the stove and in the locked position before starting stove. 3. FILL THE HOPPER WITH FUEL Ensure the hopper is clean of any debris, manuals, or other foreign objects that could jam up the fuel feed auger. Use pellets made from sawdust and/or other wood by‐products. Premium grade pellets will produce the highest heat output. WARNING •... -
Page 16: Refill
OPERATING INSTRUCTIONS 5. The unit has entered the start‐up period and pellet is now feeding under the pre‐set rate. 6. After 5 minutes, the pellet is then burning normally and you can select the HEAT LEVEL and BLOWER air flow as below: ADJUST HEAT RATE – Press UP and DOWN button at left side of control panel to select pellet feed rate to adjust the heat ouput. The LED display at left shall show 1 – LOW, 2 – MEDIUM, 3 – HIGH. REFILL 1. Press I/O switch once to turn the unit OFF. 2. The pellet will stop feeding but the unit will run for a few minutes. 3. After the unit is cooled, open hopper lid and fill pellets into hopper. 4. Restart the unit by pressing O/I once. WARNING • Keep hopper lid and front door closed at all times. Do not overfill hopper. SHUT DOWN PROCEDURE Press O/I once to turn the unit OFF. The blower and exhaust fan will run for a few minutes until the pellets in firebox are completely burnt. The unit can only be restarted when the internal temperature fallen into preset level. 16 ... -
Page 17: Cleaning And Maintenance
CLEANING AND MAINTENANCE CAUTION • Make sure the unit is cooled and unplugged before any maintenance and cleaning. WARNING • Failure to clean and maintain this unit will result in poor performance and safety hazards. • Never clean the unit when hot. • Make sure ashes are cool to the touch before using vacuum. 1. Dispose the ash by pulling out the ash drawer. Put the ash into air‐tight metal container and wait for final disposal. The metal container or ash shall be placed on a non‐combustible surface or on the ground and well away from all combustible material. Replace the ash drawer after cleaning. Make sure the drawer is pushed all the way in and level. 2. Open the door. Sweep the ashes on the front glass by the brush provided. 3. Sweep the ashes on inside surfaces. 17 ... - Page 18 CLEANING AND MAINTENANCE 4. Pull out the burning pot and sweep the burning pot by brush. Also sweep the inside surface of fire box (around the burning pot) though the opening into Ash drawer. Put the burning pot back in place. Make sure it is level and all the way in. WARNING • Make sure the front door is completely closed before you operate. 5. Remove 4 hex screws at the back cover by Hex screw driver provided. The exhaust blower and pellet feeding assembly are as shown below. Clean the exhaust blower and pellet feeding assembly by vacuum. 18 ...
- Page 19 CLEANING AND MAINTENANCE Note: Do not further disassemble the inside parts / component. If further repair or replacement of parts is needed, call customer service. EXHAUST BLOWER ASSEMBLY DIAGRAM 19 ...
-
Page 20: Specifications
CLEANING AND MAINTENANCE PELLET FEEDINGMOTOR ASSEMBLYDIAGRAM SPECIFICATIONS Model:………………………………………………………………………………….QCPS‐28000 Width: … …………………………………………………………………………..55 cm (21.6 in) Depth: ………………………………………………………………………….52.5 cm (20.6 in) Height: …………………………………………………………………………….75 cm (29.5 in) Weight: …………………………………………………………………………80 kg (176.3 lbs) Hopper Capacity: …………………………………………………Up to 22 kgs (48.5 lbs) (Hopper capacity may vary slightly depending on pellet size, length, and diameter) Burn Rate:………………………………………………………...Maximum 2 kgs (4.4 lbs) BTU Range: ……………………………………………………………………………28000 BTU Electrical Rating:…………………………………………………………………120Vac, 60Hz Light Cycle:……………………………………………………………………………………..410W Continuous Cycle:…………………………………………………………………………..110W 20 ... -
Page 21: Troubleshooting And Helpful Hints
TROUBLESHOOTING AND HELPFUL HINTS STOVE DOES NOT FEED SMOKE IS VISIBLE COMING OUT OF VENT 1. No fuel in hopper. Air‐fuel ratio is too rich: 2. Firebox draft may be too low for sensing a. Feed rate is too high switch in feeder circuit to operate. CHECK b. Draft too low cause by as gasket leak. FOR CLOSED DOORS, loose or missing gasket on front door. LOW HEAT OUTPUT 3. Restriction in hopper or feeder. When 1. Feed rate too low. stove is cold, remove all fuel and examine. 2. Draft too low because of gasket leak. Clear the obstruction. 3. Poor quality or damp pellets. 4. Feed motor has failed. 4. Combination of 1 and 2. PARTIALLY BURNED PELLETS HELPFUL HINTS 1. Feed rate too high. 2. Poor air to fuel mixture. Check burn pot CLEANING BURNING POT clean‐out cover and air intake. Whenever your stove is not burning, take the ... -
Page 22: Warranty
WARRANTY WARRANTY PERIOD Warranty coverage begins on the date of original purchase for one year. WARRANTY CONDITIONS This warranty is only valid while the pellet stove remains at the site of original installation. Check with customer service in advance for any costs to you when arranging a warranty call. Travel and shipping charges for parts are not covered under this warranty. WARRANTY EXCLUSIONS This warranty does not cover the following: • Change in surface finishes as a result of normal use. As a heating appliance, some changes in color of interior and exterior surface finishes may occur. This is not a flaw and is not covered under warranty. • Damage to printed, plated, or enameled surfaces caused by fingerprints, accidents, misuse, scratches, melted items, or other external sources and residues left on the plated surfaces from the use of abrasive cleaners and polishes. • Repair or replacement of parts that are subject to normal wear and tear during warranty period. These parts include: paint, pellet gaskets, firebricks, grates, flame guides, and discoloration of glass. • Minor expansion, contraction, or movement of certain parts causing noise. The conditions are normal and complaints related to this noise is not covered under warranty. • Damages resulting from: 1) failure to install, operate, or maintain the pellet stove is accordance with the installation instructions and operating instructions; 2) failure to install the pellet stove in accordance with local building codes; 3) shipping or improper handling; 4) improper operation, abuse, misuse, continued operation with damaged, corroded, or failed components, accident, or improperly / incorrectly performed repairs; 5) environmental conditions, inadequate ventilation, negative pressure, or drafting caused by tightly sealed constructions or insufficient make‐up air supply; 6) use of fuels other than those specified in the operating instructions; 7) installation or use of components not supplied with the pellet stove or any other components not expressly authorized in this manual; 8) interruptions of fluctuations of electrical power supply to the pellet stove. • Non‐venting components, hearth components, or other accessories used in conjunction with the pellet stove. • This warranty does not extend to the pellet stove’s capability to heat the desired space. Consideration must be given to the pellet stoves location and configuration, environmental conditions, insulation and air tightness of the structure. ... - Page 23 WARRANTY LIMITATIONS OF LIABILITY The owner’s exclusive remedy and the manufacturer’s sole obligation under this warranty, under any other warranty, express or implied, or in contract, tort or otherwise, shall be limited to replacement, repair, or refund as specified above. In no event will the manufacture be liable for any incidental or consequential damages caused by defects in the pellet stove. Some states do not allow exclusions or limitation of incidental or consequential damages, so these limitations may not apply to you. This warranty gives you specific rights; you may also have other rights, which vary from state to state. EXCEPT TO THE EXTENT PROVIDED BY LAW, THE MANUFACTURE MAKES NO EXPRESS WARRANTIES OTHER THAN THE WARRANTY SPECIFIED HEREIN. THE DURATION OF ANY IMPLIED WARRANTY IS LIMITED TO DURATION OF THE EXPRESSED WARRANTY SPECIFIED ABOVE. 23 ...
Need help?
Do you have a question about the QCPS?28000 and is the answer not in the manual?
Questions and answers