Table of Contents
Advertisement
|
wingscapes.com
888.811.WING
© 2013 Ebsco Industries, Inc. All Rights Reserved. Made in China
This product is covered by one or more of the following US Patents: 6735387, 6768868, 6834162. Other patents pending.
WARNING! This product may contain lead, a chemical known to the state of California to cause cancer,
birth defects and other reproductive harm.
Advertisement
Table of Contents

Related Manuals for WingScapes WCB-00116


Summary of Contents for WingScapes WCB-00116
- Page 1 888.811.WING © 2013 Ebsco Industries, Inc. All Rights Reserved. Made in China This product is covered by one or more of the following US Patents: 6735387, 6768868, 6834162. Other patents pending. WARNING! This product may contain lead, a chemical known to the state of California to cause cancer,...
- Page 2 BirdCam Pro ® User’s Guide For Models: - BirdCam WCB-00116 ® 6/6/13...
-
Page 3: Customer Support
Fax: 205.408.6157 Email: customerservice@wingscapes.com Web: www.wingscapes.com/support Address: Wingscapes 150 Industrial Road Alabaster, AL 35007 Find Us Online Photogallery: wingscapes.com/photogallery YouTube: youtube.com/wingscapes Blog: wingscapes.com/blog Facebook: facebook.com/Wingscapes Twitter: @wingscapes (or tweet with hashtags #birdcam or #plantcam) Page 2 BirdCam PRO User Guide... - Page 4 Windows XP/Vista/7. Copy the images and videos from the camera onto your PC for further editing or printing. When the USB cable is disconnected, the camera will go back to SETUP mode. See the full line of Wingscapes camera accessories at www.wingscapes.com Page 23 BirdCam PRO User Guide...
-
Page 5: Auto Mode
AVI 640 x 480 (based on 30 sec video) Actual capacity will vary based on image properties. Warnings & Regulations Wingscapes, a division of Plastic Research and Development Corporation Birdcam PRO FCC Statements Note: changes and modifications not expressly approved by the party responsible could void the user’s authority to operate this device. -
Page 6: Table Of Contents
Table of Contents Introduction Important Care & Caution Information Important Battery Information Wingscapes Limited Warranty Quick Start Guide Mounting Your BirdCam Pro Default Settings Specifications Product Overview Definitions Camera Setup Setup and Programming 1. Playback 2. Setup 3. Motion 4. Timelapse 5. -
Page 7: Introduction
Introduction Thank you for your purchase of the Wingscapes BirdCam PRO Camera. Your BirdCam camera is a compact high performance digital camera that uses infrared detection. Your BirdCam uses an infrared detector to sense heat changes in the surrounding environment. - Page 8 SECTION 5 - MOTION+T.L. To enter the Motion+Timelapse mode, move the Rotary Dial to the MOTION+T.L. position. 5.1 TEST PHOTO - Press OK button to take test photo with current settings. The display will show a countdown and then capture a photo. This photo will then appear on the display for review until the OK button is pressed again.
- Page 9 4.3.2 T.L.PROGRAMS PER DAY - Press LEFT (<) button. Press (+) or (-) buttons to choose between 2 different settings: 2 programs and 1 program. Press the OK button to save changes. 4.3.3 T.L.PROGRAMS 1-START - Press LEFT (<) button. Press (+) or (-) buttons to choose between 24 different settings: 12am midnight, 11pm, 10pm, 9pm, 8pm, 7pm, 6pm, 5pm, 4pm, 3pm, 2pm, 1pm, 12pm noon, 11am, 10am, 9am, 8am, 7am, 6am, 5am,...
-
Page 10: Quick Start Guide
LEFT/RIGHT to move between fields. STEP 3 Mount Camera in desired location using a mounting strap or other accessories offered by Wingscapes (visit www.wingscapes.com for more information on mounting accessories). Switch the camera to Laser Aim by sliding the power switch to the corresponding position. -
Page 11: Mounting Your Birdcam Pro
Mounting your BirdCam Pro The key to taking great BirdCam Pro photos 2. Focus - Note that the BirdCam Pro lens and videos is proper mounting and placement can be focused manually. This is a snap. Use of the BirdCam Pro. One reason the BirdCam the included measuring tape to measure the Pro captures such unique images is that it can distance between the BirdCam Pro and its... - Page 12 SECTION 4 - TIMELAPSE To enter the TIMELAPSE mode, move the Rotary Dial to the TIMELAPSE position. 4.1 TEST PHOTO - Press OK button to take test photo with current settings. The display will show a countdown and then capture a photo. This photo will then appear on the display for review until the OK button is pressed again.
- Page 13 3.2.3 NO. OF SHOTS PER DELAY - Select the desired number of images to be captured per delay setting. 3.2.4 DETECTION DELAY - The photo delay determines the number of minutes between pictures when an animal is detected and remains in range. 3.3 START - Press the RIGHT (>) button to start capturing photos or videos with the motion detect mode.
- Page 14 BirdCam Pro and the tree to facilitate aiming. Mounting Arm Accessories Wingscapes offers two optional mounting accessories for the BirdCam Pro: BirdCam Mounting Arm (WSBR01) Outdoor Camera Mounting Bracket...
-
Page 15: Default Settings
Default Settings Factory Settings SETUP MENU DEFAULT TAKE PHOTO, VIDEO OR BOTH: PHOTO PHOTO RESOLUTION: WideHD 1920 x 1080 VIDEO LENGTH: 10 SECONDS FLASH: AUTO 50% LIGHT SOURCE: OTHER IMPRINT INFO: DATE/TIME: 01/01/99 12:00am CAMERA NAME: BIRDCAM RESET IMAGE NUMBERING: WIFI SD CARD: ERASE ALL MEMORY: UPGRADE FIRMWARE... - Page 16 SECTION 3 - MOTION To enter the MOTION DETECT mode, move the Rotary Dial to the MOTION position. 3.1 TEST PHOTO - Press OK button to take test photo with current settings. The display will show a countdown and then capture a photo.
- Page 17 Wi-fi network set up. Note: Wingscapes does not offer technical support for Wi-Fi SD cards. Please contact your Wi-Fi card’s manufacturer for support. Before use, you must setup your Wi-Fi SD card on your wireless network.
-
Page 18: Specifications
System Requirements Microsoft® Windows® XP with Service Pack 2 or Service Pack 3 (recommended); Windows Vista® Home Premium, Business, Ultimate, or Enterprise with Service Pack 1; or Windows 7 Hard disk space: 100MB or above CPU: Intel® Pentium® 4 or AMD Athlon® 64 processor or above Memory: 1GB of RAM Specifications... -
Page 19: Product Overview
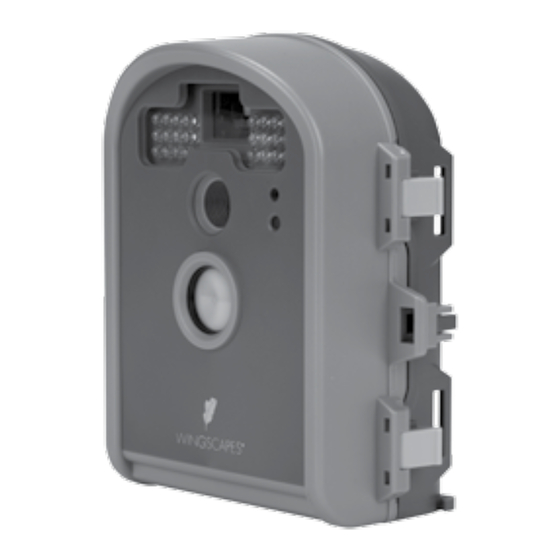
Product Overview Security Lock Hole 15 OK / Select Button Cover Latch 16 Left / Right Buttons Tree Mount Socket 17 TFT Display Front Cover 18 Battery Chamber Release Button Laser Aim / Power Switch 19 Rotary Dial Infrared Sensor 20 Mounting Strap Slot LED Flash 21 SD Card Slot... - Page 20 2.2.3 VIDEO LENGTH - Select length of video desired. 2.2.4 FLASH - Select flash level. OFF will prevent flash from firing, even at night. AUTO 100%-25% will allow the camera to flash the LEDs when capturing images in low light conditions with a maximum flash level (brightness) respective to the percentage of total flash power.
- Page 21 SECTION 2 - SETUP To enter the SETUP mode, move the Rotary Dial to the SETUP position. 2.1 TEST PHOTO - Press OK button to take test photo with current settings. The display will show a countdown and then capture a photo. This photo will then appear on the display for review until the OK button is pressed again.
-
Page 22: Definitions
Used to store batteries. Note: make sure that your (+ or -) polarities match the polarities indicated inside the battery chamber. 27 12V DC Power Port Used to connect an external power source. Accepts Wingscapes accessories. Visit us at www.wingscapes.com for more information. Unapproved power sources may damage the camera and void the Manufacturer’s Warranty. -
Page 23: Camera Setup
Camera Setup Battery lnstallation Make sure the Power switch is in the OFF position. Open the camera cover. Press the Battery Chamber Release button. Install 6 C-Cell Alkaline batteries. Make sure that the (+ and -) polarities match the polarities indicated inside the battery chamber holder. Reinsert the Battery Chamber into the camera until you hear an audible click. -
Page 24: Setup And Programming
Setup and Programming SECTION 1 - PLAYBACK 1.1 Turn POWER ON - Turn the Rotary Dial to the PLAYBACK position. The display will show the most recent photo. 1.2 Press (-) button DELETE PHOTO? Window will appear on the display. Press (+) or (–) buttons to choose between Yes or No and OK button to execute the action.
Need help?
Do you have a question about the WCB-00116 and is the answer not in the manual?
Questions and answers