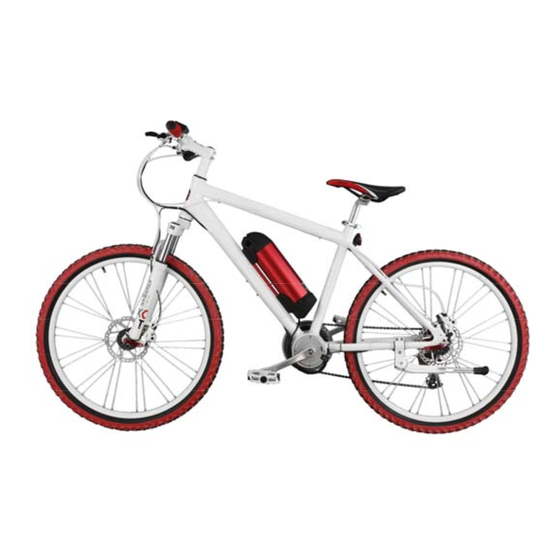
Achiever WHISTLER Owner's Manual

Pedal assisted electric bike

Advertisement

Pedal Assisted Electric Bike
Owner Manual
for models: WHISTLER / Hugo 26 / Sport

Advertisement

Table of Contents
loading

Summary of Contents for Achiever WHISTLER

  • Page 1 Pedal Assisted Electric Bike Owner Manual for models: WHISTLER / Hugo 26 / Sport...
  • Page 3: About This Manual

    Read This First: Safety and Compliance with the Law Congratulations on your purchase of your new PedElec. Your new PedElec is an excellent piece of personal transportation equipment that will give you good service for many years. Before you start using your PedElec, we want you to be aware of a few important points.
  • Page 4 5. Always turn off your PedElec and plug in the charger after each and every ride. 6. The manufacturer reserves the right to update WHISTLER / Hugo 26 / Sport in function and technical issues. 7. Maximum Load Capacity: One person up to 100 kilograms.
  • Page 5: Table Of Contents

    Assembling the pedals …………………..…………………... 17 Charging the Battery Pack ………………………..…….….. 18 Removing and installing the Battery Pack ……..……… 21 Instructions for use Achiever PedElec System Panel ..…………………..……. 23 Derailleur Operation …………………………….……………. 32 Maintenance Care and Maintenance ………………………………………. 34 Recommendation for washing ……………………………. 38 Suggestions for use…………………………………………...
  • Page 6: General

    1 General 1.1 Parts Checklist Check if the Package is complete and not damaged Your PedElec comes in a carton containing the following:  PedElec Model: WHISTLER / HUGO 26 / Sport assembled main body  The front wheel ...
  • Page 7: Parts Introduction

    1.2 Parts Introduction Brake lever Rear derailleur Shifter Chain Battery Kick stand Quick release for seat post Achiever® Coaxial Motor Seat Achiever® Crank Set Rear reflector Quick release for front wheel Battery mount Front brake Rear brake Suspension front fork...
  • Page 8: Achiever® Coaxial Motor System

    Electric Assistance for general purpose riding Your e-bike has an electric pedal assist drive system – Achiever Coaxial Motor System. It is not a moped or motorcycle. In EU countries, it is known legally as an “EPAC”...
  • Page 9 In all modes/levels, the drive assist system power reduces progressively and cuts off as the bike reaches a speed of 25 km/h, (15.5 mph), or sooner if you stop pedaling. The drive assist re- engages when speed drops below 25 km/h, (15.5 mph) as long as the pedals are turning.
  • Page 10 Power Modes Selection ® The Achiever System provides five different assistance modes for use with different terrains and riders to achieve the best riding experience and also for power saving and maximum riding range: Lever 1 to 5 (1 is most economic and 5 is most powerful) Easy-to-use LCD Control Panel There are three buttons –...
  • Page 11 INTENDED USE: This bicycle is intended to be used as a commuter bicycle. This bike complies with the requirements of European Standard EN 15194, Electrically Power Assisted Cycles. The drive assist system is limited to a maximum continuous power rating of 0,25 kW (250W) and a maximum speed of 25Km/h, (15.5 mph).
  • Page 12: Before You Ride

    2 Before you ride 2.1 Mounting the Front Wheel There are two types of front wheel hubs - Nut and Quick Release. Nutted Front Wheels 1. Loosen the axle nuts on the front wheel. If there is a washer inside of the axle nut, it belongs outside of the fork dropouts. If the washer has a hook or a step, be sure that it engages the fork before tightening the axle nuts.
  • Page 13 washer, be sure the step fits into the key hole at the top of the wheel slot. 3. Tighten the two outer axle nuts evenly; 4. Tighten one side part way, then tighten the other side and repeat until both sides are tightened securely. 5.
  • Page 14 2. Unscrew the lock nut from the quick release skewer, remove outer spring and slide the skewer through the front wheel axle so that the handle is on the left side of the bike (the side opposite the chain). 3. Install the spring and then start to thread the lock nut back onto the skewer, but do not tighten too far.
  • Page 15 DO NOT attempt to tighten the wheel by turning the handle to tighten; the handle is for closing, the lock nut (opposite side) is for adjusting the tension. Caution! All quick release levers should be inspected before every ride to be sure they are fully closed and secure. Failure to properly close a quick release lever can cause loss of control of the bicycle resulting in injury or death.
  • Page 16: Mounting The Front Wheel

    2.2 Setting up the Handlebar 1. Remove all protective packaging from the handlebar assembly if not already done. Turn the fork of the bicycle to face forward. Hold the front tire between your legs facing the bike while you turn the head stem to straighten it. Make sure the head stem’s direction is aligned with the front wheel.
  • Page 17 tightening torque of 8 Nm. Ensure that distance “A” is equal to distance “B”. 6. Check handlebar stem clamp bolts to be sure they are properly tightened, and handlebar can not move. The angle of the handlebar can be adjusted. To adjust; loosen all of the handlebar stem clamping bolts, and rotate the handlebar to the desired angle.
  • Page 18: Setting Up The Seat

    2.3 Setting up the Seat 1. Open the seat post quick release lever. 2. Slide the seat post (with the saddle already mounted in place) into the seat tube of the bike frame. 3. Insert the seat post into the seat tube to a sufficient depth so that the minimum insertion line is no longer showing.
  • Page 19: Assembling The Pedals

    bicycle or create an unstable riding position causing an accident. Caution! If your saddle has coil springs, cover them with protectors if you add a child seat behind so that your child's fingers cannot be trapped in them. 2.4 Assembling the Pedals 1.
  • Page 20: Charging The Battery Pack

    left pedal attaches to the other crank arm and has a left- hand (counter-clockwise thread). Turn the left pedal axle anti-clockwise until tight). 3. After the pedals can no longer be turned by hand, use a 15 mm pedal wrench to tighten the pedals securely to 40 Nm. It is very important that you check the crank set for correct adjustment and tightness before riding your bicycle.
  • Page 21 Make sure that the main power switch on the bike is turned off or the battery is removed from the bike before charging. Label on the charger contains information about its specifications such as input voltage, output voltage, polarity and cautions on use. It is important to follow instruction contained in this manual and on the label of the battery charger.
  • Page 22 The battery will be fully charged within 5 or 6 hours, depending on the battery power situation. Caution! Replace any damaged power cable immediately to prevent electric shock. 4. After the battery is fully charged, the LED on the charger turns GREEN.
  • Page 23: Removing And Installing The Battery Pack

    Caution! Only use the original charger supplied for charging. Using any 3rd party’s chargers may result in over- heating, fire or even explosion. 2.6 Removing and Installing the Battery Pack The battery is an important and costly part of the PedElec. It is designed to be locked into position with a key to prevent theft.
  • Page 24 Caution! It is important to use only genuine replacement parts for several safety critical components. Battery is one such component. Only use battery approved by Achiever. 2013 © Fanciteck International Ltd. All rights reserved. Page 22...
  • Page 25: Instructions For Use

    3 Instructions for use 3.1 Achiever Coaxial Motor System ® Your PedElec is equipped with the Achiever Coaxial Motor System. It is an electronic system solely developed by Achiever for Pedal Assisted Electric Bike. Control Panel: J-LCD 1. Assistanc Level 4.
  • Page 26: Switching Off

    * Switching ON Press and hold the “Mode” button (shaded in RED in the picture) to switch the system ON. Press and Hold for 3 seconds. Press and Release. As soon as the system is ‘on’, the screen will display and each segment on the LCD will be shown for a second.
  • Page 27 To display the Maximum Speed (MAX) of this ride, press and hold the “UP” key. To display the Average Speed (AVG) of this ride, press and hold the “UP” key again. * Power Assist (Switching Assist Level) The default assist level when the system starts is “1”, which is the weakest level.
  • Page 28 To lower the power assist level, press and release the “DOWN” arrow button. The assist level will then be decreased by 1. If it is at level “5” now, you will get level “4” by pressing and releasing the “DOWN” arrow button once. You will get down to level “1”...
  • Page 29 * Starting Aid (6Km/h) The Pedelec can be driven up to 6km/h without pedaling. A button serves as a starting aid. This function is also called “Walking Assist”. Press and hold the “DOWN” button for a while to activate the Starting Aid.
  • Page 30 * See trip distance / total distance The panel can measure two types of riding information. Push ‘Mode’ button to switch between trip distance and total distance. This function is convenient for users to check the riding distance (TRIP) and the total distance (ODO). * Power Display The battery level is displayed as follow: Full...
  • Page 31 Setup Time Right after entering into the setting state, set the HOUR by using “UP” or “DOWN” arrow button. Press “MODE” for confirmation and jump to set the MINUTE. Set the MINUTE by using “UP” or “DOWN” arrow button. Press “MODE” for confirmation and jump to set the maximum speed limit (MAX).
  • Page 32 Set up max speed The default value of the maximum speed limit set up by the factory is 25 Km/h. When the speed of the pedelec reach this pre-set value, the power cutoffs automatically. When the speed drops below this limit, the power assistance resumes. The maximum speed limit can be set to a value within the range 10 –...
  • Page 33 Press “MODE” to confirm your selection and jump to set the Wheel Diameter. Setup Wheel diameter The default value is set to 26”. Set the Wheel diameter by using “UP” or “DOWN” arrow button. Press “MODE” to confirm your selection and jump to set the LCD back light brightness.
  • Page 34: Derailleur Operation

    * Quit from Setup State Press and hold the “MODE” button to save all current setting and quit from Setup State. 3.2 Derailleur Operation Your PedElec uses multi-speeds derailleur up to 7 o 8 speeds*. The speed change is controlled by a shifting levers* or twist grip* during * depending on derailleur model) riding.
  • Page 35 Low gear provides higher torque but lower speed while high gear provides low torque but higher speed. Below are examples of using the speeds in different situations: Gear no. 1 – 3 are good for startup and going uphill. Gear no. 3 – 6 are comfortable for cruising on flat road. Gear no.
  • Page 36: Maintenance

    4 Maintenance 4.1 Care and Maintenance Take care of your PedElec the way you would with a regular bicycle by keeping it dry, clean and the moving parts well lubricated. Avoid parking your PedElec in exposed areas whenever possible. Avoid parking your PedElec outside when there is rain or snow. At the end of a trip where there was rain or snow, bring the PedElec inside and use a clean, dry towel to eliminate any wetness.
  • Page 37 Caution! Riding a damaged or worn rim may lead to sudden improper braking function. Sudden or improper braking function can cause loss of control, resulting in serious injury or death. Replace damaged or worn rims before riding the bike. The operation of the derailleur system should be checked at least every month.
  • Page 38 Caution! As with all mechanical components, the bicycle is subjected to wear and high stresses. Different materials and components may react to wear or stress fatigue in different ways. If the design life of a component has been exceeded, it may suddenly fail possibly causing injuries to the rider.
  • Page 39 Do not place the battery near fire or corrosive substances. Do not immerse in water or other liquids. Avoid subjecting the battery to high temperature, such as directly under the hot sun, for prolonged periods of time. After much use, your battery's charge holding capacity will decrease. If you find that your battery does not hold sufficient charge even for short trips, you should contact your dealer to order a replacement.
  • Page 40: Recommendation For Washing

    4.2 Recommendation for washing Use only water. On suspension forks and shocks, cover adjustment knobs with a clean plastic bag secured temporarily with a rubber band or masking tape. When cleaning the bike, use a sponge and/or a soft brush. For the battery-case, a damp cloth suffices.
  • Page 41 Maximizing the Riding Range Many factors affect the rate of energy consumption and hence affect the riding range. Fully charge the battery before a long journey. Rough road conditions and hilly terrain will consume more energy. Frequent change of speed will consume more energy. Carrying more weight on the bike will consume more energy.
  • Page 42: Specifications

    5 Specifications Model: WHISTLER / Hugo 26 / Sport Frame Aluminum Alloy Front Fork Suspension Aluminum Front Fork Frame Size 17.5" (Uni size) Tyres Size 26" x 1.95" Motor Brushless DC Motor, 36V, 250W Battery Type Lithium Ion Voltage 36 V Capacity 8.8 Ah...
  • Page 44 The developer and manufacturer of PedElecs.

This manual is also suitable for:

SportHugo 26

Table of Contents