
Related Manuals for Clever Choice TD-3018

Summary of Contents for Clever Choice TD-3018
- Page 1 Digital Wrist Blood Pressure Monitor OWNER'S MANUAL 311-3018100-017 Version 3.0, DEC, 2009...
-
Page 2: Table Of Contents
TABLE OF CONTENTS BEFORE YOU START Warnings and Precautions Intended Use Health Information ABOUT THIS SYSTEM Content of the System Device Description PREPARATIONS BEFORE USE Low Power Warning Batteries Installation and Replacement Setting the Monitor MEASURE BLOOD PRESSURE Suggestions before Measuring Applying the Wrist Cuff Testing Your Blood Pressure USE MEMORY... -
Page 3: Before You Start
BEFORE YOU START Warnings and Precautions Do NOT use the device to diagnose newborns and on infants or persons who cannot communicate, for it might lead to serious accidents. This device does not serve as a cure of any symptoms or disease. The data measured are only for refer- ence. -
Page 4: Intended Use
BEFORE YOU START Intended Use Thank you for purchasing this CLEVER CHOICE Wrist Blood Pressure Monitor (BPM). CLEVER CHOICE measures blood pressure non-invasively based on the Oscillometric method. This device is designed for individuals age 16 and above, for home use only. Please read these instructions carefully before measuring. -
Page 5: Health Information
BEFORE YOU START Health Information Knowing your blood pressure trend tells whether your body is in good condition or not. Human blood pressure naturally increases after reaching middle age. This symptom is a re- sult of continuous aging of the blood vessel. Further causes include obesity, lack of exercise, and cholesterol (LDL) ad- hering to the blood vessels. -
Page 6: About This System
ABOUT THIS SYSTEM Content of the System uMonitor vWrist Cuff (connected to the moni- tor) wStorage Case xOwner’s Manual yTwo 1.5V AAA batteries Please check your system to be sure you have everything above. If not, please return your system to the place of pur- chase. -
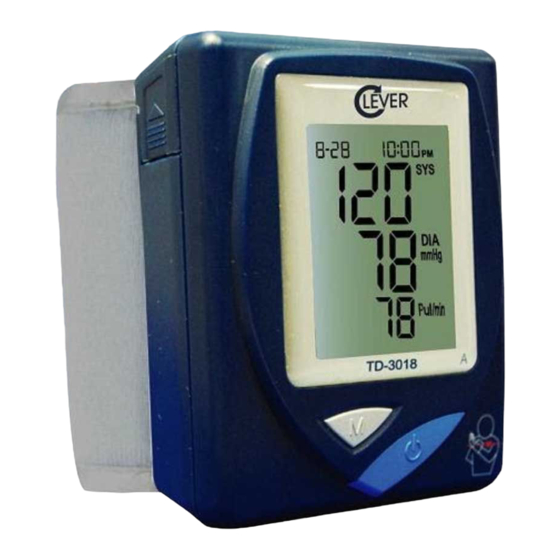
Page 7: Device Description
ABOUT THIS SYSTEM Device Description... -
Page 8: Preparations Before Use
PREPARATIONS BEFORE USE Your monitor comes with batteries already installed. When replacing, use ONLY 1.5V AAA size alkaline batteries. Please use alkaline batteries for best performance and longest life. Low Power Warning The monitor will remind you when the power is getting low by displaying two different messages: uBattery Symbol appears with... -
Page 9: Batteries Installation And Replacement
PREPARATIONS BEFORE USE Batteries Installation and Replacement To replace the batteries, please make sure the monitor is turned off. Step1- Please make sure the monitor is turned off. Press the edge of the battery cover and push upward. (Fig. 3) (Fig 3) Note: Replacing the batteries does not affect... -
Page 10: Setting The Monitor
PREPARATIONS BEFORE USE Setting the monitor Your monitor comes with the time, date, and unit preset. These options may be changed any time to fit your needs. They also need to be set again when you change the bat- teries. How to set the monitor? Step 1- Enter the Setting Mode. - Page 11 PREPARATIONS BEFORE USE See the date setting for example: Set the Year uThe year will appear first, with the number flashing. (Fig. 7) vPress and release the “ M ” button to advance one year. Note: (Fig 7) To move the number faster, hold the “...
- Page 12 Note: The mmHg is the standard unit in the United States. The KPa is the International Unit (IU). Use of the wrong unit of measure may cause you to misinterpret your blood pressure level, and may lead to incorrect treatment.
-
Page 13: Measure Blood Pressure
MEASURE BLOOD PRESSURE Suggestions before Measuring Avoid caffeine, tea, alcohol, and cigarette at least 30 min- utes before measurement. Wait 30 minutes after exercising or bathing before mea- surement. Sit or lie down for at least 10 minutes before measuring. Do not measure when feeling anxious or tense. -
Page 14: Applying The Wrist Cuff
MEASURE BLOOD PRESSURE Applying the Wrist Cuff Step 1- Hold your left arm in front of you with your palm facing up. Slide the cuff onto your wrist. Make sure the monitor is on the inside of your wrist with the display in easy view. (Fig. -
Page 15: Testing Your Blood Pressure
MEASURE BLOOD PRESSURE Testing Your Blood Pressure Step 1- Sit or lie down for at least 10 minutes before measur- ing. Do measurement while sitting: Step 2- Apply the wrist cuff accord- ing to page 13. Step 3- Press the “ ”... - Page 16 After the cuff pressure is reached, the cuff begins to deflate. As the cuff deflates, deflation symbol “ “ appears on the display. You will also see the number decreasing and Pulse Symbol “ “ flash- (Fig 15 ) es on the display when pulse is detected.
-
Page 17: Use Memory
USE MEMORY Your monitor stores the most recent 352 sets of readings. You can review them in the monitor itself or in your personal computer. Viewing Results on the Monitor Step1- When the monitor is off, press the M Button. You will see the aver- age of all data stored (Fig. -
Page 18: Viewing Results On A Personal Computer
Viewing Results on a Personal Computer Transferring test results to your personal computer for home viewing requires CLEVER CHOICE Health Care System Software and an Interface Cable. The software can be down- loaded from the home page of Simple Diagnostics. The in- terface cable is an optional accessory. - Page 19 vConnect the Interface Cable to a serial port on the back of your computer. With the monitor turned off, connect the Interface Cable to the data port located on the bottom of the monitor. wPress the “ ” button and then “PCL” will appear on LCD, indicating that the monitor is in the communication mode.
-
Page 20: Erasing Memories
USE MEMORY Erasing Memories Note: Be sure to turn off the unit before erasing all readings. Step 1-“ Press and hold the M button until and “CLr ALL” appear on the LCD display.(Fig. 19)” (Fig 19) Step 2- Release the M button and the Monitor will automatically turn off. -
Page 21: Maintainance
MAINTAINANCE Storage Please protect the monitor form direct sunlight and humidi- ty. It might not meet its performance specifications if stored or used beyond the specified temperature and humidity ranges listed below: Operating conditions: 50℉-104℉, below 85% relative humidity Storage conditions: -4℉-140℉, below 95% relative humidity Do not drop the monitor. - Page 22 MAINTAINANCE Cleaning To clean the unit, wipe with a cloth moistened with tap wa- ter or a mild cleaning agent, then dry the device with a soft and dry cloth. Do not flush with or immerse in water. Do not use benzene, gasoline, or any alcoholic-base or solvent agent to clean the monitor.
-
Page 23: Error Message
ERROR MESSAGE Please check the chart below for problems you can fix at home without tools. For error messages other than the ones below, do not try to repair by yourself. Please con- tact dealer for service. -
Page 24: Troubleshooting
TROUBLESHOOTING Message Cause What to do Batteries ran Check and correct No display after “ ” pushing the out or were the battery button although not installed polarities. batteries are properly installed. Replace the Battery symbol batteries. appears on LCD. Batteries Place the batteries might perform... -
Page 25: Specifications
SPECIFICATIONS... -
Page 26: Warranty Information
WARRANTY INFORMATION The CLEVER CHOICE Wrist Blood Pressure Monitor is guaranteed to be free from manufacturing defects under normal use for a period of TWO years from the date listed on the Purchase Record. For repair under guarantee, our Authorized Service Agentmust be advised of the problem within the warranty period.This guarantee... - Page 27 NOTE...
- Page 28 NOTE...
Need help?
Do you have a question about the TD-3018 and is the answer not in the manual?
Questions and answers