Table of Contents
Advertisement
Quick Links
Advertisement
Table of Contents

Summary of Contents for xxodd xxodd
-
Page 1: User Manual
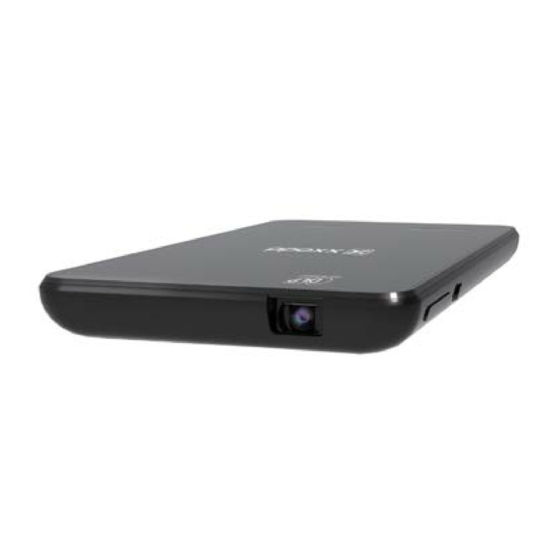
USER MANUAL 【Projector Nano Go 3 】 READ THIS USER MANUAL COMPLETELY BEFORE USAGE... -
Page 2: Table Of Contents
Contents Appearance, parts and name of product Product specification Charge the projector Connection of projector Startup and operation of projector Volume adjustment Motor focusing Use the projector to charge other product Important safety information Trouble shooting Trademarks... - Page 3 [Parts of the projector]...
- Page 4 Bottom...
- Page 5 Side Volume adjustment/FOCUS key Mode key Power key...
- Page 6 Side USB 5V OUT interface Micro USB charging interface HDMI/MHL interface LENS...
- Page 7 【Specifications Projector Nano Go 3】 Texas Instruments DLP Technology Megabright LED lamp: 25 Lumen LED Lamp: 20,000 hours lifetime Up to 60” screen size HDMI video/audio input Compatible with HDMI for: iPad 1 , 3d and 4...
-
Page 8: Charge The Projector
Stereo speaker with digital control Rechargeable 3400mAh battery Up to 2.5 hours projection time USB powerbank for smartphone (5V / 500mA) USB Charge cable included 5pin MHL-HDMI cable included HDMI-HDMI cable included Dimension 68W x 10.5H x 12.6D (mm) ... -
Page 9: Connection Of Projector
1.2. There are 4 charging LED indicators. The white indicators will flash in turn when charging, and will stop flashing and stay lightened when the charging is completed. Attention: For the initial use, the battery of the projector shall be fully charged for about 4-5 hours. The working hour of projector is above 2.5 hours. -
Page 10: Startup And Operation Of Projector
Attention! when connecting to an Apple device, please use an Apple AV adapter (to be purchased separately) to connect the HDMI data cable (included in the packaging). When connecting to other device, please inquire the manufacturer or distributor of the product. The connection may need other converters to connect the HDMI data cable (such as Micro- or Mini-HDMI converter). -
Page 11: Volume Adjustment
background. An image of 60" will be the best. Use the projector in a dark ambient environment will improve the image effect. Attention: the projector will become warm at both upper and down side during working. This is a normal phenomenon of heat emission which won’t impact the operation of projector. -
Page 12: Use The Projector To Charge Other Product
6. Use the projector to charge other product The projector can be used for charging smartphones. 6.1. Connect one end of USB cable (to be purchased separately) to a smartphone, and other end of USB cable to the USB interface of the projector. (fully charged). - Page 13 To reduce the risk of electric shock, do not open the housing of product. No part inside the product can be repaired by user. To reduce the risk of fire or electric shock, do not expose the product to rain or moisture. The lightning flash with arrowhead symbol within an equilateral triangle is...
- Page 14 The exclamation point within an equilateral triangle is intended to alert the user to the presence of important operating and maintenance (servicing) instructions in the literature accompanying the appliance. Danger To reduce the risk of electric shock, burn, fire and injury: 1.
- Page 15 Warning 1. Please pay special attention to child or mental patient who is present or using the product. 2. Please operate the product as per the instructions of user manual. 3. Please pull out the power plug during thunder storm or when the product is idle. 4.
- Page 16 blocking the air vent of products. Do not place the product on the surface that may block the air vent, such as sofa or bed. 9. Do not overload the power outlet. Only use the exclusively appointed power voltage. 10. Do not move or place the product by pulling the power cable 11.
- Page 17 Warning! The product is with rechargeable battery built in. . Do not place the product in any area with high temperature, moisture or direct sunlight. . Do not disassemble the product. . Do not put the product into fire or water, which may cause explosion or injury.
-
Page 18: Trouble Shooting
Trouble shooting Q: The projector cannot project video image. A: Please charge the battery of device, and check whether the interface of HDMI data cable is correctly connected to the projector and device. Q: The projection image is fuzzy. A: Toggle the focusing adjustment button to adjust the image to the optimal projection effect. - Page 19 [Trademarks] HDMI, HDMI logo and High- definition Multimedia Interface are trademarks or registered trademarks of HDMI Licensing LLC in the United States and other countries or districts. iPad, iPhone, and iPod touch are trademarks of Apple Inc., registered in the U.S. and other countries. DLP and the DLP ®...

Need help?
Do you have a question about the xxodd and is the answer not in the manual?
Questions and answers