Table of Contents
Advertisement
Advertisement
Table of Contents

Related Manuals for Cricut Expression 24" Personal Electronic Cutter

Summary of Contents for Cricut Expression 24" Personal Electronic Cutter
- Page 1 ™ User Manual Manuel d’Utilisateur...
- Page 3 0.25” (0.62 cm) and as large as 23.5” (59.69 cm) with just the touch of a button. Cricut Expression works with paper sizes up to 12” x 12” (30.48 cm x 30.48 cm) and 12” x 24” (30.48 cm x 60.96 cm), significantly expanding your creative capabilities.
-
Page 4: Table Of Contents
The Cricut Expression™ 24” Personal Electronic Cutter™ ..........8 Installing the Cutting Blade Assembly ............9 Positioning Your Cricut Expression™ Machine ..........9 What Your Cricut Expression™ Machine Can Cut ........10 Basic Operations ......................... 10 Setup ........................10 Loading Paper ....................11 Place Paper on Cutting Mat................11... -
Page 5: License Agreement
4. TRANSFER. You may permanently transfer all of your rights under this AGREEMENT only as part of a sale or transfer of the CRICUT EXPRESSION, provided you retain no copies of any part or component of the CRICUT EXPRESSION, you transfer all of the CRICUT EXPRESSION (including all component parts, hardware, software and upgrades thereof, and documentation), and the recipient agrees to the terms of this AGREEMENT. - Page 6 8. TRADEMARKS AND LOGOS. You acknowledge and agree as between you and PROVO CRAFT that PROVO CRAFT owns the CRICUT EXPRESSION and PROVO CRAFT trademarks and all CRICUT EXPRESSION and PROVO CRAFT-related trademarks, ser- vice marks, logos, and other brand designations (“PROVO CRAFT marks”).
-
Page 7: Unpack Your Box
Unpack Your Box Your box should contain the following: 1. Cricut Expression™ machine 2. User Manual 3. Plantin SchoolBook™ font cartridge, cartridge binder, keypad overlay, and handbook 4. Blade assembly 5. 12” x 12” (30.48 cm x 30.48 cm) cutting mat 6. -
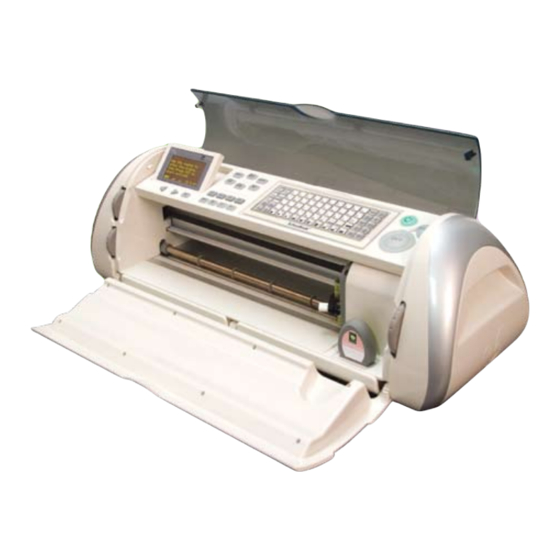
Page 8: The Cricut Expression™ 24" Personal Electronic Cutter
Cartridge WARNING! Disconnect electrical power before servicing or cleaning. DO NOT place your fingers or other objects in the Cricut Expression™ machine while connected to electrical power, powered on, or during cutting operations. Rapid movements of the cutting carriage during operation may cause bodily injury and/or damage to the Cricut Expression machine. -
Page 9: Installing The Cutting Blade Assembly
Positioning Your Cricut Expression™ Machine Place your Cricut Expression™ machine at least 12” (30.48 cm) from the edge of your table to prevent it from tipping and causing possible injury. Depending on the cutting mat used, allow 12”... -
Page 10: What Your Cricut Expression™ Machine Can Cut
When positioning your Cricut Expression machine, choose a location that is • inaccessible to children. The Cricut Expression machine is not a toy and contains components, including a sharp blade, that could be hazardous to children. • stable, flat, and hard-surfaced, within 6 feet (1.83 meters) of a grounded electrical outlet, and that has a minimum clearance of 2 feet (60.96 cm) behind the Cricut... -
Page 11: Loading Paper
TIP: Make sure the title on the keypad is the same as the title on the cartridge. Loading Paper TIP: The Cricut Expression machine can cut materials as large as 12” x 24” (30.48 cm x 60.96 cm). The machine cannot cut materials smaller than 3” x 3” (7.62 cm x 7.62 cm). -
Page 12: Load Cutting Mat Into Machine
TIP: Letters will be cut as single characters. Basic Keys and Buttons You Should Know If you want to stop the Cricut Expression™ machine from cutting before it is finished, simply press the STOP button located adjacent STOP to the CUT button. -
Page 13: Space
TIP: If you turn the sound key off, that will become your default setting. The next time you turn the Cricut Expression machine on, the sound will still be off. The Load Paper key pulls the cutting mat and paper into the machine. -
Page 14: Cutting Characters
Press the CUT button. The STOP button, located adjacent to the CUT button, will stop any operation in progress. When the Cricut Expression machine is finished cutting, press the Unload Paper key on the keypad to eject the cutting mat and paper from the machine. -
Page 15: Advanced Operations
Advanced Operations Your Cricut Expression machine has a variety of advanced operations designed to enhance your creativity. We recommend you become familiar with basic operations before moving onto the advanced operations described in this section. Creative Feature Keys Creative Features are found within the six gray keys in the upper left corner of the keypad. -
Page 16: Modes On The Cricut Expression Machine
Modes on the Cricut Expression™ machine Portrait The Portrait mode changes the cutting direction from Landscape mode, the default setting, to Portrait mode. Landscape cuts characters from top to bottom on the cutting mat (the right side of the cut comes out of the machine first). -
Page 17: Quantity
The Quantity mode allows you to choose the number of cuts you want of those selected on the display. To use the Quantity mode, press the Quantity button until the button is backlit in green and the display reads “Quantity on” and offers instructions. -
Page 18: Auto Fill
However, the size modes (Fit to Page, Fit to Length, and Auto Fill) cannot be combined. For example, if you select Fit to Page and then select Auto Fill, the Cricut Expression will automatically deselect Fit to Page and select Auto Fill. -
Page 19: Flip
TIP: Even with the Center Point function activated, a character will still cut proportion- ate to the Key Height Character unless Real Dial Size is selected. For example, a lower- case letter may not cut exactly centered over the center point because it is being cut proportionate to the Key Height Character. -
Page 20: Mat Size
CUT button. Cutting on Lightweight or Heavyweight Materials Your Cricut Expression machine can cut a variety of materials. For an optimal cut on lightweight materials such as vellum or heavyweight materials such as thick cardstock, you may need to adjust the blade depth, the speed of the cut, and/or the cut pres- sure discussed in the following sections. -
Page 21: Speed Dial
TIP: Cutting on cardstock and other heavy materials will reduce the life of your blade, but it will produce the best cuts. TIP: If the Cricut Expression produces poor cutting results, always insert a new blade first before trying other options. -
Page 22: Caring For The Cutting Mat
The blade should be “sucked” up inside the shaft if properly installed (Figure 3). The replacement cutting blade is now installed. Reinstall the cutting blade assembly into the Cricut Expression machine by reversing the procedure to remove the cutting blade assembly. -
Page 23: Frequently Asked Questions
See page 13 of this manual. Q: What does Real Dial Size do? A: By default, your Cricut Expression™ machine will cut characters in proportion to each other. However, if you want to “break” this proportion and get any character to cut at the literal dial size, press the Real Dial Size key. -
Page 24: Troubleshooting
Possible Solution 2: Increase the cut pressure. Do this with the Pressure Dial found on the left side of the front of the Cricut Expression machine. See page 21. Possible Solution 3: The blade depth may need to be adjusted, particularly if you are trying to cut through thicker materials. - Page 25 ENGLISH...
- Page 26 29-2268 User Manual © 2007 Provo Craft and Novelty, Inc. All rights reserved/Tous droits réservés Spanish Fork, UT 84660 Made in China/Fabriqué en Chine www.provocraft.com • 024107...
Need help?
Do you have a question about the 24" Personal Electronic Cutter and is the answer not in the manual?
Questions and answers