Table of Contents
Advertisement
Advertisement
Table of Contents

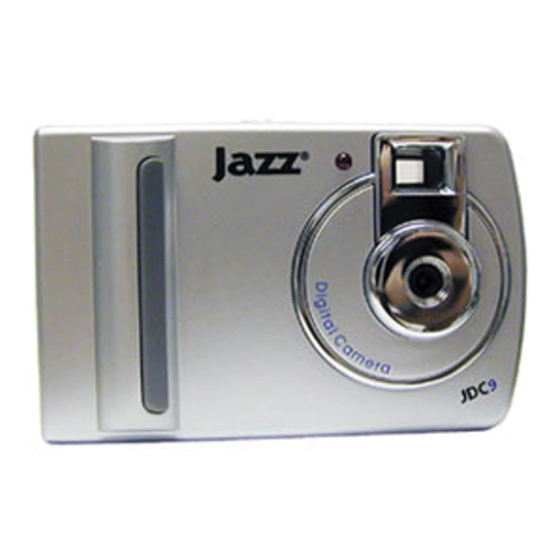
Summary of Contents for Jazz JDC9
- Page 1 JDC9 USER’S MANUAL...
-
Page 2: Fcc Part
FCC part 15.21 Warning: Changes or modifications to this unit not expressly approved by the party responsible for compliance could void the user’s authority to operate the equipment. FCC part 15.105 NOTE: This equipment has been tested and found to comply with the limits for a Class B digital device, pursuant to Part 15 of the FCC Rules. -
Page 3: Table Of Contents
Index FCC part ......................... 1 1. Getting to know your digital camera:..............3 Functions and characteristics ............3 Technical specifications..............4 System compatibility :..............5 Camera functions ................5 2. Using your digital camera..................6 2.1 Battery loading ..................6 2.2 Changing function modes............... -
Page 4: Getting To Know Your Digital Camera
1. Getting to know your digital camera: Using your digital camera will be a new experience. You no longer need films and do not need to worry about ageing (colours fading) of your precious pictures. You can now store all your photos on your computer and on CD-ROM. After taking pictures you can now touch them up in order to correct imperfections due to poor conditions. -
Page 5: Technical Specifications
each press of the shutter button. Automatic exposure control: the camera automatically controls exposition in poor light conditions meaning that you do not have to worry about aperture or shutter speed. Automatic shutdown (Sleep mode): after 30 seconds of inactivity the camera automatically shuts down thus reducing the consumption of batteries to a minimum. -
Page 6: System Compatibility
150 photos compressed QCIF Power supply : 3 alkaline batteries type AAA PHOTOS STORED IN MEMORY. Interface : USB port 1.3 System compatibility : - Pentium II - Windows 98/2000/ME/XP - Memory : 64 MB minimum (128 MB recommended) - Hard drive capacity : 350 MB - Installation via CD ROM drive - Colour monitor : minimum 800*600. -
Page 7: Using Your Digital Camera
2. Using your digital camera 2.1 Battery loading Open the battery compartment located at the back of the appliance and place three 1.5V AAA type alkaline batteries in it, inserting them in the direction shown on the diagram at the bottom of the compartment. Close the compartment and press the MODE button. -
Page 8: Taking Photos
Sleep m ode H i-resolution T im er m ode A V I C a pture photo m ode C ontinuous C hange to Low - D elete last photo D elete all photos shooting resolution C hange to C hange to n orm al C hange to 60 H z C hang e to 50 H z com pressed m ode... -
Page 9: Sleep Mode (Automatic Energy-Saving)
2.4 Sleep mode (automatic energy-saving) The camera goes into sleep mode automatically after 30 seconds of inactivity if it is not linked to a computer via the USB cable. You can manually go into sleep mode by pressing the MODE button until "off" is shown on the LCD screen. -
Page 10: Deleting The Last Photos Saved To Memory
chosen resolution mode will not change. 2.9 Deleting the last photos saved to memory Press the MODE button until the LCD screen displays the icon of the "delete last photo taken" mode and then press the shutter button to validate. The last photo taken and saved will be deleted. -
Page 11: Software Installation
3. Software Installation 3.1 Put the CD-ROM supplied with your camera into the CD-ROM drive of your computer. The software should automatically run. 3.2 The following main installation screen will appear. Click on Install Camera Driver. A setup wizard will guide you through the driver installation process. - Page 12 Successful installation will create a shortcut on your desktop called "My DSC2". You can double click this to access the PCCAM and Video-Photo Download software provided.
-
Page 13: Connecting To Your Pc
3.3 Click on Install ArcSoft PhotoImpression 4. 3.4 On the next screen, select your language and click OK. 3.5 Following the indication and Click Next to finish the installation. 4.Connecting to Your PC Connect the USB cable (small end) to your camera, your computer will automatically recognize the new device. - Page 14 This "Get Photo" screen will appear. Take a minute to familiarise yourself with this and the other software interfaces as you work through these instructions. To access the on-line help, right-click on the grey area around the screen and select Help.
-
Page 15: Pc/Webcam Function
Click on the MyDSC2 icon and your pictures will be transferred to the download program ,you can download all of the photos by clicking on the Select all Photos icon. Clicking on the Transfer Photos button will transfer the corresponding photo/s to the ArcSoft PhotoImpression 4™ interface. Here you can edit, enhance, add special effects and save them on your computer or on removable media e.g. -
Page 16: Problem-Solving
save them on your PC and email them. Open the PCCAM program by double clicking on the "MyDSC2" icon on your desk-top, then double clicking on the PCCAM icon. Click on Options then Preview to see what the camera can see. By clicking Capture you can set a time limit for your movie clip (this is useful if you intend to email the clip and don't want to send large emails). -
Page 17: Important Notes
Important NOTES 1. Please take few pictures and download images to computer according with this Manual. Learn how to use and to know your camera before taking important pictures. 2. Please transfer all captured photos to your computer before replacing the batteries.


Need help?
Do you have a question about the JDC9 and is the answer not in the manual?
Questions and answers