Table of Contents
Advertisement
Quick Links
Advertisement
Table of Contents

Subscribe to Our Youtube Channel
Summary of Contents for Telecom CellFax Plus
- Page 1 CellFax Plus Installation and User Manual Version 1 – May 2009...
- Page 2 Document Control Date Change Version May 2009 release of document 1. OVERVIEW Product Features Supports dual-mode voice access (Mobile network GSM and Telecom PSTN). • GSM Fax function • GSM data function • Supports traditional PBX access • Dynamic echo cancellations to ensure the perfect voice quality •...
- Page 3 This is because the RF transmitter is designed to work at minimum power where ever possible. TelecomFM CellFax Plus meets the legal requirements of ICNIRP encompassed within the following standards:...
- Page 4 CellFax Plus Installation and User Manual Approvals Conformity Declaration of Conformity Applicant: TelecomFM Ltd. Address: 895 Plymouth Road, Slough, Berkshire, SL1 4LP, U.K. Product: CellFax Plus This equipment complies with the European R&TTE Directive no. 1999/5/EC on radio and telecommunication terminal equipment.
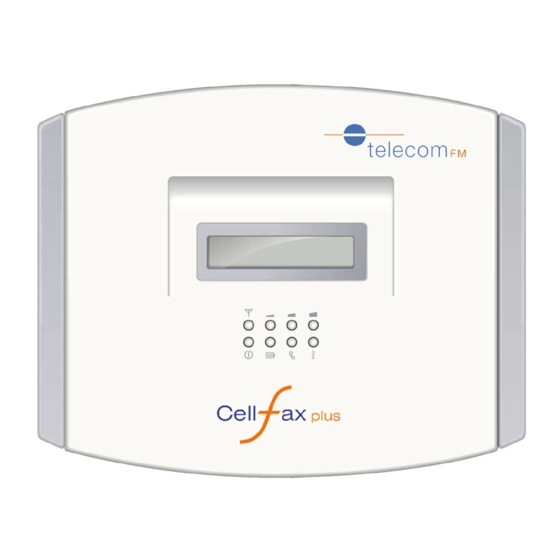
- Page 5 PSTN………… External line port,connect to external phone line 2.2 Indicators (LEDs) Indicators There are 8 indicators on the front panel of the CellFax Plus, functioning as follows: Power supply indicator Power LED ON: DC12V power adapter connected Power LED Off: DC12V power adapter disconnected...
- Page 6 Voice/Fax/Data LED Flashing: Inbound call in progress Voice/Fax/Data LED Off: Not in use Start up status indicator Start up LED ON: Cellfax Plus is initialised successfully Start up LED Slow Flashing: Cellfax Plus is initialising Start up LED Quick Flashing Indicates a start-up failure...
- Page 7 CellFax Plus Installation and User Manual 2.3 Hardware Installation Steps 1. Unscrew the screw from the SIM cover on the underside of the Cellfax Plus and remove the SIM cover. 2. Slide the SIM latch open and insert a SIM card making sure the gold contacts of the SIM touch the gold contacts of the SIM holder.
- Page 8 CellFax Plus Installation and User Manual 3. APPLICATIONS 31 Mode (#*1*1# with no sim) – Standalone Voice/Fax standalone mode application 32A Mode (#*1*2# with no sim) – PBX Trunk Connection When connecting to the PBX in this mode you are required to connect to the Phone port on the back of the unit.
- Page 9 CellFax Plus Installation and User Manual 4. OPERATING INSTRUCTION 4.1 Telephone Function 4.1.1 Making a phone call 1. Lift up the handset; you will hear a dialing tone. 2. Dial the telephone number; the system will dial your number automatically.
- Page 10 DB9 serial cable. This will allow the PC to communicate with the Cellfax Plus as a Standard Modem and also to use the GPRS features of the unit. To set up your PC to connect to the Cellfax Plus unit via the serial port use the following instructions:...
- Page 11 CellFax Plus Installation and User Manual 4.3.1 Installing the Modem From the Start Menu, click Control Panel Note: If the screen displayed differs to that shown here click Switch to Classic View Double click Phone and Modem Options Select the Modems Tab...
- Page 12 CellFax Plus Installation and User Manual Select Don’t detect my modem, I will select it from a list Click Next Ensure that Standard Modem Types is selected on the left and click on Standard 19200 bps Modem on the right...
- Page 13 CellFax Plus Installation and User Manual Select the serial port that the CELLFAX PLUS is attached to and click Next Click Finish...
- Page 14 CellFax Plus Installation and User Manual Click OK The CELLFAX PLUS is now installed as a modem on your PC. If you query the modem then make sure the serial port switch is set #*83*2#...
- Page 15 CellFax Plus Installation and User Manual 4.3.2 Connecting to the Internet It is assumed that an Internet account has already been set up with a service provider. You will have been given: • Telephone number for the dial-up connection •...
- Page 16 CellFax Plus Installation and User Manual Click Dial-up connection and click Next Click Next Enter a name for the connection and click Next Enter the phone number for your internet provider and click Next Click Finish...
- Page 17 CellFax Plus Installation and User Manual Enter the Username and Password given to you by your Internet provider and click Dial The computer will then connect to your Internet provider and log you on. 4.3.3 Disconnecting from the Internet When on-line there is a computer icon in the bottom right corner of the screen that flashes whenever data is being transferred.
- Page 18 The following are additional steps that need to be carried out in order to use the CELLFAX PLUS unit with GPRS. To connect to the internet via GPRS the Cellfax Plus requires a GPRS enabled SIM Card and the following information must be provided by the Network Operator: •...
- Page 19 CellFax Plus Installation and User Manual Under Extra initialisation commands enter the following text exactly as it appears here: AT+CGDCONT=1,”IP”,”APN” Where APN is the access point name is provided by the Network operator. Click OK to confirm the settings Click OK to exit the Phone and Modem options screen.
- Page 20 3. Set work mode Command #*1*working mode# Set the work mode of Cellfax Plus: Working mode = 0 is voice mode. 1 is voice/fax mode. 2 is PBX Trunk mode. 3 is PBX extension mode 4. Set dial mode Command #*333*n# Set the terminal dialing mode, n=0 is audio dial mode;...
- Page 21 CellFax Plus Installation and User Manual Command #*110*n# Description n=1 the device will send a prompt tone per one minute during user’s conversation. n=0 Disable this function. 4.4.2 Fax mode configuration 1. Set fax receive mode Command #*950*n# Description n=0 fax receiving mode is Synchronization; n=1 fax receiving mode is Asynchronous.
- Page 22 CellFax Plus Installation and User Manual 4.4.4 Detect the caller ID identification function standard 1. Detect the Caller ID Standard Command #*99# Description: Detect the standard of supporting caller ID identification. After completing this command, the user should hang up the phone immediately. If the standard of displaying caller ID identification is compliant with local standard, then the display will show “0123456789”.
- Page 23 CellFax Plus Installation and User Manual 4.4.7 Hotline call number Set the hotline call number Command#*65*hotline Number# Description On lifting the handset the stored number will be dialed automatically. Set the hotline dialing time Command#*66*seconds# Description Sets the required time in second 1 to 10 before the stored number is dialed.
- Page 24 CellFax Plus Installation and User Manual GSM international call restriction except the homeland Command (*|#|*#) 332*PW*BS# Description GSM restrict all the international call except the homeland GSM all incoming call restriction Command (*|#|*#) 35*PW*BS# Description GSM restrict all the incoming call...
- Page 25 CellFax Plus Installation and User Manual 4.4.9 Technical Specification Frequency Bands GSM 900/1800MHz • Transmission Power EGSM 900 Class4 (2W Peak) • GSM 1800 Class1 (1W Peak) • Frequency Range EGSM 900 880~915 MHz 925~960 MHz • GSM 1800 1710~1785 MHz 1805~1880 MHz •...
- Page 26 Q: How can I tell if a battery is fitted? A: If the mains power is disconnected you will not see the battery LED lit and the Cellfax Plus unit will not operate. You can also check by opening the SIM cover that holds the battery.
- Page 27 CellFax Plus Installation and User Manual 6. WARRANTY 1. The CellFax Plus is supplied with a 1 year return to base warranty which covers any defect in design or manufacture. No other warranties whatsoever are given. 2. TelecomFM shall accept no liability for any error or damages of any kind resulting from the use of this document or the equipment it relates to.
Need help?
Do you have a question about the CellFax Plus and is the answer not in the manual?
Questions and answers