Table of Contents
Advertisement
Advertisement
Table of Contents

Related Manuals for Advent 4211


Summary of Contents for Advent 4211
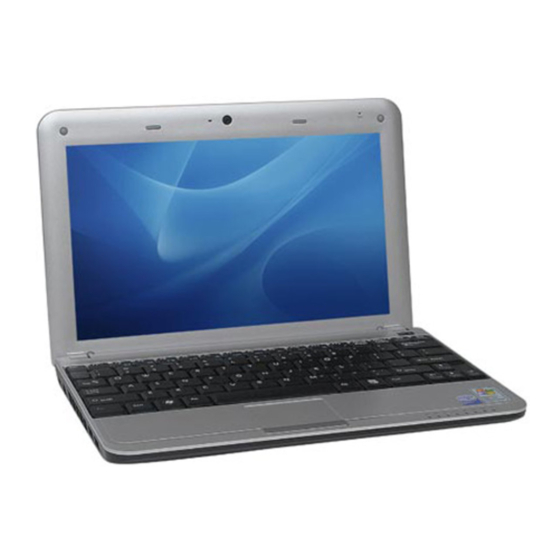
- Page 1 4211 User Guide Supported by...
-
Page 2: Table Of Contents
Table of Contents Preface Table of Content ..........................1-3 Regulations Information ....................... 1-4 FCC-B Radio Frequency Interference Statement ..............1-4 Conditions......................... 1-4 Safety Instructions ........................1-5 Safety Guideline for Using Lithium Battery ................1-6 WEEE Statement..........................1-6 Trademarks ............................ 1-6 Introductions Manual Map ............................ - Page 3 Getting Started Power Management........................3-1 AC Adapter ..........................3-1 Battery Pack ..........................3-2 Using the Battery Pack ......................3-3 Basic Operations ........................... 3-5 Safety and Comfort Tips ......................3-5 Having a Good Work Habit ....................... 3-5 Knowing the Keyboard ......................3-6 Knowing the Touchpad......................
-
Page 4: Regulations Information
CHAPTER 1 Preface Regulations Information FCC-B Radio Frequency Interference Statement This equipment has been tested and found to comply with the limits for a Class B digital device, pursuant to part 15 of the FCC rules. These limits are designed to provide reasonable protection against harmful interference in a residential installation. -
Page 5: Safety Instructions
Safety Instructions Read the safety instructions carefully and thoroughly. Keep the User‘s Guide that All cautions and warnings on the comes with the package for equipment or user‘s manual future reference. should be noted. Keep this equipment away from Lay this equipment on a stable humidity and high temperature. -
Page 6: Safety Guideline For Using Lithium Battery
All trademarks are the properties of their respective owners. ® ® Intel and Atom are registered trademarks of Intel Corporation. Advent is a registered trade DSG retail limited ® ® Microsoft is a registered trademark of Microsoft Corporation. Windows 2000/ XP/ Vista are registered trademarks of Microsoft Corporation. -
Page 7: Introductions
CHAPTER 2 Introductions Congratulations on becoming an user of this notebook, the finely designed notebook. This brand-new exquisite notebook will give you a delightful and professional experience in using notebook. We are proud to tell our users that this notebook is thoroughly tested and certified by our reputation for unsurpassed dependability and customer satisfaction Manual Map This User‘s Manual provides instructions and illustrations on how to operate this notebook. -
Page 8: Unpacking
Unpacking First, unpack the shipping carton and check all items carefully. If any item contained is damaged or missing, please contact your local dealer immediately. Also, keep the box and packing materials in case you need to ship the unit in the future. The package should contain the following items: Notebook Quick Start Manual High-capacity Li-ion battery... - Page 9 Memory DDR2 SDRAM Maximum Power AC Adapter 40W, 19V Battery Type 3 cells (optional) 6 cells (optional) RTC Battery I/O Port Monitor(VGA) 15 pin D-Sub x 1 x 3 (USB version 2.0) Mic-in Headphone Out RJ45 Card Reader x 1 (SD/ MMC/ MS) The supported memory cards may vary without notice.
-
Page 10: Product Overview
WebCam CMOS (optional) Supported Software & BIOS USB Flash Boot Yes, USB floppy boot up DOS only BIOS Fast Boot Support --- Yes Others Kensington Lock Hole Compliance WHQL Product Overview This section provides the description of basic aspects of the notebook. It will help you to know more about the appearance of this notebook before using it. - Page 11 1. Webcam/ Webcam LED (optional) This built-in Webcam can be used for picture taking, video recoding or conferencing, and any other interactive applications. Webcam LED indicator, next to the webcam, grows orange when webcam function is activated; LED goes out when this function is turned off.
-
Page 12: Front Side View
Battery Status Glowing green when the battery is being charged. Glowing amber when the battery is in low battery status. Blinking amber if the battery fails and it is recommended to replace a new battery. Consult the local dealer for purchasing an equivalent type of battery recommended by the manufacturer. -
Page 13: Right Side View
Right Side View USB Port Card Reader Audio Port Connectors VGA Port RJ-45 Connector 1. USB Port The USB 2.0 port allows you to connect USB-interface peripheral devices, such as the mouse, keyboard, modem, portable hard disk module, printer and more. 2. -
Page 14: Left Side View
Left Side View Power Connector Kensington Lock Ventilator USB Port 1. Power Connector To connect the AC adapter and supply power for the notebook. 2. Kensington Lock This notebook provides a Kensington Lock hole, which allows users to secure the notebook in place with a key or some mechanical PIN device and attached through a rubberised metal cable. -
Page 15: Bottom Side View
Bottom Side View Battery Release Button Battery Lock/Unlock Button Battery Pack Battery Release Button It is a bounce-back device as a preparation for releasing the battery pack. Slide it with one hand and pull the battery pack carefully with the other. Battery Lock/Unlock Button Battery cannot be moved when the button is positioned on lock status. -
Page 16: Getting Started
CHAPTER 3 Getting Started Power Management AC Adapter Please be noted that it is strongly recommended to connect the AC adapter and use the AC power while using this notebook for the first time. When the AC adapter is connected, the battery is being charged immediately. Note that the AC adapter included in the package is approved for your notebook;... -
Page 17: Battery Pack
Battery Pack This notebook is equipped with a high-capacity Li-ion battery pack. The rechargeable Li-ion battery pack is an internal power source of the notebook. Be aware of that this battery pack may be damaged if users try to disassemble the battery pack on their own. Also, note that the limited warranty to the battery pack may also lose its efficacy when this battery pack is disassembled not by an authorized machinist. -
Page 18: Using The Battery Pack
Replacing the Battery Pack To insert the battery pack, following the steps below: 1. Use both hands to align and insert the battery pack into the compartment with correct orientation. 2. Slightly slide and press the battery pack into the right position until the battery back is fastened in the compartment. -
Page 19: Conserving Battery Power
Conserving Battery Power Efficient battery power is critical to maintain a normal operation. If the battery power is not managed well, the saved data and customized settings may be lost. To optimize battery life and avoid a sudden power loss, read the tips below: ... -
Page 20: Basic Operations
Basic Operations If you are a beginner to the notebook, please read the following instructions to assure your own safety, and make yourself comfortable during the operations. Safety and Comfort Tips The notebook is a portable platform that allows you to work anywhere. However, choosing a good workspace is important if you have to work with your notebook for a long period of time. -
Page 21: Knowing The Keyboard
Knowing the Keyboard This notebook provides a full-functioned keyboard. This keyboard can be divided into four categories: Typewriter keys, Cursor keys, Numeric keys and Function keys. Typewriter keys Numeric keys Cursor keys / Function keys Typewriter Keys In addition to providing the major function of the keyboard, these typewrite keys also provide several keys for special purposes, such as [Ctrl,] [Alt,] and [Esc] key. -
Page 22: Cursor Keys
Cursor Keys The four cursor (arrow) keys and [Home], [PgUp], [PgDn], [End] keys are used to control the cursor movement. Move the cursor left for one Move to the previous page. space. Move the cursor right for one Move to the next page. space. -
Page 23: Knowing The Touchpad
Disable computer‘s audio Decrease the LCD brightness. function. Force the computer into suspend Increase the LCD brightness. mode (depending on the system configuration). Knowing the Touchpad The touchpad integrated in your notebook is a pointing device that is compatible with standard mouse, allowing you to control the notebook by pointing the location of the cursor on the screen and making selection with its two buttons. -
Page 24: About Hard Disk Drive
Point and Click When you have moved and placed the cursor over an icon, a menu item or a command that you want to execute, simply tap slightly on the touchpad or press the left button to select. This procedure, called as point and click is the basics of operating your notebook. -
Page 25: Connecting The External Devices
Connecting the External Devices The I/O (input/output) ports on the notebook allow you to connect peripheral devices. All devices listed here are for reference only. Using the External Optical Storage Device An optional external optical storage device may come with the package of the notebook. The actual external optical storage device may vary depending on the model you purchased. -
Page 26: Connecting The Communication Devices
Connecting the External Display Devices This notebook provides a VGA port for connecting a larger display with higher resolution. The 15-pin-D-sub VGA port allows users to connect an external monitor or other standard VGA-compatible device (such as a projector) for a great view of the notebook display. To connect the external display, make sure the notebook and the external display are both powered off, and then connect the display to the notebook. -
Page 27: Safely Remove Hardware
hub, switch and gateway, to build a network connection. For more instructions or detailed steps on connecting to the LAN, please ask your MIS staff or network manager for help. Safely Remove Hardware When any peripheral device is connected to the notebook, the Safely Remove Hardware icon will appear on the taskbar. -
Page 28: Re-Installing Device Drivers And Software
Re-installing device drivers and software If you are experiencing problems with a particular piece of software or hardware supplied with your Advent computer you can re-install it without the need to erase your hard drive and run a full System Recovery. -
Page 29: The Techguys Recovery Backup
The TechGuys Recovery Backup Your Advent computer is supplied with a tool that allows you to create a backup of your Recovery Solution. We advise that you do this before you start using your computer. You require a USB pen drive or SD card that has a capacity of 2GB or greater. -
Page 30: Running System Recovery From Windows
When the recovery backup has been successfully created remove the device from the computer and store for future use. Note It is recommended that you now test your newly created Recovery Backup to ensure the process has completed successfully. To do this, simply re-insert the device used during the steps above and follow the steps 1 to 13 in the ‗Running System Recovery from USB drive/SD Card’... -
Page 31: Running System Recovery From Outside Of Windows
Note Once you have used the System Recovery utility you will need to re-install any additional software and hardware that you may have added. Please refer to the documentation supplied with those products for further help. Running System Recovery from outside of Windows The normal method of running System Recovery is from the hard drive. -
Page 32: Running System Recovery From Usb Drive/Sd Card
Running System Recovery from USB drive/SD Card Important! Please save all important files and documents to an external device before you begin. The hard drive contents will be deleted. All information that it contains will be permanently destroyed. This includes your email, your documents, your internet favourites, and your music &... -
Page 33: Bios Setup
CHAPTER 4 BIOS Setup About BIOS Setup When to Use BIOS Setup? You may need to run the BIOS Setup when: An error message appears on the screen during the system booting up and is requested to run SETUP. ... -
Page 34: Control Keys
Control Keys You can use only the keyboard to control the cursor in the BIOS Setup Utility. Press left arrow to select one Press right arrow to select one menu title. menu title. Press up arrow to select one item Press down arrow to select one under the menu title. -
Page 35: Bios Setup Menu
BIOS Setup Menu Once you enter the BIOS Setup Utility, the Main Menu will appear on the screen. Select the tags to enter the other menus. Main Menu Show system overview information about BIOS version, CPU features, memory size and setting of system time and date. -
Page 36: Main Menu
Main Menu System Time This item allows you to set the system time. The system clock will go on no matter you shut down the PC or get into sleep mode. The time format is [hour:minute:second]. System Date This item allows you to set the system date. The date format is [day:month:date:year]. Day (Translation) Day of the week, from Sun to Sat, which is determined by BIOS (read-only). -
Page 37: Advanced Menu
Advanced Menu Intel(R) SpeedStep(tm) tech. This item allows you to enable or disable Intel SpeedStep technology. When set to Disabled, the system always operates in a conserve power mode (the processor works at FSB400-600MHz or FSB533-800MHz). If you want optimize the processor, set this item to Enabled, so that the processor‘s speed will be controlled by the use of your operating system and applications. -
Page 38: Boot Menu
Boot menu Boot Device Priority These items showing the sequence of boot devices where BIOS attempts to load the disk operating system. 1st, 2nd , and 3rd Boot Option These items allow you to set the sequence of boot devices where BIOS attempts to load the disk operating system. -
Page 39: Security Menu
Security menu Supervisor Password When this function is selected, a message box will appear on the screen as below: Enter New Password Type the password, up to six characters in length and press [Enter]. The password typed now will replace any previously set password from CMOS memory. You may also press [ESC] to abort the selection without entering a password. -
Page 40: Save & Exit Menu
Save & Exit menu Exit and Save Changes Save the changes you have made and exit the utility. Exit and Discard Changes Exit the utility without saving the changes you have made. Discard Changes Abandon your changes and reload the previous configuration before running the utility. ...
Need help?
Do you have a question about the 4211 and is the answer not in the manual?
Questions and answers