TXU Energy iThermostat User Manual
Hide thumbs
Also See for iThermostat:
- Quick start manual (2 pages) ,
- Online user's manual (9 pages) ,
- Installation manual (34 pages)
Table of Contents
Advertisement
Advertisement
Table of Contents
Troubleshooting

Subscribe to Our Youtube Channel
Related Manuals for TXU Energy iThermostat


Summary of Contents for TXU Energy iThermostat
- Page 1 TXU Energy iThermostat User Manual...
- Page 2 Copyright May 2008 Data, drawings, and other material contained herein are proprietary to TXU Energy Retail Company, LLC and may not be reproduced or duplicated in any form without the prior permission of TXU Energy. iThermostat is a trademark of TXU Energy Retail Company, LLC.
-
Page 3: Table Of Contents
Buttons ........................3 iThermostat Display ........................4 Selecting Heating or Cooling .......................5 Setting the Current Day and Time ....................7 Replacing the Batteries in Your iThermostat ................10 Resetting the FLTR Display .......................12 Programming Your iThermostat ...............13 Planning Your Program......................14 Programming Heating and Cooling....................15 Setting Holds ..........................19... -
Page 4: Getting Started With Your Ithermostat
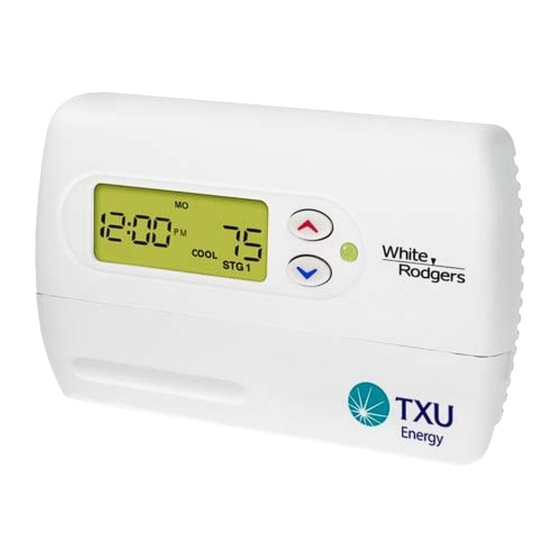
Getting Started with Your iThermostat™ Overview Your iThermostat consists of two main parts: the base and the cover (lower portion of iThermostat front as shown below). You open the cover to access the buttons to operate and program the iThermostat. -
Page 5: Ithermostat Buttons
• In programming mode, toggles FLTR display on your changeover, emergency heat settings. between the period start time iThermostat. (applies to heat pumps only), or and temperature setpoint you • Exits programming and OFF. want to program. saves all settings. iThermostat™ User Manual... -
Page 6: Ithermostat Display
• HEAT/COOL – Auto-changeover • EMER – Emergency heat (heat pump only) • AUX – Auxiliary heat (heat pump only) • STG 1 – Low speed of 2-stage compressor • STG 1+2 – High speed of 2-stage compressor iThermostat™ User Manual... -
Page 7: Selecting Heating Or Cooling
Selecting Heating or Cooling Use the SYSTEM button to select your iThermostat system mode. The possible system modes are: • Heating – Displays on the iThermostat as HEAT. • Cooling – Displays on the iThermostat as COOL. • Auto-changeover (see below) – Both HEAT and COOL icons are on. - Page 8 When the system is Off, OFF displays to the left. When heating or cooling is called (compressor turned On), STG 1 or STG 1+2 will display (depending on how many speeds your heating/cooling system is capable of using). iThermostat™ User Manual...
-
Page 9: Setting The Current Day And Time
Setting the Current Day and Time Typically the current day and time on your iThermostat will be set automatically by the system. In case the system does not set the day and time, you may need to set it yourself manually. - Page 10 Press TIME again. The display shows minutes only. Press again. Press and hold the up arrow or down arrow button until Press to select the you reach the correct minute. minute. Press TIME again. The display shows the day of week. Press again. iThermostat™ User Manual...
- Page 11 Display Press and hold the up arrow or down arrow button until Press to select the you reach the current day of the week. day of week. Press RUN. The iThermostat returns to normal display. Press once. iThermostat™ User Manual...
-
Page 12: Replacing The Batteries In Your Ithermostat
If BATT appears on your iThermostat display, the batteries are low and need to be replaced. Batteries are not required to keep your programming or menu data. However, with batteries installed, your iThermostat will maintain the time and continuously display the temperature during a loss of AC power. - Page 13 OFF is displayed in the area displayed. where the time is normally displayed. Gently pull the cover straight off the base. Note: Forcing or prying on the iThermostat can cause Remove cover. damage to the unit. Remove old batteries. Install fresh AA alkaline Install batteries.
-
Page 14: Resetting The Fltr Display
Resetting the FLTR Display If FLTR appears in your iThermostat display, this is a reminder that you need to change or clean the filter in your HVAC system. After you change or clean the filter, you can reset the display so FLTR no longer appears. -
Page 15: Programming Your Ithermostat
Conserve Energy While Maximizing Comfort The iThermostat’s programming options help you maximize comfort during the times when you are typically at home. You can also conserve energy during the times when you are typically away from home or sleeping by allowing the temperature in your home to increase (summer) or decrease (winter). -
Page 16: Planning Your Program
Planning Your Program Before you begin programming your iThermostat, you can use the chart below to help you plan your program. Weekdays Saturday Sunday (MO TU WE TH FR) (SA) (SU) Period Start Time Temp Start Time Temp Start Time Temp iThermostat™... -
Page 17: Programming Heating And Cooling
(MOR) and the currently programmed temperature flashing. Temperature will flash: Press to select Press the up or down arrow button to change the desired temperature to the desired setting for the first time period temperature. of the day (MOR). iThermostat™ User Manual... - Page 18 Press PRGM once. The current start time and temperature Press once. for the second heating/cooling program period (DAY) appears in the display. Repeat Steps 3 Repeat Steps 3 and 4 to select the start time and and 4. temperature for the DAY period. iThermostat™ User Manual...
- Page 19 MOR period and the currently programmed temperature. Repeat Steps 3 Repeat Steps 3 through 7 to complete Saturday through 7. heating/cooling programming. Press PRGM once to change to SU (Sunday) Press once. heating/cooling programming. iThermostat™ User Manual...
- Page 20 Programming Heating and Cooling Quick Guide Step Description iThermostat Display Repeat Steps 3 Repeat Steps 3 through 7 to complete Sunday through 7. heating/cooling programming. Press the RUN button once to save and exit programming. Press once. iThermostat™ User Manual...
-
Page 21: Setting Holds
15 minute increments (0:00 means disabled). A timed hold lasts for the selected time or until you manually clear it. The iThermostat display indicates a timed hold by displaying a flashing HOLD icon below the Day of the Week bar. - Page 22 Note: If you want to return to your normal programmed setting before the temporary hold has defaulted back to your program, you can clear the temporary hold by pressing the RUN button. iThermostat™ User Manual...
-
Page 23: Setting Permanent Holds
Press the HOLD button. The HOLD icon appears, indicating that you have placed the system on permanent hold. Press once. Note: To clear the hold, press the RUN button. iThermostat™ User Manual... -
Page 24: Setting Timed Holds
HOLD button and the HOLD icon appears and Press and hold for flashes, indicating that you have placed the system on timed more than 2 hold. seconds. Note: To clear the hold, press the RUN button. iThermostat™ User Manual... -
Page 25: Clearing Holds
You do not have to manually clear timed holds as well. When the predetermined time period has expired the programmed setting will be in effect. iThermostat™ User Manual... -
Page 26: Troubleshooting Assistance Guide
Troubleshooting Assistance Guide This section helps you troubleshoot common issues you may encounter with your iThermostat. If you encounter a problem that you do not see listed here, contact iThermostat customer service at 1-866-733-1807. iThermostat™ Display Display is Blank. The iThermostat gets its power from the indoor air handler, or if gas furnace from a 120 volt outlet. -
Page 27: Troubleshooting
The green light stays On, it does not flash, the UP/DOWN buttons do not work. If the green light is On and the buttons will not change the display, your iThermostat may need service. Call iThermostat customer service at 1-866-733-1807. - Page 28 Ensure that someone else has not changed the program. If no one else has changed the program, the schedule may have been lost. The iThermostat’s schedule is stored in a non- volatile memory. The iThermostat may have sustained a large electrostatic discharge, erasing its memory.
- Page 29 Configuration Menu (see the iThermostat Installation Manual). • The iThermostat may be set in the HOLD (override) mode. Press RUN to reset the hold and go back to the programmed setpoint. • Recheck program for current setting versus the program settings.
- Page 30 • If the HOLD icon is displayed, the iThermostat is set for a permanent hold. Press RUN to reset the hold and go back to the programmed setpoint.
- Page 31 • Check to ensure that the iThermostat is in the correct HEAT or COOL mode by pressing the SYSTEM button. The iThermostat is OFF when the display shows OFF on the left side of the display.
- Page 32 How do I skip a time period? Programming There is no capability within the iThermostat to skip a period. If you want a period to be (continued) identical to the previous period, simply program it to the same start time and setpoint as the previous period.
- Page 33 Check to make sure that a curtailment event is not in effect. If a curtailment event is in effect, the green light is On. The temperature will return to your programmed temperature when the curtailment event ends. Can I program the iThermostat for a vacation mode? Vacation Mode •...
- Page 34 Holds Hold override does not work. A permanent hold remains in effect independent of user schedule. To clear a permanent hold, make sure the iThermostat is in normal display and press RUN. Temporary hold cannot be set. • Make sure unit is set for Cool or Heat mode and try again to set the hold.
- Page 35 Fan will not turn Off. Equipment • The iThermostat fan setting may be in the On position. In this position, the fan will continuously run. Change it to the Auto position. • IThermostat may be currently calling for heat or cool. This is normal operation. Fan will turn off automatically once the heating/cooling is satisfied if fan is in Auto mode.
- Page 36 • If the display on the iThermostat is blank, verify that the air handler breaker is not tripped, and that the indoor air handler is being powered. If the display is still blank, call iThermostat customer service at 1-866-733-1807.
- Page 37 • If the display on the iThermostat is blank, verify that the air handler breaker is not tripped, and that the indoor air handler is being powered. Also verify that the outdoor compressor breaker is not tripped. For a gas furnace, check for power to the outlet that provides 120v to the indoor fan at the heater closet.
- Page 38 Verify that the breakers are not tripped for both the air handler and the outdoor compressor. Reset the breakers. If power is being supplied to the equipment, and the iThermostat indicates the system is On (STG 1 icon displayed), call your heating and cooling contractor.
- Page 39 Check that the system setting is set to HEAT. Press the SYSTEM button until the HEAT icon is displayed. • Verify that the air handler breaker is not tripped and that the iThermostat indicates the system is On (STG 1 displayed). •...
- Page 40 Troubleshooting iThermostat™ User Manual...
Need help?
Do you have a question about the iThermostat and is the answer not in the manual?
Questions and answers